Page 252 of 590
252 3-2. Using the multimedia system
■Setting the clock
Select “Clock” on the “General Settings” screen.
Adjust the time, then select “OK”.
■ Delete personal data
Select “Delete Personal Data” on the “General Settings”
screen.
Select “Delete”.
Check carefully beforehand, as data cannot be retrieved once
deleted.
A confirmation screen will be displayed. Select “Yes”.
The following personal data will be deleted or changed to its
default settings.
• General settings
• Audio settings
• Phone settings
■ To return to the default settings
Select “Default”, and then “Yes”.
Page 271 of 590

271
3-2. Using the multimedia system
3
Interior and exterior features
■
About iPod
●“Made for iPod”, “Made for iPhone” and “Made for iPad” mean that an
electronic accessory has been designed to connect specifically to iPod or
iPhone, or iPad, respectively, and has been certified by the developer to
meet Apple performance standards.
● Apple is not responsible for the operation of this device or its compliance
with safety and regulatory standards. Please note that the use of this
accessory with iPod, iPhone or iPad may affect wireless performance.
● iPad, iPhone, iPod, iPod classic, iPod nano, and iPod touch are trade-
marks of Apple Inc., registered in the U.S. and other countries. Lightning
is a trademark of Apple Inc.
■ iPod cover art
●Depending on the iPod and songs in the iPod, iPod cover art may be dis-
played.
● This function can be changed to on/off. ( P. 253)
● It may take time to display iPod cover art, and the iPod may not be oper-
ated while the cover art display is in process.
● Only iPod cover art that is saved in JPEG format can be displayed.
Page 274 of 590
274 3-2. Using the multimedia system
■Compatible models
The following iPod
®, iPod nano®, iPod classic®, iPod touch® and iPhone®
devices can be used with this system.
●Made for
• iPod touch (5th generation)
• iPod touch (4th generation)
• iPod touch (3rd generation)
• iPod touch (2nd generation)
• iPod touch (1st generation)
• iPod classic
• iPod with video
• iPod nano (7th generation)
• iPod nano (6th generation)
• iPod nano (5th generation)
• iPod nano (4th generation)
• iPod nano (3rd generation)
• iPod nano (2nd generation)
• iPod nano (1st generation)
• iPhone 5
• iPhone 4S
• iPhone 4
• iPhone 3GS
• iPhone 3G
• iPhone
Depending on differences between models or software versions etc., some
models might be incompatible with this system.
CAUTION
■ While driving
Do not connect an iPod or operate the controls.
Page 282 of 590
282
3-2. Using the multimedia system
Connecting Bluetooth®
The following can be performed using Bluetooth® wireless commu-
nication:
■ A portable audio player can be operated and listened to via
multimedia system
■ Hands-free phone calls can be made via a cellular phone
In order to use wireless communicat ion, register and connect a
Bluetooth
® device by performing the following procedures.
Page 283 of 590
283
3-2. Using the multimedia system
3
Interior and exterior features
Device registrati
on/connection flow
1. Register the Bluetooth® device to be used with Multimedia
system ( P. 285, 286)
2. Connect the Bluetooth® device to be used
( P. 288)
To be used for audio To be used for hands-free
phone
3. Start Bluetooth®
connection ( P. 288)3. Start Bluetooth®
connection ( P. 288)
4. Check connection status
( P. 304)4. Check connection status
( P. 306)
5. Use Bluetooth® audio
( P. 304)5. Use Bluetooth® phone
( P. 305)
Page 285 of 590

285
3-2. Using the multimedia system
3
Interior and exterior features
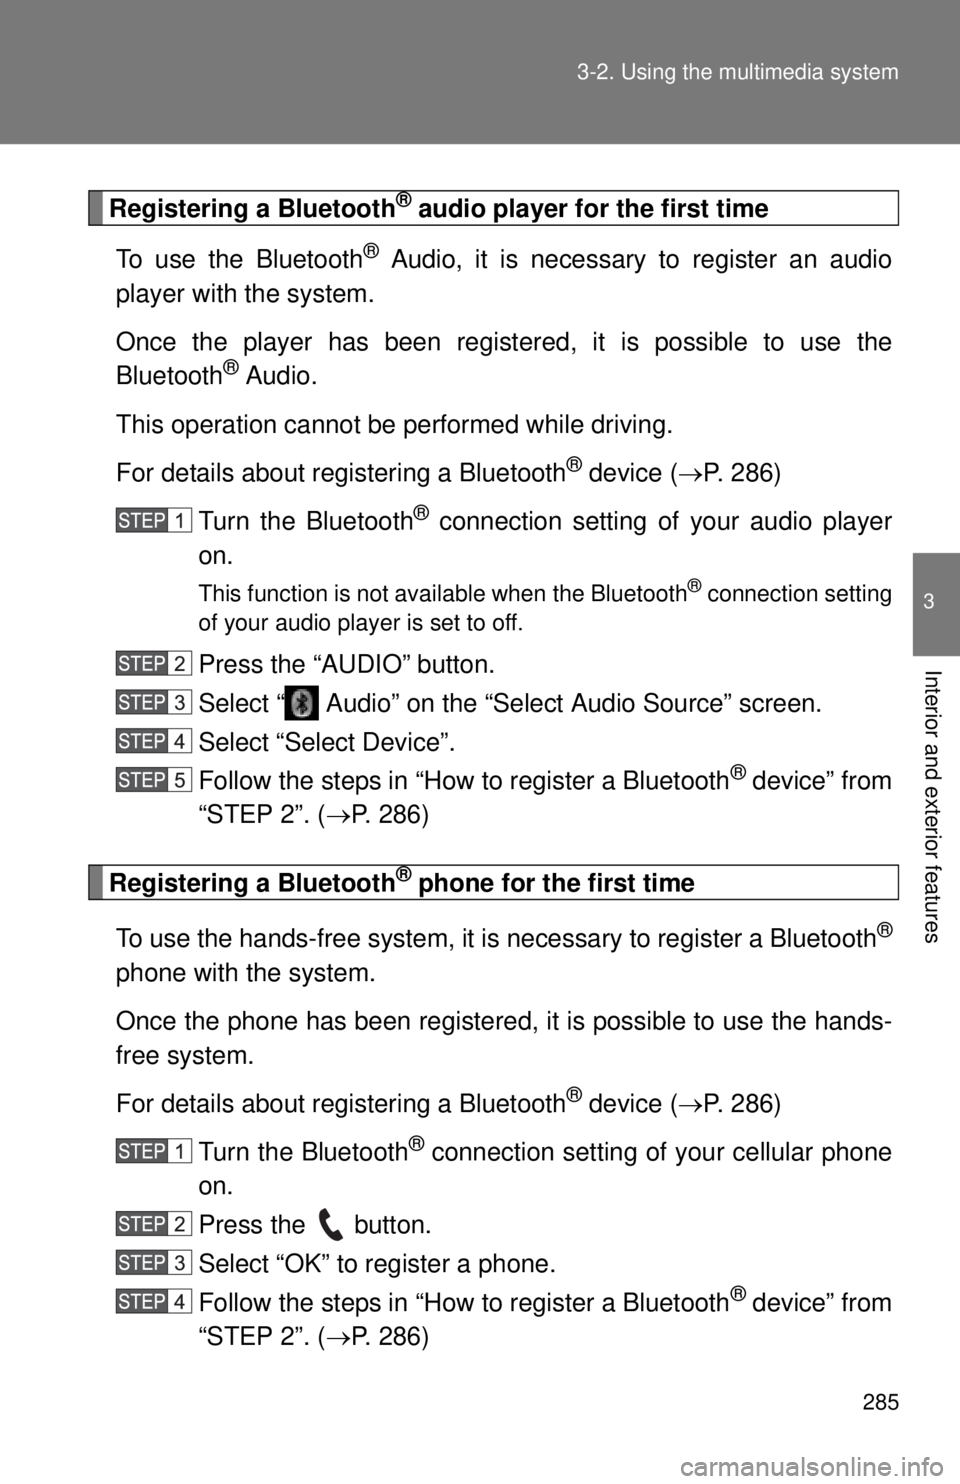
Registering a Bluetooth® audio player for the first time
To use the Bluetooth
® Audio, it is necessary to register an audio
player with the system.
Once the player has been register ed, it is possible to use the
Bluetooth
® Audio.
This operation cannot be performed while driving.
For details about registering a Bluetooth
® device ( P. 286)
Turn the Bluetooth
® connection setting of your audio player
on.
This function is not available when the Bluetooth® connection setting
of your audio player is set to off.
Press the “AUDIO” button.
Select “ Audio” on the “Select Audio Source” screen.
Select “Select Device”.
Follow the steps in “How to register a Bluetooth
® device” from
“STEP 2”. ( P. 286)
Registering a Bluetooth® phone for the first time
To use the hands-free system, it is necessary to register a Bluetooth
®
phone with the system.
Once the phone has been registered, it is possible to use the hands-
free system.
For details about registering a Bluetooth
® device ( P. 286)
Turn the Bluetooth
® connection setting of your cellular phone
on.
Press the button.
Select “OK” to register a phone.
Follow the steps in “How to register a Bluetooth
® device” from
“STEP 2”. ( P. 286)
Page 286 of 590

286 3-2. Using the multimedia system
Registering a Bluetooth® device
Bluetooth
® compatible phones (HFP) and portable audio players
(AVP) can be registered simultaneously. You can register up to 5
Bluetooth
® devices.
■ How to register a Bluetooth
® device
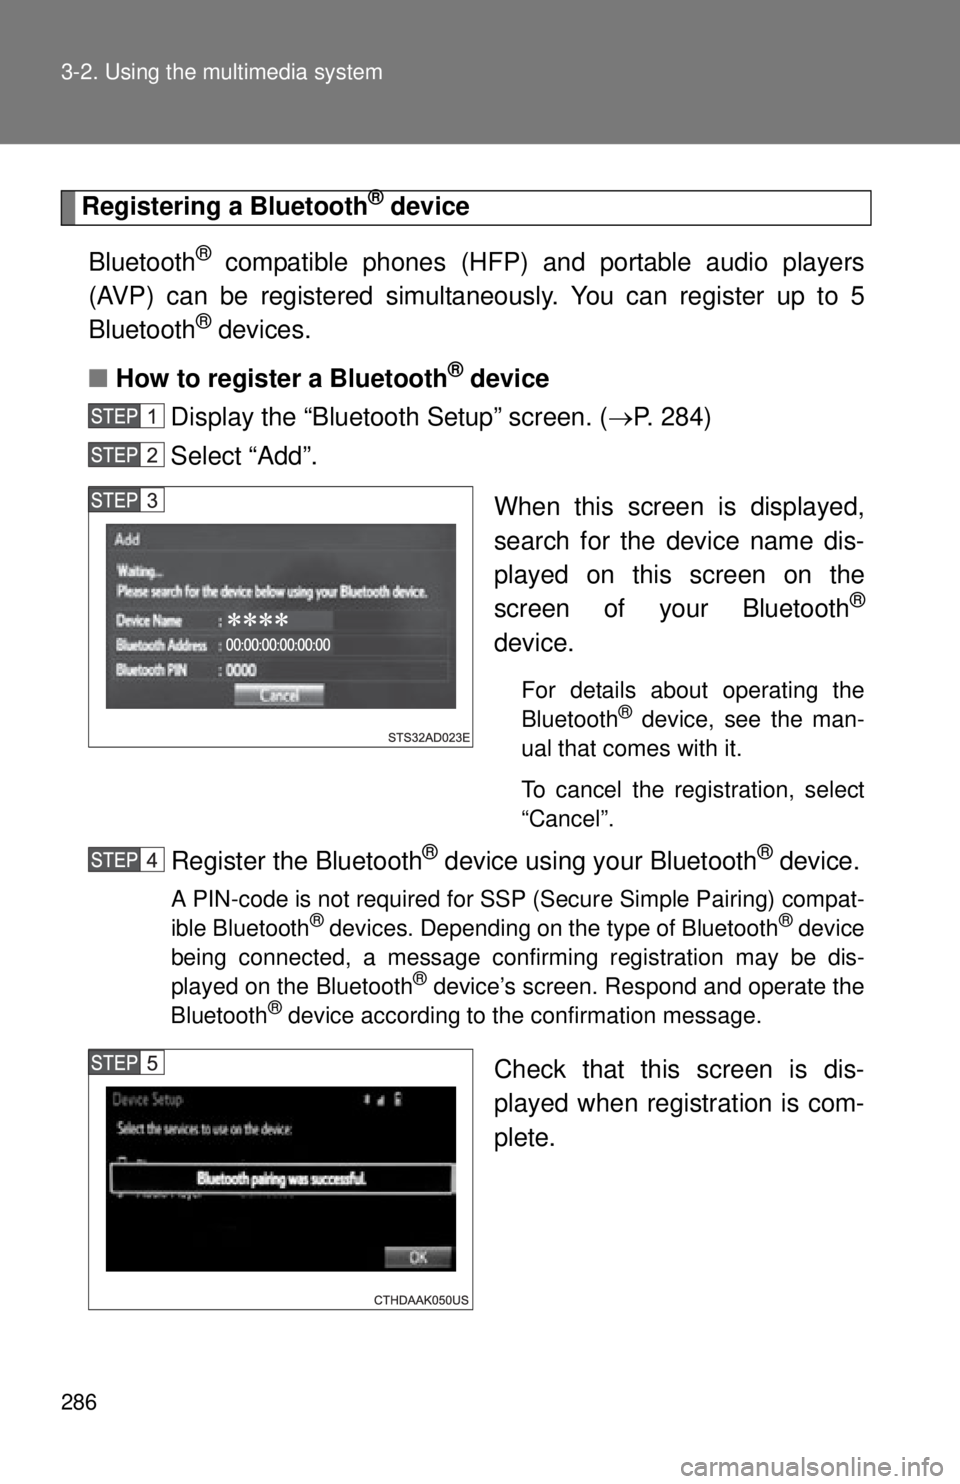
Display the “Bluetooth Setup” screen. ( P. 284)
Select “Add”.
When this screen is displayed,
search for the device name dis-
played on this screen on the
screen of your Bluetooth
®
device.
For details about operating the
Bluetooth® device, see the man-
ual that comes with it.
To cancel the registration, select
“Cancel”.
Register the Bluetooth® device using your Bluetooth® device.
A PIN-code is not required for SSP (Secure Simple Pairing) compat-
ible Bluetooth® devices. Depending on the type of Bluetooth® device
being connected, a message confirming registration may be dis-
played on the Bluetooth
® device’s screen. Respond and operate the
Bluetooth® device according to the confirmation message.
Check that this screen is dis-
played when registration is com-
plete.
Page 288 of 590

288 3-2. Using the multimedia system
Connecting a Bluetooth® device
Up to 5 Bluetooth
® devices (Phones (HFP) and audio players (AVP))
can be registered.
If more than 1 Bluetooth
® device has been registered, select which
device to connect to.
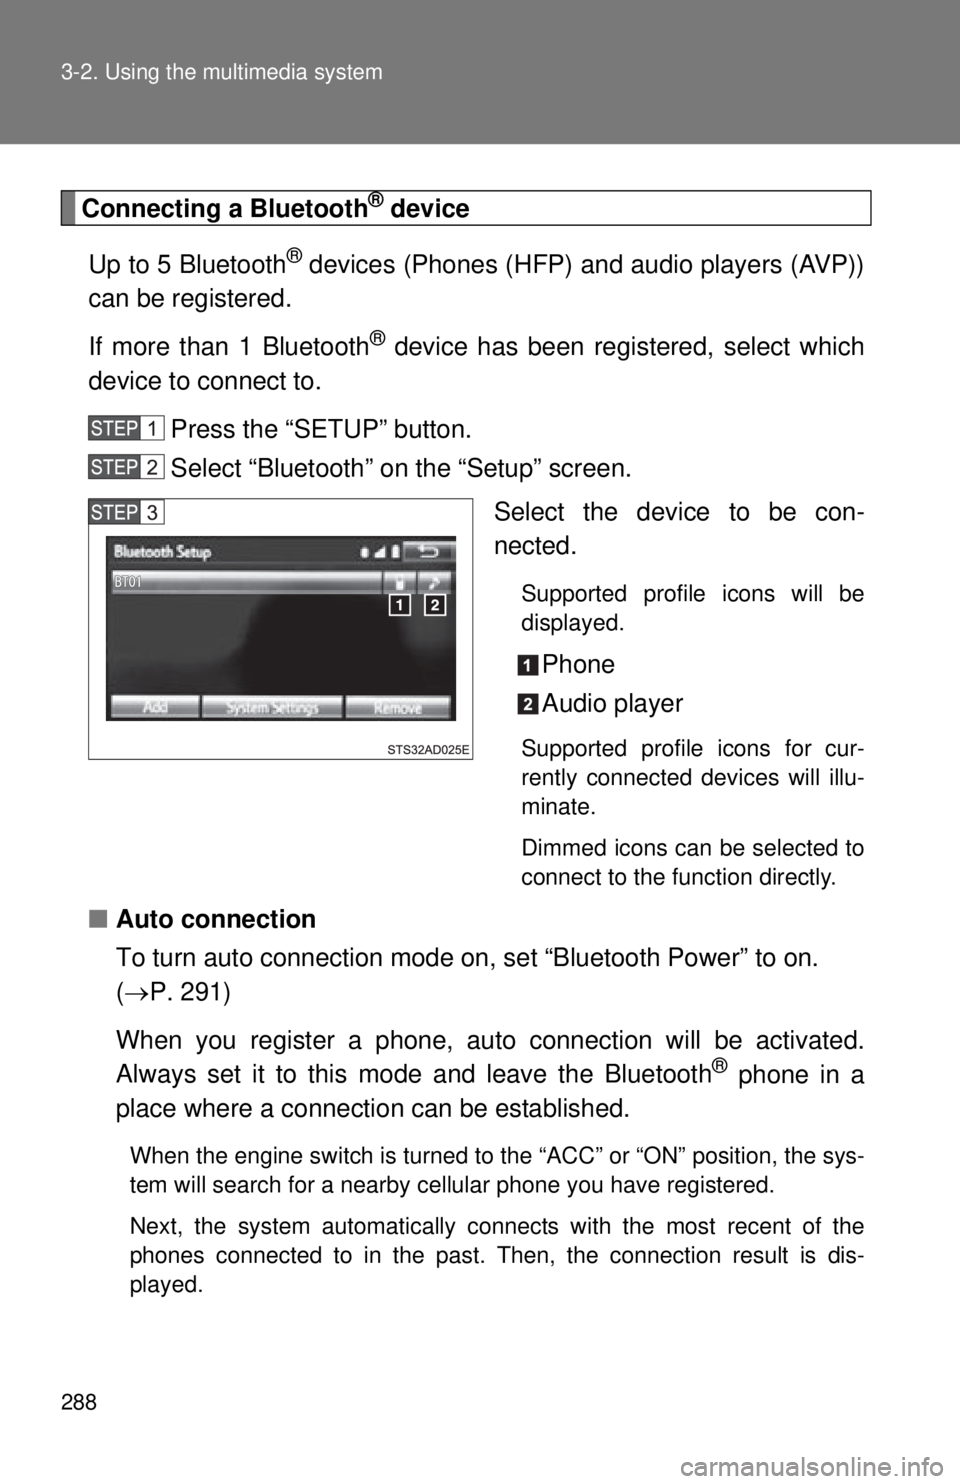
Press the “SETUP” button.
Select “Bluetooth” on the “Setup” screen. Select the device to be con-
nected.
Supported profile icons will be
displayed.
Phone
Audio player
Supported profile icons for cur-
rently connected devices will illu-
minate.
Dimmed icons can be selected to
connect to the function directly.
■Auto connection
To turn auto connection mode on, set “Bluetooth Power” to on.
( P. 291)
When you register a phone, auto connection will be activated.
Always set it to this mode and leave the Bluetooth
® phone in a
place where a connection can be established.
When the engine switch is turned to the “ACC” or “ON” position, the sys-
tem will search for a nearby ce llular phone you have registered.
Next, the system automatically connects with the most recent of the
phones connected to in the past. Then, the connection result is dis-
played.