Page 49 of 100
 Columbus Infotainment System Manual Dial the mailbox number
Entering a number using the voice control
Edit the entered telephone number
The telephone number you entered can be edited even before dialling, by
pressing one of the function")
Dial the mailbox number
Entering a number using the voice control
Edit the entered telephone number
The telephone number you entered can be edited even before dialling, by
pressing one of the function keys.
›
- To delete the last number entered.
›
- Display of the function keys
/
for the movement of the cursor in the
input line » Fig. 29 -
.
Prefix code
If the telephone number entered has no prefix code, then the prefix number
can be added before the number by using the function key.
Press the function key is displayed only when the prefix function
» page 38,
Settings is shown.
The prefix can, for example, be used for international calls.
Breakdown and info numbers
The breakdown and info numbers are free of charge. Charges are only made
for a telephone call in accordance with the fare conditions of your telephone
service provider.
The telephone numbers are already set at the factory. If you want to change
the numbers, then consult a ŠKODA service partner.
If no breakdown or Info calls can be made then a ŠKODA service partner should
be consulted.
Search for a contact using the numeric keypad
The numeric keypad can also be used for a contact search.
For example, if you enter 32, the unit will display contacts with the letter se-
quence DA, FA, EB, etc. next to the numerical keypad in areas 1
» Fig. 29 .
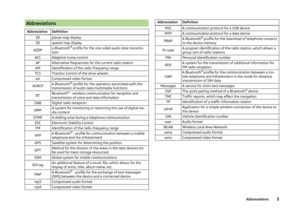
List of telephone contactsFig. 30
List of telephone contacts / contact details
The contact list contains telephone contacts of the main telephone.
If no telephone is connected to the device and there is a SIM card in the exter-
nal module with activated telephone services then the telephone contacts are
made with the SIM card.
Show list
›
Press in the menu Telephone the function key
.
Select contact
›
Select the desired contact.
If a contact contains several telephone numbers, the system displays a menu
containing the telephone numbers for this contact after selecting the contact.
›
Select the desired telephone number.
Contact details
› In the list of telephone contacts, press the function key
next to the desired
contact » Fig. 30 -
.
The contact details » Fig. 30 -
displayed.
The connection can be made in the contact details or one of the following
functions can be started.
The contact name can be read out by the device's generated voice
Opens the menu for sending a text message (SMS)
Start of the connection with the prefix (the symbol is displayed only with
active preset function in the settings)
46Telephone
Page 50 of 100
 Columbus Infotainment System Manual Opens the menu for editing the telephone number of the contact before
dialling
Start the route guidance to the contact address
Searching for a contact in the contact list › Press the function key
S")
Opens the menu for editing the telephone number of the contact before
dialling
Start the route guidance to the contact address
Searching for a contact in the contact list › Press the function key
Search.
› Search for the contact.
Import list
After the first connection of the primary telephone and/or the SIM card with
the device, the import of the telephone contacts to the device memory starts.
The import can take several minutes.
The device telephone book contains 4000 free memory locations for imported
telephone contacts. Each contact can contain up to 5 telephone numbers.
For the last 4 connected telephones an import follows with a maximum of
5000 contact assigned images to the device memory.
The number of contacts imported can be checked in the menu item Import
contacts » page 38 , Settings .
If an error occurs during the import, the following message appears Import
failed. Please try again and check whether the BT device … allows connec-
tions.
Refresh list
If the telephone is connected to the device again the list is updated automati-
cally.
The update can be performed manually as follows.
› Press the key
→
→ User profile → Import contacts .
During updating, the number of imported contacts to the device memory/the number of contacts in the telephone is displayed.
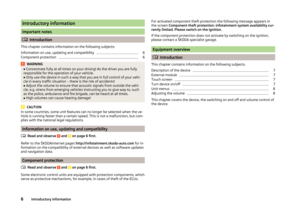
Manage preferred contactsFig. 31
Favourite contacts
The function keys
A
» Fig. 31 allows an immediate selection of the preferred
contact telephone number.
There are 12 pre-set keys in two memory groups.
Assign the preferred contact
›
In the menu Telephone press the desired function key
A
» Fig. 31 .
›
Select the desired contact (if necessary one of the contact numbers).
Change the assigned preferred contact
›
In the menu Telephone hold the desired function key
A
» Fig. 31 .
›
Select the desired contact (if necessary one of the contact numbers).
Delete preferred contact
›
Press the key
→
→ User profile → Manage favourites .
›
Press the desired function key of the preferred contact and confirm the dele-
tion.
You can delete all contacts by pressing the function key
Delete all .
Call list
Fig. 32
Call list
47Telephone
Page 51 of 100
 Columbus Infotainment System Manual Show list›Press in the menu Telephone the function key .
Distinguishing the types of calls
In the call list, the call types are distinguished by the following symbols
» Fig. 32 .
Answered call")
Show list›Press in the menu Telephone the function key .
Distinguishing the types of calls
In the call list, the call types are distinguished by the following symbols
» Fig. 32 .
Answered call
Outgoing call
Missed call
Filter for the display of call types
By pressing the function key A
» Fig. 32 the following menu is displayed.
› All
- List of all calls
› Missed calls
- list of missed calls
› Dialled numbers
- list of numbers dialled
› Received calls
- list of received calls
Function keys in the call list Start connection
- Starts the connection set-up with the prefix
Edit the telephone number before dialling (the number is not assigned to
any telephone contact)
Display the call details
Telephone conversation
Depending on the conversation context, the following functions can be execu-
ted.
End dialling / reject incoming call / end call
Accept incoming call / return to held call
Mute the ringer
Restore ringer
Hold a call
Deactivate the microphone
Activate the microphone
Show caller details (if the contact is stored in the list)
Switch the call to the telephone
› Press in the menu
Telephone the function key
→ Hands-free
.
Switch the call back to the device
› Press in the menu
Telephone the function key .
Dialling tone (DTMF)
During an ongoing call, the sending of the dialling tone (DTMF) is possible.
› Press in the menu
Telephone the function key
and enter the tone dial
number.
Note
If the incoming call is answered by the auxiliary telephone and the caller has
been imported into your contact list from the main telephone, the caller details
are displayed.
Conference
The conference is a shared call with between three and six participants.
Start a conference/invite additional participants
›
During a call or conference, make the next call.
or
›
To answer a new incoming call press the function key .
›
Press the function key
to initiate the conference or return the partici-
pants to the conference.
Ongoing conference
During an ongoing conference call, the call duration is displayed on the screen.
Depending on the context, the following functions can be selected.
Hold a conference - leave the conference temporarily (the conference
continues in your absence)
Return to the held conference
Deactivate the microphone
Activate the microphone
End conference call
Conference call details
Conference details
› During the ongoing conference, press the function key
.
A list of other conference participants is displayed. The following functions can
be selected depending on the type of telephone.
48Telephone
Page 52 of 100
 Columbus Infotainment System Manual View details of participant
Talk to a participant separately from the conference
End the call to a conference participant
Text messages (SMS)
Introduction
This chapter contains information on the")
View details of participant
Talk to a participant separately from the conference
End the call to a conference participant
Text messages (SMS)
Introduction
This chapter contains information on the following subjects:
Main menu
49
New text message
49
Received text message
50
Main menu
Fig. 33
Main menu text messages
›
Press in the main menu the Telephone function key
.
The main menu for text messages appears » Fig. 33.
If there is SIM card in the external module with activated telephone services
and a telephone is connected to the device, then a selection has to be made
between the SIM card and the telephone.
The priority with respect to the use of the SIM card and the connected tele-
phone can be set as follows.
›
In the main menu Telephone press the function key
→ Text message set-
tings → Standard account .
›
Select the desired menu item.
Open a list for quick answer provided short messages (called templates)
New text message - Creating and sending the message
Inbox - Open a list of received messages
1Sent
- Open a list of sent messages
Outbox - Open a list of messages not sent
Drafts - Open a list of drafts (messages in progress)
Deleted - Open a list of deleted messages
Send contact details - send the contact details (Contact business card)
New text message
Fig. 34
Entering a text message / viewing a text message
Fig. 35
Contact list / recipient list
Creating and sending the message
›
In the main menu of the text messages press the function key
» Fig. 33 on
page 49 .
›
Write a message and press the function key
» Fig. 34 -
.
›
Press the function key
» Fig. 34 -
.
›
Enter the recipient of the message.
By pressing the function key
more recipients of the message can be added.
49Telephone
Page 53 of 100
 Columbus Infotainment System Manual ›Press the function key
.
The message is sent.
View the number of text message characters
The number of characters entered while drafting the message are displayed
» Fig. 34 -
.
T")
›Press the function key
.
The message is sent.
View the number of text message characters
The number of characters entered while drafting the message are displayed
» Fig. 34 -
.
The max. number of characters of a message is 440. If a message contains
more than 70 characters, then it is split into multiple messages.
Viewing the text message
After opening the view message function » Fig. 34 -
the following functions
can be executed.
The text can be read out by the device's generated voice
The text can be stored as a draft
Open a list of templates with the possibility to replace the recorded text
by the selected template
Open the contact list
The message can be edited, as long as the text range is within the entered
view.
Contact list / recipient list
After the list has been opened the following functions can be executed
» Fig. 35 -
.
Insert a contact in the recipient list
Contact search
Enter the telephone number
Return to view the message
After selecting the contact number or entering the telephone number, the re-
cipient list will be displayed in the screen » Fig. 35 -
.
The following functions can be performed by pressing one of the function
keys.
Display the contact list with the possibility to add / remove further recipi-
ents for the message
Removal of the selected contact from the recipient list
Sending the message
Return to view the message1Received text message
When you receive a new message, the number of new messages received is
displayed next to the function key,
and at the same time the icon in the sta-
tus bar is
displayed.›
Press the key
→
→
.
This will open a list of received messages.
›
Select a message.
The message content and the following menu is displayed.
The text can be read out by the device's generated voice
Open a menu with additional options
› Reply with template
- Reply using a template
› Delete current text message
- Removal of the displayed text message
› Display numbers
- Recognition of telephone numbers in the message
including the contact number (recognized numbers can be dialled direct-
ly or edited before dialling, or may be sent to this message)
Open the contacts list for forwarding a message Reply to the sender via a message
50Telephone
Page 54 of 100
 Columbus Infotainment System Manual WLAN connectivity and data connection
WLAN
Introduction
This chapter contains information on the following subjects:
WLAN Hotspot - Connection to the external device with the device WLAN
51
WLAN Cl")
WLAN connectivity and data connection
WLAN
Introduction
This chapter contains information on the following subjects:
WLAN Hotspot - Connection to the external device with the device WLAN
51
WLAN Client - Connect the device to an external device with WLAN
51
WLAN client - manual settings
52
The requirement for the WLAN function is the ignition is switched on.
After switching on the ignition, the last-used WLAN connection appears.
WLAN can be used to connect to the Internet or as a source for playing audio
files in the menu Media.
The device allows you to set up the WLAN hotspot on which up to 8 external
devices can be connected, or to connect to an external device via WLAN client.
WLAN hotspot and WLAN client are two independent connections, these can
be turned on simultaneously.
If the external module has a SIM card with activated data services or if there is
a connection with the telephone via the rSAP profile then it is not possible to
connect the device to the external device using WLAN.
WLAN Hotspot - Connection to the external device with the device
WLAN
WLAN hotspot switch on/off
›
Press the key
→
→ WLAN → Mobile hotspot → Mobile hotspot .
Connection set-up
›
Set WLAN hotspot in the device » page 16, WLAN Settings .
›
Enable the WLAN in the external device and search for any available WLAN.
›
Select the WLAN hotspot of the device (WLAN name of the device - SSID
» page 16 , WLAN Settings ).
›
Enter the type of security and the access password (if required).
WLAN Client - Connect the device to an external device with
WLANFig. 36
List of available WLAN networks
WLAN client switch on/off
›
Press the key
→
→ WLAN → WLAN → WLAN .
View of available WLAN networks
› Press the key
→
→ WLAN → WLAN 1)
.
A list of available WLAN networks with the following information and function
keys are displayed » Fig. 36.
Search for available WLAN networks
Function keys with the name and type of WLAN security
Currently connected WLAN network Disconnect from the current WLAN network connection / deletion of
the WLAN access password from the device memory (the function keys
only appear for previously connected WLAN networks)
Updating the list of available WLAN networks
There is no automatic updating of the list of available WLAN networks.
› Press the function key
Search.
Connection set-up › Switch on the WLAN client mode in the device.
› In the list of available WLAN networks, press the key
Search.
› Select the desired WLAN network.
› If the access to the WLAN network is password protected, then enter the re-
quired password.
SearchADelete1)
If the device is connected to the external device via WLAN client, the WLAN name of the external device
appears in this function key.
51WLAN connectivity and data connection
Page 55 of 100
 Columbus Infotainment System Manual If the device is connected to the external device via WLAN client the following
will appear in the function key
→ → WLAN → WLAN the WLAN name
of the external device.
Secu")
If the device is connected to the external device via WLAN client the following
will appear in the function key
→ → WLAN → WLAN the WLAN name
of the external device.
Security type
In the list of available WLAN networks the security type appears in the func-
tion key with the name of the WLAN security type A
» Fig. 36 .
■ WPA2 - WPA2 security
■ WPA - WPA security
■ Open - Without security (without WLAN access password)
Disconnection
› Switch off the WLAN client mode in the device.
or
› Press the key
→
→ WLAN → WLAN → Delete .
WLAN client - manual settings
Manual settings / connections are then to be used when the desired WLAN
network is not in the list of available WLAN networks (e.g. the desired WLAN
network is not broadcasting a name).
›
Press the key
→
→ WLAN → WLAN → Manual settings .
›
Enter and select the following menu items.
■ Network name - Enter the WLAN name
■ Network key - Enter password for the WLAN connection
■ Security level: - Setting of the WLAN connection security
■ WPA2 - WPA2 security
■ WPA - WPA security
■ No security level - Without protection (without WLAN access password)
› Press the function key
Connect.
Data connection
Introduction
This chapter contains information on the following subjects:
Connection options for the data connection
52
Settings
52Connection options for the data connection
Using the data connection, the device can be connected to the Internet.
The data connection can be established in one of the following ways.
Data connection using rSAP›
Connect the device via Bluetooth ®
profile rSAP to a telephone with activated
data services.
Data connection using the SIM card in the external module
›
Insert a SIM card with activated data services in the external module and es-
tablish the data connection » page 44.
Data connection via WLAN
›
Connect the device to an external device with activated data services over
the WLAN client mode » page 51.
Settings
›
Press the key
→
→ Network .
■ Network settings - Setting of the data connection according to the associ-
ated telephone service provider (APN settings)
■ Access point name: ... - Setting of the access point name
■ User name: … - Setting of user name
■ Password: ... - Password setting
■ Authentication - Setting for the type of verification
■ Normal - Without verification
■ Safe - Verification required
■ Delete connection - Delete the data connection
■ Reset access point (APN) - Delete the settings of the data connection pa-
rameters
■ Store - Saving the settings
■ Network provider: ... - Select the data connection provider (the menu item is
visible when only the data connection of the inserted SIM card is active)
■ Data roaming - Enable / disable the use of data roaming connection
■ Current connection details - Display of information on data downloaded (by
pressing the function key Reset the data information is deleted)
■ Restore factory settings - Restoring the data connection settings
■ Data connection: - Settings relating to turning on/off the data connection
■ Off - Turning the data connection off
■ Ask - Switch on the data connection after confirming the request
■ On - Switch on the data connection
52WLAN connectivity and data connection
Page 56 of 100
 Columbus Infotainment System Manual SmartLink
Introductory information
Introduction
This chapter contains information on the following subjects:
Main menu
53
List of connected devices
54
Settings
54
The SmartLink function offers the")
SmartLink
Introductory information
Introduction
This chapter contains information on the following subjects:
Main menu
53
List of connected devices
54
Settings
54
The SmartLink function offers the possibility to display and operate certified
applications of a connected device (such as a telephone) in the device screen.
Depending on the connected device some applications can be started using
the voice activation, via the device screen, using the operating elements on
the device or using the buttons on the multi-function steering wheel.
The voice control of the connected device can be activated by pressing and
holding the button
or by pressing and holding the symbol key
on the
multifunction steering wheel.
For reasons of safety, the operation of some applications while driving is limi-
ted or not possible.
Using the applications in the connected device it is possible to use the naviga-
tion, to make a call, to listed to music or similar things.
The SmartLinkFunction supports the following connection types.
› Android Auto ™
› Apple CarPlay
› MirrorLink ™
The device allows only one active connection.
CAUTION■ ŠKODA is not responsible for damage to the unit or to the vehicle by the use
of faulty or incorrectly programmed applications in the connected device.■
Due to the low charging current from the USB input, intensive use of the
SmartLink function can lead to the discharge of the battery of the connected
device.
■
To establish the connection, it is necessary that the date and time values in
the device are set correctly. If the setting of the date and time values are
based on the GPS signal, then a connection may not be possible with bad sig-
nal reception. If there is sufficient signal reception, the synchronization of the
device with the GPS signal may take up to ten minutes.
Note
■ We recommend that you use extension cords from ŠKODA Original Accesso-
ries.■
The device saves the last 10 connected devices.
■
With some connected devices, it is necessary that the connected device is
“unlocked” over the entire duration of the connection for trouble-free func-
tioning of the SmartLink function.
Main menu
Fig. 37
Main menu: no connection / example of an active connection
Read and observe
on page 53 first.
›
Press the key
→
.
If there is no active connection, then the main menu SmartLink » Fig. 37 -
is
displayed.
If there is an active connection, then the main menu SmartLink » Fig. 37 -
is
displayed.
53SmartLink