Page 86 of 348
5. Place the decklid prop rod in the decklid slot to secure
the decklid in the open position.CAUTION!
To prevent possible damage, do not slam the decklid
to close it. Use a firm downward push at the center of
the decklid to ensure the decklid latch is fully
engaged.
WARNING!
•The maximum load limit for the luggage compart-
ment, in addition to the kits provided, is 33.1 lbs.
(15kg). Do not exceed the maximum permitted load
in the luggage compartment. When accessing the
rear luggage compartment, do not come into con-
tact with engine, or other components, that may be
hot and could burn you if touched.
(Continued)
Decklid Prop Rod Slot
84 UNDERSTANDING THE FEATURES OF YOUR VEHICLE
Page 87 of 348
WARNING!(Continued)
•Access the luggage compartment only with the
vehicle stationary. Before exiting the vehicle, you
should always place the vehicle into First gear,
apply the parking brake, and remove the key from
the ignition. Never leave the key fob in the vehicle
or in a location accessible to children.
•The decklid may drop suddenly, causing serious
injury, if the supporting rod is not positioned
correctly.
•The decklid must always be closed properly, and
the lock engaged, while the vehicle is in motions.
LIGHTS
Multifunction Lever
The multifunction lever, located on the left side of the
steering wheel, controls the operation of the headlights,
headlight beam selection, passing light and turn signals.NOTE:The external lights can only be turned on with
the ignition in the ON/RUN position.
Multifunction Lever
3
UNDERSTANDING THE FEATURES OF YOUR VEHICLE 85
Page 94 of 348
WARNING!
Sudden loss of visibility through the windshield
could lead to a collision. You might not see other
vehicles or other obstacles. To avoid sudden icing of
the windshield during freezing weather, warm the
windshield with defroster before and during wind-
shield washer use.
TILT/TELESCOPING STEERING COLUMN
This feature allows you to tilt the steering column
upward or downward. It also allows you to lengthen or
shorten the steering column. The tilt/telescoping control
handle is located below the steering wheel at the end of
the steering column.To unlock the steering column, push the lever downward
(toward the floor). To tilt the steering column, move the
steering wheel upward or downward as desired. To
lengthen or shorten the steering column, pull the steering
wheel outward or push it inward as desired. To lock the
Tilt/Telescoping Column Lever
92 UNDERSTANDING THE FEATURES OF YOUR VEHICLE
Page 95 of 348

steering column in position, push the lever upward until
fully engaged.
WARNING!
Do not adjust the steering column while driving.
Adjusting the steering column while driving or driv-
ing with the steering column unlocked, could cause
the driver to lose control of the vehicle. Failure to
follow this warning may result in serious injury or
death.
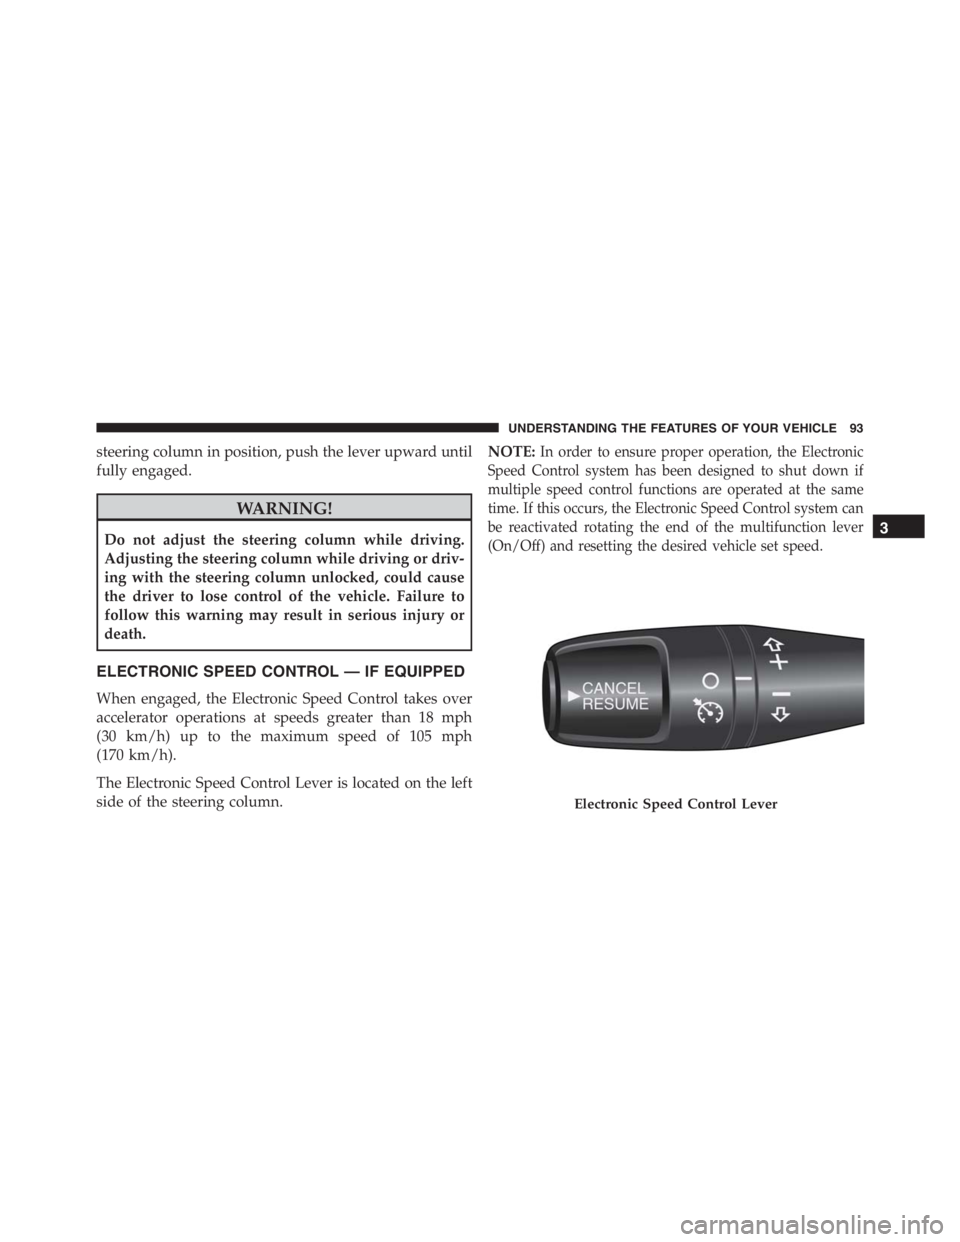
ELECTRONIC SPEED CONTROL — IF EQUIPPED
When engaged, the Electronic Speed Control takes over
accelerator operations at speeds greater than 18 mph
(30 km/h) up to the maximum speed of 105 mph
(170 km/h).
The Electronic Speed Control Lever is located on the left
side of the steering column.NOTE:
In order to ensure proper operation, the Electronic
Speed Control system has been designed to shut down if
multiple speed control functions are operated at the same
time. If this occurs, the Electronic Speed Control system can
be reactivated rotating the end of the multifunction lever
(On/Off) and resetting the desired vehicle set speed.
Electronic Speed Control Lever
3
UNDERSTANDING THE FEATURES OF YOUR VEHICLE 93
Page 96 of 348

To Activate
Rotate the end of the multifunction lever to activate the
Electronic Speed Control. The Cruise Indicator Light in
the Electronic Vehicle Information Center (EVIC) will
illuminate. To turn the system off, rotate the end of the
multifunction lever to the “O” position. The Cruise
Indicator Light will turn off. The system should be
turned off when not in use.
WARNING!
Leaving the Electronic Speed Control system on
when not in use is dangerous. You could accidentally
set the system or cause it to go faster than you want.
You could lose control and have an accident. Always
leave the system OFF when you are not using it.
To Set A Desired Speed
Turn the Electronic Speed Control ON. When the vehicle
has reached the desired speed, move the electronic speed
control lever upward SET(+) and release. Release the
accelerator and the vehicle will operate at the selected
speed.
NOTE:The vehicle should be traveling at a steady speed
and on level ground before moving the electronic speed
control lever upward SET(+).
To Deactivate
A soft tap on the brake pedal, pushing the RESUME/
CANCEL button, or normal brake pressure while slow-
ing the vehicle will deactivate Electronic Speed Control
without erasing the set speed memory. Rotating the end
of the multifunction lever to the “O” position or turning
the ignition switch OFF erases the set speed memory.
94 UNDERSTANDING THE FEATURES OF YOUR VEHICLE
Page 101 of 348

The car is close to the obstacle when the display shows a
single constant arc and emits a continuous sound.
If there are several obstacles, the closest one is indicated.
Fault Indication
Parking sensor failures, if any, will be indicated when
reverse is engaged by the switching on of the
warn-
ing light on the instrument panel together with the
message on the display.
General Warnings
When parking, take the utmost care over obstacles that
may be above or under the sensor.
Under certain circumstances, objects close to the vehicle
are not detected by the system and could therefore cause
damage to the car or be damaged themselves.Some conditions may influence the performance of the
parking sensors:
•The presence of ice, snow, mud or multiple layers of
paint on the sensor surface may cause reduced sensi-
tivity of the sensor itself and therefore reduce the
system performance.
•Mechanical interference (e.g washing the car, rain,
strong wind, hail) may cause the sensor to detect a
non-existent obstacle (“echo interference”).
•The presence of ultrasonic systems (e.g. pneumatic
brake systems of trucks or pneumatic drills) near the
car could alter the signals sent by the sensor.
•The variation in sensor position, caused by variation in
ride (due to suspension component wear), changing
tires, overloaded car, or tuning that lowers the car, for
example, may affect parking sensor system perfor-
mance.
3
UNDERSTANDING THE FEATURES OF YOUR VEHICLE 99
Page 102 of 348

NOTE:The sensor must be free from mud, dirt snow or
ice in order for the system to operate correctly. Be careful
not to scratch or damage the sensors while cleaning them.
Avoid using dry, rough or hard cloths. The sensors must be
washed using clean water, with the addition of car sham-
poo if necessary. When using special washing equipment
such as high pressure jets or steam cleaning, clean the
sensors very quickly keeping the jet more than 4 in (10 cm)
away. Also, do not apply stickers to the sensors.
CAUTION!
•The Parking Sensor system is only a parking aid
and it is unable to recognize every obstacle, includ-
ing small obstacles. Parking curbs might be tem-
porarily detected or not detected at all. Obstacles
located above or below the sensors will not be
detected when they are in close proximity
(Continued)
CAUTION!(Continued)
•The vehicle must be driven slowly when using the
Parking Sensor system in order to be able to stop in
time when an obstacle is detected. It is recom-
mended that the driver looks over his/her shoulder
when using the Parking Sensor system.
WARNING!
Drivers must be careful when backing up even when
using the Parking Sensor system. Always check care-
fully behind your vehicle, and be sure to check for
pedestrians, animals, other vehicles, obstructions, or
blind spots before backing up. You are responsible
for the safety of your surroundings and must con-
tinue to pay attention while backing up. Failure to do
so can result in serious injury or death.
100 UNDERSTANDING THE FEATURES OF YOUR VEHICLE
Page 104 of 348

WARNING!
To avoid serious injury or death:
•Only devices designed for use in this type of outlet
should be inserted into any 12 Volt outlet.
•Do not touch with wet hands.
•Close the lid when not in use and while driving the
vehicle.
•If this outlet is mishandled, it may cause an electric
shock and failure.
CAUTION!
•Many accessories that can be plugged in draw
power from the vehicle’s battery, even when not in
use (i.e., cellular phones, etc.). Eventually, if
plugged in long enough, the vehicle’s battery will
discharge sufficiently to degrade battery life and/or
prevent the engine from starting.
•Accessories that draw higher power (i.e., coolers,
vacuum cleaners, lights, etc.) will degrade the bat-
tery even more quickly. Only use these intermit-
tently and with greater caution.
•After the use of high power draw accessories, or
long periods of the vehicle not being started (with
accessories still plugged in), the vehicle must be
driven a sufficient length of time to allow the
generator to recharge the vehicle’s battery.
102 UNDERSTANDING THE FEATURES OF YOUR VEHICLE