2015 PEUGEOT 4C air condition
[x] Cancel search: air conditionPage 25 of 348
General Information
This device complies with Part 15 of the FCC rules and
RSS 210 of Industry Canada. Operation is subject to the
following conditions:
•This device may not cause harmful interference.
•This device must accept any interference received,
including interference that may cause undesired op-
eration.
NOTE:Changes or modifications not expressly approved
by the party responsible for compliance could void the
user’s authority to operate the equipment.If your RKE transmitter fails to operate from a normal
distance, check for these two conditions:
1. A weak battery in the transmitter. The expected life of
the battery is a minimum of three years.
2. Closeness to a radio transmitter such as a radio station
tower, airport transmitter, and some mobile or CB
radios.
DOOR LOCKS
Central Door Locking/Unlocking
Locking Doors From The Outside
With the doors closed, push the lock button on the key
fob or turn the metal insert (located inside the key fob) in
the door lock.
2
THINGS TO KNOW BEFORE STARTING YOUR VEHICLE 23
Page 37 of 348

NOTE:If BeltAlert has been deactivated, the Seat Belt
Reminder Light
will continue to illuminate while the
driver ’s seat belt remains unbuckled and a continuous
chime will sound when the ignition switch is first
placed in the START or ON/RUN position.
Lap/Shoulder Belts
All seating positions in your vehicle are equipped with
lap/shoulder belts.
The seat belt webbing retractor will lock only during very
sudden stops or collisions. This feature allows the shoul-
der part of the seat belt to move freely with you under
normal conditions. However, in a collision the seat belt
will lock and reduce your risk of striking the inside of the
vehicle or being thrown out of the vehicle.
This seat belt system has a retractor assembly that is
designed to release webbing in a controlled manner. Thisfeature is designed to help reduce the seat belt force
acting on the occupant’s chest.
WARNING!
•Relying on the air bags alone could lead to more
severe injuries in a collision. The air bags work
with your seat belt to restrain you properly. In
some collisions, the air bags won’t deploy at all.
Always wear your seat belt even though you have
air bags.
•In a collision, you and your passengers can suffer
much greater injuries if you are not properly buck-
led up. You can strike the interior of your vehicle or
other passengers, or you can be thrown out of the
vehicle. Always be sure you and others in your
vehicle are buckled up properly.
(Continued)
2
THINGS TO KNOW BEFORE STARTING YOUR VEHICLE 35
Page 57 of 348

ON/RUN position. After the self-check, the Air Bag
Warning Light will turn off. If the ORC detects a mal-
function in any part of the system, it turns on the Air Bag
Warning Light, either momentarily or continuously. A
single chime will sound to alert you if the light comes on
again after initial startup.
The ORC also includes diagnostics that will illuminate
the instrument cluster Air Bag Warning Light if a mal-
function is detected that could affect the air bag system.
The diagnostics also record the nature of the malfunction.
While the air bag system is designed to be maintenance
free, if any of the following occurs, have an authorized
dealer service the air bag system immediately.
•The Air Bag Warning Light does not come on during
the four to eight seconds when the ignition switch is
first turned to the ON/RUN position.
•The Air Bag Warning Light remains on after the four to
eight-second interval.•The Air Bag Warning Light comes on intermittently or
remains on while driving.
NOTE:If the speedometer, tachometer, or any engine
related gauges are not working, the Occupant Restraint
Controller (ORC) may also be disabled. In this condition
the air bags may not be ready to inflate for your protec-
tion. Have an authorized dealer service the air bag
system immediately.
WARNING!
Ignoring the Air Bag Warning Light in your instru-
ment panel could mean you won’t have the air bags
to protect you in a collision. If the light does not come
on as a bulb check when the ignition is first placed in
the on position, and stays on after you start the
vehicle, or if it comes on as you drive, have an
authorized dealer service the air bag system immedi-
ately.
2
THINGS TO KNOW BEFORE STARTING YOUR VEHICLE 55
Page 73 of 348
damaged, deteriorated, or mispositioned parts. Open
seams or loose connections could permit exhaust fumes
to seep into the passenger compartment. In addition,
inspect the exhaust system each time the vehicle is raised
for lubrication or oil change. Replace as required.
Safety Checks You Should Make Inside The
Vehicle
Seat Belts
Inspect the belt system periodically, checking for cuts,
frays, and loose parts. Damaged parts must be replaced
immediately. Do not disassemble or modify the system.
Front seat belt assemblies must be replaced after a
collision. Seat belt assemblies must be replaced after a
collision if they have been damaged (i.e., bent retractor,
torn webbing, etc.). If there is any question regarding belt
or retractor condition, replace the belt.
Air Bag Warning Light
The light should come on and remain on for four to eight
seconds as a bulb check when the ignition is first cycled
to ON. If the light is not lit during starting, see your
authorized dealer. If the light stays on, flickers, or comes
on while driving, have the system checked by an autho-
rized dealer.
Defroster
Check operation by selecting the defrost mode and place
the blower control on high speed. You should be able to
feel the air directed against the windshield. See your
authorized dealer for service if your defroster is inoper-
able.
2
THINGS TO KNOW BEFORE STARTING YOUR VEHICLE 71
Page 123 of 348
28. Brake Warning Light — If Equipped
This light monitors various brake functions,
including brake fluid level and parking brake
application. If the brake light turns on it may
indicate that the parking brake is applied, that
the brake fluid level is low, or that there is a problem with
the anti-lock brake system reservoir.
If the light remains on when the parking brake has been
disengaged, and the fluid level is at the full mark on the
master cylinder reservoir, it indicates a possible brake
hydraulic system malfunction or that a problem with the
Brake Booster has been detected by the Anti-Lock Brake
System (ABS) / Electronic Stability Control (ESC) system.
In this case, the light will remain on until the condition
has been corrected. If the problem is related to the brake
booster, the ABS pump will run when applying the brake
and a brake pedal pulsation may be felt during each stop.The dual brake system provides a reserve braking capac-
ity in the event of a failure to a portion of the hydraulic
system. A leak in either half of the dual brake system is
indicated by the Brake Warning Light, which will turn on
when the brake fluid level in the reservoir has dropped
below a specified level.
The light will remain on until the cause is corrected.
NOTE:The light may flash momentarily during sharp
cornering maneuvers, which change fluid level condi-
tions. The vehicle should have service performed, and
the brake fluid level checked.
If brake failure is indicated, immediate repair is neces-
sary.
4
UNDERSTANDING YOUR INSTRUMENT PANEL 121
Page 125 of 348
In this case, the light will remain on until the condition
has been corrected. If the problem is related to the brake
booster, the ABS pump will run when applying the brake
and a brake pedal pulsation may be felt during each stop.
The dual brake system provides a reserve braking capac-
ity in the event of a failure to a portion of the hydraulic
system. A leak in either half of the dual brake system is
indicated by the Brake Warning Light, which will turn on
when the brake fluid level in the reservoir has dropped
below a specified level.
The light will remain on until the cause is corrected.
NOTE:The light may flash momentarily during sharp
cornering maneuvers, which change fluid level condi-
tions. The vehicle should have service performed, and
the brake fluid level checked.
If brake failure is indicated, immediate repair is neces-
sary.WARNING!
Driving a vehicle with the red brake light on is
dangerous. Part of the brake system may have failed.
It will take longer to stop the vehicle. You could have
a collision. Have the vehicle checked immediately.
Vehicles equipped with the Anti-Lock Brake System
(ABS), are also equipped with Electronic Brake Force
Distribution (EBD). In the event of an EBD failure, the
Brake Warning Light will turn on along with the ABS
Light. Immediate repair to the ABS system is required.
Operation of the Brake Warning Light can be checked by
turning the ignition switch from the OFF position to the
ON/RUN position. The light should illuminate for ap-
proximately two seconds. The light should then turn off
unless the parking brake is applied or a brake fault is
detected. If the light does not illuminate, have the light
inspected by an authorized dealer.
4
UNDERSTANDING YOUR INSTRUMENT PANEL 123
Page 145 of 348
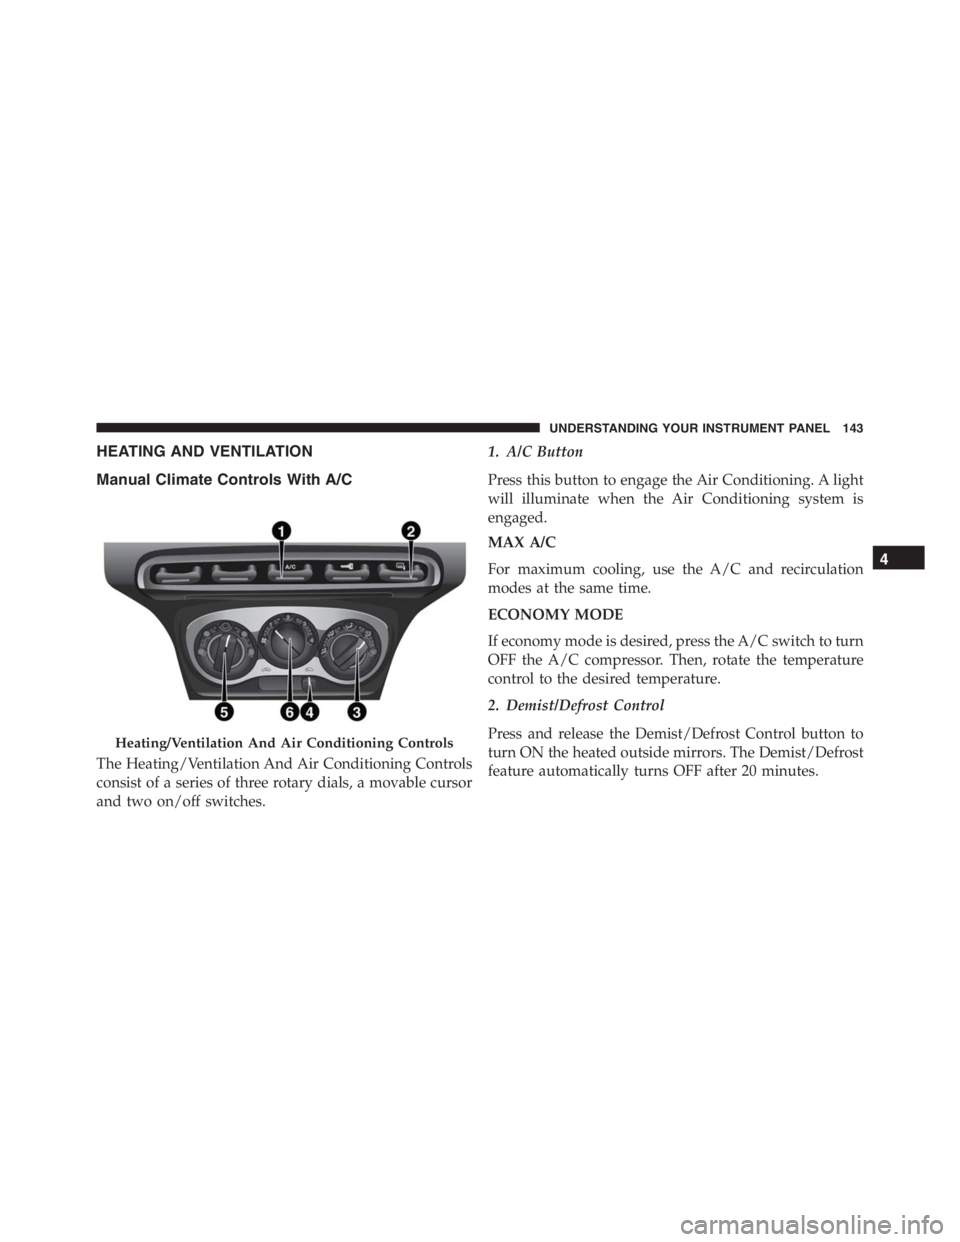
HEATING AND VENTILATION
Manual Climate Controls With A/C
The Heating/Ventilation And Air Conditioning Controls
consist of a series of three rotary dials, a movable cursor
and two on/off switches.1. A/C Button
Press this button to engage the Air Conditioning. A light
will illuminate when the Air Conditioning system is
engaged.
MAX A/C
For maximum cooling, use the A/C and recirculation
modes at the same time.
ECONOMY MODE
If economy mode is desired, press the A/C switch to turn
OFF the A/C compressor. Then, rotate the temperature
control to the desired temperature.
2. Demist/Defrost Control
Press and release the Demist/Defrost Control button to
turn ON the heated outside mirrors. The Demist/Defrost
feature automatically turns OFF after 20 minutes.
Heating/Ventilation And Air Conditioning Controls
4
UNDERSTANDING YOUR INSTRUMENT PANEL 143
Page 146 of 348
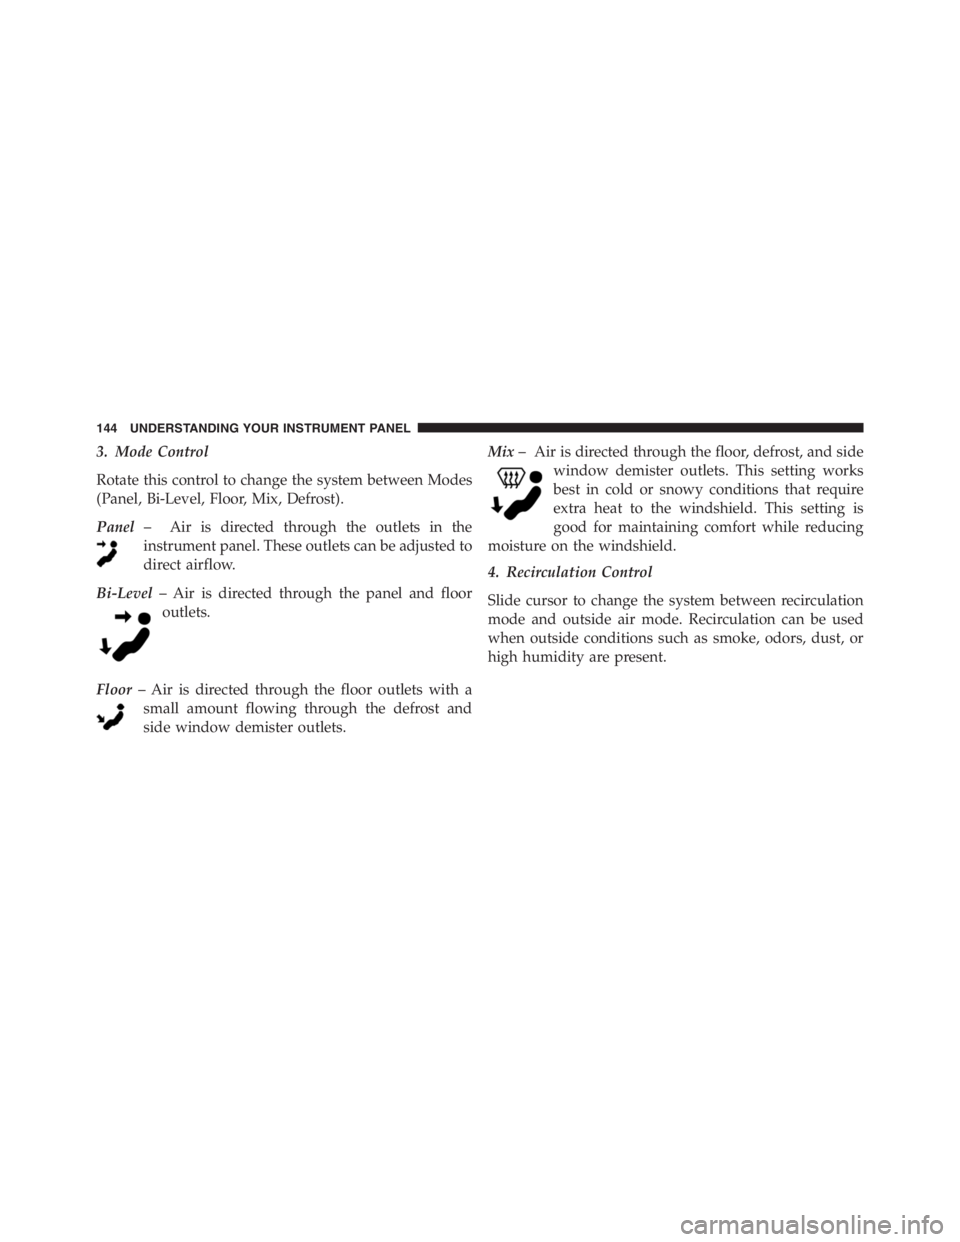
3. Mode Control
Rotate this control to change the system between Modes
(Panel, Bi-Level, Floor, Mix, Defrost).
Panel– Air is directed through the outlets in the
instrument panel. These outlets can be adjusted to
direct airflow.
Bi-Level– Air is directed through the panel and floor
outlets.
Floor– Air is directed through the floor outlets with a
small amount flowing through the defrost and
side window demister outlets.Mix– Air is directed through the floor, defrost, and side
window demister outlets. This setting works
best in cold or snowy conditions that require
extra heat to the windshield. This setting is
good for maintaining comfort while reducing
moisture on the windshield.
4. Recirculation Control
Slide cursor to change the system between recirculation
mode and outside air mode. Recirculation can be used
when outside conditions such as smoke, odors, dust, or
high humidity are present.
144 UNDERSTANDING YOUR INSTRUMENT PANEL