Page 12 of 348
▫Central Door Locking/Unlocking...........23
▫Locking/Unlocking Doors From The Inside . . .25
▫Emergency Door Locking Device...........25
▫Door Opening/Closing Mechanism Reset.....26
�WINDOWS...........................27
▫Power Windows.......................27
�DECKLID.............................29
�OCCUPANT RESTRAINT SYSTEMS..........32
▫Seat Belt Systems......................33
▫Supplemental Restraint System (SRS)........44▫Child Restraints.......................57
�ENGINE BREAK-IN RECOMMENDATIONS....68
�SAFETY TIPS..........................69
▫Transporting Passengers.................69
▫Exhaust Gas.........................70
▫Safety Checks You Should Make Inside The
Vehicle.............................71
▫Periodic Safety Checks You Should Make Outside
The Vehicle..........................72
10 THINGS TO KNOW BEFORE STARTING YOUR VEHICLE
Page 28 of 348
To restore the starting condition of the door locks (only if
battery charge restored), proceed as follows:
•Push the Unlock button on the remote control;
•Push the door locking/unlocking LED indicator but-
ton
on the dashboard; or
•Introduce the metal insert of the ignition key in the
front door pawl; or
•Pull the internal door handle.
Door Opening/Closing Mechanism Reset
If the battery is disconnected or the protection fuse
blows, the door opening/closing mechanism must be
reset as follows:
1. Close all the doors.
2. Push the unlock button on the key or the door
locking/unlocking LED indicator button
on the
dashboard.
3. Push the lock button on the key or the door locking/
unlocking LED indicator button
on the dash-
board.
Emergency Door Lock Function
26 THINGS TO KNOW BEFORE STARTING YOUR VEHICLE
Page 30 of 348

When one of the two buttons is pushed briefly, the
window moves in stages; if the button is held down to
open,�continuous automatic�operation is activated.
If the button is pushed again the window will stop in its
current position. If the button is pushed for several
seconds, the window lowers automatically (only with
ignition key in MAR-ON position).
Continuous Automatic Operation
This is activated by pushing one of the two buttons for
longer than half a second. The window will stop when it
is fully opened, or when the button is pushed again.
It can be used on both the driver side and passenger side,
only for lowering the window.
Electric Window System Reset
After a break in power supply for the control units
(battery replaced or disconnected or protective fuses forthe electric window control units replaced), the auto-
matic operation of the windows must be restored.
The restoration procedure must be performed as de-
scribed below with the doors closed:
1. Completely open the driver’s door window keeping
the operating button pushed for at least three seconds
after the (lower) end of travel position is reached.
2. Completely raise the driver side window and hold the
button down for at least three seconds once the
(upper) end of travel position has been reached.
3. Proceed in the same way as described in points 1 and
2 for the passenger side door.
4. Make sure that the reset is correct by checking that the
windows work automatically.
28 THINGS TO KNOW BEFORE STARTING YOUR VEHICLE
Page 55 of 348
•Turn on the interior lights, which remain on as long as
the battery has power or until the ignition is cycled to
OFF.
•Unlock the doors automatically.
System Reset Procedure
Depending on the nature of the event the left and right
turn signal lights, located in the instrument panel, may
both be blinking and will continue to blink until the
ignition switch is turned to the OFF position. In order to
move your vehicle to the side of the road, you must
follow the system reset procedure.Customer Action Customer Will See
1. Turn ignition OFF.
(Turn Signal Switch Must
be placed in Neutral
State).
2. Turn ignition ON. Left Turn Light is OFF.
Right Turn Light
BLINKS.
3. Turn Right Turn Signal
Switch ON.Right Turn Light is ON
SOLID. Left Turn Light
BLINKS.
4. Turn Left Turn Signal
Switch ON.Left Turn Light is ON
SOLID. Right Turn Light
BLINKS.
5. Turn Right Turn Signal
Switch ON.Right Turn Light is ON
SOLID. Left Turn Light
BLINKS.
2
THINGS TO KNOW BEFORE STARTING YOUR VEHICLE 53
Page 56 of 348

6. Turn Left Turn Signal
Switch ON.Left Turn Light is ON
SOLID. Right Turn Light
is ON SOLID.
7. Turn Left Turn Signal
Switch OFF. (Turn Signal
Switch Must be placed in
Neutral State).Left Turn Light is OFF.
Right Turn Light is OFF.
8. Turn ignition OFF. System is now reset and
the engine may be
started.
9. Turn Hazard Flashers
OFF (Manually).
If a reset procedure step is not completed within 45
seconds, then the turn signal lights will turn off and the
reset procedure must be performed again in order to be
successful.Air Bag Warning Light
The air bags must be ready to inflate for your protection
in a collision. The Air Bag Warning Light
monitors the internal circuits and interconnect-
ing wiring associated with air bag system elec-
trical components.
The ORC monitors the readiness of the electronic parts of
the air bag system whenever the ignition switch is in the
START or ON/RUN position. If the ignition switch is in
the OFF position the air bag system is not on and the air
bags will not inflate.
The ORC contains a backup power supply system that
may deploy the air bags even if the battery loses power or
it becomes disconnected prior to deployment.
Also, the ORC turns on the Air Bag Warning Light in the
instrument panel for approximately four to eight seconds
for a self-check when the ignition is first turned to the
54 THINGS TO KNOW BEFORE STARTING YOUR VEHICLE
Page 89 of 348

Flash-To-Pass
You can signal another vehicle with your headlights by
partially pulling the multifunction lever toward the steer-
ing wheel. This will cause the high beam headlights to
turn on until the lever is released.
Parking Lights
To turn on the parking lights, remove the key
or turn the ignition to OFF/LOCK position and
turn on the headlights.
Turn Signals
Move the multifunction lever up or down and the arrows
on each side of the instrument cluster flash to show
proper operation of the front and rear turn signal lights.NOTE:If either light remains on and does not flash, or
there is a very fast flash rate, check for a defective outside
light bulb. If an indicator fails to light when the lever is
moved, it would suggest that the indicator bulb is
defective.
Lane Change Assist
Tap the lever up or down once, without moving beyond
the detent, and the turn signal (right or left) will flash five
times then automatically turn off.
Follow Me Home/Headlight Delay — If Equipped
When this feature is selected the driver can choose to
have the headlights remain on for a preset period of time.
3
UNDERSTANDING THE FEATURES OF YOUR VEHICLE 87
Page 95 of 348

steering column in position, push the lever upward until
fully engaged.
WARNING!
Do not adjust the steering column while driving.
Adjusting the steering column while driving or driv-
ing with the steering column unlocked, could cause
the driver to lose control of the vehicle. Failure to
follow this warning may result in serious injury or
death.
ELECTRONIC SPEED CONTROL — IF EQUIPPED
When engaged, the Electronic Speed Control takes over
accelerator operations at speeds greater than 18 mph
(30 km/h) up to the maximum speed of 105 mph
(170 km/h).
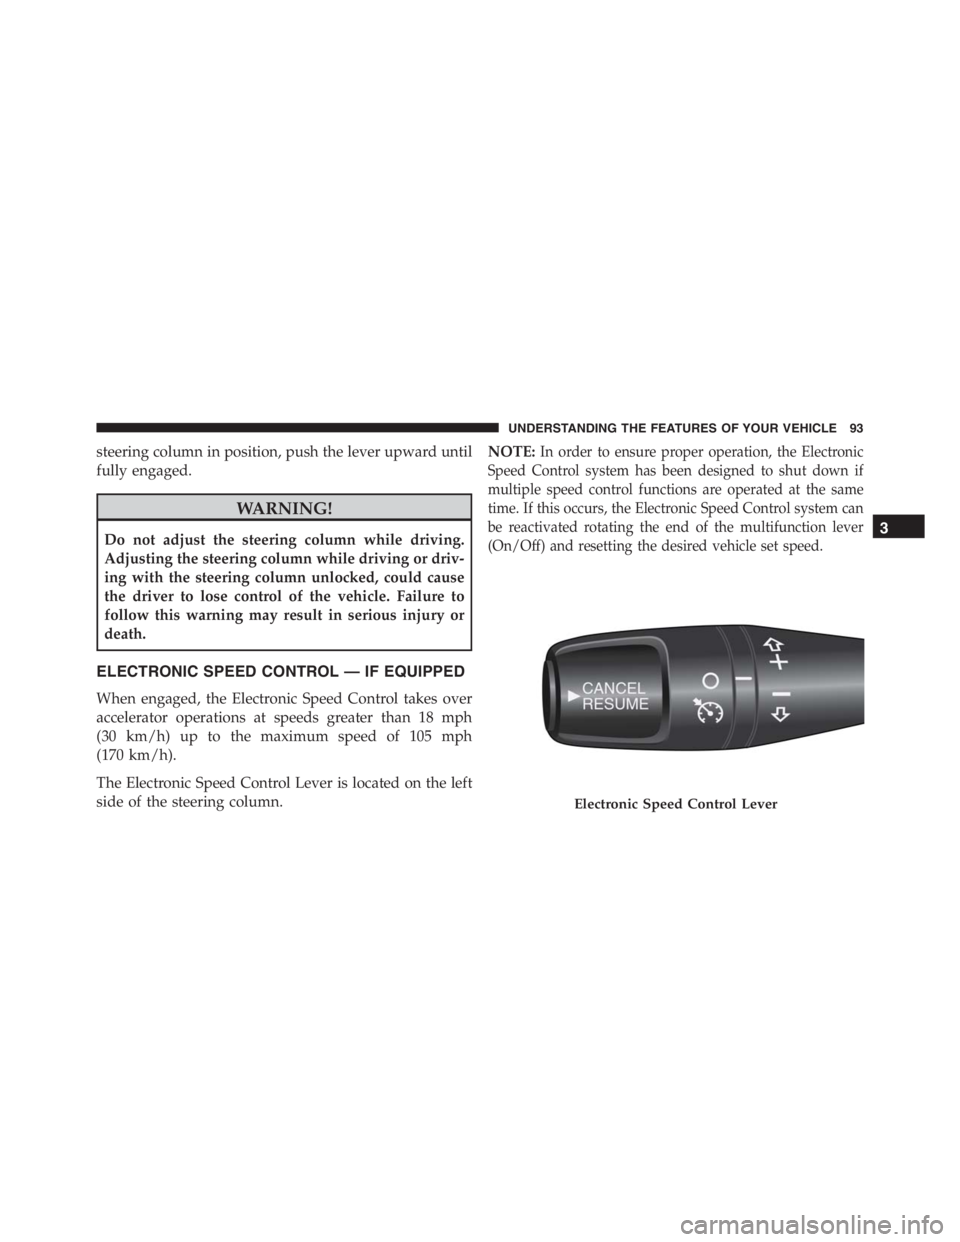
The Electronic Speed Control Lever is located on the left
side of the steering column.NOTE:
In order to ensure proper operation, the Electronic
Speed Control system has been designed to shut down if
multiple speed control functions are operated at the same
time. If this occurs, the Electronic Speed Control system can
be reactivated rotating the end of the multifunction lever
(On/Off) and resetting the desired vehicle set speed.
Electronic Speed Control Lever
3
UNDERSTANDING THE FEATURES OF YOUR VEHICLE 93
Page 120 of 348

18. Fuel Door Reminder
The arrow in this symbol is a reminder that the
Fuel Filler Door is located on the right side of
the vehicle.
19. Trip Odometer
This area of the cluster displays the total distance trav-
eled since the last Trip reset.
20. Electronic Throttle Control (ETC) Light
This light informs you of a problem with the
Electronic Throttle Control (ETC) system. The
light will come on when the ignition is first
turned ON and remain on briefly as a bulb
check. If the light does not come on during starting, have
the system checked by an authorized dealer.
If a problem is detected, the light will come on while the
engine is running. Cycle the ignition key when the
vehicle has completely stopped and the gear selector isplaced in the 1st position. The light should turn off.
If the light remains lit with the engine running, your
vehicle will usually be drivable. However, see an autho-
rized dealer for service as soon as possible. If the light is
flashing when the engine is running, immediate service is
required. You may experience reduced performance, an
elevated/rough idle or engine stall and your vehicle may
require towing.
21. Speedometer
Indicates vehicle speed.
22. “Alfa DNA” Driving Mode Indicator
This area of the cluster displays which driving mode the
vehicle is currently in. A letter (d, n, or a) corresponding
to the active driving mode (dynamic or race, natural, all
weather) and a dedicated message is shown on the
display.
118 UNDERSTANDING YOUR INSTRUMENT PANEL