Page 12 of 416

10
308_en_Chap00c_eco-conduite_ed01-2015
Optimise the use of your gearbox
With a manual gearbox, move off gently and change up without waiting.
During acceleration change up early.
With an automatic or electronic gearbox, give preference to automatic
mode and avoid pressing the accelerator pedal heavily or suddenly.
Control the use of your electrical
equipment
Before moving off, if the passenger compartment is too warm, ventilate it
by opening the windows and air vents before using the air conditioning.
Above 30 mph (50 km/h), close the windows and leave the air vents
open.
Remember to make use of equipment that can help keep the
temperature in the passenger compartment down (sunroof and window
blinds...).
Switch off the air conditioning, unless it has automatic regulation, as
soon as the desired temperature is attained.
Switch off the demisting and defrosting controls, if not automatic.
Switch off the heated seat as soon as possible.
Switch off the headlamps and front foglamps when the level of light
does not require their use.
Avoid running the engine before moving off, particularly in winter; your
vehicle will warm up much faster while driving.
As a passenger, if you avoid connecting your multimedia devices
(film, music, video game...), you will contribute towards limiting the
consumption of electrical energy, and so of fuel.
Disconnect your portable devices before leaving the vehicle.
eco-driving
eco-driving is a range of everyday practices that allow the motorist to optimise their fuel consumption and CO2 emissions.
Drive smoothly
Maintain a safe distance between vehicles, use engine braking
rather than the brake pedal, and press the accelerator progressively.
th
ese practices contribute towards a reduction in fuel consumption
and
CO
2 emissions and also helps reduce the background traffic noise.
If your vehicle has cruise control, make use of the system at speeds
above 25 mph (40 km/h) when the traffic is flowing well.
th
e gear shift indicator invites you engage the most suitable gear: as
soon as the indication is displayed in the instrument panel, follow it
straight away.
For vehicles fitted with an electronic or automatic gearbox, this
indicator appears only in manual mode.
eco-driving
Page 13 of 416

11
308_en_Chap00c_eco-conduite_ed01-2015
Limit the causes of excess consumption
Spread loads throughout the vehicle; place the heaviest items in the
bottom of the boot, as close as possible to the rear seats.
Limit the loads carried in the vehicle and reduce wind resistance (roof
bars, roof rack, bicycle carrier, trailer...). u
s
e a roof box in preference.
Remove roof bars and roof racks after use.
At the end of winter, remove snow tyres and refit your summer tyres.
Observe the recommendations on
maintenance
Check the tyre pressures regularly, when cold, referring to the label in
the door aperture, driver's side.
Carry out this check in particular:
-
b
efore a long journey,
-
a
t each change of season,
-
a
fter a long period out of use.
Don't forget the spare wheel and the tyres on any trailer or caravan.
Have your vehicle serviced regularly (engine oil, oil filter, air filter,
passenger compartment filter...) and observe the schedule of
operations recommended in the manufacturer's service schedule.
With a BlueHDi Diesel engine, if the SCR system is faulty your vehicle
becomes polluting; go to a P
e
uge
Ot
dealer or a qualified workshop
without delay to have the emissions of nitrous oxides brought back to
the legal level.
When refuelling, do not continue after the third cut-off of the nozzle to
avoid any over flow.
At the wheel of your new vehicle, it is only after the first 1 800 miles
(3 000 kilometres) that you will see the fuel consumption settle down to
a consistent average.
.
eco-driving
Page 26 of 416

24
308_en_Chap01_controle-de-marche_ed01-2015
Engine oil
pressurefixed.th
ere is a fault with the engine
lubrication system. You must stop as soon it is safe to do so.
Park, switch off the ignition and contact a Pe
ugeOt
dealer or a qualified workshop.
Deflated tyre fixed.
th
e pressure in one or more tyres is
too low. Check the pressures of the tyres as soon as possible.
th
is check should preferably carried out with the tyres
cold.
flashing then fixed.
th
e under-inflation detection system
has a fault. Have it checked by a P
e
uge
Ot
dealer or a qualified
workshop.
For more information on under-inflation detection,
refer to the corresponding section.
Warning
/ indicator lamp
State Cause Action
/ Observations
Foot on the
brake pedal fixed.
th
e brake pedal must be pressed. With an automatic gearbox, press the brake pedal, engine running, before releasing the parking brake, to
unlock the lever and come out of position P .
If you wish to release the parking brake without
pressing the brake pedal, this warning lamp will
remain on.
Foot on the
clutch fixed.
In the S
tO
P mode of Stop & Start,
changing to S
tA
R
t
mode is refused
because the clutch pedal is not fully
down. You must declutch fully to allow the change to engine
S
t
A R
t m
o d e .
Monitoring
Page 35 of 416
33
308_en_Chap01_controle-de-marche_ed01-2015
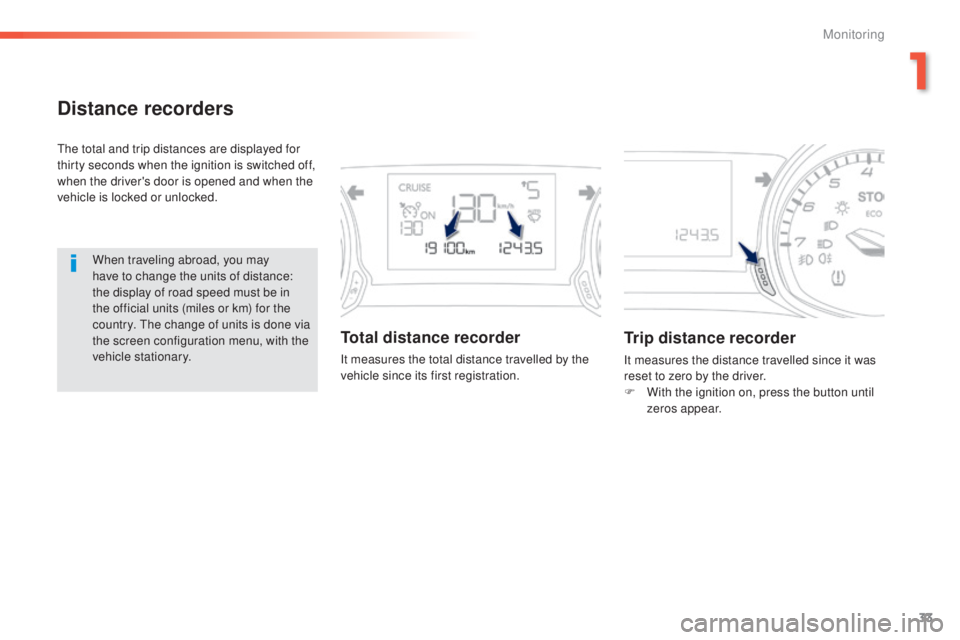
Distance recorders
the total and trip distances are displayed for
thirty seconds when the ignition is switched off,
when the driver's door is opened and when the
vehicle is locked or unlocked.When traveling abroad, you may
have to change the units of distance:
the display of road speed must be in
the official units (miles or km) for the
country.
t
h
e change of units is done via
the screen configuration menu, with the
vehicle stationary.
Total distance recorder
It measures the total distance travelled by the
vehicle since its first registration.
Trip distance recorder
It measures the distance travelled since it was
reset to zero by the driver.
F
W
ith the ignition on, press the button until
zeros appear.
1
Monitoring
Page 40 of 416

38
308_en_Chap01_controle-de-marche_ed01-2015
Trip computer, a few definitions
Range
(miles or km)the distance which can still be
travelled with the fuel remaining in
the tank (related to the average fuel
consumption over the last few miles
(kilometres) travelled).
th
is value may vary following a change
in the style of driving or the relief,
resulting in a significant change in the
current fuel consumption.
When the range falls below 20 miles (30 km),
dashes are displayed. After filling with at least
5 litres of fuel, the range is recalculated and is
displayed when it exceeds 60 miles (100 km). If dashes are displayed continuously
while driving in place of the digits,
contact a P
e
uge
Ot
dealer or a
qualified workshop.
th
is function is only displayed from
20
mph (30 km/h).
Current fuel consumption
(mpg or l/100 km or km/l)
Calculated over the last few seconds.
Average fuel consumption
(mpg or l/100 km or km/l)
Calculated since the last trip
computer reset.
Average speed
(mph or km/h)
Calculated since the last trip
computer reset.
Distance travelled
(miles or km)
Calculated since the last trip
computer reset.
Stop & Start time
counter
(minutes / seconds or
h ours / minutes)
If your vehicle is fitted with Stop & Start, a time
counter calculates the time spent in S
tO
P mode
during a journey.
It resets to zero every time the ignition is
switched on.
Monitoring
Page 50 of 416
48
308_en_Chap01_controle-de-marche_ed01-2015
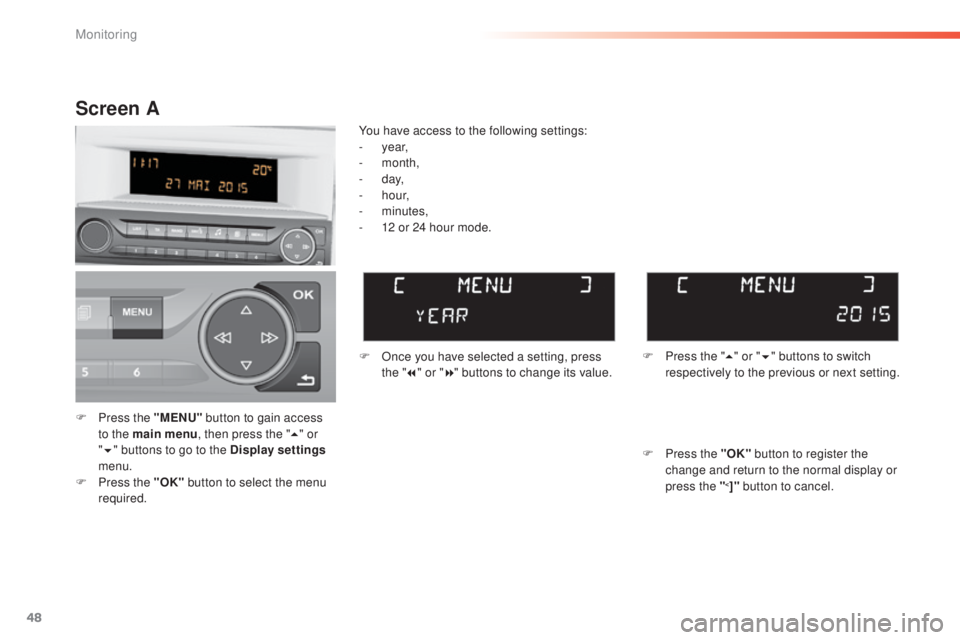
F Press the "MENU" button to gain access
to the main menu , then press the "5" or
" 6 " buttons to go to the Display settings
menu.
F
P
ress the "OK" button to select the menu
required. F
O
nce you have selected a setting, press
the " 7" or " 8" buttons to change its value.
You have access to the following settings:
-
year,
-
month,
-
d ay,
-
h o u r,
-
minutes,
-
1
2 or 24 hour mode.
Screen A
F Press the " 5" or " 6" buttons to switch
respectively to the previous or next setting.
F
P
ress the "OK" button to register the
change and return to the normal display or
press the "
<]" button to cancel.
Monitoring
Page 51 of 416
49
308_en_Chap01_controle-de-marche_ed01-2015
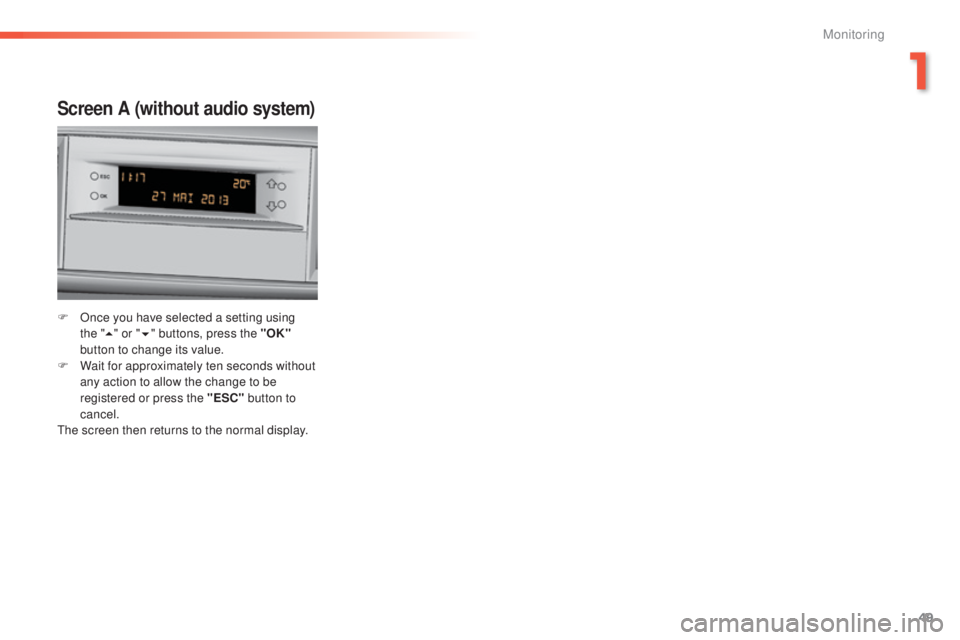
Screen A (without audio system)
F Once you have selected a setting using the "5 " or " 6" buttons, press the "OK"
button to change its value.
F
W
ait for approximately ten seconds without
any action to allow the change to be
registered or press the "ESC" button to
cancel.
th
e screen then returns to the normal display.
1
Monitoring
Page 89 of 416
87
308_en_Chap03_confort_ed01-2015
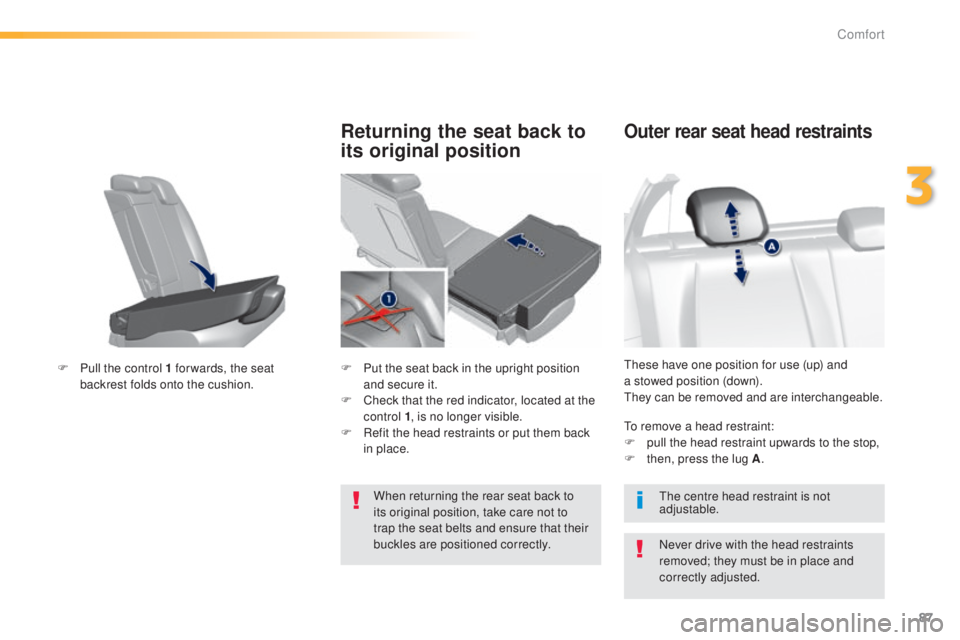
these have one position for use (up) and
a stowed position (down).
th
ey can be removed and are interchangeable.
Outer rear seat head restraints
Never drive with the head restraints
removed; they must be in place and
correctly adjusted.
to r
emove a head restraint:
F
p
ull the head restraint upwards to the stop,
F
t
hen, press the lug A
.
th
e centre head restraint is not
adjustable.
F
P
ull the control 1 for wards, the seat
backrest folds onto the cushion.
Returning the seat back to
its original position
F Put the seat back in the upright position and secure it.
F
C
heck that the red indicator, located at the
control 1 , is no longer visible.
F
R
efit the head restraints or put them back
in place.
When returning the rear seat back to
its original position, take care not to
trap the seat belts and ensure that their
buckles are positioned correctly.
3
Comfort