Page 117 of 416
115
308_en_Chap04_conduite_ed01-2015
Avoid attaching heavy objects to the
key, which would weigh down on its
blade in the ignition switch and could
cause a malfunction.
Switching off the engine leads to a loss
of braking assistance.
Key left in the "Ignition on"
position
If the key has been left in the ignition switch
at position 2 (Ignition on)
, the ignition will
be switched off automatically after one hour.
to s
witch the ignition back on, turn the key
to position 1 (Stop) , then back to position 2
(Ignition on) .
Never leave the engine running in
an enclosed area without adequate
ventilation: internal combustion
engines emit toxic exhaust gases,
such as carbon monoxide. Danger of
intoxication and death.
In very severe wintry conditions
(temperatures below -23°C), to ensure
the correct operation and the durability
of the mechanical components of your
vehicle, the engine and gearbox, it is
necessary to leave the engine running
for 4 minutes before moving off. F
Imm obilise the vehicle.
F tu rn the key fully towards you to position 1
(Stop) .
F
R
emove the key from the ignition switch.
F
t
o l
ock the steering column, turn the
steering wheel until it locks.
Switching off using the key
to facilitate unlocking of the steering
wheel, it is recommended that you
place the wheels in the straight ahead
position before switching off the engine.
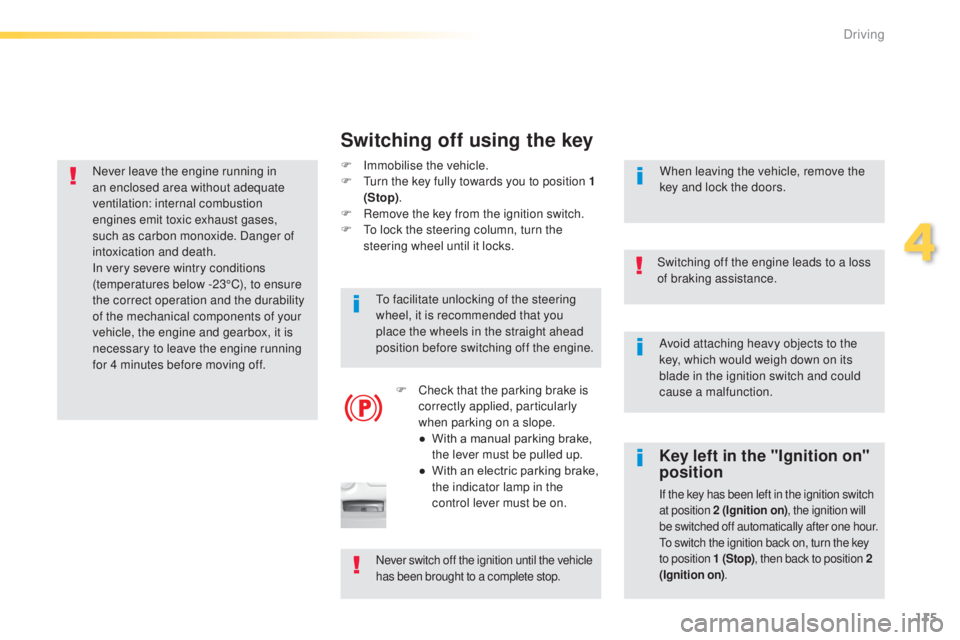
F
C
heck that the parking brake is
correctly applied, particularly
when parking on a slope.
●
W
ith a manual parking brake,
the lever must be pulled up.
●
W
ith an electric parking brake,
the indicator lamp in the
control lever must be on. When leaving the vehicle, remove the
key and lock the doors.
Never switch off the ignition until the vehicle
has been brought to a complete stop.
4
Driving
Page 118 of 416
116
308_en_Chap04_conduite_ed01-2015
For Diesel vehicles, in sub-
zero temperatures the engine
will not start until the pre-heater
warning lamp has gone off.
If this warning lamp comes on
after pressing the "S
tA
R
t/
StO
P" button, press down on
the brake or clutch pedal until
the warning lamp goes off,
without pressing the "S
tA
R
t/
StO
P" button again, until the
engine starts and runs.
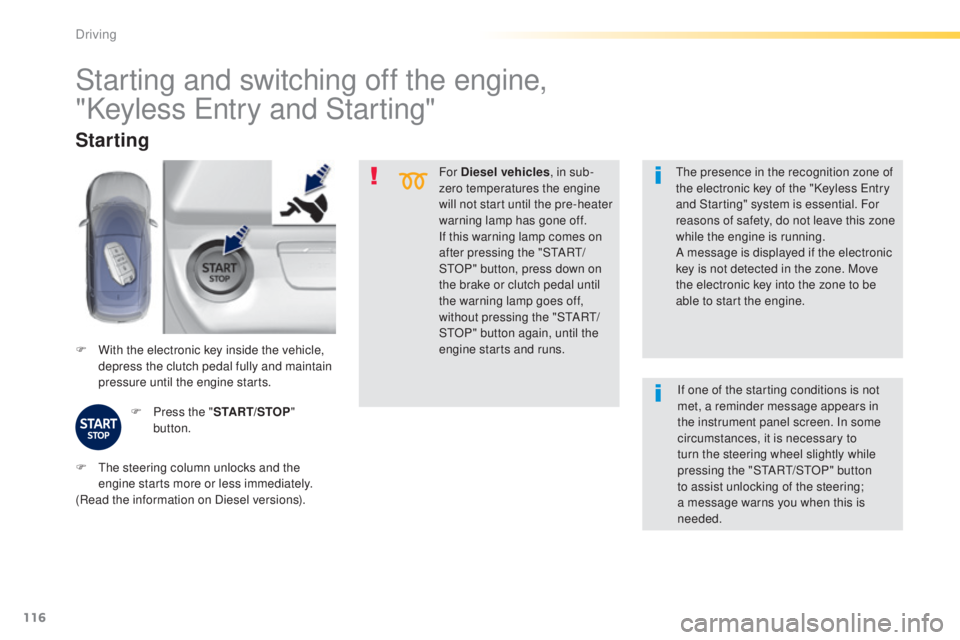
F
W
ith the electronic key inside the vehicle,
depress the clutch pedal fully and maintain
pressure until the engine starts.
Starting
F Press the " START/STOP"
button.
th
e presence in the recognition zone of
the electronic key of the "Keyless e
n
try
and Starting" system is essential. For
reasons of safety, do not leave this zone
while the engine is running.
A message is displayed if the electronic
key is not detected in the zone. Move
the electronic key into the zone to be
able to start the engine.
Starting and switching off the engine,
"Keyless e
n
try and Starting"
F the steering column unlocks and the
engine starts more or less immediately.
(Read the information on Diesel versions). If one of the starting conditions is not
met, a reminder message appears in
the instrument panel screen. In some
circumstances, it is necessary to
turn the steering wheel slightly while
pressing the "StA
Rt/ StO P" button
to assist unlocking of the steering;
a message warns you when this is
needed.
Driving
Page 122 of 416
120
308_en_Chap04_conduite_ed01-2015
Manual parking brake
F With your foot on the brake pedal, pull the parking brake lever up to immobilise your
vehicle. F
W ith your foot on the brake pedal, pull the
parking brake lever up gently, press the
release button then lower the lever fully. When parking on a slope, direct your
wheels against the kerb, apply the
parking brake, engage a gear and
switch off the ignition.
When the vehicle is being driven, this
warning lamp coming on, accompanied
by an audible signal and a message,
indicates that the parking brake is still
on or has not been fully released. Pressing the brake pedal facilitates the
application and release of the manual
parking brake.
Release
Application
Driving
Page 123 of 416
121
308_en_Chap04_conduite_ed01-2015
electric parking brake
Never leave a child alone inside the
vehicle with the ignition on, as they
could release the parking brake.
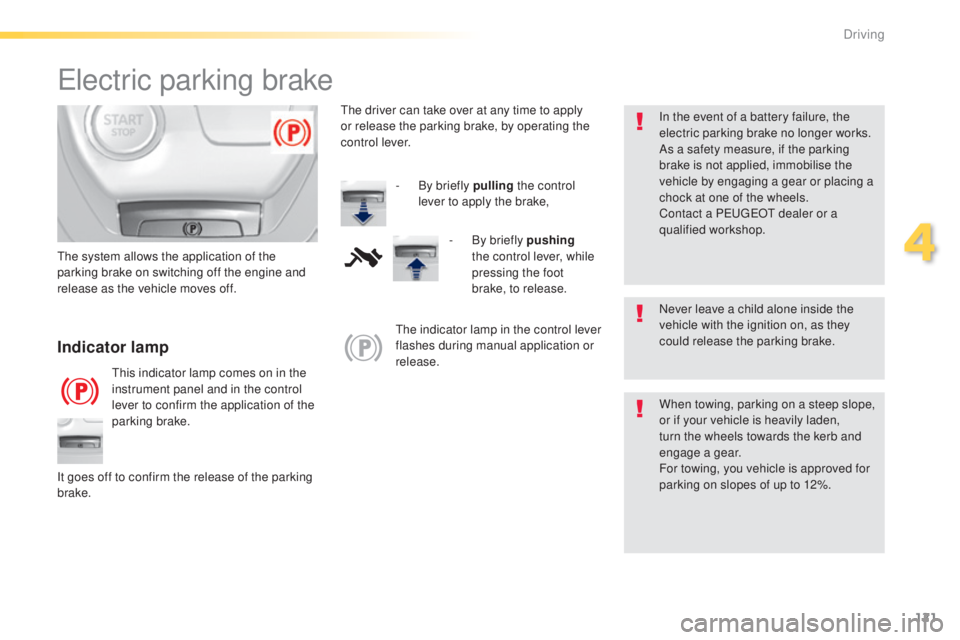
Indicator lamp
this indicator lamp comes on in the
instrument panel and in the control
lever to confirm the application of the
parking brake.
th
e system allows the application of the
parking brake on switching off the engine and
release as the vehicle moves off.
When towing, parking on a steep slope,
or if your vehicle is heavily laden,
turn the wheels towards the kerb and
engage a gear.
For towing, you vehicle is approved for
parking on slopes of up to 12%.
It goes off to confirm the release of the parking
brake.
th
e indicator lamp in the control lever
flashes during manual application or
release. In the event of a battery failure, the
electric parking brake no longer works.
As a safety measure, if the parking
brake is not applied, immobilise the
vehicle by engaging a gear or placing a
chock at one of the wheels.
Contact a P
e
uge
Ot
dealer or a
qualified workshop.
th
e driver can take over at any time to apply
or release the parking brake, by operating the
control lever.
-
B
y briefly pulling
the control
lever to apply the brake,
-
B
y briefly pushing
the control lever, while
pressing the foot
brake, to release.
4
Driving
Page 126 of 416
124
308_en_Chap04_conduite_ed01-2015
Special cases
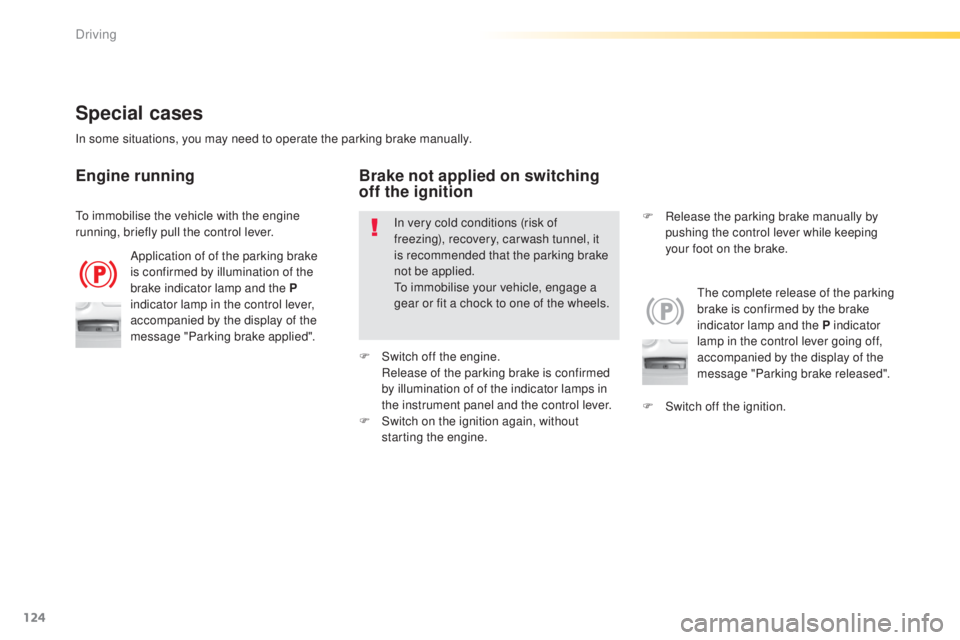
Application of of the parking brake
is confirmed by illumination of the
brake indicator lamp and the P
indicator lamp in the control lever,
accompanied by the display of the
message "Parking brake applied".
th
e complete release of the parking
brake is confirmed by the brake
indicator lamp and the P indicator
lamp in the control lever going off,
accompanied by the display of the
message "Parking brake released".
In some situations, you may need to operate the parking brake manually.
Engine running
In very cold conditions (risk of
freezing), recovery, car wash tunnel, it
is recommended that the parking brake
not be applied.
to
immobilise your vehicle, engage a
gear or fit a chock to one of the wheels.
Brake not applied on switching
off the ignition
F Switch off the ignition. F
R
elease the parking brake manually by
pushing the control lever while keeping
your foot on the brake.
to i
mmobilise the vehicle with the engine
running, briefly pull the control lever.
F
S
witch off the engine.
R
elease of the parking brake is confirmed
by illumination of of the indicator lamps in
the instrument panel and the control lever.
F
S
witch on the ignition again, without
starting the engine.
Driving
Page 129 of 416
127
308_en_Chap04_conduite_ed01-2015
SituationsConsequences
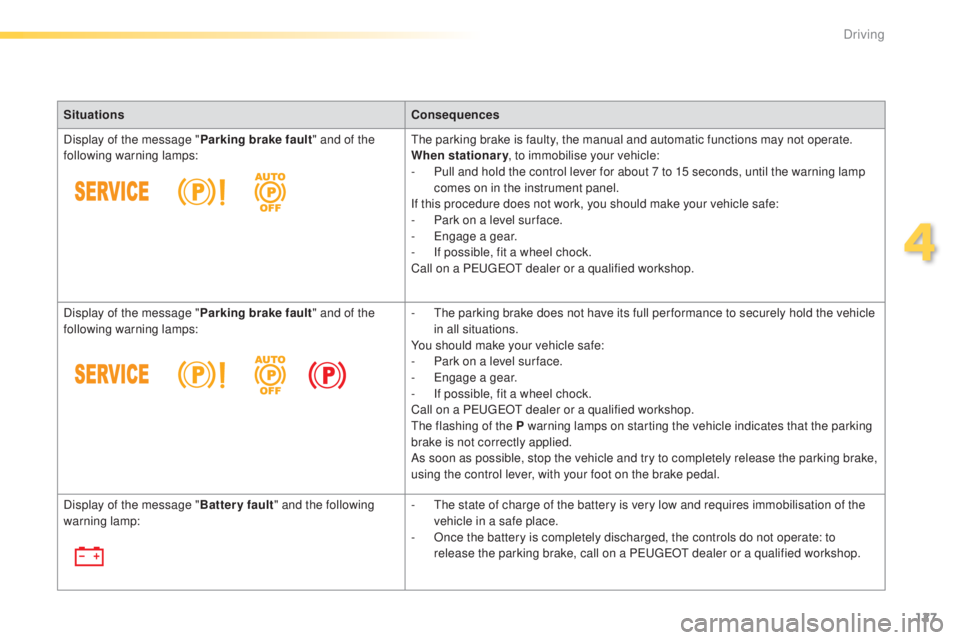
Display of the message " Parking brake fault" and of the
following warning lamps:
th
e parking brake is faulty, the manual and automatic functions may not operate.
When stationary , to immobilise your vehicle:
-
P
ull and hold the control lever for about 7 to 15 seconds, until the warning lamp
comes on in the instrument panel.
If this procedure does not work, you should make your vehicle safe:
-
P
ark on a level sur face.
-
e
n
gage a gear.
-
I
f possible, fit a wheel chock.
Call on a P
e
uge
Ot
dealer or a qualified workshop.
Display of the message " Parking brake fault" and of the
following warning lamps: -
t
h
e parking brake does not have its full per formance to securely hold the vehicle
in all situations.
You should make your vehicle safe:
-
P
ark on a level sur face.
-
e
n
gage a gear.
-
I
f possible, fit a wheel chock.
Call on a P
e
uge
Ot
dealer or a qualified workshop.
th
e flashing of the P warning lamps on starting the vehicle indicates that the parking
brake is not correctly applied.
As soon as possible, stop the vehicle and try to completely release the parking brake,
using the control lever, with your foot on the brake pedal.
Display of the message " Battery fault" and the following
warning lamp: -
t
h
e state of charge of the battery is very low and requires immobilisation of the
vehicle in a safe place.
-
O
nce the battery is completely discharged, the controls do not operate: to
release the parking brake, call on a P
e
uge
Ot
dealer or a qualified workshop.
4
Driving
Page 142 of 416
140
308_en_Chap04_conduite_ed01-2015
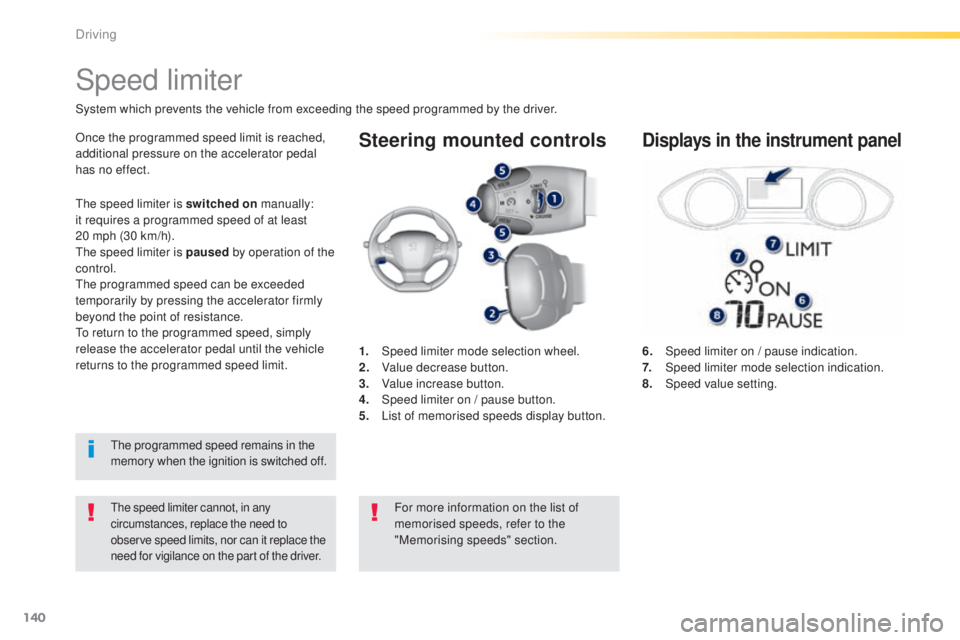
Steering mounted controls
6. Speed limiter on / pause indication.
7. Speed limiter mode selection indication.
8.
Spe
ed value setting.
Speed limiter
System which prevents the vehicle from exceeding the speed programmed by the driver.
the speed limiter cannot, in any
circumstances, replace the need to
observe speed limits, nor can it replace the
need for vigilance on the part of the driver.
Once the programmed speed limit is reached,
additional pressure on the accelerator pedal
has no effect.
1.
Spe
ed limiter mode selection wheel.
2.
V
alue decrease button.
3.
V
alue increase button.
4.
S
peed limiter on / pause button.
5.
L
ist of memorised speeds display button.Displays in the instrument panel
the speed limiter is switched on manually:
it requires a programmed speed of at least
20
mph (30 km/h).
th
e speed limiter is paused by operation of the
control.
th
e programmed speed can be exceeded
temporarily by pressing the accelerator firmly
beyond the point of resistance.
to r
eturn to the programmed speed, simply
release the accelerator pedal until the vehicle
returns to the programmed speed limit.
th
e programmed speed remains in the
memory when the ignition is switched off.
For more information on the list of
memorised speeds, refer to the
"Memorising speeds" section.
Driving
Page 143 of 416
141
308_en_Chap04_conduite_ed01-2015
Switching on / Pause
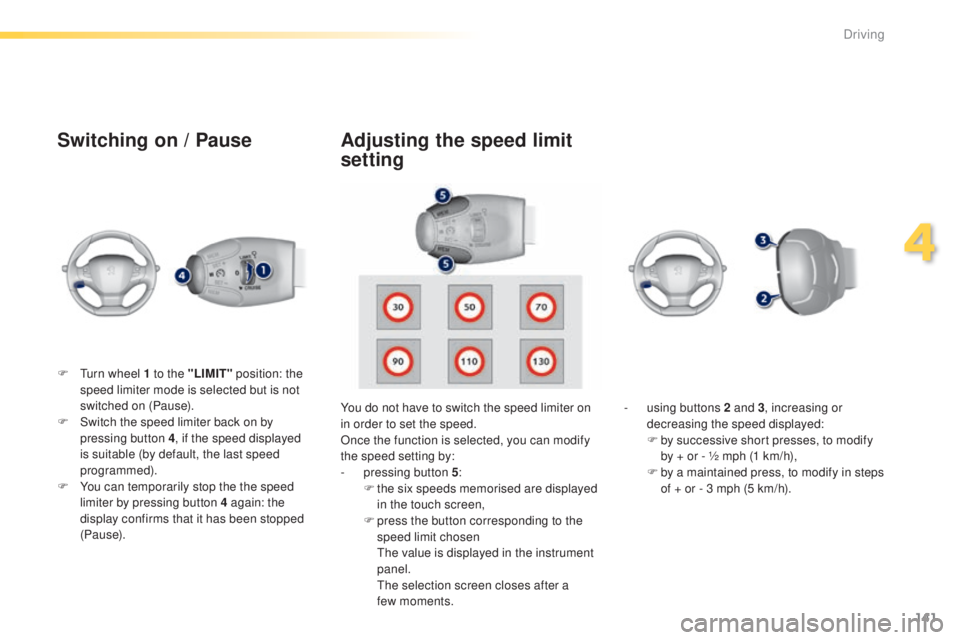
F turn wheel 1 to the "LIMIT" position: the
speed limiter mode is selected but is not
switched on (Pause).
F
S
witch the speed limiter back on by
pressing button 4 , if the speed displayed
is suitable (by default, the last speed
programmed).
F
Y
ou can temporarily stop the the speed
limiter by pressing button 4 again: the
display confirms that it has been stopped
(Pause). You do not have to switch the speed limiter on
in order to set the speed.
Once the function is selected, you can modify
the speed setting by:
-
p
ressing button 5:
F
t
he six speeds memorised are displayed
in the touch screen,
F
p
ress the button corresponding to the
speed limit chosen
t
h
e value is displayed in the instrument
panel.
t
h
e selection screen closes after a
few
moments.-
u
sing buttons 2 and 3, increasing or
decreasing the speed displayed:
F
b
y successive short presses, to modify
by + or - ½ mph (1 km/h),
F
b
y a maintained press, to modify in steps
of + or - 3 mph (5 km/h).
Adjusting the speed limit
setting
4
Driving