Page 44 of 416

42
308_en_Chap01_controle-de-marche_ed01-2015
ButtonCorresponding function Comments
Vehicle settings Access to other functions with settings that can be adjusted.
t
h
e functions are grouped
together under three tabs:
-
"Driving assistance "
-
"
[Automatic rear wiper in reverse]" (Activation of rear wiper coupled to reverse gear;
see the "[Visibility]" section)
-
"
[Collision risk alert]" (Activation of the collision risk alert system; see the "[Driving]
section")
-
"[ Lighting ]"
-
"
[
gu
ide-me-home lighting]" (Automatic guide me home lighting; see the "[ Visibility]"
section),
-
"
[Welcome lighting]" (
ex
terior welcome lighting; see the "[ Visibility]" section),
-
"
[Mood lighting]" (Interior mood lighting; see the "[ Visibility]" section).
-
"Vehicle access "
-
"
[Driver plip action]" (Selective unlocking of the driver's door; see the "[Access]"
section).
-
"
[
un
locking boot]" (Selective unlocking of the boot; see the "[Access]" section).
Select or deselect the tabs at the bottom of the screen to display the functions required.
Diagnostic List of current alerts.
Parking sensors Activation/Deactivation of the function.
Active cruise control Choice of the standard cruise control or the active cruise control.
th
e choice of active cruise control is retained on condition that the steering mounted control
thumb wheel is on the "CR
uI
S
e" p
osition.
Monitoring
Page 73 of 416

71
308_en_Chap02_ouvertures_ed01-2015
Protection - exterior
perimeter monitoring only
Volumetric monitoring
Deactivationthe tilt alarm is deactivated as well, if your
vehicle has it.
F
S
witch of the ignition and within
ten seconds press this button
until its indicator lamp is on fixed.
F
g
e
t out of the vehicle.
F
I
mmediately lock the vehicle using the
remote control or the "Keyless
e
n
try and
Starting" system.
Only the exterior perimeter protection system is
active: the indicator lamp in the button flashes
once per second.
to b
e effective, this deactivation must be done
every time the ignition is switched off.
Deactivate the interior volumetric monitoring
(and tilt monitoring if your vehicle has it) to
avoid unwanted triggering of the alarm in
certain cases such as:
-
o
ccupant(s) present in the vehicle,
-
l
eaving a window partially open,
-
w
ashing your vehicle,
-
c
hanging a wheel,
-
t
owing your vehicle,
-
t
ransport on a ferry. Reactivationth
e tilt alarm is reactivated as well, if your
vehicle has it.
F
D
eactivate the exterior perimeter
monitoring by unlocking the vehicle using
the remote control or the Keyless
e
n
try and
Starting system.
th
e indicator lamp in the button goes off.
F
R
eactivate the full alarm system by locking
the vehicle using the remote control or the
"Keyless
e
n
try and Starting" system.
th
e indicator lamp in the button flashes once
per second again.
2
Access
Page 81 of 416

79
308_en_Chap03_confort_ed01-2015
Steering wheel adjustment
F When stationary , lower the control lever
to release the steering wheel adjustment
mechanism.
F
A
djust the height and reach to suit your
driving position.
F
P
ull the control lever to lock the steering
wheel ad justment mechanism.
As a safety precaution, these
operations should only be carried out
while the vehicle is stationary.
PeugeOt i -Cockpit
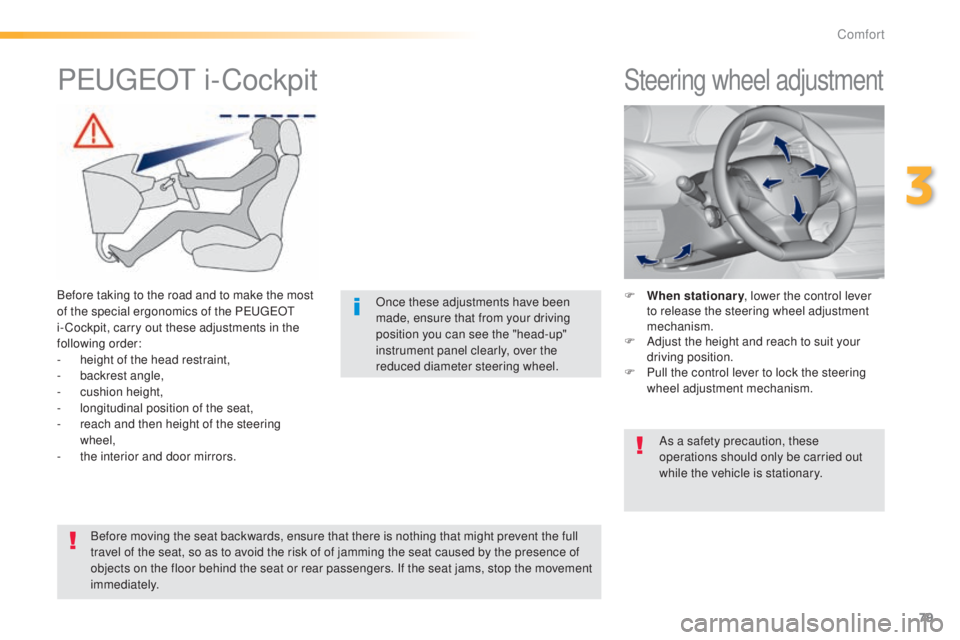
Before taking to the road and to make the most
of the special ergonomics of the Pe
ugeOt
i- Cockpit, carry out these adjustments in the
following order:
-
h
eight of the head restraint,
-
b
ackrest angle,
-
c
ushion height,
-
l
ongitudinal position of the seat,
-
r
each and then height of the steering
wheel,
-
t
he interior and door mirrors. Once these adjustments have been
made, ensure that from your driving
position you can see the "head-up"
instrument panel clearly, over the
reduced diameter steering wheel.
Before moving the seat backwards, ensure that there is nothing that might prevent the full
travel of the seat, so as to avoid the risk of of jamming the seat caused by the presence of
objects on the floor behind the seat or rear passengers. If the seat jams, stop the movement
immediately.
3
Comfort
Page 85 of 416
83
308_en_Chap03_confort_ed01-2015
Heated seats control
0: Of f.
1: Low.
2: Medium.
3: High.
F
u
s
e the adjustment wheel to switch on and
select the level of heating required:
With the engine running, the front seats can be
heated separately.
F
to r
aise the head restraint, pull it upwards.
F
t
o r
emove the head restraint, press the
lug
A and pull the head restraint upwards.
F
t
o p
ut the head restraint back in place,
engage the head restraint stems in the
openings keeping them in line with the seat
back.
F
t
o l
ower the head restraint, press the lug A
and the head restraint at the same time.
th
e head restraint is fitted with a frame
with notches which prevents it from
lowering; this is a safety device in case
of impact.
The adjustment is correct when the
upper edge of the head restraint is
level with the top of the head.
Never drive with the head restraints
removed; they must be in place and
adjusted correctly.
Head restraint height
Additional adjustments
3
Comfort
Page 96 of 416
94
308_en_Chap03_confort_ed01-2015
Boot fittings (hatchback)
1. Rear parcel shelf
2. Boot floor
R
aise the floor for access to the storage.
3.
S
torage wells
i
n which are stowed:
-
t
he towing eye,
-
t
he temporary puncture repair kit,
-
t
he spare wheel, depending on trim
level, an option or standard.
4.
S
towing rings
Comfort
Page 97 of 416
95
308_en_Chap03_confort_ed01-2015
Boot fittings (SW)
1. Boot lamp
2. Rear seat folding controls
3.
1
2 V accessor y socket (120 W max)
4.
R
emovable storage boxes
P
ull on the separations to unclip them.
5.
S
torage wells
w
here are stowed:
-
t
he towing eye,
-
t
he temporary puncture repair kit,
-
t
he spare wheel, depending on trim
level, an option or standard.
6.
L
oad space cover
(
see corresponding section).
7.
E
yes for fixing the luggage retaining net
F
e
x
tract the eyes one at a time then slide
them into the oblong housing.
F
W
hile pressing the button, move the eye to
the desired position.
F
O
bserve the direction of fitting (eyes to the
outside of the vehicle).
3
Comfort
Page 114 of 416

112
308_en_Chap04_conduite_ed01-2015
A few driving recommendations
Observe the driving regulations at all times and
remain vigilant whatever the traffic conditions.
Pay close attention to the traffic and keep your
hands on the wheel so that you are ready to
react at any time to any eventuality.
On a long journey, a break every two hours is
strongly recommended.
In difficult weather, drive smoothly, anticipate
the need to brake and increase the distance
from other vehicles.Never drive with the parking brake
applied - Risk of overheating and
damage to the braking system!
Do not park or run the engine when
stationary in areas where inflammable
substances and materials (dry grass,
dead leaves...) might come into contact
with the hot exhaust system - Risk of
fire!
Never leave a vehicle unsupervised
with the engine running. If you have
to leave your vehicle with the engine
running, apply the parking brake
and put the gearbox into neutral or
position
N or P, depending on the type
of gearbox.
Driving on flooded roads
We strongly advise against driving on flooded
roads, as this could cause serious damage
to the engine or gearbox, as well as to the
electrical systems of your vehicle.
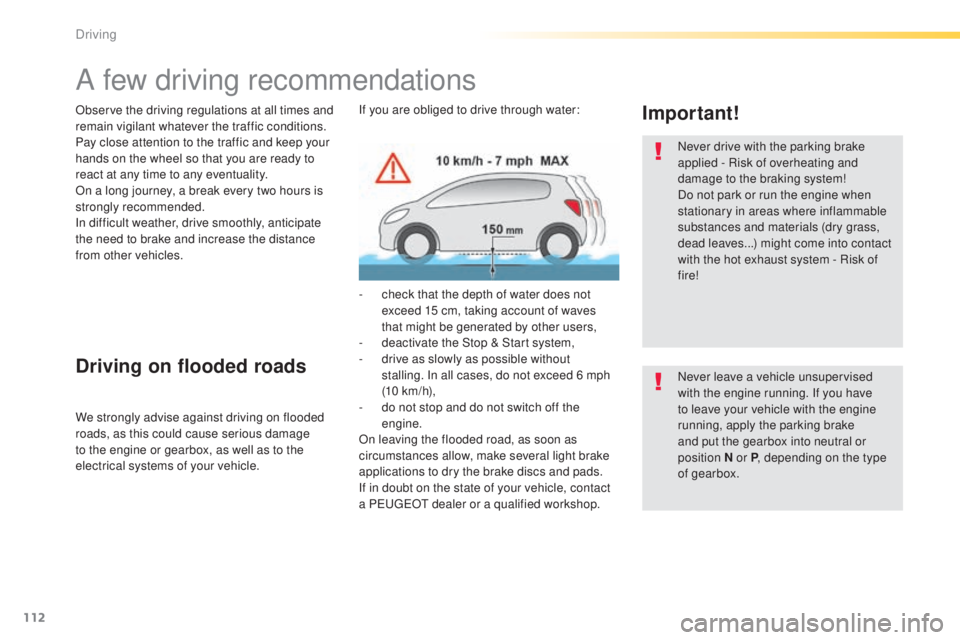
Important!If you are obliged to drive through water:
-
c
heck that the depth of water does not
exceed 15 cm, taking account of waves
that might be generated by other users,
-
d
eactivate the Stop & Start system,
-
d
rive as slowly as possible without
stalling. In all cases, do not exceed 6 mph
(10
km/h),
-
d
o not stop and do not switch off the
engine.
On leaving the flooded road, as soon as
circumstances allow, make several light brake
applications to dry the brake discs and pads.
If in doubt on the state of your vehicle, contact
a P
e
uge
Ot
dealer or a qualified workshop.
Driving
Page 115 of 416
113
308_en_Chap04_conduite_ed01-2015
Starting-switching off the engine, remote control
Put the gear lever into neutral.
Ignition switch
1. Stop position.
2. I gnition on position.
3.
S
tarting position.
Starting using the key
the parking brake must be applied.
F
I
nsert the key in the ignition switch.
t
h
e system recognises the starting code.
F
u
n
lock the steering column by
simultaneously turning the steering wheel
and the key.
F
W
ith a manual gearbox, place the gear
lever in neutral then fully depress the clutch
pedal.
In certain circumstances, you may have
to apply some force to turn the wheels
(if the wheels are against a kerb, for
example).
F
W
ith an automatic gearbox, place the gear
lever in position N or P then firmly press
the brake pedal.
4
Driving