Page 5 of 341
3
208_en_Chap00a_sommaire_ed01-2015
Fittings 161
Fitting roof bars 164
Towing a trailer 165
To w i n g 16 7
Accessories 169
Fittings
General information 174
B o n n et 175
We i g ht s 179
Fuel tank 180
BlueHDi and AdBlue
® additive 185
Battery 190
Fuses 193
Triangle 199
Under-inflation 200
Temporary puncture repair kit 203
Spare wheel 208
Advice 215
Dimensions 217
Identification markings 219
Practical information
Emergency call 220
Assistance call 221
7-inch touch screen 223
Audio system / Bluetooth 287
Audio system 307
Audio equipment and telematics
Alphabetical index
Direction indicators 144
Hazard warning lamps 144
Lighting 145
Automatic illumination of headlamps 149
LED lamps 150
Daytime running lamps 150
Headlamp adjustment 152
Cornering lighting 153
Changing a bulb 154
Lighting and signalling Key
Warning
This symbol marks warnings which it is
essential to observe for your own safety,
for the safety of others or to avoid any risk
of damaging your vehicle.
InformationThis symbol draws your attention to
additional information for better use of
your vehicle.
Protection of the environmentThis symbol accompanies advice relating
to protection of the environment.
AdviceThis symbol indicates a reminder of
practical information.
Section identificationColoured blocks separate and identify each
section.
Start
Heading
End
Contents
Page 6 of 341
4
208_en_Chap01_vue-ensemble_ed01-2015
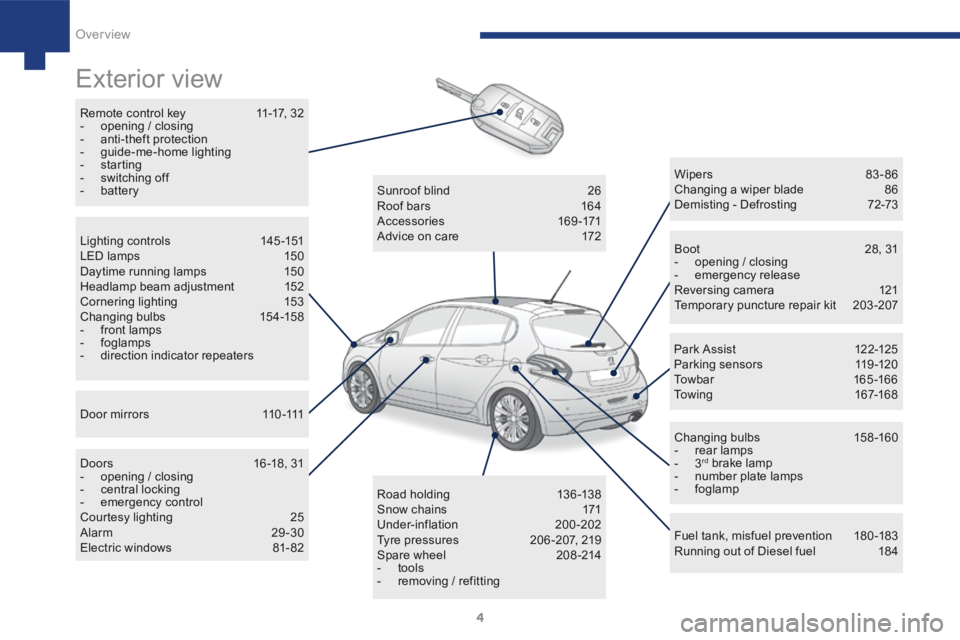
Exterior view
Remote control key 11-17, 32
- opening / closing
- anti-theft protection
- guide-me-home lighting
- starting
- switching off
- battery
Boot 28, 31
- opening / closing
- emergency release
Reversing camera 121
Temporary puncture repair kit 203-207
Wipers 83 - 86
Changing a wiper blade
86
Demisting - Defrosting 72-73
Changing bulbs 158-160
- rear lamps
- 3
rd brake lamp
- number plate lamps
- foglamp
Fuel tank, misfuel prevention 180-183
Running out of Diesel fuel 184
Sunroof blind
26
Roof bars 164
Accessories 169-171
Advice on care 172
Road holding 13 6 -13 8
Snow chains 171
Under-inflation 200-202
Tyre pressures 206 -207, 219
Spare wheel 208-214
- tools
- removing / refitting
Lighting controls
145-151
LED lamps 150
Daytime running lamps 150
Headlamp beam adjustment 152
Cornering lighting 153
Changing bulbs 154-158
- front lamps
- foglamps
- direction indicator repeaters
D o o r m i r r o r s 11 0 -111
Doors 16 -18, 31
- opening / closing
- central locking
- emergency control
Courtesy lighting 25
Alarm 29-30
Electric windows 81- 82 Par k A ssist
12 2-125
Parking sensors 119-120
Towbar 165 -166
Towing 167-168
Over view
Page 15 of 341
13
208_en_Chap02_ Acces-Demarrage_ed01-2015
Starting
Mode - Gearbox Ignition
Avoid attaching heavy objects to the
key or the remote control, which would
weigh down on its blade in the ignition
switch and could cause a malfunction.
It could adversely affect the deployment
of the front airbag.
The original key contains a coded electronic chip.
When the ignition is switched on, starting is only
possible if the code is detected and recognised.
This protection against theft locks the engine
management system a few moments after the
ignition is switched off and prevents starting of
the engine following a break-in.
Electronic engine immobiliser
Keep away from your vehicle, the
label attached to the keys given to you
on acquisition of the vehicle. It will
help in finding the original code for
replacement of the key.
In the event of a fault, you are
informed by illumination of the
warning lamp, an audible signal and the display
of a message.
In this case, your vehicle will not start; contact
a PEUGEOT dealer as soon as possible.
Manual
F Place the gear lever in neutral.Advice
Automatic
F Place the gear lever at position P or N .
Electronic
F Place the gear lever at position N .
Steering wheel
In some cases, you may have to apply
some force to turn the steering (if the
wheels are on lock against a kerb, for
example).
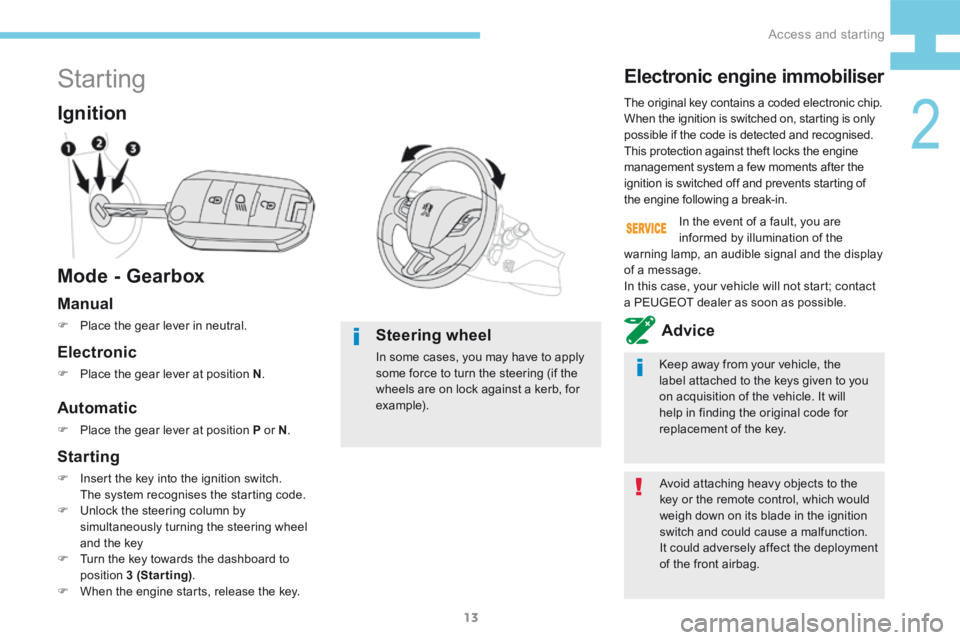
Starting
F Insert the key into the ignition switch.
The system recognises the starting code.
F Unlock the steering column by
simultaneously turning the steering wheel
and the key
F Turn the key towards the dashboard to
position 3 (Starting) .
F When the engine starts, release the key.
2
Access and starting
Page 17 of 341
15
208_en_Chap02_ Acces-Demarrage_ed01-2015
Switching off
Ignition
Key left in the "Ignition on"
position
On opening the driver's door, an alert
message is displayed, accompanied by an
audible signal, to remind you that the key is
still in the ignition switch at position 1 (Stop).
If the key has been left in the ignition
switch at position 2 (Ignition on),
the ignition will be switched off
automatically after one hour.
To switch the ignition back on, turn the
key to position 1 (Stop) , then back to
position 2 (Ignition on) .
Coasting
As a safety measure, do not coast
(free-wheeling in neutral or with the
clutch pedal depressed).
Switching off the engine leads to a loss
of braking assistance.
Procedure - Gearbox
Manual
F Place the gear lever in neutral.
F Immobilise the vehicle.
F Apply the parking brake.
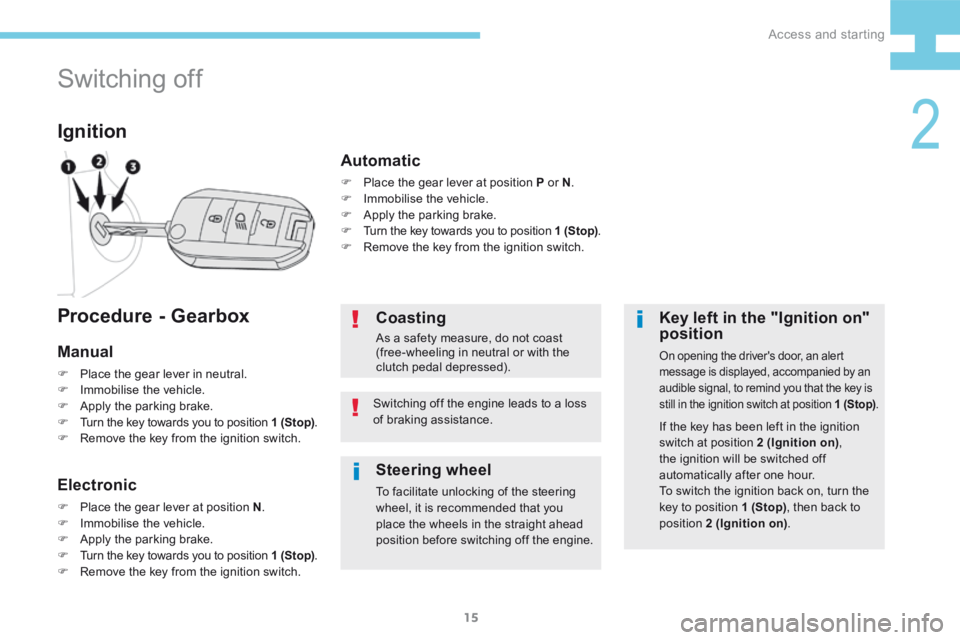
F Turn the key towards you to position 1 (Stop) .
F Remove the key from the ignition switch.
Electronic
F Place the gear lever at position N .
F Immobilise the vehicle.
F Apply the parking brake.
F Turn the key towards you to position 1 (Stop) .
F Remove the key from the ignition switch.
Automatic
F Place the gear lever at position P or N .
F Immobilise the vehicle.
F Apply the parking brake.
F Turn the key towards you to position 1 (Stop) .
F Remove the key from the ignition switch.
Steering wheel
To facilitate unlocking of the steering
wheel, it is recommended that you
place the wheels in the straight ahead
position before switching off the engine.
2
Access and starting
Page 18 of 341
16
208_en_Chap02_ Acces-Demarrage_ed01-2015
F Press.
Using the remote control
Maintaining the locking action (key or remote
control) automatically closes the windows.
Locking - Key
Locking
Using the key
F Turn the key towards the rear of the
vehicle.
As a safety measure (passengers on
board), never leave the vehicle, even for
a short period, without taking your key
with you.
Locking is confirmed by fixed
illumination of the direction indicators
for approximately two seconds.
According to version, the electric door
mirrors fold at the same time.
The folding and unfolding of the electric
door mirrors can be deactivated by
a PEUGEOT dealer or a qualified
workshop. If one of the doors or the boot is still
open or if an electronic key has been left
inside the vehicle, the locking does not
take place.
When the vehicle is locked, if it
is unlocked inadvertently, it will
automatically lock itself again after about
thirty seconds, unless a door is opened.
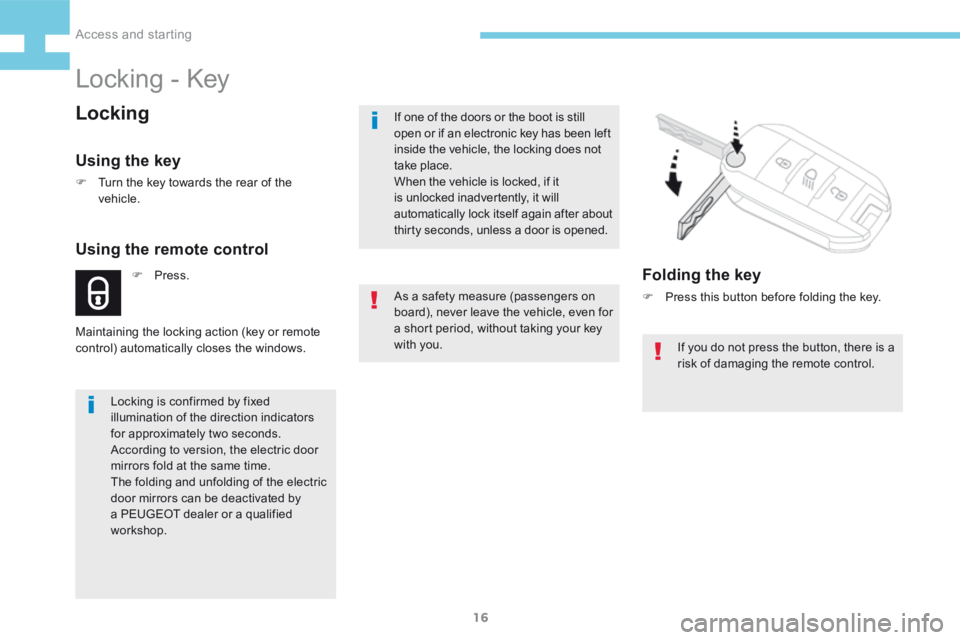
Folding the key
F
Press this button before folding the key.
If you do not press the button, there is a
risk of damaging the remote control.
Access and starting
Page 33 of 341
31
208_en_Chap02_ Acces-Demarrage_ed01-2015
Advice
Doors
Driver's door
Insert the key in the lock to lock or unlock the
d o o r.
Tailgate release
System for mechanical unlocking of the boot in
the event of a central locking malfunction.
Unlocking
F Fold back the rear seats to gain access to
the lock from inside the boot.
F Insert a small screwdriver into hole A of the
lock to unlock the tailgate.
Back-up manual locking
For mechanically locking and unlocking the
doors in the event of a fault with the central
locking system or a battery failure.
Passenger doors
F On the rear doors, check that the child lock
is not on.
F Remove the black cap located on the edge
of the door, using the key.
F Insert the key into the aperture without
forcing, then without turning, move the
latch sideways towards the inside of the
d o o r.
F Remove the key and refit the cap.
Boot
2
Access and starting
Page 50 of 341
48
208_en_Chap03_Indicateurs_ed01-2015
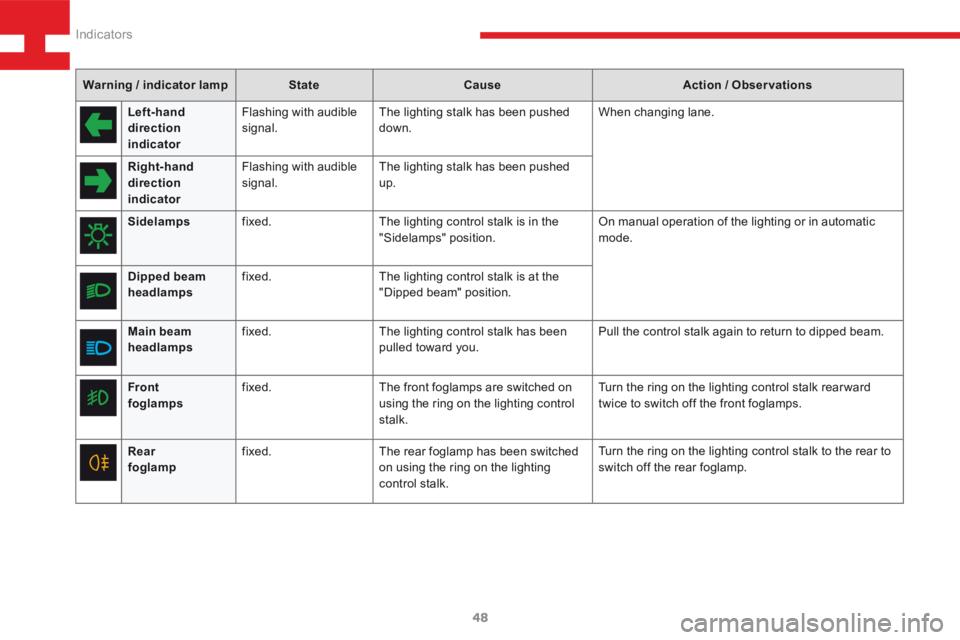
Warning / indicator lampStateCause Action / Observations
Left-hand
direction
indicato r Flashing with audible
signal.
The lighting stalk has been pushed
down. When changing lane.
Right-hand
direction
indicator Flashing with audible
signal.
The lighting stalk has been pushed
up.
Sidelamps fixed. The lighting control stalk is in the
"Sidelamps" position. On manual operation of the lighting or in automatic
mode.
Dipped beam
headlamps fixed.
The lighting control stalk is at the
"Dipped beam" position.
Main beam
headlamps fixed.
The lighting control stalk has been
pulled toward you. Pull the control stalk again to return to dipped beam.
Front
foglamps fixed.
The front foglamps are switched on
using the ring on the lighting control
stalk. Turn the ring on the lighting control stalk rear ward
twice to switch off the front foglamps.
Rear
foglamp fixed.
The rear foglamp has been switched
on using the ring on the lighting
control stalk. Turn the ring on the lighting control stalk to the rear to
switch off the rear foglamp.
Indicators
Page 66 of 341
64
208_en_Chap04_confort_ed01-2015
Bucket seats
HeightBackrest
Adjustment
F
Lift the control and slide the seat for wards
or backwards. F
Pull the handle upwards to raise or push
it downwards to lower, as many times as
necessary to obtain the required position. F
Push the handle towards the rear and
move the seat backrest for wards or
backwards.
Forwards-backwards
Comfort