2015 Peugeot 208 bonnet
[x] Cancel search: bonnetPage 4 of 341
2
208_en_Chap00a_sommaire_ed01-2015
Unlocking - Key 11
D o o r s 11
3 - door 12
Starting 13
Switching off 15
Locking - Key 16
Parking brake 19
Stop & Start 20
Hill start assist 23
Ports and sockets - Connectivity 24
Details of the roof console 25
Sunroof blind 26
Mood lighting 27
Boot 28
Alarm 29
Advice 31
Access and starting Over view
Instrument panels
34
Date and time 36
Library of indicator and warning lamps 37
Library of symbols 49
Engine coolant temperature 51
Instrument panel dimmer 52
Gear shift indicator 59
Energy load 60
Indicators
PEUGEOT i- Cockpit 61
Front seats 62
One-piece rear seats 66
Ventilation 69
Demist - defrost 72
Heating 74
Air conditioning 76
Window controls 81
Wipers 83
Carrying children 87
Deactivating the passenger's front airbag 89
ISOFIX child seats 96
Child lock 101
Seat belts 102
Airbags 105
Comfort
Driving recommendations 109
M i r r o r s 11 0
Manual 5 gearbox 112
Manual 6 gearbox 112
Electronic 5 gearbox 113
Electronic 6 gearbox 113
Automatic 4 gearbox 116
Automatic 6 gearbox 116
Parking sensors 119
Reversing camera 121
Park Assist 122
Speed limiter 126
Cruise control 128
Active City Brake 133
Road holding 136
Trip computer 139
Eco-driving 142
Driving
Exterior view 4
Interior view 5
Instruments and controls 6
Middle console 8
Upper console 9
Lower console 9
Underbonnet view 10
Contents
Page 12 of 341
10
208_en_Chap01_vue-ensemble_ed01-2015
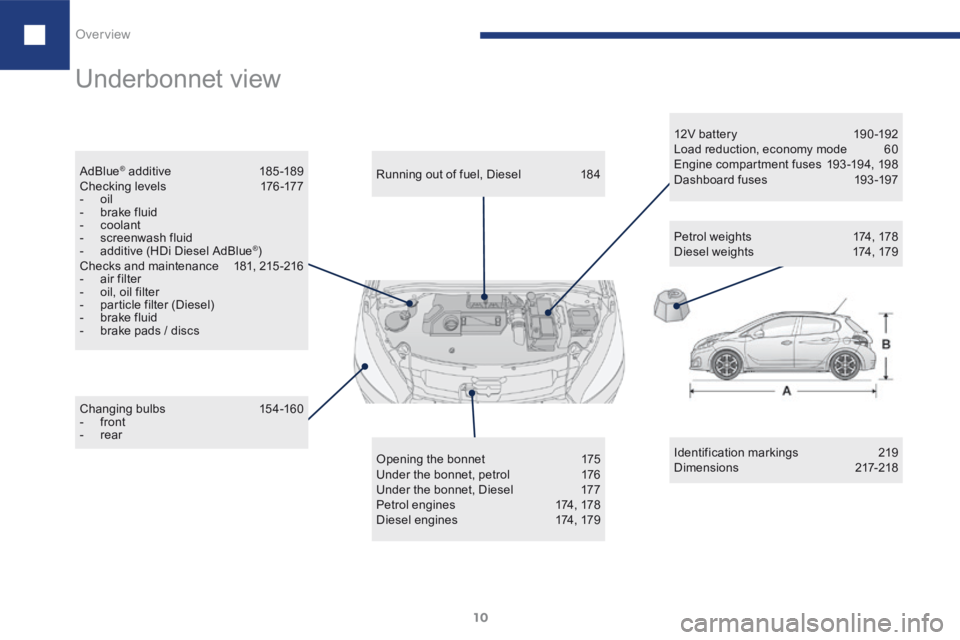
Underbonnet view
Identification markings 219
Dimensions 217-218
Changing bulbs
154-160
- front
- rear Running out of fuel, Diesel
184
Opening the bonnet 175
Under the bonnet, petrol 176
Under the bonnet, Diesel 177
Petrol engines 174, 178
Diesel engines 174, 17912V bat ter y
19 0 -192
Load reduction, economy mode 60
Engine compartment fuses 193-194, 198
Dashboard fuses 193-197
Petrol weights 174, 178
Diesel weights 174, 179
AdBlue
® additive
185 -189
C h e c k i n g l eve l s 176 -17 7
- oil
- brake fluid
- coolant
- screenwash fluid
- additive (HDi Diesel AdBlue
®)
Checks and maintenance 181, 215-216
- air filter
- oil, oil filter
- particle filter (Diesel)
- brake fluid
- brake pads / discs
Over view
Page 24 of 341
22
208_en_Chap02_ Acces-Demarrage_ed01-2015
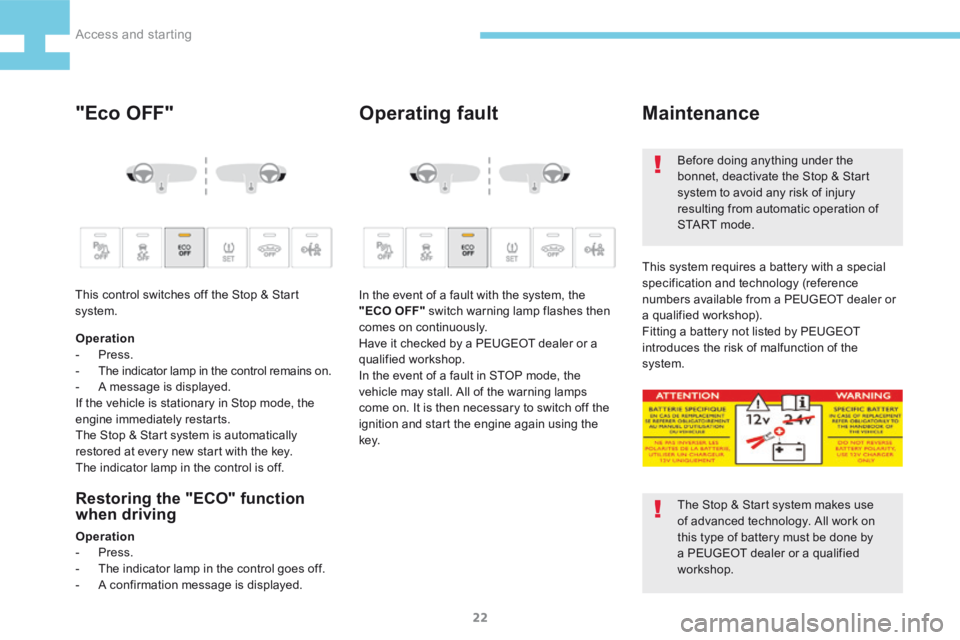
"Eco OFF"Operating fault
Restoring the "ECO" function
when driving
Operation
- Press.
- The indicator lamp in the control goes off.
- A confirmation message is displayed. In the event of a fault with the system, the
"ECO OFF" switch warning lamp flashes then
comes on continuously.
Have it checked by a PEUGEOT dealer or a
qualified workshop.
In the event of a fault in STOP mode, the
vehicle may stall. All of the warning lamps
come on. It is then necessary to switch off the
ignition and start the engine again using the
key.
Maintenance
The Stop & Start system makes use
of advanced technology. All work on
this type of battery must be done by
a PEUGEOT dealer or a qualified
workshop. Before doing anything under the
bonnet, deactivate the Stop & Start
system to avoid any risk of injury
resulting from automatic operation of
S TA R T m o d e .
This system requires a battery with a special
specification and technology (reference
numbers available from a PEUGEOT dealer or
a qualified workshop).
Fitting a battery not listed by PEUGEOT
introduces the risk of malfunction of the
system.
Operation
- Press.
-
The indicator lamp in the control remains on.
- A message is displayed.
If the vehicle is stationary in Stop mode, the
engine immediately restarts.
The Stop & Start system is automatically
restored at every new start with the key.
The indicator lamp in the control is off.
This control switches off the Stop & Start
system.
Access and starting
Page 31 of 341
29
208_en_Chap02_ Acces-Demarrage_ed01-2015
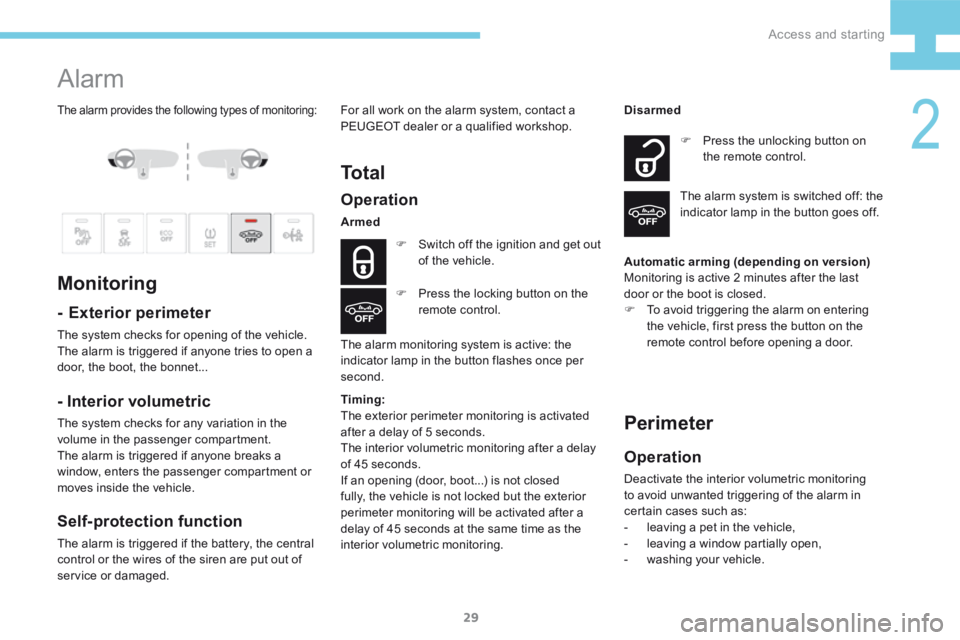
The alarm provides the following types of monitoring:
Alarm
Monitoring
- Exterior perimeter
The system checks for opening of the vehicle.
The alarm is triggered if anyone tries to open a
door, the boot, the bonnet...
Operation
Armed
F Switch off the ignition and get out
of the vehicle.
The alarm monitoring system is active: the
indicator lamp in the button flashes once per
second. F
Press the unlocking button on
the remote control.
Disarmed
The alarm system is switched off: the
indicator lamp in the button goes off.
F Press the locking button on the
remote control.
- Interior volumetric
The system checks for any variation in the
volume in the passenger compartment.
The alarm is triggered if anyone breaks a
window, enters the passenger compartment or
moves inside the vehicle.
Self-protection function
The alarm is triggered if the battery, the central
control or the wires of the siren are put out of
service or damaged. For all work on the alarm system, contact a
PEUGEOT dealer or a qualified workshop.
To t a l
Automatic arming (depending on version)
Monitoring is active 2 minutes after the last
door or the boot is closed.
F
To avoid triggering the alarm on entering
the vehicle, first press the button on the
remote control before opening a door.
Perimeter
Operation
Deactivate the interior volumetric monitoring
to avoid unwanted triggering of the alarm in
certain cases such as:
- leaving a pet in the vehicle,
- leaving a window partially open,
- washing your vehicle.
Timing:
The exterior perimeter monitoring is activated
after a delay of 5 seconds.
The interior volumetric monitoring after a delay
of 45 seconds.
If an opening (door, boot...) is not closed
fully, the vehicle is not locked but the exterior
perimeter monitoring will be activated after a
delay of 45 seconds at the same time as the
interior volumetric monitoring.
2
Access and starting
Page 59 of 341
57
208_en_Chap03_Indicateurs_ed01-2015
Oil level
PrincipleAdvice
Dipstick
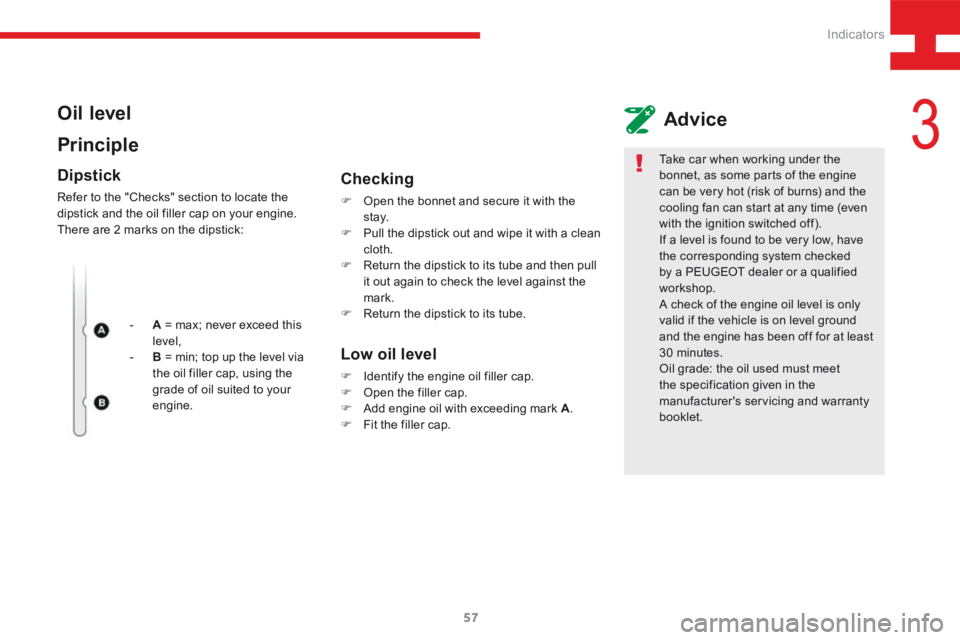
Refer to the "Checks" section to locate the
dipstick and the oil filler cap on your engine.
There are 2 marks on the dipstick:
- A = max; never exceed this
level,
- B = min; top up the level via
the oil filler cap, using the
grade of oil suited to your
engine.
Checking
F Open the bonnet and secure it with the
st ay.
F Pull the dipstick out and wipe it with a clean
cloth.
F Return the dipstick to its tube and then pull
it out again to check the level against the
mark.
F Return the dipstick to its tube.
Low oil level
F Identify the engine oil filler cap.
F Open the filler cap.
F Add engine oil with exceeding mark A .
F Fit the filler cap. Take car when working under the
bonnet, as some parts of the engine
can be very hot (risk of burns) and the
cooling fan can start at any time (even
with the ignition switched off).
If a level is found to be very low, have
the corresponding system checked
by a PEUGEOT dealer or a qualified
workshop.
A check of the engine oil level is only
valid if the vehicle is on level ground
and the engine has been off for at least
30 minutes.
Oil grade: the oil used must meet
the specification given in the
manufacturer's servicing and warranty
booklet.
3
Indicators
Page 88 of 341
86
208_en_Chap04_confort_ed01-2015
Maintenance
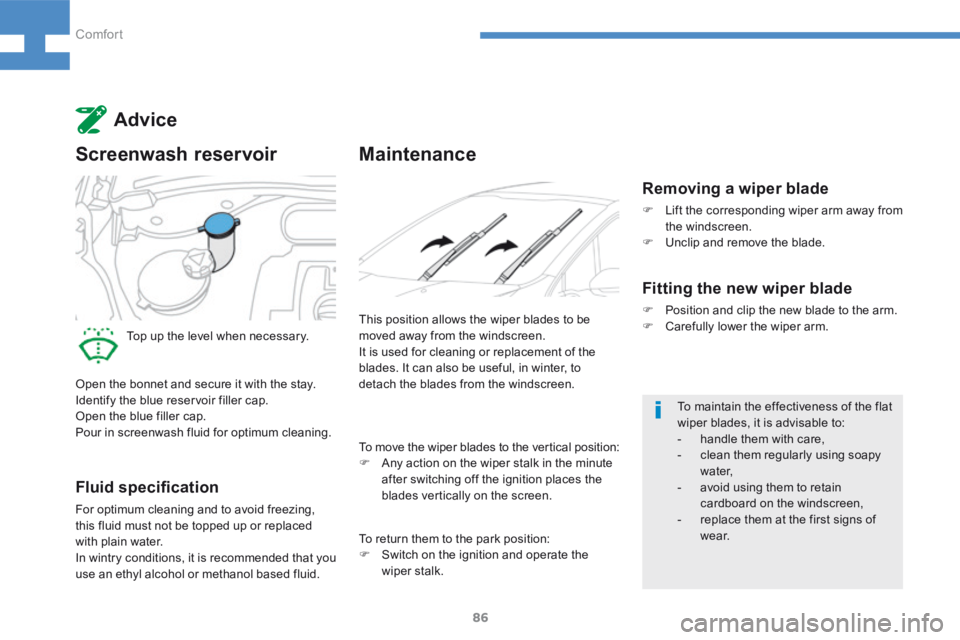
This position allows the wiper blades to be
moved away from the windscreen.
It is used for cleaning or replacement of the
blades. It can also be useful, in winter, to
detach the blades from the windscreen.To maintain the effectiveness of the flat
wiper blades, it is advisable to:
- handle them with care,
- clean them regularly using soapy
water,
- avoid using them to retain
cardboard on the windscreen,
- replace them at the first signs of
w e a r.
To move the wiper blades to the vertical position:
F
Any action on the wiper stalk in the minute
after switching off the ignition places the
blades vertically on the screen.
Advice
Screenwash reservoir
Top up the level when necessary.
Open the bonnet and secure it with the stay.
Identify the blue reservoir filler cap.
Open the blue filler cap.
Pour in screenwash fluid for optimum cleaning.
Fluid specification
For optimum cleaning and to avoid freezing,
this fluid must not be topped up or replaced
with plain water.
In wintry conditions, it is recommended that you
use an ethyl alcohol or methanol based fluid.
Removing a wiper blade
F Lift the corresponding wiper arm away from
the windscreen.
F Unclip and remove the blade.
Fitting the new wiper blade
F Position and clip the new blade to the arm.
F Carefully lower the wiper arm.
To return them to the park position:
F Switch on the ignition and operate the
wiper stalk.
Comfort
Page 137 of 341
135
208_en_Chap05_conduite_ed01-2015
Switching off:
Check the "Automatic emergency braking
deactivated " box.
The last selection remains in memory when the
ignition is switched off.
If the automatic emergency braking function is
deactivated, following each start a temporary
message will be displayed to signal this
once a speed threshold (6 mph - 10 km/h) is
exceeded.
To deactivate:
- Following an impact to the windscreen
close to the sensor.
- When towing a trailer.
- When the vehicle is being towed.
To check (whether it is necessary to deactivate
the function before):
- crossing a toll payment barrier.
- going through an automatic car wash.
Advice
To clean or clear: from the top of the
windscreen, any dirt, masking deposits or
accumulation of mist on the windscreen, any
stickers or leaves obstructing the field of vision
of the laser, as well as accumulations of snow
on the bonnet that could inter fere with the
perception of risks and so the measurement.
If the laser is obscured, a message appears
to suggest cleaning and/or demisting the
windscreen.
Remain particularly vigilant when driving
in poor weather (very heavy rain, hail, fog,
snow…) as braking distances increase while
the laser's calculation parameters stay the
same.Maintenance
Check that the sensor is not obscured.
Have the system checked by a PEUGEOT
dealer or a qualified workshop.
- The message " Automatic braking system
fault " accompanied by an audible signal
indicating that a fault has been detected.
- Following an impact, the system is
automatically put out of service, it no longer
works. The system detects the deployment
of airbags.
Class 1M Laser Product : The laser
rays are invisible, do not look at it
directly with an optical instrument
(magnifying glass, microscope…) as
there is a risk of eye injury.
5
Driving
Page 177 of 341
175
208_en_Chap08_Informations-pratiques_ed01-2015
Bonnet
The location of the interior release lever
prevents opening of the bonnet when
the left hand front door is closed.
Before doing anything under the
bonnet, switch off the Stop & Start
system to avoid any risk of injury
resulting from an automatic change to
S TA R T m o d e .
Closing
F
Take the stay C out of its support slot.
F Clip the stay back into its housing.
F Lower the bonnet and release it at the end
of its travel.
F Pull the bonnet to check that it has latched
c o r r e c t l y.
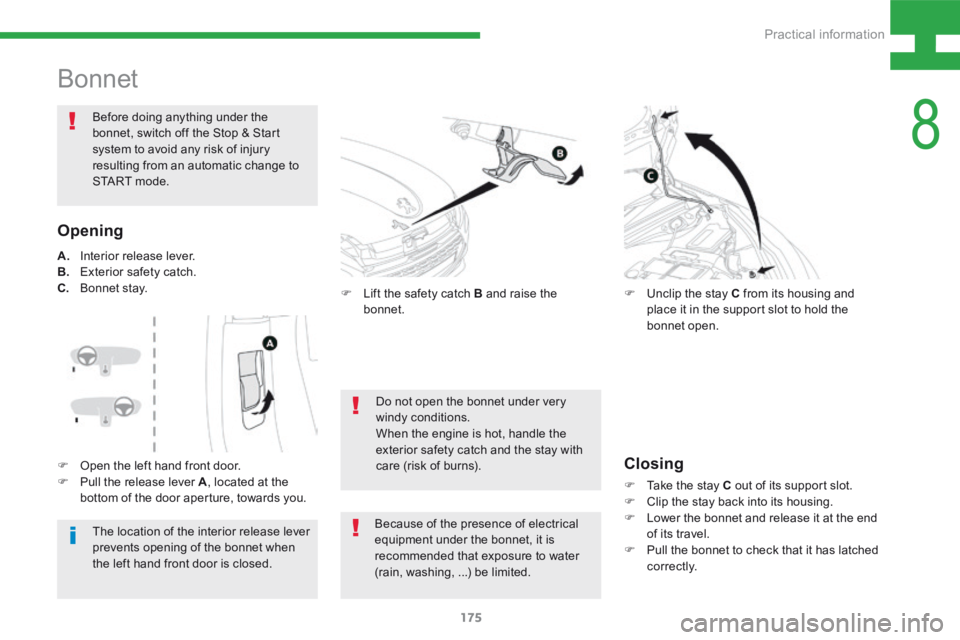
F
Unclip the stay C from its housing and
place it in the support slot to hold the
bonnet open.
Do not open the bonnet under very
windy conditions.
When the engine is hot, handle the
exterior safety catch and the stay with
care (risk of burns).
Opening
F Lift the safety catch B and raise the
bonnet.
A.
Interior release lever.
B. Exterior safety catch.
C. B o n n et st ay.
Because of the presence of electrical
equipment under the bonnet, it is
recommended that exposure to water
(rain, washing, ...) be limited.
F
Open the left hand front door.
F Pull the release lever A , located at the
bottom of the door aperture, towards you.
8
Practical information