Page 112 of 322
cover is not removed, it may da-
mage the top tether strap during a
collision. Your child could be ser-
iously injured or killed in a collision
if the child restraint top tether strap
is damaged.
. Do not allow cargo to contact the
top tether strap when it is attached
to the top tether anchor. Properly
secure the cargo so it does not
contact the top tether strap. Cargo
that is not properly secured or that
contacts the top tether strap may
damage the top tether strap during
a collision. Your child could be
seriously injured or killed in a colli-
sion if the child restraint top tether
strap is damaged.
JVI0850X
LUGGAGE HOOKS
WARNING
.Always make sure that the luggage
is properly secured. Use the suitable
ropes and hooks. .
Unsecured luggage can become
dangerous in an accident or sudden
stop.
CAUTION
Do not apply a total load of more than
22 lb (10 kg)*Ato a single hook.
Instruments and controls2-37
Page 113 of 322
2-38Instruments and controls
SIC4550
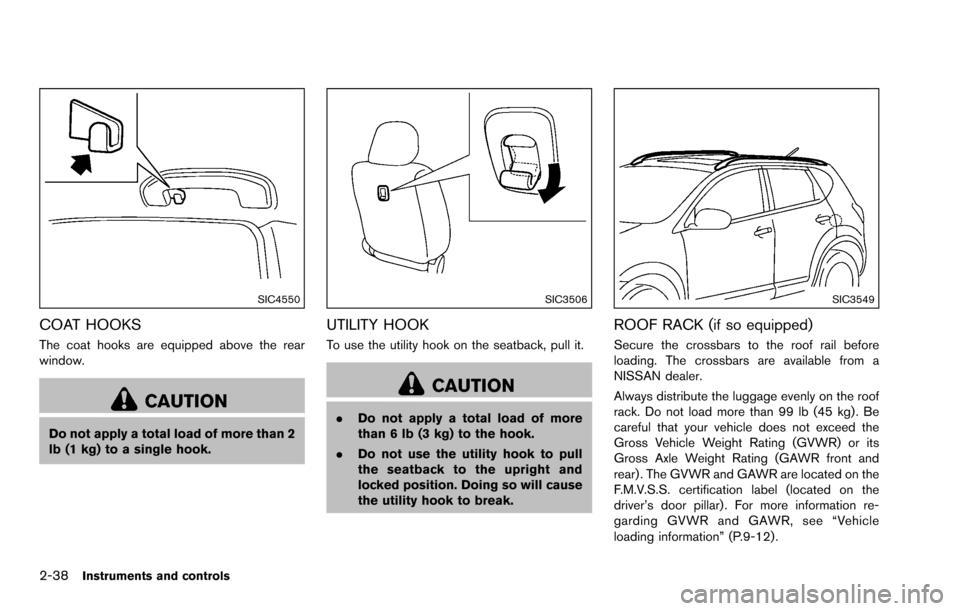
COAT HOOKS
The coat hooks are equipped above the rear
window.
CAUTION
Do not apply a total load of more than 2
lb (1 kg) to a single hook.
SIC3506
UTILITY HOOK
To use the utility hook on the seatback, pull it.
CAUTION
.Do not apply a total load of more
than 6 lb (3 kg) to the hook.
. Do not use the utility hook to pull
the seatback to the upright and
locked position. Doing so will cause
the utility hook to break.
SIC3549
ROOF RACK (if so equipped)
Secure the crossbars to the roof rail before
loading. The crossbars are available from a
NISSAN dealer.
Always distribute the luggage evenly on the roof
rack. Do not load more than 99 lb (45 kg) . Be
careful that your vehicle does not exceed the
Gross Vehicle Weight Rating (GVWR) or its
Gross Axle Weight Rating (GAWR front and
rear) . The GVWR and GAWR are located on the
F.M.V.S.S. certification label (located on the
driver’s door pillar) . For more information re-
garding GVWR and GAWR, see “Vehicle
loading information” (P.9-12) .
Page 114 of 322
WARNING
.Drive extra carefully when the vehi-
cle is loaded at or near the cargo
carrying capacity, especially if the
significant portion of that load is
carried on the roof rack.
. Heavy loading of the roof rack has
the potential to affect the vehicle
stability and handling during sud-
den or unusual handling maneuvers.
. Roof rack load should be evenly
distributed.
. Do not exceed maximum roof rack
load weight capacity.
. Properly secure all cargo with ropes
or straps to help prevent it from
sliding or shifting. In a sudden stop
or collision, unsecured cargo could
cause personal injury.
CAUTION
Use care when placing or removing
items from the roof rack. If you cannot
comfortably lift the items onto the roof rack from the ground, use a ladder or
stool.
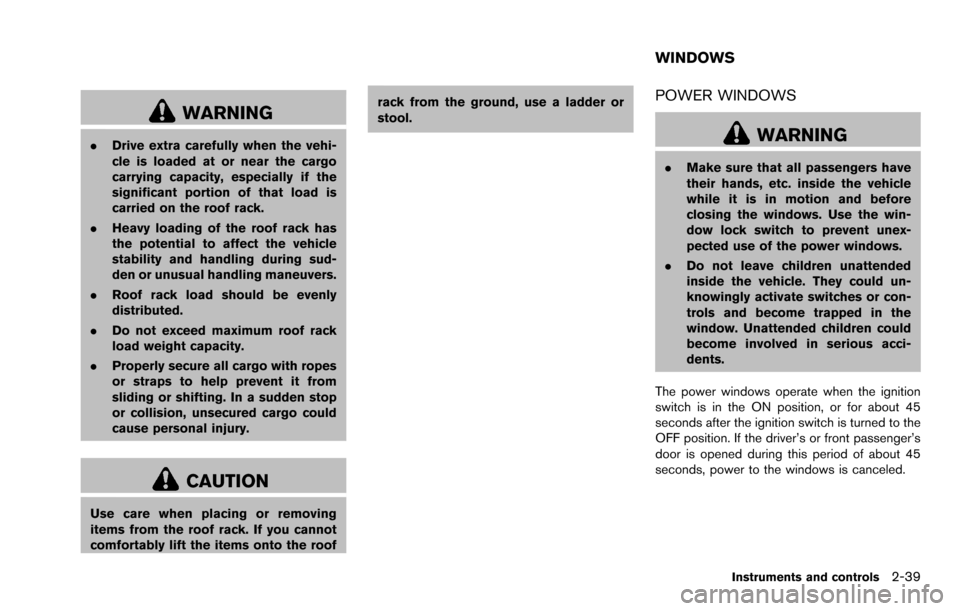
POWER WINDOWS
WARNING
.
Make sure that all passengers have
their hands, etc. inside the vehicle
while it is in motion and before
closing the windows. Use the win-
dow lock switch to prevent unex-
pected use of the power windows.
. Do not leave children unattended
inside the vehicle. They could un-
knowingly activate switches or con-
trols and become trapped in the
window. Unattended children could
become involved in serious acci-
dents.
The power windows operate when the ignition
switch is in the ON position, or for about 45
seconds after the ignition switch is turned to the
OFF position. If the driver’s or front passenger’s
door is opened during this period of about 45
seconds, power to the windows is canceled.
Instruments and controls2-39
WINDOWS
Page 124 of 322
SPA2037
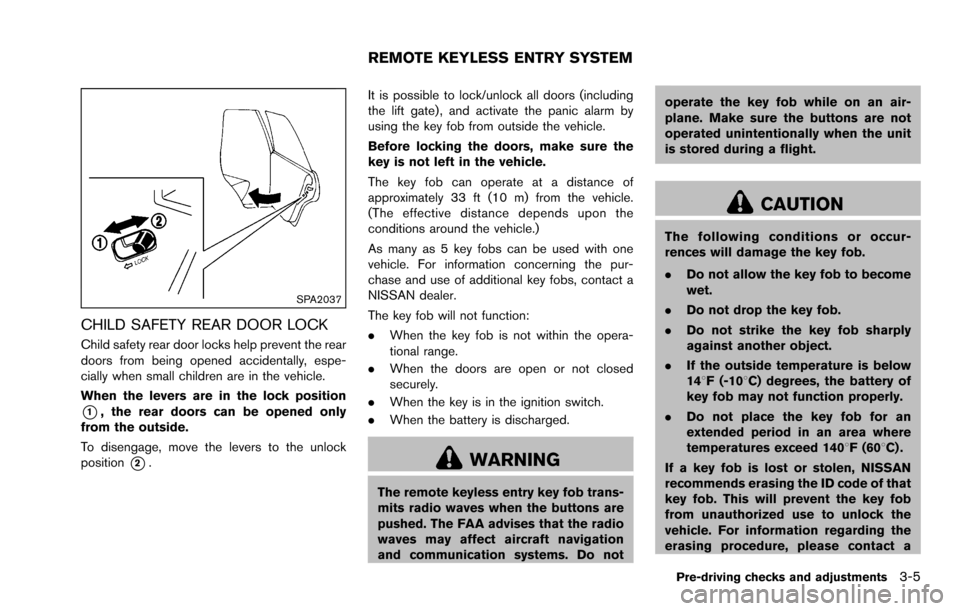
CHILD SAFETY REAR DOOR LOCK
Child safety rear door locks help prevent the rear
doors from being opened accidentally, espe-
cially when small children are in the vehicle.
When the levers are in the lock position
*1, the rear doors can be opened only
from the outside.
To disengage, move the levers to the unlock
position
*2. It is possible to lock/unlock all doors (including
the lift gate) , and activate the panic alarm by
using the key fob from outside the vehicle.
Before locking the doors, make sure the
key is not left in the vehicle.
The key fob can operate at a distance of
approximately 33 ft (10 m) from the vehicle.
(The effective distance depends upon the
conditions around the vehicle.)
As many as 5 key fobs can be used with one
vehicle. For information concerning the pur-
chase and use of additional key fobs, contact a
NISSAN dealer.
The key fob will not function:
.
When the key fob is not within the opera-
tional range.
. When the doors are open or not closed
securely.
. When the key is in the ignition switch.
. When the battery is discharged.WARNING
The remote keyless entry key fob trans-
mits radio waves when the buttons are
pushed. The FAA advises that the radio
waves may affect aircraft navigation
and communication systems. Do not operate the key fob while on an air-
plane. Make sure the buttons are not
operated unintentionally when the unit
is stored during a flight.
CAUTION
The following conditions or occur-
rences will damage the key fob.
.
Do not allow the key fob to become
wet.
. Do not drop the key fob.
. Do not strike the key fob sharply
against another object.
. If the outside temperature is below
148F (-108C) degrees, the battery of
key fob may not function properly.
. Do not place the key fob for an
extended period in an area where
temperatures exceed 1408F (608C) .
If a key fob is lost or stolen, NISSAN
recommends erasing the ID code of that
key fob. This will prevent the key fob
from unauthorized use to unlock the
vehicle. For information regarding the
erasing procedure, please contact a
Pre-driving checks and adjustments3-5
REMOTE KEYLESS ENTRY SYSTEM
Page 125 of 322
3-6Pre-driving checks and adjustments
NISSAN dealer.
For information regarding the replacement of a
battery, see “Battery replacement” (P.8-22).
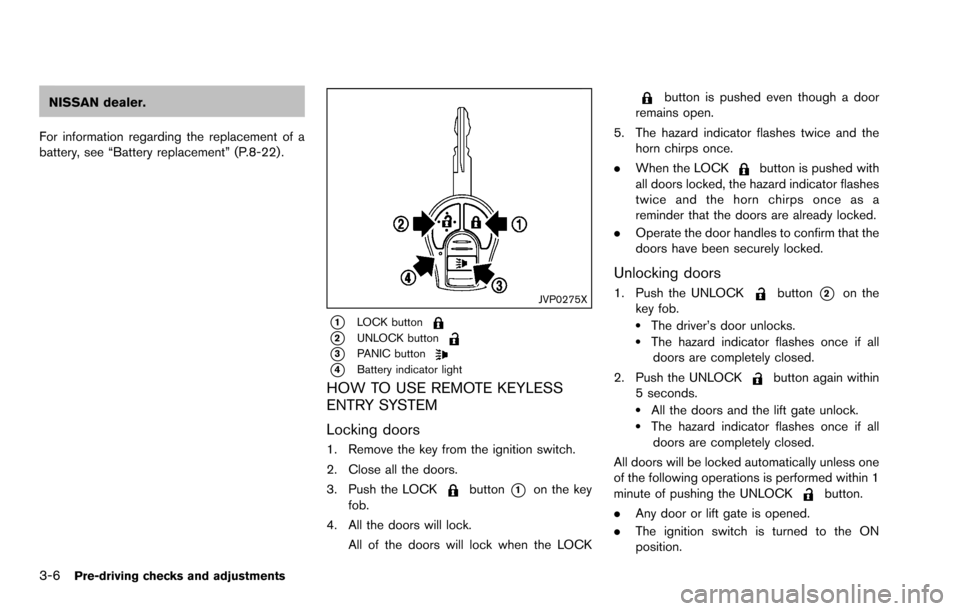
JVP0275X
*1LOCK button
*2UNLOCK button
*3PANIC button
*4Battery indicator light
HOW TO USE REMOTE KEYLESS
ENTRY SYSTEM
Locking doors
1. Remove the key from the ignition switch.
2. Close all the doors.
3. Push the LOCK
button*1on the key
fob.
4. All the doors will lock. All of the doors will lock when the LOCK
button is pushed even though a door
remains open.
5. The hazard indicator flashes twice and the horn chirps once.
. When the LOCK
button is pushed with
all doors locked, the hazard indicator flashes
twice and the horn chirps once as a
reminder that the doors are already locked.
. Operate the door handles to confirm that the
doors have been securely locked.
Unlocking doors
1. Push the UNLOCKbutton*2on the
key fob.
.The driver’s door unlocks..The hazard indicator flashes once if all doors are completely closed.
2. Push the UNLOCK
button again within
5 seconds.
.All the doors and the lift gate unlock..The hazard indicator flashes once if all doors are completely closed.
All doors will be locked automatically unless one
of the following operations is performed within 1
minute of pushing the UNLOCK
button.
. Any door or lift gate is opened.
. The ignition switch is turned to the ON
position.
Page 128 of 322
WARNING
.Make sure the hood is completely
closed and latched before driving.
Failure to do so could cause the
hood to fly open and result in an
accident.
. If you see steam or smoke coming
from the engine compartment, to
avoid injury do not open the hood.
SPA2412
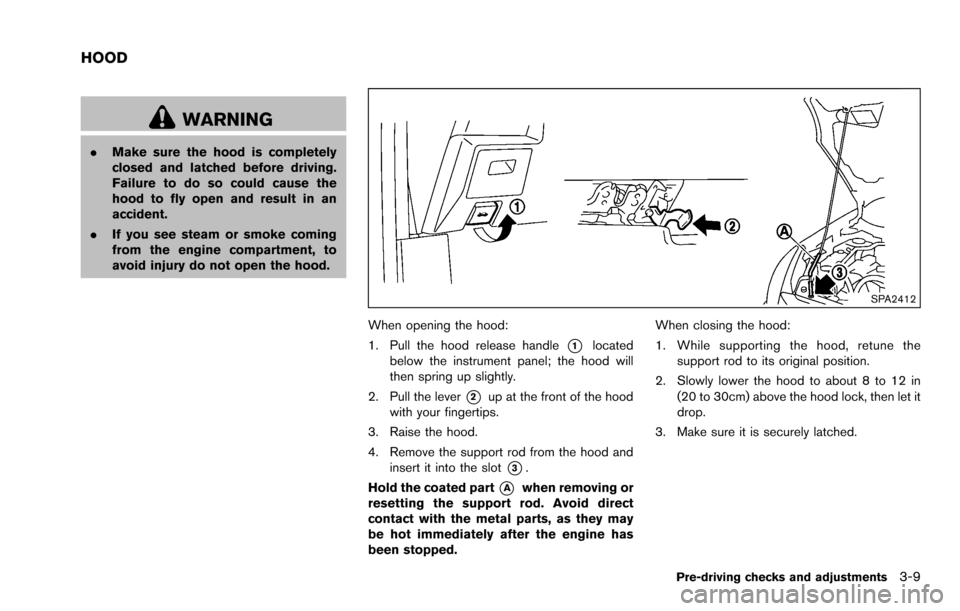
When opening the hood:
1. Pull the hood release handle
*1located
below the instrument panel; the hood will
then spring up slightly.
2. Pull the lever
*2up at the front of the hood
with your fingertips.
3. Raise the hood.
4. Remove the support rod from the hood and insert it into the slot
*3.
Hold the coated part
*Awhen removing or
resetting the support rod. Avoid direct
contact with the metal parts, as they may
be hot immediately after the engine has
been stopped. When closing the hood:
1. While supporting the hood, retune the
support rod to its original position.
2. Slowly lower the hood to about 8 to 12 in (20 to 30cm) above the hood lock, then let it
drop.
3. Make sure it is securely latched.
Pre-driving checks and adjustments3-9
HOOD
Page 129 of 322
3-10Pre-driving checks and adjustments
WARNING
.Always be sure the lift gate has
been closed securely to prevent it
from opening while driving.
. Do not drive with the lift gate open.
This could allow dangerous exhaust
gases to be drawn into the vehicle.
See “Exhaust gas (carbon monox-
ide)” (P.5-2) of this manual.
. Make sure that all passengers have
their hands, etc. inside the vehicle
before closing the lift gate.
SPA2413
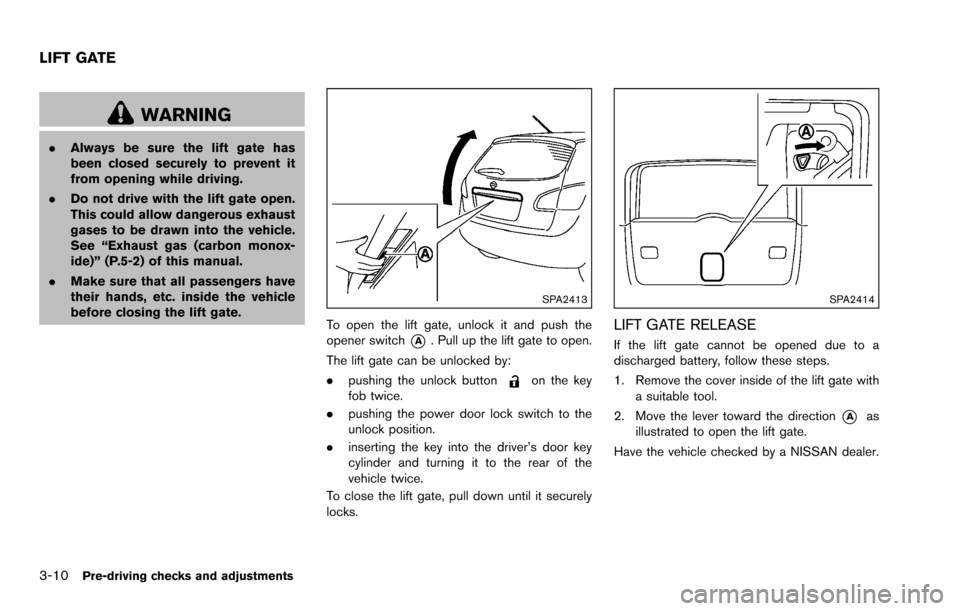
To open the lift gate, unlock it and push the
opener switch
*A. Pull up the lift gate to open.
The lift gate can be unlocked by:
. pushing the unlock button
on the key
fob twice.
. pushing the power door lock switch to the
unlock position.
. inserting the key into the driver’s door key
cylinder and turning it to the rear of the
vehicle twice.
To close the lift gate, pull down until it securely
locks.
SPA2414
LIFT GATE RELEASE
If the lift gate cannot be opened due to a
discharged battery, follow these steps.
1. Remove the cover inside of the lift gate with a suitable tool.
2. Move the lever toward the direction
*Aas
illustrated to open the lift gate.
Have the vehicle checked by a NISSAN dealer.
LIFT GATE
Page 132 of 322
WARNING
Do not adjust the steering wheel while
driving. You could lose control of your
vehicle and cause an accident.
SPA2383
TILT OPERATION
Pull the lock lever down*1and adjust the
steering wheel up or down
*2to the desired
position.
Push the lock lever up
*3securely to lock the
steering wheel in place. A clicking noise may be
heard when the lever is moved to the lock
position.
SIC2872
1. To block out glare from the front, swing down the sun visor
*1.
2. To block glare from the side, remove the sun visor from the center mount and swing it to
the side
*2.
Pre-driving checks and adjustments3-13
STEERING WHEEL SUN VISORS