2015 NISSAN ROGUE SELECT ECU
[x] Cancel search: ECUPage 84 of 322
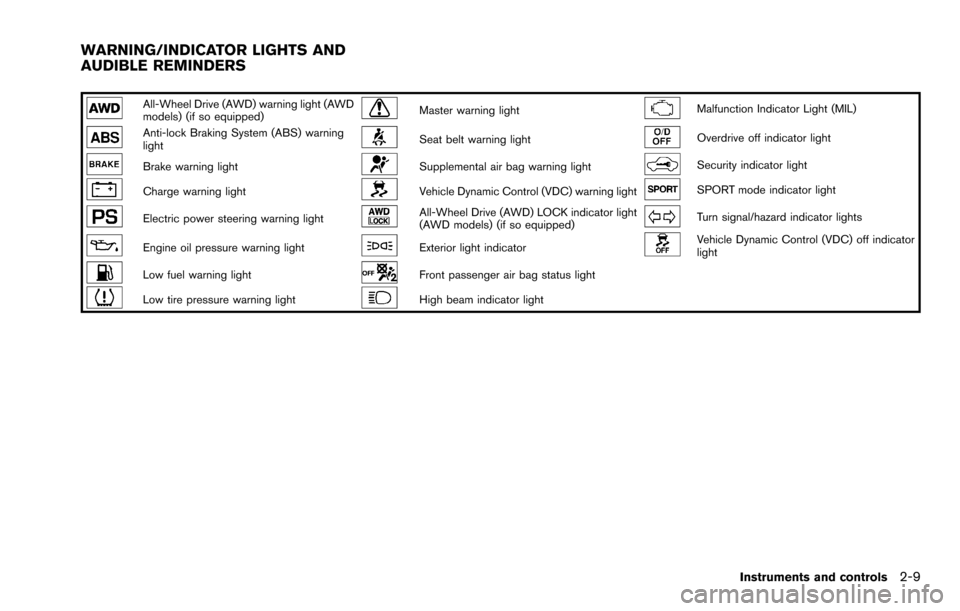
All-Wheel Drive (AWD) warning light (AWD
models) (if so equipped)Master warning lightMalfunction Indicator Light (MIL)
Anti-lock Braking System (ABS) warning
lightSeat belt warning lightOverdrive off indicator light
Brake warning lightSupplemental air bag warning lightSecurity indicator light
Charge warning lightVehicle Dynamic Control (VDC) warning lightSPORT mode indicator light
Electric power steering warning lightAll-Wheel Drive (AWD) LOCK indicator light
(AWD models) (if so equipped)Turn signal/hazard indicator lights
Engine oil pressure warning lightExterior light indicatorVehicle Dynamic Control (VDC) off indicator
light
Low fuel warning lightFront passenger air bag status light
Low tire pressure warning lightHigh beam indicator light
Instruments and controls2-9
WARNING/INDICATOR LIGHTS AND
AUDIBLE REMINDERS
Page 88 of 322
WARNING
.If the light does not illuminate with
the ignition switch turned ON, have
the vehicle checked by a NISSAN
dealer as soon as possible.
. If the light illuminates while driving,
avoid sudden steering maneuvers or
abrupt braking, reduce vehicle
speed, pull off the road to a safe
location and stop the vehicle as
soon as possible. Driving with un-
der-inflated tires may permanently
damage the tires and increase the
likelihood of tire failure. Serious
vehicle damage could occur and
may lead to an accident and could
result in serious personal injury.
Check the tire pressure for all four
tires. Adjust the tire pressure to the
recommended COLD tire pressure
shown on the Tire and Loading
Information label to turn the low
tire pressure warning light OFF. If
the light stays on after adjusting the
tire pressure and driving over 16
MPH (25 km/h) , have the system
checked by a NISSAN dealer. If you
have a flat tire, replace it with a spare tire as soon as possible.
. When a spare tire is mounted or a
wheel is replaced, the TPMS will not
function and the low tire pressure
warning light will flash for approxi-
mately 1 minute. The light will
remain on after 1 minute. Contact
your NISSAN dealer as soon as
possible for tire replacement and/
or system resetting.
. Replacing tires with those not ori-
ginally specified by NISSAN could
affect the proper operation of the
TPMS.
CAUTION
.The TPMS is not a substitute for the
regular tire pressure check. Be sure
to check the tire pressure regularly.
. If the vehicle is being driven at
speeds of less than 16 MPH (25
km/h) , the TPMS may not operate
correctly.
. Be sure to install the specified size
of tires to the front and rear.
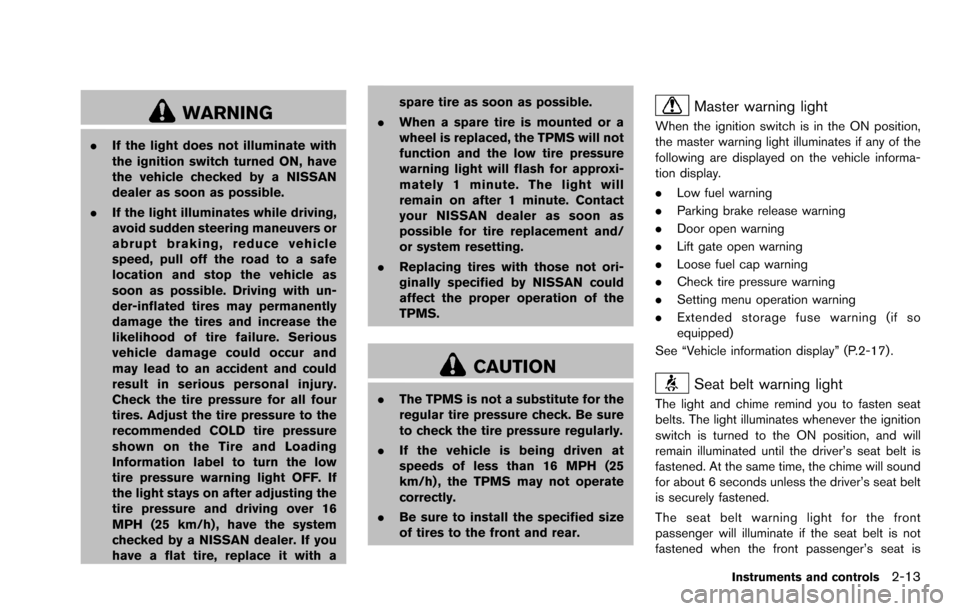
Master warning light
When the ignition switch is in the ON position,
the master warning light illuminates if any of the
following are displayed on the vehicle informa-
tion display.
. Low fuel warning
. Parking brake release warning
. Door open warning
. Lift gate open warning
. Loose fuel cap warning
. Check tire pressure warning
. Setting menu operation warning
. Extended storage fuse warning (if so
equipped)
See “Vehicle information display” (P.2-17) .
Seat belt warning light
The light and chime remind you to fasten seat
belts. The light illuminates whenever the ignition
switch is turned to the ON position, and will
remain illuminated until the driver’s seat belt is
fastened. At the same time, the chime will sound
for about 6 seconds unless the driver’s seat belt
is securely fastened.
The seat belt warning light for the front
passenger will illuminate if the seat belt is not
fastened when the front passenger’s seat is
Instruments and controls2-13
Page 91 of 322
2-16Instruments and controls
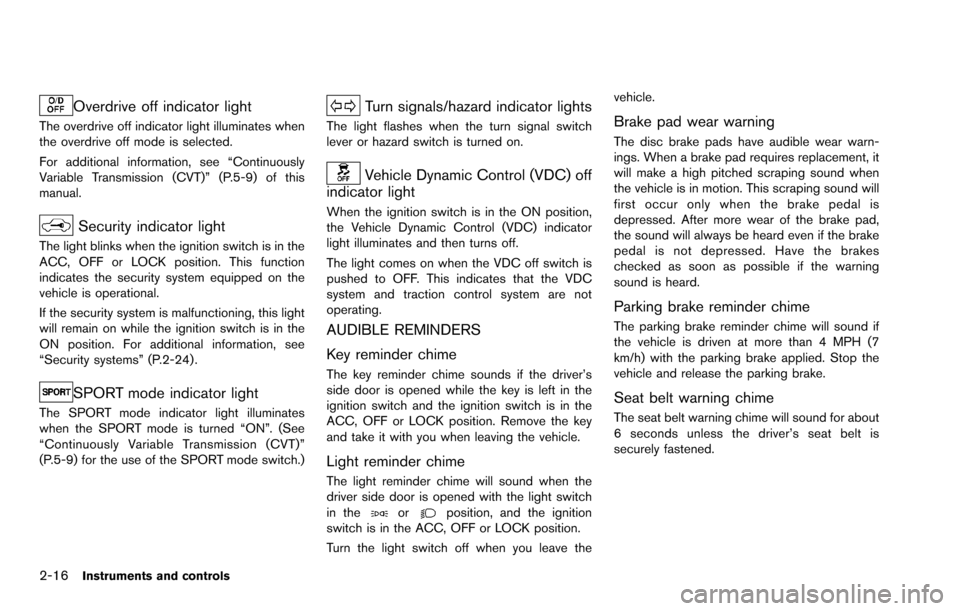
Overdrive off indicator light
The overdrive off indicator light illuminates when
the overdrive off mode is selected.
For additional information, see “Continuously
Variable Transmission (CVT)” (P.5-9) of this
manual.
Security indicator light
The light blinks when the ignition switch is in the
ACC, OFF or LOCK position. This function
indicates the security system equipped on the
vehicle is operational.
If the security system is malfunctioning, this light
will remain on while the ignition switch is in the
ON position. For additional information, see
“Security systems” (P.2-24) .
SPORT mode indicator light
The SPORT mode indicator light illuminates
when the SPORT mode is turned “ON”. (See
“Continuously Variable Transmission (CVT)”
(P.5-9) for the use of the SPORT mode switch.)
Turn signals/hazard indicator lights
The light flashes when the turn signal switch
lever or hazard switch is turned on.
Vehicle Dynamic Control (VDC) off
indicator light
When the ignition switch is in the ON position,
the Vehicle Dynamic Control (VDC) indicator
light illuminates and then turns off.
The light comes on when the VDC off switch is
pushed to OFF. This indicates that the VDC
system and traction control system are not
operating.
AUDIBLE REMINDERS
Key reminder chime
The key reminder chime sounds if the driver’s
side door is opened while the key is left in the
ignition switch and the ignition switch is in the
ACC, OFF or LOCK position. Remove the key
and take it with you when leaving the vehicle.
Light reminder chime
The light reminder chime will sound when the
driver side door is opened with the light switch
in the
orposition, and the ignition
switch is in the ACC, OFF or LOCK position.
Turn the light switch off when you leave the vehicle.
Brake pad wear warning
The disc brake pads have audible wear warn-
ings. When a brake pad requires replacement, it
will make a high pitched scraping sound when
the vehicle is in motion. This scraping sound will
first occur only when the brake pedal is
depressed. After more wear of the brake pad,
the sound will always be heard even if the brake
pedal is not depressed. Have the brakes
checked as soon as possible if the warning
sound is heard.
Parking brake reminder chime
The parking brake reminder chime will sound if
the vehicle is driven at more than 4 MPH (7
km/h) with the parking brake applied. Stop the
vehicle and release the parking brake.
Seat belt warning chime
The seat belt warning chime will sound for about
6 seconds unless the driver’s seat belt is
securely fastened.
Page 94 of 322
INDICATORS FOR OPERATION
The design of the warnings and alerts may differ
depending on the model.
1. Door open warning
This warning appears if any of the doors are
open or not closed securely. The vehicle icon
indicates which door is open on the display.
2. Lift gate open warning
This warning appears if the lift gate is open or
not closed securely. When theswitch is
pushed, the lift gate open warning turns off.
3. Loose fuel cap warning
This warning appears when the fuel-filler cap is
not tightened correctly after the vehicle has
been refueled. (See “Fuel-filler cap” (P.3-11) .)
4. Check tire pressure warning
This warning appears when the low tire pressure
warning light in the meter illuminates and low tire
pressure is detected. The warning appears each
time the ignition switch is placed in the ON
position as long as the low tire pressure warning
light remains illuminated. If this warning appears,
stop the vehicle and adjust the tire pressure to
the recommended COLD tire pressure shown
on the Tire and Loading Information label. The
check tire pressure warning turns off after a period of time. (See “Low tire pressure warning
light” (P.2-12) and “Tire Pressure Monitoring
System (TPMS)” (P.5-3) .)
5. Parking brake release warning
This warning appears when the vehicle speed is
above 4 MPH (7 km/h) and the parking brake is
applied.
6. Setting menu operation warning
The warning appears when you try to operate
the setting menu while driving. The setting menu
can only be entered when the vehicle is
stationary.
7. Low outside temperature warning
This warning appears if the outside temperature
drops below 378F(3
8C) with the ignition switch
in the ON position. The outside temperature
display flashes at the same time. These warning
features can be turned off. (See “Trip computer”
(P.2-21) .)
8. Low fuel warning
This warning appears when the fuel level in the
tank is getting low. Refuel as soon as it is
convenient, preferably before the fuel gauge
reaches the empty (0) position.
There is a small reserve of fuel remaining
in the tank when the fuel gauge reaches
the empty (0) position.
9. Driver alert
This warning appears when the previously set
time for a break is reached. You can set the time
for up to 6 hours in the setting menu. (See “Trip
computer” (P.2-21).)
10. Cruise control indicator (if so
equipped)
The cruise main switch indicator (CRUISE) is
displayed when the cruise control main switch is
pushed. When the main switch is pushed again,
the CRUISE indicator disappears. When the
CRUISE indicator is displayed, the cruise
control system is operational.
The cruise control set indicator (SET) is
displayed while the vehicle speed is controlled
by the cruise control system. If the SET indicator
blinks while the engine is running, it may indicate
that the cruise control system is not functioning
properly. Have the system checked by a
NISSAN dealer.
For more details, see “Cruise control” (P.5-17) .
11. Extended storage fuse warning (if so
equipped)
This warning may appear if the extended storage
fuse switch is not pushed in (switched on) .
When this warning appears, push in (switch on)
the extended storage fuse switch to turn off the
Instruments and controls2-19
Page 99 of 322
2-24Instruments and controls
Maintenance:
The maintenance intervals of the following items
can be set or reset for the reminders.
.Service
Select this submenu to set or reset the
distance for service due.
. Tire
Select this submenu to set or reset the
distance for replacing tires.
. Other
Select this submenu and set or reset the
distance for items other than service or tires.
To return to the top page of the setting mode,
select “Back”.
Alarms:
Alarms menu can be set to notify the following
items.
. Driver alert
Select this submenu to set the driver alert
period.
. Outside temp
Select this submenu to turn ON or OFF the
low outside temperature warning features.
For a description of the low outside tem-
perature warning features when Outside
Temp is set to ON, see “Outside air
temperature” (P.2-17). With Outside Temp set to OFF,
— The outside temperature display remains
on steady at all outside temperatures and
does not flash.
— The low outside temperature warning indicator does not appear.
To return to the top page of the setting mode,
select “Back”.
Language:
Select the submenu to set the desired language
of the display.
Factory:
Select the submenu to reset the factory settings
of the display.
NOTE:
When resetting Factory, all previous set-
tings made are changed to default.
To return to the top page of the setting mode,
select “Back”.
CONTINUOUSLY VARIABLE TRANS-
MISSION (CVT) POSITION INDICATOR
The Continuously Variable Transmission (CVT)
position indicator indicates the shift lever posi-
tion when the ignition switch is in the ON
position.
SIC2133
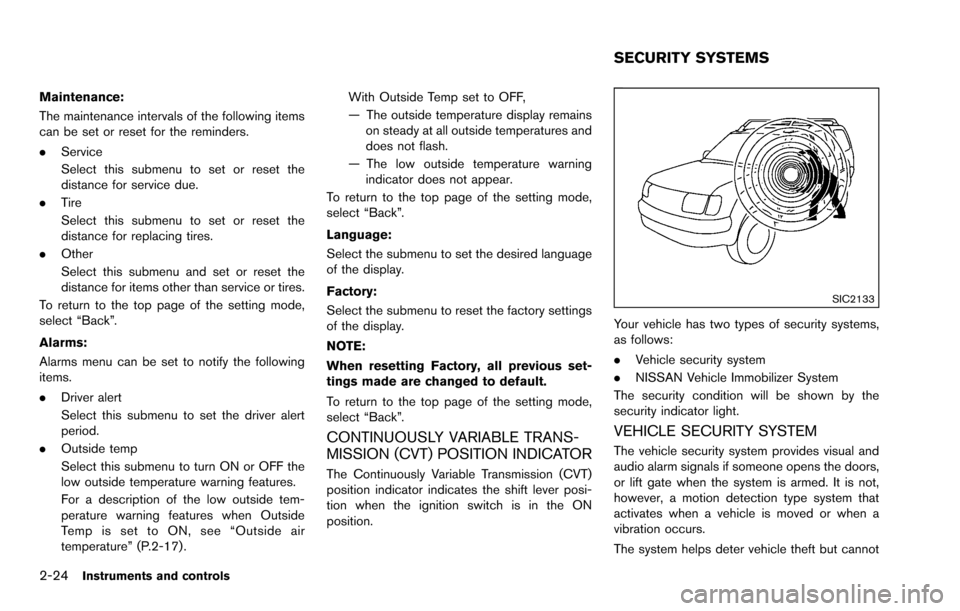
Your vehicle has two types of security systems,
as follows:
. Vehicle security system
. NISSAN Vehicle Immobilizer System
The security condition will be shown by the
security indicator light.
VEHICLE SECURITY SYSTEM
The vehicle security system provides visual and
audio alarm signals if someone opens the doors,
or lift gate when the system is armed. It is not,
however, a motion detection type system that
activates when a vehicle is moved or when a
vibration occurs.
The system helps deter vehicle theft but cannot
SECURITY SYSTEMS
Page 100 of 322
prevent it, nor can it prevent the theft of interior
or exterior vehicle components in all situations.
Always secure your vehicle even if parking for a
brief period. Never leave your keys in the vehicle,
and always lock it when unattended. Be aware
of your surroundings, and park in secure, well-lit
areas whenever possible.
Many devices offering additional protection,
such as component locks, identification markers,
and tracking systems, are available at auto
supply stores and specialty shops. Your
NISSAN dealer may also offer such equipment.
Check with your insurance company to see if
you may be eligible for discounts for various
theft protection features.
SIC2045
How to arm the vehicle security system
1. Close all windows.The system can be armed even if the
windows are open.
2. Turn the ignition switch to the LOCK position and remove the key.
3. Close all doors. Lock all doors. The doors can be locked with:
.the lock buttonon the key fob.the power door lock switch.Master key
4. Confirm that the security indicator light illuminates. The security indicator light stays
on for about 30 seconds. The vehicle security system is now pre-armed. After
about 30 seconds the vehicle security
system automatically shifts into the armed
phase. The security light begins to flash
once every approximately 3 seconds. If,
during this 30-second pre-arm time period,
the door is unlocked, or the ignition switch is
turned to the ACC or ON position, the
system will not arm.
Even when the driver and/or passengers
are in the vehicle, the system will activate
with all doors locked with the ignition
switch in the LOCK position. When turning
the ignition switch to the ACC or ON
position, the system will be released.
Vehicle security system activation
The vehicle security system will give the follow-
ing alarm:
. The headlights blink and the horn sounds
intermittently.
. The alarm automatically turns off after
approximately 50 seconds. However, the
alarm reactivates if the vehicle is tampered
with again.
The alarm is activated by:
. Unlocking the door without using the key
fob, or the key. (Even if the door is opened
by releasing the door inside lock knob, the
Instruments and controls2-25
Page 101 of 322
2-26Instruments and controls
alarm will activate.)
How to stop an activated alarm
The alarm will stop by unlocking a door by
pushing the unlock buttonon the key fob, or
using the key. The alarm will not stop if the
ignition switch is turned to the ACC or ON
position.
If the system does not operate as de-
scribed above, have it checked by a
NISSAN dealer.
NISSAN VEHICLE IMMOBILIZER SYS-
TEM
The NISSAN Vehicle Immobilizer System will not
allow the engine to start without the use of the
registered key.
If the engine fails to start using the registered
key, it may be due to interference caused by
another registered key, an automated toll road
device or automated payment device on the key
ring. Restart the engine using the following
procedures:
1. Leave the ignition switch in the ON position for approximately 5 seconds.
2. Turn the ignition switch to the OFF or LOCK position and wait approximately 10 seconds.
3. Repeat step 1 and 2 again. 4. Restart the engine while holding the device
(which may have caused the interference)
separate from the registered key.
If this procedure allows the engine to start,
NISSAN recommends placing the regis-
tered key on a separate key ring to avoid
interference from other devices.
Statement related to section 15 of FCC
rules for NISSAN Vehicle Immobilizer
System (CONT ASSY-BCM. ANT ASSY-
IMMOBILISER)
FCC Notice:
This device complies with Part 15 of the
FCC Rules. Operation is subject to the
following two conditions: (1) This device
may not cause harmful interference, and
(2) this device must accept any interfer-
ence received, including interference that
may cause undesired operation.
NOTE:
Changes or modifications not expressly
approved by the party responsible for
compliance could void the user’s authority
to operate the equipment.SIC2045
Security indicator light
The security indicator light is located on the
meter panel. It indicates the status of the
NISSAN Vehicle Immobilizer System.
The light blinks after the ignition switch was in
the LOCK position. This function indicates the
security systems equipped on the vehicle are
operational.
If the NISSAN Vehicle Immobilizer System is
malfunctioning, this light will remain on while the
ignition switch is in the ON position.
If the light still remains on and/or the
engine will not start, see a NISSAN dealer
for NISSAN Vehicle Immobilizer System
Page 111 of 322
2-36Instruments and controls
SIC4267
LUGGAGE SIDE BOX
To open the luggage side box, pull up the strap.
SIC3503
CARGO COVER (if so equipped)
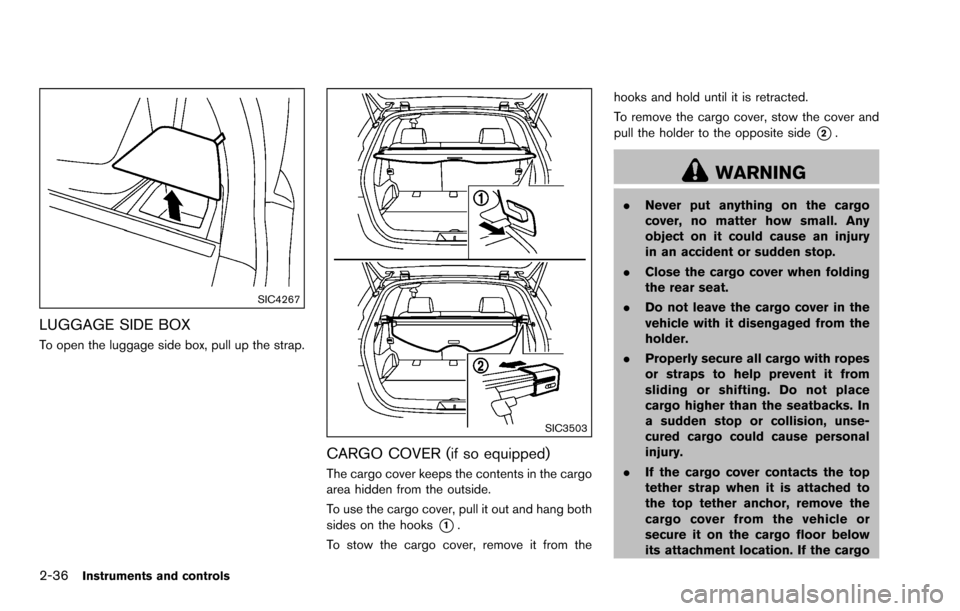
The cargo cover keeps the contents in the cargo
area hidden from the outside.
To use the cargo cover, pull it out and hang both
sides on the hooks
*1.
To stow the cargo cover, remove it from the hooks and hold until it is retracted.
To remove the cargo cover, stow the cover and
pull the holder to the opposite side
*2.
WARNING
.
Never put anything on the cargo
cover, no matter how small. Any
object on it could cause an injury
in an accident or sudden stop.
. Close the cargo cover when folding
the rear seat.
. Do not leave the cargo cover in the
vehicle with it disengaged from the
holder.
. Properly secure all cargo with ropes
or straps to help prevent it from
sliding or shifting. Do not place
cargo higher than the seatbacks. In
a sudden stop or collision, unse-
cured cargo could cause personal
injury.
. If the cargo cover contacts the top
tether strap when it is attached to
the top tether anchor, remove the
cargo cover from the vehicle or
secure it on the cargo floor below
its attachment location. If the cargo