2015 NISSAN MICRA ESP
[x] Cancel search: ESPPage 146 of 293
USB (Universal Serial Bus)
Connection Port (if so equipped)
WARNING
Do not connect, disconnect or operate the
USB device while driving. Doing so can be
a distraction. If distracted you could lose
control of your vehicle and cause an acci-
dent or serious injury.
CAUTION
●Do not force the USB device into the
USB port. Inserting the USB device
tilted or up-side-down into the port may
damage the port. Make sure that the
USB device is connected correctly into
the USB port.
● Do not grab the USB port cover (if so
equipped) when pulling the USB device
out of the port. This could damage the
port and the cover.
● Do not leave the USB cable in a place
where it can be pulled unintentionally.
Pulling the cable may damage the port.
The vehicle is not equipped with a USB device.
USB devices should be purchased separately as
necessary. This system cannot be used to format USB de-
vices. To format a USB device, use a personal
computer.
In some jurisdictions, the USB device for the front
seats plays only sound without images for regu-
latory reasons, even when the vehicle is parked.
This system supports various USB Connection
Port devices, USB hard drives and iPod® play-
ers. Some USB devices may not be supported by
this system.
● Partitioned USB devices may not play cor-
rectly.
● Some characters used in other languages
(Chinese, Japanese, etc.) may not appear
properly in the display. Using English lan-
guage characters with a USB device is rec-
ommended.
General notes for USB use: ● Refer to your device manufacturer’s owner
information regarding the proper use and
care of the device. Notes for iPod® use (if so equipped):
iPod® is a trademark of Apple Inc., registered in
the U.S. and other countries.
● Improperly plugging in the iPod® may cause
a checkmark to be displayed on and off
(flickering) . Always make sure that the
iPod® is connected properly.
● An iPod® nano (1st Generation) may remain
in fast forward or rewind mode if it is con-
nected during a seek operation. In this case,
please manually reset the iPod®.
● An iPod® nano (2nd Generation) will con-
tinue to fast-forward or rewind if it is discon-
nected during a seek operation.
● An incorrect song title may appear when the
Play Mode is changed while using an iPod®
nano (2nd Generation) .
● Audiobooks may not play in the same order
as they appear on an iPod®.
● Large video files cause slow responses in an
iPod®. The vehicle center display may mo-
mentarily black out, but will soon recover.
● If an iPod® automatically selects large video
files while in the shuffle mode, the vehicle
center display may momentarily black out,
but will soon recover.
Display screen, heater, air conditioner, audio and phone systems4-29
Page 166 of 293
The command given is picked up by the micro-
phone, and voice feedback is given when the
command is accepted.● If you need to hear the available commands
for the current menu again, say “Help” and
the system will repeat them.
● If a command is not recognized, the system
announces, “Command not recognized.
Please try again.” Make sure the command is
said exactly as prompted by the system and
repeat the command in a clear voice.
● If you want to go back to the previous com-
mand, you can say “Go back” or “Correc-
tion” any time the system is waiting for a
response.
● You can cancel a command when the sys-
tem is waiting for a response by saying,
“Cancel” or “Quit.” The system announces
“Cancel” and ends the VR session. You can
also press and hold the
button on the
steering wheel for 5 seconds at any time to
end the VR session. Whenever the VR ses-
sion is cancelled, a double beep is played to
indicate you have exited the system. ●
If you want to adjust the volume of the voice
feedback, press the volume control switches
(+ or -) on the steering wheel while being
provided with feedback. You can also use
the radio volume control knob.
Voice Prompt Interrupt
In most cases you can interrupt the voice feed-
back to speak the next command by pressing
the
button on the steering wheel. After
interrupting the system, wait for a beep before
speaking your command.
One Shot Call
To use the system faster, you may speak the
second level commands with the main menu
command on the main menu. For example, press
the
button and after the tone say, “Call
Redial”.
Operating tips
To get the best performance out of the system,
observe the following:
● Keep the interior of the vehicle as quiet as
possible. Close the windows to eliminate
surrounding noises (traffic noises, vibration
sounds, etc.) , which may prevent the system
from recognizing voice commands correctly.
CONTROL BUTTONS
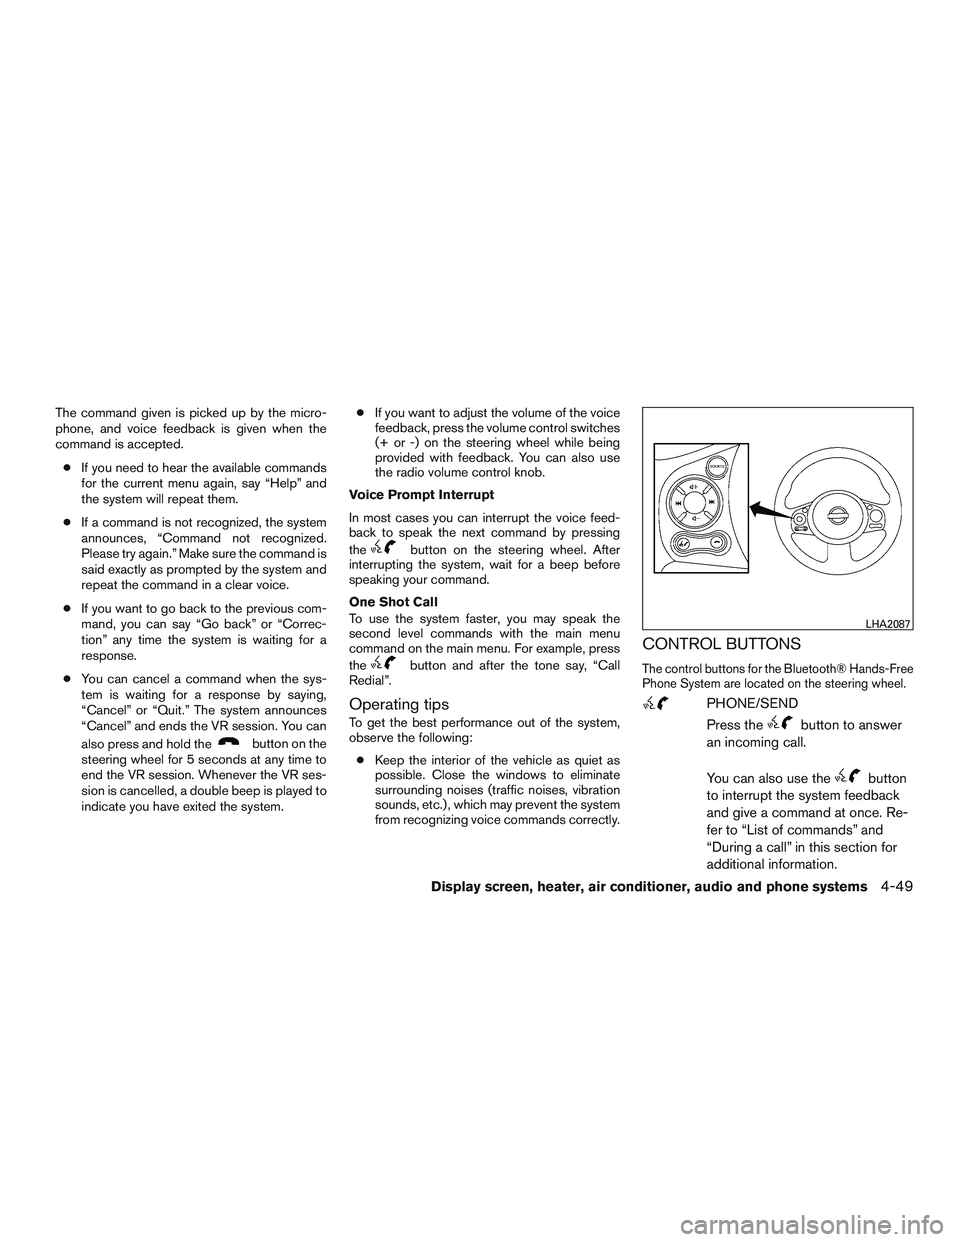
The control buttons for the Bluetooth® Hands-Free
Phone System are located on the steering wheel.
PHONE/SEND
Press the
button to answer
an incoming call.
You can also use the
button
to interrupt the system feedback
and give a command at once. Re-
fer to “List of commands” and
“During a call” in this section for
additional information.
LHA2087
Display screen, heater, air conditioner, audio and phone systems4-49
Page 173 of 293

TROUBLESHOOTING GUIDE
The system should respond correctly to all voice
commands without difficulty. If problems are en-
countered, try the following solutions.
Where the solutions are listed by number, try
each solution in turn, starting with number 1, until
the problem is resolved.
SymptomSolution
System fails to interpret the command correctly. 1. Ensure that the command is valid. Refer to “List of commands” in this section.
2. Ensure that the command is spoken after the tone.
3. Speak clearly without pausing between words and at a level appropriate to the ambient noise level in the vehicle.
4. Ensure that the ambient noise level is not excessive (for example, windows open or defroster on) . NOTE: If it is too
noisy to use the phone, it is likely that the voice commands will not be recognized.
5. If more than one command was said at a time, try saying the commands separately.
The system consistently selects the wrong entry from the
phone book. 1. Ensure that the phone book entry name requested matches what was originally stored. This can be confirmed by
using the “List Names” command. Refer to “Phonebook” in this section.
2. Replace one of the names being confused with a new name.
4-56Display screen, heater, air conditioner, audio and phone systems
Page 177 of 293
●If you decide that it is not safe to return the
vehicle to the road surface based on vehicle,
road or traffic conditions, gradually slow the
vehicle to a stop in a safe place off the road.
RAPID AIR PRESSURE LOSS
Rapid air pressure loss or a “blow-out” can occur
if the tire is punctured or is damaged due to
hitting a curb or pothole. Rapid air pressure loss
can also be caused by driving on under-inflated
tires.
Rapid air pressure loss can affect the handling
and stability of the vehicle, especially at highway
speeds.
Help prevent rapid air pressure loss by maintain-
ing the correct air pressure and visually inspect
the tires for wear and damage. For additional
information, refer to “Wheels and tires” in the
“Maintenance and do-it-yourself” section of this
manual. If a tire rapidly loses air pressure or
“blows-out” while driving, maintain control of the
vehicle by following the procedure below. Please
note that this procedure is only a general guide.
The vehicle must be driven as appropriate based
on the conditions of the vehicle, road and traffic.
WARNING
The following actions can increase the
chance of losing control of the vehicle if
there is a sudden loss of tire air pressure.
Losing control of the vehicle may cause a
collision and result in personal injury.
● The vehicle generally moves or pulls in
the direction of the flat tire.
● Do not rapidly apply the brakes.
● Do not rapidly release the accelerator
pedal.
● Do not rapidly turn the steering wheel.
1. Remain calm and do not overreact.
2. Maintain a firm grip on the steering wheel with both hands and try to hold a straight
course.
3. When appropriate, slowly release the accel- erator pedal to gradually slow the vehicle.
4. Gradually steer the vehicle to a safe location off the road and away from traffic if possible.
5. Lightly apply the brake pedal to gradually stop the vehicle.
6. Turn on the hazard warning flashers and contact a roadside emergency service to
change the tire. For additional information, refer to “Changing a flat tire” in the “In case
of emergency” section of this manual.DRINKING ALCOHOL/DRUGS AND
DRIVING
WARNING
Never drive under the influence of alcohol
or drugs. Alcohol in the bloodstream re-
duces coordination, delays reaction time
and impairs judgement. Driving after
drinking alcohol increases the likelihood
of being involved in an accident injuring
yourself and others. Additionally, if you
are injured in an accident, alcohol can
increase the severity of the injury.
NISSAN is committed to safe driving. However,
you must choose not to drive under the influence
of alcohol. Every year thousands of people are
injured or killed in alcohol-related collisions. Al-
though the local laws vary on what is considered
to be legally intoxicated, the fact is that alcohol
affects all people differently and most people
underestimate the effects of alcohol.
Remember, drinking and driving don’t mix! That is
true for drugs (over-the-counter, prescription)
and illegal drugs too. Don’t drive if your ability to
operate your vehicle is impaired by alcohol,
drugs, or some other physical condition.
5-4Starting and driving
Page 181 of 293
and then crank the engine. Release the
key and the accelerator pedal when the
engine starts.
● If the engine is very hard to start because
it is flooded, depress the accelerator
pedal all the way to the floor and hold it.
Crank the engine for 5-6 seconds. After
cranking the engine, release the accel-
erator pedal. Crank the engine with your
foot off the accelerator pedal by plac-
ing the ignition in the START position.
Release the key when the engine starts. If
the engine starts, but fails to run, repeat
the above procedure.
CAUTION
Do not operate the starter for more than
15 seconds at a time. If the engine does
not start, turn the key off and wait 10 sec-
onds before cranking again, otherwise the
starter could be damaged.
4. Allow the engine to idle for at least 30 sec- onds after starting. Do not race the engine
while warming it up. Drive at moderate
speed for a short distance first, especially in
cold weather.
AUTOMATIC TRANSMISSION (if so
equipped)
The Automatic Transmission (A/T) in your vehicle
is electronically controlled to produce maximum
power and smooth operation.
The recommended operating procedures for this
transmission are shown on the following pages.
Follow these procedures for maximum vehicle
performance and driving enjoyment.
WARNING
●Do not depress the accelerator pedal
while shifting from P (Park) or N (Neu-
tral) to R (Reverse) , D (Drive) , 2 or 1.
Always depress the brake pedal until
shifting is completed. Failure to do so
could cause you to lose control and
have an accident.
● The cold engine idle speed is high, so
use caution when shifting the transmis-
sion into a forward or reverse position
before the engine has warmed up.
● Avoid revving up the engine while the
vehicle is stopped. This could cause un-
expected vehicle movement.
CAUTION
● Do not downshift abruptly on slippery
roads. This may cause a loss of control.
● Never shift to either the P (Park) or R
(Reverse) position while the vehicle is
moving. This could cause serious dam-
age to the transmission.
● Except in an emergency, do not shift to
the N (Neutral) position while driving.
Coasting with the transmission in the N
(Neutral) position may cause serious
damage to the transmission.
● Start the engine in either the P (Park) or
N (Neutral) position. The engine will not
start in any other position. If it does,
have your vehicle checked by a NISSAN
dealer.
● Shift into the P (Park) position and ap-
ply the parking brake when at a stand-
still for longer than a short waiting
period.
● Keep the engine at idling speed while
shifting from the N (Neutral) position to
any driving position.
DRIVING THE VEHICLE
5-8Starting and driving
Page 189 of 293
To reset at a faster cruising speed,use one of
the following three methods.
● Depress the accelerator pedal. When the
vehicle attains the desired speed, push and
release the COAST/SET switch.
● Push and hold the ACCEL/RES switch.
When the vehicle attains the speed you de-
sire, release the switch.
● Push and release the ACCEL/RES switch.
Each time you do this, the set speed in-
creases by about 1 MPH (1.6 km/h).
To reset at a slower cruising speed, use one
of the following three methods.
● Lightly tap the brake pedal. When the ve-
hicle attains the desired speed, push the
COAST/SET switch and release it.
● Push and hold the COAST/SET switch. Re-
lease the switch when the vehicle slows to
the desired speed.
● Push and release the COAST/SET switch.
Each time you do this, the set speed de-
creases by about 1 MPH (1.6 km/h).
To resume the preset speed, push and re-
lease the ACCEL/RES switch. The vehicle re-
turns to the last set cruising speed when the
vehicle speed is over 23 MPH (37 km/h). When the force applied to the brake pedal ex-
ceeds a certain level, the Brake Assist is acti-
vated, generating greater braking force than a
conventional brake booster even with light pedal
force.
WARNING
The Brake Assist is only an aid to assist
braking operation and is not a collision
warning or avoidance device. It is the driv-
er’s responsibility to stay alert, drive
safely and be in control of the vehicle at all
times.
CAUTION
During the first 2,000 km (1,200 miles),
follow these recommendations to obtain
maximum engine performance and ensure
the future reliability and economy of your
new vehicle. Failure to follow these rec-
ommendations may result in shortened
engine life and reduced engine
performance.
● Avoid driving for long periods at constant
speed, either fast or slow, and do not run the
engine over 4,000 rpm.
● Do not accelerate at full throttle in any gear.
● Avoid quick starts.
● Avoid hard braking as much as possible.
BRAKE ASSIST BREAK-IN SCHEDULE
5-16Starting and driving
Page 192 of 293
WARNING
●If the engine is not running or is turned
off while driving, the power assist for
the steering will not work. Steering will
be harder to operate.
● When the power steering warning light
illuminates with the engine running,
there will be no power assist for the
steering. You will still have control of
the vehicle but the steering will be
harder to operate. Have the power
steering system checked by a NISSAN
dealer.
The power steering system is designed to pro-
vide power assist while driving to operate the
steering wheel with light force.
When the steering wheel is operated repeatedly
or continuously while parking or driving at a very
low speed, the power assist for the steering
wheel will be reduced. This is to prevent over-
heating of the power steering system and protect
it from getting damaged. While the power assist
is reduced, steering wheel operation will become
heavy. When the temperature of the power steer-
ing system goes down, the power assist level will
return to normal. Avoid repeating such steering
wheel operations that could cause the power
steering system to overheat. You may hear a sound when the steering wheel is
operated quickly. However, this is not a malfunc-
tion.
If the electric power steering warning light
PS
illuminates while the engine is running, it may
indicate the power steering system is not func-
tioning properly and may need servicing. Have
the power steering system checked by a
NISSAN dealer.
When the electric power steering warning light
illuminates with the engine running, there will be
no power assist for the steering but you will still
have control of the vehicle. At this time, greater
steering effort is required to operate the steering
wheel, especially in sharp turns and at low
speeds.
For additional information, refer to “Power steer-
ing warning light” in the “Instruments and con-
trols” section. The brake system has two separate hydraulic
circuits. If one circuit malfunctions, you will still
have braking at two wheels.
BRAKE PRECAUTIONS
Vacuum assisted brakes
The brake booster aids braking by using engine
vacuum. If the engine stops, you can stop the
vehicle by depressing the brake pedal. However,
greater foot pressure on the brake pedal will be
required to stop the vehicle and stopping dis-
tance will be longer.
Using the brakes
Avoid resting your foot on the brake pedal while
driving. This will overheat the brakes, wear out the
brake pads faster, and reduce gas mileage.
To help reduce brake wear and to prevent the
brakes from overheating, reduce speed and
downshift to a lower gear before going down a
slope or long grade. Overheated brakes may
reduce braking performance and could result in
loss of vehicle control.
POWER STEERING
BRAKE SYSTEM
Starting and driving5-19
Page 193 of 293
WARNING
●While driving on a slippery surface, be
careful when braking, accelerating or
downshifting. Abrupt braking or accel-
erating could cause the wheels to skid
and result in an accident.
● If the engine is not running or is turned
off while driving, the power assist for
the brakes will not work. Braking will be
harder.
Wet brakes
When the vehicle is washed or driven through
water, the brakes may get wet. As a result, your
braking distance will be longer and the vehicle
may pull to one side during braking.
To dry the brakes, drive the vehicle at a safe
speed while lightly pressing the brake pedal to
heat up the brakes. Do this until the brakes return
to normal. Avoid driving the vehicle at high
speeds until the brakes function correctly.
Parking brake break-in
Adjust the parking brake shoes whenever the
effect of the parking brake is weakened or when-
ever the parking brake shoes and/or drum/rotors
are replaced, in order to assure the best brake
performance. This procedure can be performed by a NISSAN
dealer.
ANTI-LOCK BRAKING SYSTEM
(ABS)
WARNING
●
The Anti-lock Braking System (ABS) is a
sophisticated device, but it cannot pre-
vent accidents resulting from careless
or dangerous driving techniques. It can
help maintain vehicle control during
braking on slippery surfaces. Remem-
ber that stopping distances on slippery
surfaces will be longer than on normal
surfaces even with ABS. Stopping dis-
tances may also be longer on rough,
gravel or snow covered roads, or if you
are using tire chains. Always maintain a
safe distance from the vehicle in front of
you. Ultimately, the driver is respon-
sible for safety.
● Tire type and condition may also affect
braking effectiveness.
– When replacing tires, install the specified size of tires on all four
wheels. – When installing a spare tire, make
sure that it is the proper size and type
as specified on the Tire and Loading
Information label. Refer to “Tire and
Loading Information label” in the
“Technical and consumer informa-
tion” section of this manual.
– For additional information, refer to “Wheels and tires” in the “Mainte-
nance and do-it-yourself” section of
this manual.
The Anti-lock Braking System (ABS) controls the
brakes so the wheels do not lock during hard
braking or when braking on slippery surfaces.
The system detects the rotation speed at each
wheel and varies the brake fluid pressure to pre-
vent each wheel from locking and sliding. By
preventing each wheel from locking, the system
helps the driver maintain steering control and
helps to minimize swerving and spinning on slip-
pery surfaces.
Using the system
Depress the brake pedal and hold it down. De-
press the brake pedal with firm steady pressure,
but do not pump the brakes. The ABS will oper-
ate to prevent the wheels from locking up. Steer
the vehicle to avoid obstacles.
5-20Starting and driving