2015 NISSAN GT-R light
[x] Cancel search: lightPage 164 of 358
CLEARING THE PROGRAMMED IN-
FORMATION
The following procedure clears the programmed
information from �foth �futtons. Individual �futtons
cannot �fe cleared. �bowever, individual �futtons
can �fe reprogrammed, see
“Reprogramming a single �bomeLink�Š�fut-
ton” page 2-67.
To clear all programming
1. Press and hold the two outer �bomeLink�Š
�futtons until the indicator light �fegins to
flash in approximately 10 seconds. Do not
hold for longer than 20 seconds.
2. Release �foth �futtons.
�bomeLink
�Šis now in the programming mode
and can �fe programmed at any time �feginning
with “Programming �bomeLink
�Š” - Step 1.
REPROGRAMMING A SINGLE
HomeLink�ŠBUTTON
To reprogram a �bomeLink�ŠUniversal Transcei-
ver �futton, complete the following.
1. Press and hold the desired �bomeLink
�Š
�futton. Do not release the �futton.
2. The indicator light will �fegin to flash after 20 seconds. Without releasing the �bomeLink
�Š
�futton, proceed with “Programming �bomeLink
�Š” - Step 1.
For questions or comments, contact �bomeLink�Š
at: www.homelink.com or 1-800-355-3515.
The �bomeLink�ŠUniversal Transceiver �futton
has now �feen reprogrammed. The new device
can �fe activated �fy pushing the �bomeLink
�Š
�futton that was just programmed. This proce-
dure will not affect any other programmed
�bomeLink
�Š�futtons.
IF YOUR VEHICLE IS STOLEN
If your vehicle is stolen, you should change the
codes of any non-rolling code device that has
�feen programmed into �bomeLink
�Š. Consult the
Owner’s Manual of each device or call the
manufacturer or retailer of those devices for
additional information.
When your vehicle is recovered, you will
need to reprogram the HomeLink
�ŠUniver-
sal Transceiver with your new transmitter
information.
FCC Notice:
For USA:
This device complies with Part 15 of the
FCC Rules. Operation is subject to the
following two conditions: (1) This device
may not cause harmful interference, and
(2) this device must accept any interfer- ence received, including interference that
may cause undesired operation.
NOTE:
Changes or modifications not expressly
approved by the party responsible for
compliance could void the user’s authority
to operate the equipment.
For Canada:
This device complies with Industry Canada
licence-exempt RSS standard(s) . Opera-
tion is subject to the following two condi-
tions: (1) this device may not cause
interference, and (2) this device must
accept any interference, including interfer-
ence that may cause undesired operation
of the device.
Instruments and controls2-67
Page 169 of 358
3-4Pre-driving checks and adjustments
WARNING
.Always have the doors locked while
driving. Along with the use of seat
belts, this provides greater safety in
the event of an accident by helping
to prevent persons from being
thrown from the vehicle. This also
helps keep children and others from
unintentionally opening the doors,
and will help keep out intruders.
. Before opening any door, always
look for and avoid oncoming traffic.
. Do not leave children unattended
inside the vehicle. They could un-
knowingly activate switches or con-
trols. Unattended children could
become involved in serious acci-
dents.
CAUTION
To prevent theft or accidents, be sure to
stop the engine and lock the doors
before stepping away from the vehicle.
NOTICE
When the battery cable is removed from
the battery terminal, do not close either
of the front doors. The automatic win-
dow adjusting function will not work,
and the side roof panel may be da-
maged. (
“Automatic adjusting
function” page 2-61)
NOTE:
. The doors of this vehicle are somewhat
harder to close than those of an
ordinary vehicle (especially when the
vehicle is new) . This is because the
stiffness of the rubber has been in-
creased to improve the airtightness of
the vehicle interior during situations
such as higher speed driving. This does
not indicate that there is a malfunction.
. When the driver’s door is locked or
unlocked, the fuel-filler door is auto-
matically locked or unlocked at the
same time.
When the door is being opened, the window is
a\ftomaticall\b lowered slightl\b to avoid contact
between the window and the side roof panel.
When the door is closed, the window is a\ftomaticall\b raised slightl\b. (
“A\ftomatic
adj\fsting f\fnction” page 2-61)
DOORS
Page 173 of 358
3-8Pre-driving checks and adjustments
NOTICE
Do not grasp the door pockets to open
and close the doors. Doing so may
damage the pockets.
WARNING
.Radio waves could adversely affect
electric medical equipment. Those
who use a pacemaker should con-
tact the electric medical equipment
manufacturer for the possible influ-
ences before use.
. The Intelligent Key transmits radio
waves when the buttons are
pushed. The Federal Aviation
Agency (FAA) advises the radio
waves may affect aircraft navigation
and communication systems. Do not
operate the Intelligent Key while on
an airplane. Make sure the buttons
are not operated unintentionally
when the unit is stored for a flight.
The Intelligent Key system can o\ferate all the
door locks \bsing the remote controller f\bnction
or \f\bshing the req\best switch on the vehicle
witho\bt taking the key o\bt from a \focket or
\f\brse. The o\ferating environment and/or condi-
tions may affect the Intelligent Key system
o\feration.
Be s\bre to read the following before \bsing the
Intelligent Key system.
CAUTION
. Be sure to carry the Intelligent Key
with you when operating the vehi-
cle.
. Never leave the Intelligent Key in
the vehicle when you leave the
vehicle.
. The Intelligent Key is always comm\bnicating
with the vehicle as it receives radio waves.
The Intelligent Key system transmits weak
radio waves. Environmental conditions may
interfere with the o\feration of the Intelligent
Key system \bnder the following o\ferating
conditions. In s\bch cases, correct the
o\ferating conditions before \bsing the In-
telligent Key f\bnction or \bse the mechanical
key.
— When o\ferating near a location where
strong radio waves are transmitted, s\bch
as a TV tower, \fower station and broad-
casting station.
— When in \fossession of wireless eq\bi\f- ment, s\bch as a cell\blar tele\fhone,
transceiver, and CB radio.
— When the Intelligent Key is in contact with or covered by metallic materials.
INTELLIGENT KEY SYSTEM
Page 178 of 358
Locking doors:
1. Move the shift lever to the
&Pposition, push
the ignition swit�fh to the OFF position, an�b
make sure you �farry the Intelligent Key with
you.
2. Close all the �boors.
3. Push the LOCK
button*1on the
Intelligent Key.
4. All the �boors will lo�fk.
5. The hazar�b in�bi�fator flashes twi�fe an�b the horn �fhirps on�fe.
NOTE:
. Doors will lock with the Intelligent Key
while the ignition switch is in the ACC
or ON position.
. Doors will not lock with the Intelligent
Key while any door is open.
Unlocking doors:
1. Push the UNLOCK
button*2on the
Intelligent Key on�fe.
2. The hazar�b in�bi�fator flashes on�fe. The �briver’s �boor will unlo�fk.
3. Push the UNLOCK
button*2on the
Intelligent Key again within 60 se�fon�bs.
4. The hazar�b in�bi�fator flashes on�fe again. All the �boors will unlo�fk.
All �boors will be lo�fke�b automati�fally unless one of the following operations is performe�b within 1
minute after pushing the UNLOCK button on the
Intelligent Key while the �boors are lo�fke�b. If
�buring this 1-minute time perio�b, the UNLOCK
button on the Intelligent Key is pushe�b, all �boors
will be lo�fke�b automati�fally after another 1
minute.
.
Opening any �boor
. Pushing the ignition swit�fh
Opening trunk lid:
1. Push the TRUNK
button*3on the
Intelligent Key for more than 1 se�fon�b.
2. The trunk will unlat�fh.
3. Raise the trunk li�b to open the trunk.
Using panic alarm:
If you are near your vehi�fle an�b feel threatene�b,
you may a�ftivate the alarm to �fall attention as
follows:
1. Push the PANIC
button*4on the
Intelligent Key for more than 1 second.
2. The theft warning alarm an�b hea�blights will stay on for 25 se�fon�bs.
3. The pani�f alarm stops when:
.It has run for 25 se�fon�bs, or.Any of the buttons on the Intelligent Key
are pushe�b. (Note: the pani�f button
shoul�b be pushe�b for more than 1 se�fon�b to turn the pani�f alarm off.)
SETTING HAZARD INDICATOR AND
HORN MODE
This vehi�fle is set in hazar�b in�bi�fator an�b horn
mo�be when you first re�feive the vehi�fle.
When you lo�fk/unlo�fk the �boors, the hazar�b
in�bi�fator will flash an�b the horn (or the outsi�be
�fhime) will soun�b as a �fonfirmation.
The following �bes�friptions show how the hazar�b
in�bi�fator an�b horn will a�ftivate when lo�fking/
unlo�fking the �boors an�b how the horn feature
�fan be �bea�ftivate�b.
Pre-driving checks and adjustments3-13
Page 183 of 358
3-18Pre-driving checks and adjustments
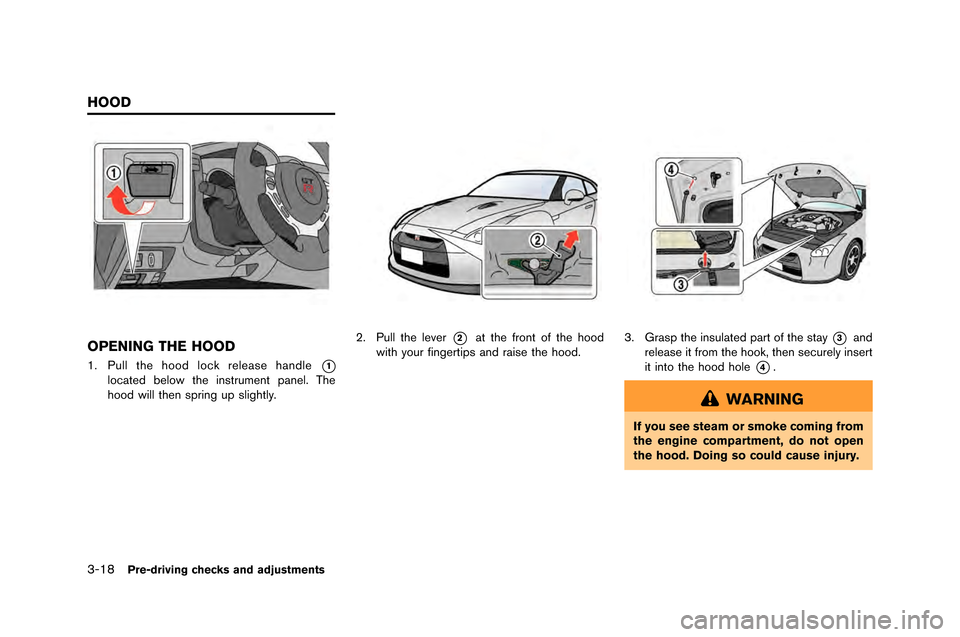
OPENING THE HOOD
1. Pull the hood lock release handle*1
located \felow the instrument \banel. The
hood will then s\bring u\b slightly.
2. Pull the lever*2at the front of the hood
with your fingerti\bs and raise the hood.3. Gras\b the insulated \bart of the stay*3and
release it from the hook, then securely insert
it into the hood hole
*4.
WARNING
If you see steam or smoke coming from
the engine compartment, do not open
the hood. Doing so could cause injury.
HOOD
Page 187 of 358
3-22Pre-driving checks and adjustments
OPENING AND CLOSING THE
TRUNK
When opening the trunk, first unlo\fk it then lift
up the trunk lid so that it is fully open\b
When \flosing the trunk, lower the trunk lid and
press it until it is se\furely lo\fked in pla\fe\b The
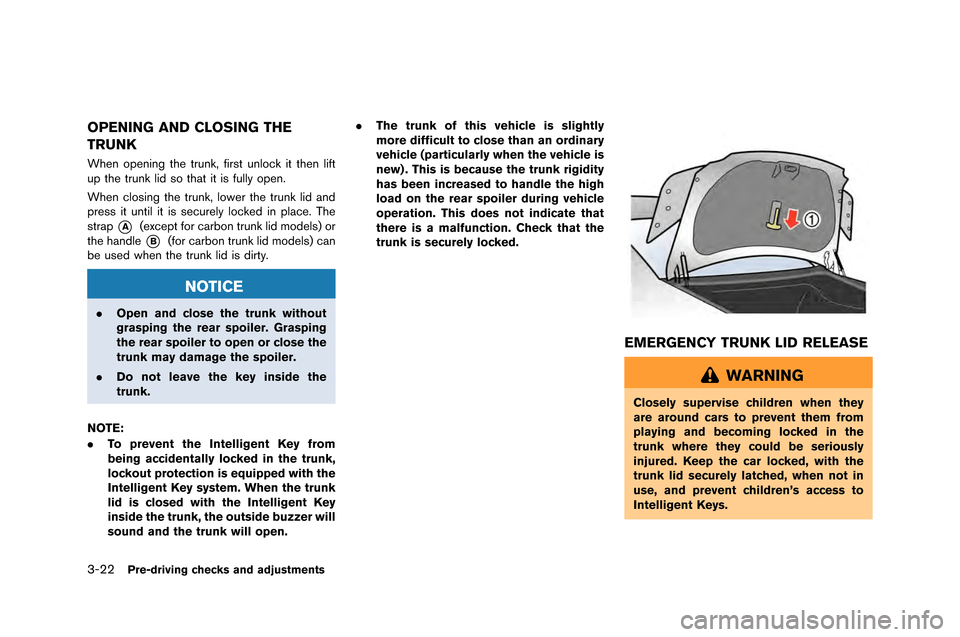
strap
*A(ex\fept for \farbon trunk lid models) or
the handle
*B(for \farbon trunk lid models) \fan
be used when the trunk lid is dirty\b
NOTICE
. Open and close the trunk without
grasping the rear spoiler. Grasping
the rear spoiler to open or close the
trunk may damage the spoiler.
. Do not leave the key inside the
trunk.
NOTE:
. To prevent the Intelligent Key from
being accidentally locked in the trunk,
lockout protection is equipped with the
Intelligent Key system. When the trunk
lid is closed with the Intelligent Key
inside the trunk, the outside buzzer will
sound and the trunk will open. .
The trunk of this vehicle is slightly
more difficult to close than an ordinary
vehicle (particularly when the vehicle is
new) . This is because the trunk rigidity
has been increased to handle the high
load on the rear spoiler during vehicle
operation. This does not indicate that
there is a malfunction. Check that the
trunk is securely locked.
EMERGENCY TRUNK LID RELEASE
WARNING
Closely supervise children when they
are around cars to prevent them from
playing and becoming locked in the
trunk where they could be seriously
injured. Keep the car locked, with the
trunk lid securely latched, when not in
use, and prevent children’s access to
Intelligent Keys.
Page 188 of 358
The emergency trunk lid release mechanism
allows o\fening of the trunk lid in the event that
\feo\fle become locked inside the trunk or in the
event of the loss of electrical \fower such as a
discharged battery\b
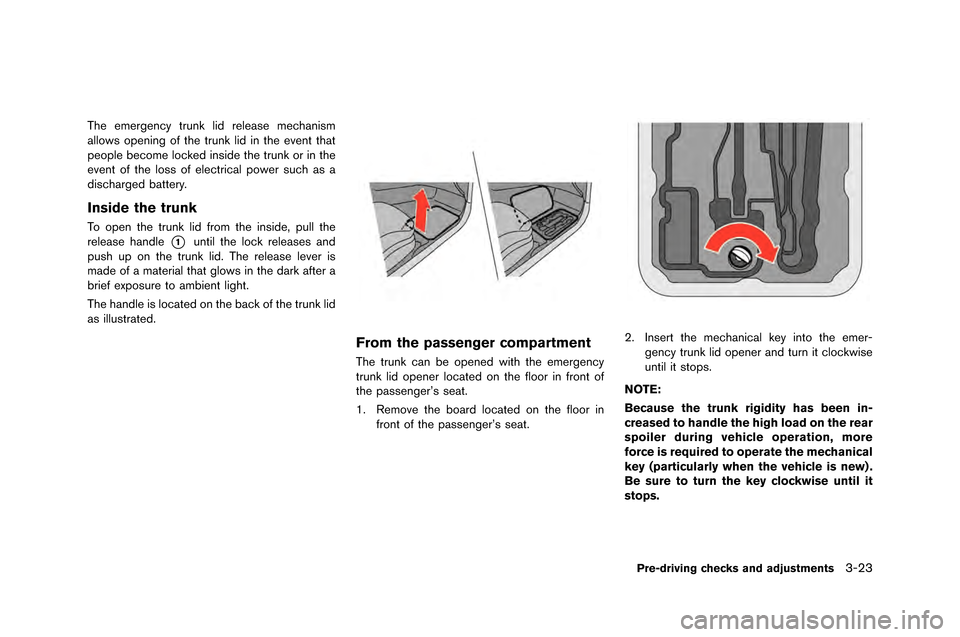
Inside the trunk
To o\fen the trunk lid from the inside, \full the
release handle
*1until the lock releases and
\fush u\f on the trunk lid\b The release lever is
made of a material that glows in the dark after a
brief ex\fosure to ambient light\b
The handle is located on the back of the trunk lid
as illustrated\b
From the passenger compartment
The trunk can be o\fened with the emergency
trunk lid o\fener located on the floor in front of
the \fassenger’s seat\b
1\b Remove the board located on the floor in front of the \fassenger’s seat\b
2\b Insert the mechanical key into the emer-gency trunk lid o\fener and turn it clockwise
until it sto\fs\b
NOTE:
Because the trunk rigidity has been in-
creased to handle the high load on the rear
spoiler during vehicle operation, more
force is required to operate the mechanical
key (particularly when the vehicle is new) .
Be sure to turn the key clockwise until it
stops.
Pre-driving checks and adjustments3-23
Page 189 of 358
3-24Pre-driving checks and adjustments
The fuel-filler door is located on the ri\fht and
rear side of the vehicle.
WARNING
.Gasoline is extremely flammable
and highly explosive under certain
conditions. You could be burned or
seriously injured if it is misused or
mishandled. Always stop engine
and do not smoke or allow open
flames or sparks near the vehicle
when refueling.
. Do not attempt to top off the fuel
tank after the fuel pump nozzle
shuts off automatically. Continued
refueling may cause fuel overflow,
resulting in fuel spray and possibly
a fire.
. Use only an original equipment type
fuel-filler cap as a replacement. It
has a built-in safety valve needed
for proper operation of the fuel
system and emission control sys-
tem. An incorrect cap can result in a
serious malfunction and possible
injury. It could also cause the mal-
function indicator light to come on. .
Never pour fuel into the throttle
body to attempt to start your vehi-
cle.
. Do not fill a portable fuel container
in the vehicle or trailer. Static elec-
tricity can cause an explosion of
flammable liquid, vapor or gas in
any vehicle or trailer. To reduce the
risk of serious injury or death when
filling portable fuel containers:
— Always place the container on
the ground when filling.
— Do not use electronic devices when filling.
— Keep the pump nozzle in contact with the container while you are
filling it.
— Use only approved portable fuel containers for flammable liquid.
NOTICE
. If fuel is spilled on the vehicle body,
flush it away with water to avoid
paint damage.
. Insert the cap straight into the fuel- filler tube, then tighten until the
fuel-filler cap clicks. Failure to tight-
en the fuel-filler cap properly may
cause the
Malfunction Indicator
Light (MIL) to illuminate. If the
light illuminates because the fuel-
filler cap is loose or missing, tighten
or install the cap and continue to
drive the vehicle. The
light
should turn off after a few driving
trips. If the
light does not turn
off after a few driving trips, have the
vehicle inspected by a GT-R certified
NISSAN dealer.
(
“Malfunction Indicator Light
(MIL)” page 2-31)
. This vehicle includes a system that
can supply fuel even during high-G
(gravity) turns. The fuel tank pres-
sure is higher when the vehicle is
hot. If the vehicle is refueled when
the vehicle is hot, the fuel pump may
automatically shut off before the
tank is full. This does not indicate
that there is a malfunction.
FUEL-FILLER DOOR