Page 89 of 300

Manual window control (if so equipped) 5-28 Features and controls
5
After unlocking the tail
gate, pull the tailgate
handle upward to open. Pull the liftgate grip (A) downward as illus- trated and release it before the liftgate closes completely. Gently slam the liftgate from the outside so that it is completely closed.
N00510700021
To open 1- UnlockCAUTION Make sure there is no one standing nearby when opening the liftgate.
To close
CAUTION To avoid injuring your hand or arm, do not attempt to close the lift
gate without releasing
the liftgate grip (A). Before starting the vehi
cle, be sure to con-
firm that the liftgate is locked. If the liftgate opens while driving
the vehicle, objects
stored in the luggage compartment could fallout into the road.NOTE
Gas struts (B) are installed in the locations illustrated in order to
support the liftgate.
Please observe the following in order to pre- vent damage or faulty operation: • Do not touch, push or pull the gas struts when closing the liftgate. • Do not attach any pl
astic material, tape,
etc., to the gas struts. • Do not tie string, etc., around the gas struts.
• Do not hang objects on the gas struts.
Manual window control
(if so
equipped)1- To open 2- To close
NOTE
BK0212400US.book 28 ページ 2014年4月1日 火曜日 午後2時21分
Page 90 of 300

Power window control
Features and controls 5-29
5
N00510800370
N00548700130
The main switch located on the driver’s door can be used to operate all the windows. A window can be opened or closed by operat-ing the corresponding switch. Press the switch down to open the window, and pull up the switch to close it.If the driver’s door window switch is fully pressed down/pulled up, the driver’s door window automatically opens/closes com-pletely. (Type 1) If the driver’s door window switch is fully pressed down, the driver’s door window auto-matically opens completely. (Type 2) If you want to stop the window movement, operate the switch lightly in the reverse direc-tion.
Power window control 1- Open (down)2- Close (up)
NOTE
Never try to operate the main switch and sub-switch in different directions at the same time. This will freeze the window in posi- tion. Operating the power
windows repeatedly
with the engine stopped will run down thebattery. Use the window
switches only while
the engine is running.WA R N I N G Before operating the power windows, make sure that nothing can be trapped (head, hands, fingers, etc.) in the window.
Never leave the vehi
cle without carrying
the key. Never leave children
or unreliable adults
unattended inside the vehicle.
Main switch
WA R N I N G
1- Driver’s door window switch 2- Front passenger door window switch3- Left rear door window switch 4- Right rear door window switch 5- Lock switchType 1Type 2
BK0212400US.book 29 ページ 2014年4月1日 火曜日 午後2時21分
Page 91 of 300

Power window control 5-30 Features and controls
5
N00548800098
Each sub-switch can be
used for it’s own pas-
senger door window, unless the driver’s win-dow lock switch is activated.
N00548900132
The power windows can be run up or downwhen the ignition switch or the operationmode is in ON. The door windows can be opened or closed for a 30-second period after the engine is
stopped. However, once the driver’s door or the front passenger’s
door is opened, the
power windows cannot be operated.
N00549000169
When this switch is in the lock mode, the pas-senger door switches cannot be used to open or close the door windows, and the main switch will open or
close only the driver’s
door window. To unlock the switch, press it again.
N00528800122
If a hand or head is trapped, for safety thedoor window is automati
cally lowered a little.
After the door window is lowered, clear the obstruction, then pull up the switch again toclose the door window.
Sub switch 1- Close2- Open
NOTE
The rear door windows open only half-way.
Power window timer function
Lock switch 1- Lock 2- Unlock
Ty p e 1 Ty p e 2
WA R N I N G Before driving with a child in the vehicle, be sure to lock the window switch to makeit inoperative. Children tampering withthe switch could easily trap their hands or heads in the window.
Safety mechanism (Driver’s door window of Type 1 only)
WA R N I N G If the battery terminals are disconnected or the fuse for electric window is replaced, the safety mechanism will be cancelled. If a hand or head got
trapped, a serious
injury could result.CAUTION The safety mechanism is deactivated just before the door window closes. This allows the door window to close completely. There- fore be especially careful that fingers are nottrapped in the door window opening.
BK0212400US.book 30 ページ 2014年4月1日 火曜日 午後2時21分
Page 92 of 300

Parking brake
Features and controls 5-31
5
N00551400043
Wind buffeting can be de
scribed as the per-
ception of pressure on the ears or a boomingor rumbling sound. Your
vehicle may exhibit
wind buffeting when driving with one or both rear door windows down or partially opened.This is a normal occurrence that can be mini- mized. If the buffeting
occurs with the rear
door windows open, open the front door win- dows as well as the rear door windows to minimize the condition.
N00511400399
To park the vehicle, first bring it to a com-plete stop, fully engage the parking brake,and then move the gearshift lever to 1st (on a uphill) or “R” (Reverse) (on a downhill) posi- tion for vehicles equipped with a manualtransaxle, set the selector lever to “P” (PARK) position for vehi
cles equipped with a
continuously variable transmission (CVT).
The safety mechanism is deactivated while the switch is pulled up.
Therefore be espe-
cially careful that fi
ngers are not trapped in
the door window opening. Do not deliberately tr
ap your hands or head
in order to activate the safety mechanism. Your hand or head coul
d be trapped and per-
sonal injury could result.NOTE
The safety mechanism can be activated if the driving conditions or
other circumstances
cause the door window to be subjected to a physical shock similar to that caused by trapped hand or head. If the battery termin
als are disc
onnected or
the fuse for electric
window is replaced, the
safety mechanism will be cancelled and the door window will not
automatically
open/close completely.If the window is open,
repeatedly raise the
driver’s door window switch until the win- dow has been fully cl
osed. Following this,
release the switch, raise the switch onceagain and hold it in this
condition for at least
1 second, then release it. You should now be able to operate the driver’s door window inthe normal fashion.CAUTION
What to do if you hear wind buffeting when driving Parking brake
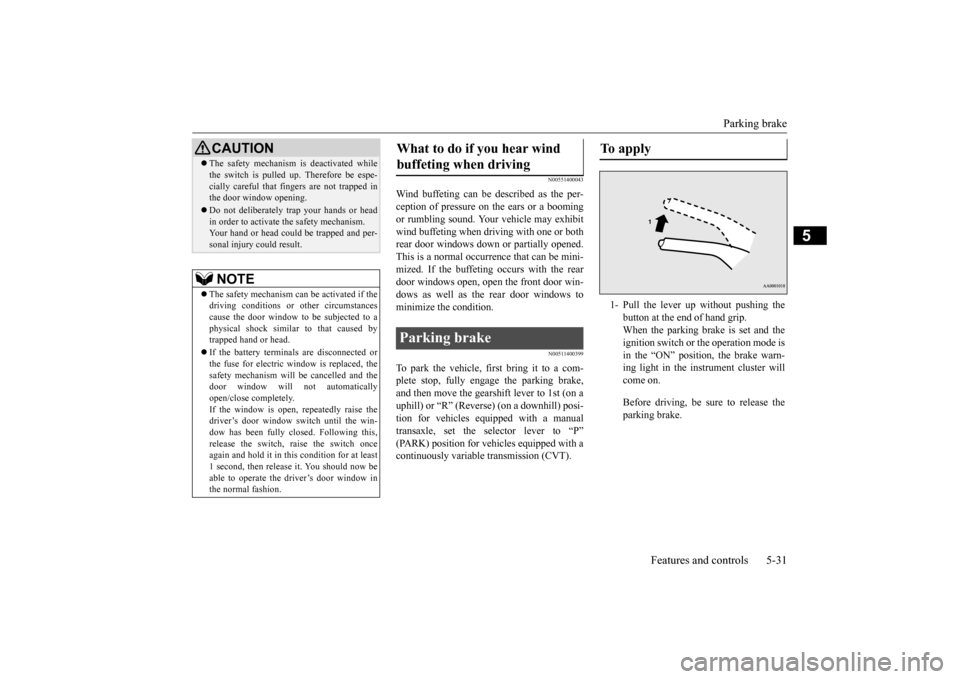
To apply 1- Pull the lever up without pushing the
button at the end of hand grip. When the parking brake is set and theignition switch or the operation mode is in the “ON” position, the brake warn- ing light in the instrument cluster willcome on. Before driving, be sure to release the parking brake.
BK0212400US.book 31 ページ 2014年4月1日 火曜日 午後2時21分
Page 93 of 300

Steering wheel height adjustment 5-32 Features and controls
5
When parking on a hill, set the parking brake, and turn the front wheels toward the curb on a downhill, or away from
the curb on an uphill.
N00511501254
To adjust the steering wheel to the desired position, move the lever upward or down-ward while moving the steering wheel to the desired level.
N00511600317
Adjust the inside rearview mirror only after making any seat adjustme
nts so as to have a
clear view to the rear of the vehicle.
To deactivate 1- Pull the lever up slightly. 2- Press and hold the button at the end of
the hand grip.
3- Push the lever downward.
CAUTION Before driving, be sure that the parking brake is fully released and brake warninglight is off.If you drive without the parking brake fully released, the warning lamp will illuminate and a buzzer sounds when the vehicle speedexceeds 5 mph (8 km/h). If a vehicle is driven without releasing the parking brake, the brak
es will be overheated,
resulting in ineffective braking and possible brake failure.
Steering wheel height adjustment
A- Wheel lock B- ReleaseWA R N I N G After adjusting, make sure the lever is secured in the locked (A) position. Do not attempt to adjust the steering wheel while driving. This can be danger-ous. When releasing the leve
r (moving it to the
position (B), be sure to hold the steering wheel firmly. Otherwise, the steering wheel may slip down too suddenly.
Inside rearview mirror
BK0212400US.book 32 ページ 2014年4月1日 火曜日 午後2時21分
Page 94 of 300

Outside rearview mirrors
Features and controls 5-33
5
Adjust the inside mirror to maximize the view through the rear window. It is possible to move
the mirror up and down
to adjust its position.
It is possible to move the mirror up/down and left/right to adjust its position. The day/night knob (A) at the bottom of the mirror can be used to adjust the mirror to reduce the glare from the headlights of vehi- cles behind you during night driving.
N00512200206
Adjust the outside rearview mirrors only aftermaking any seat adjustme
nts so as to have a
clear view to the rear of the vehicle.
WA R N I N G Do not attempt to adjust the inside rear- view mirror while driving. This can bedangerous.Be sure to adjust the mirror before driv- ing.
To adjust the vertical mirror position
To adjust the mirror position To reduce the glare
1- Daytime position 2- Night positionOutside rearview mirrors
WA R N I N G Do not attempt to adjust the outside rear- view mirrors while driving. This can be dangerous. Be sure to adjust the mirrors before driv-ing.
BK0212400US.book 33 ページ 2014年4月1日 火曜日 午後2時21分
Page 95 of 300

Outside rearview mirrors 5-34 Features and controls
5
N00549100144
The outside rearview mirrors can be adjusted when the ignition switch or the operationmode is in ON or ACC. Move the lever (A) to the same side as the mirror you wish to adjust.
Press the switch (B) to adjust the mirror posi- tion.
N00549200099
The outside mirror can be manually folded in towards the side window to prevent damage when parking in tight locations.
N00549300218
When the rear window defogger switch ispressed with the engine running, the outsiderearview mirrors are defogged or defrosted. Current will flow throug
h the heater element
inside the mirrors, thus clearing away frost orcondensation. The indicator light (A) will illuminate while the defogger is on. The heater will be turned off automatically in about 20 minutes.
Your passenger’s side mirror is convex. The objects you see in
the mirror will look
smaller and farthe
r away than they
appear in a regular flat mirror. Do not use this mirror to estimate the dis- tance of vehicles following you whenchanging lanes.
To adjust the mirror position L- Left outside mirror adjustment R- Right outside mirror adjustmentWA R N I N G
1- Up 2- Down3- Right 4- Left
NOTE
After adjusting, return the lever to the “•” (OFF) position (C).
To fold the mirror
Door mirror heater
(if so equipped)
Type 1
BK0212400US.book 34 ページ 2014年4月1日 火曜日 午後2時21分
Page 96 of 300
![MITSUBISHI MIRAGE 2015 6.G Owners Manual Ignition switch
Features and controls 5-35
5
N00512400686
[For vehicles equipped with the Free-hand Advanced Security Tr
ansmitter (F.A.S.T.-
key)] For information on ope
rations for vehicles
equ MITSUBISHI MIRAGE 2015 6.G Owners Manual Ignition switch
Features and controls 5-35
5
N00512400686
[For vehicles equipped with the Free-hand Advanced Security Tr
ansmitter (F.A.S.T.-
key)] For information on ope
rations for vehicles
equ](/manual-img/19/7511/w960_7511-95.png)
Ignition switch
Features and controls 5-35
5
N00512400686
[For vehicles equipped with the Free-hand Advanced Security Tr
ansmitter (F.A.S.T.-
key)] For information on ope
rations for vehicles
equipped with the Free-hand Advanced Secu- rity Transmitter (F.A
.S.T.-key), refer to
“Free-hand Advanced
Security Transmitter
(F.A.S.T.-key): Engine switch
”on page 5-13.
[Except for vehicles equipped with the Free-hand Advanced Security Transmit-ter (F.A.S.T.-key)]
The engine is off. The
key can be inserted and
removed only when the sw
itch is in this posi-
tion. Allows operation of some electrical accesso- ries with the engine off. The engine runs and all accessories can be used.
Engages the starter. Release the key when the engine starts.It will automatically return to the “ON” position.
N00550900201
1. Set the selector lever to the “P” (PARK)position {continuously va
riable transmis-
sion (CVT)}. 2. Turn the key to the “OFF” position and remove it.
Ignition switch Type 2
OFF ACC ON
START
NOTE
Your vehicle is equippe
d with an electronic
immobilizer. To start the engine, the ID code which the transponder inside the key sends must match the one registered to the immobi-lizer computer. (Refer to “Electronic immo- bilizer” on page 5-20.)
To remove the key
BK0212400US.book 35 ページ 2014年4月1日 火曜日 午後2時21分