2015 MERCEDES-BENZ SLK-Class steering wheel
[x] Cancel search: steering wheelPage 171 of 358
Winter driving
G
WARNING
If you shift down on a slippery road surface in an attempt to increase the engine's braking
effect, the drive wheels could lose their grip.
There is an increased danger of skidding and
accidents.
Do not shift down for additional engine brak-
ing on a slippery road surface. G
DANGER
If the exhaust pipe is blocked or adequate
ventilation is not possible, poisonous gases
such as carbon monoxide (CO) may enter the vehicle. This is the case, e.g. if the vehicle
becomes trapped in snow. There is a risk of
fatal injury.
If you leave the engine or the auxiliary heating
running, make sure the exhaust pipe and area
around the vehicle are clear of snow. To
ensure an adequate supply of fresh air, open a window on the side of the vehicle that is not
facing into the wind.
Have your vehicle winter-proofed at a quali-
fied specialist workshop at the onset of win-
ter.
Drive particularly carefully on slippery road
surfaces. Avoid sudden acceleration, steering and braking maneuvers. Do not use cruise
control.
If the vehicle threatens to skid or cannot be
stopped when moving at low speed:
X Vehicles with manual transmission:
shift to neutral.
X Vehicles with automatic transmission:
shift the transmission to position N.
The outside temperature indicator is not
designed to serve as an ice-warning device
and is therefore unsuitable for that purpose.
Changes in the outside temperature are dis-
played after a short delay.
Indicated temperatures just above the freez-
ing point do not guarantee that the road sur-
face is free of ice. The road may still be icy, especially in wooded areas or on bridges. The
vehicle could skid if you fail to adapt your
driving style. Always adapt your driving style
and drive at a speed to suit the prevailing
weather conditions.
You should pay special attention to road con-
ditions when temperatures are around freez-
ing point.
For more information on driving with snow
chains, see (Y page 313).
For more information on driving with summer tires, see (Y page 312).
Observe the notes in the "Winter operation"
section (Y page 312). Driving systems
Cruise control
General notes Cruise control maintains a constant road
speed for you. It brakes automatically in order
to avoid exceeding the set speed. On long and
steep downhill gradients, especially if the
vehicle is laden, you must select a lower gear in good time. By doing so, you will make use of the braking effect of the engine. This relievesthe load on the brake system and prevents
the brakes from overheating and wearing too
quickly.
Use cruise control only if road and traffic con- ditions make it appropriate to maintain a
steady speed for a prolonged period. You canstore any road speed above 20 mph
(30 km/h).
Important safety notes If you fail to adapt your driving style, cruise
control can neither reduce the risk of an acci-
dent nor override the laws of physics. Cruise
control cannot take into account the road,
traffic and weather conditions. Cruise control
is only an aid. You are responsible for the dis-
tance to the vehicle in front, for vehicle speed, Driving systems
169Driving and parking Z
Page 187 of 358

Problems with PARKTRONIC
Problem
Possible causes/consequences and
0050
0050Solutions Only the red segments
in the PARKTRONIC
warning displays are lit.
You also hear a warning
tone for approximately
two seconds.
PARKTRONIC is deacti-
vated after approx-
imately 20 seconds,
and the indicator lamp
in the PARKTRONIC
button lights up. PARKTRONIC has malfunctioned and has switched off.
X If problems persist, have PARKTRONIC checked at a qualified
specialist workshop. Only the red segments
in the PARKTRONIC
warning displays are lit.
PARKTRONIC is deacti-
vated after approx-
imately five seconds. The PARKTRONIC sensors are dirty or there is interference.
X Clean the PARKTRONIC sensors (Y page 287).
X Switch the ignition back on. The problem may be caused by an external source of radio or
ultrasound waves.
X See if PARKTRONIC functions in a different location. Parking Guidance
Important safety notes Parking Guidance is an electronic parking aid
with ultrasound. Ultrasound is used to meas- ure the road on both sides of the vehicle. A
suitable parking space is indicated by the
parking symbol. You receive steering instruc-
tions when parking. You may also use PARK-
TRONIC (Y page 182).
Parking Guidance is only an aid. It is not a
replacement for your attention to your imme-
diate surroundings. You are always responsi- ble for safe maneuvering, parking and exitinga parking space. When maneuvering, parking
or pulling out of a parking space, make sure
that there are no persons, animals or objects
in the area in which you are maneuvering. G
WARNING
If objects are located above the detection
range, Parking Guidance may provide steering instructions too soon. You may cause a colli-
sion as a result. There is a risk of an accident.
If objects are located above the detection
range, stop and switch off Parking Assist.
! If unavoidable, you should drive over
obstacles such as curbs slowly and not at a sharp angle. Otherwise, you may damage
the wheels or tires.
When PARKTRONIC is deactivated, Parking
Guidance is also unavailable.
Parking Guidance may also display spaces
not suitable for parking, e.g.:
R where parking or stopping is prohibited
R in front of driveways or entrances and exits
R on unsuitable surfaces Driving systems
185Driving and parking Z
Page 188 of 358

Use Parking Guidance for parking spaces:
R that are parallel to the direction of travel
R that are on straight roads, not bends
R that are on the same level as the road, i.e.
not on the pavement, for example. Parking
Guidance may not detect flat curbs
Parking tips:
R On narrow roads, drive as close to the park-
ing space as possible.
R Parking spaces that are littered or over-
grown might be identified or measured
incorrectly.
R Parking spaces that are partially occupied
by trailer drawbars might not be identified
as such or be measured incorrectly.
R Snowfall or heavy rain may lead to a parking
space being measured inaccurately.
R Pay attention to the PARKTRONIC
(Y page 184) warning messages during the
parking procedure.
R When transporting a load which protrudes
from your vehicle, you must not use Parking
Guidance.
R Never use Parking Guidance with snow
chains or an emergency spare wheel moun-
ted.
R Make sure that the tire pressures are
always correct. This has a direct effect on
the steering instructions.
R The way your vehicle is positioned in the
parking space after parking is dependent
on various factors. These include the posi-
tion and shape of the vehicles parked in
front and behind it and the conditions of the location. In some cases, Parking Guidance
may guide you too far or not far enough into
a parking space. In some cases, it may also
lead you across or onto the curb. If neces-
sary, cancel the parking procedure with
Parking Guidance. Detecting parking spaces 0043
Detected parking space on the left
0044 Parking symbol
0087 Detected parking space on the right
Parking Guidance is automatically activated
when you drive forwards. The system is
operational at speeds of up to approximately
22 mph (35 km/h). While in operation, the
system independently locates and measures
parking spaces on both sides of the vehicle.
When driving at speeds below 19 mph
(30 km/h), you will see parking symbol 0044as
a status indicator in the instrument cluster.
When a parking space has been detected, an arrow towards the right 0087or the left 0043also
appears. Parking Guidance only displays
parking spaces on the front-passenger side
as standard. Parking spaces on the driver's
side are displayed as soon as the turn signal
on the driver's side is activated. To park on
the driver's side, you must leave the driver's
side turn signal switched on until you have
engaged reverse gear.
Parking Guidance will only detect parking
spaces:
R that are parallel to the direction of travel
R that are at least 5 ft (1.5 m) wide
R that are at least 4.3 ft (1.3 m) longer than
your vehicle
A parking space is displayed while you are
driving past it, and until you are approx-
imately 50 ft (15 m) away from it. 186
Driving systemsDriving and parking
Page 189 of 358
Parking
Moving the vehicle into the stop position
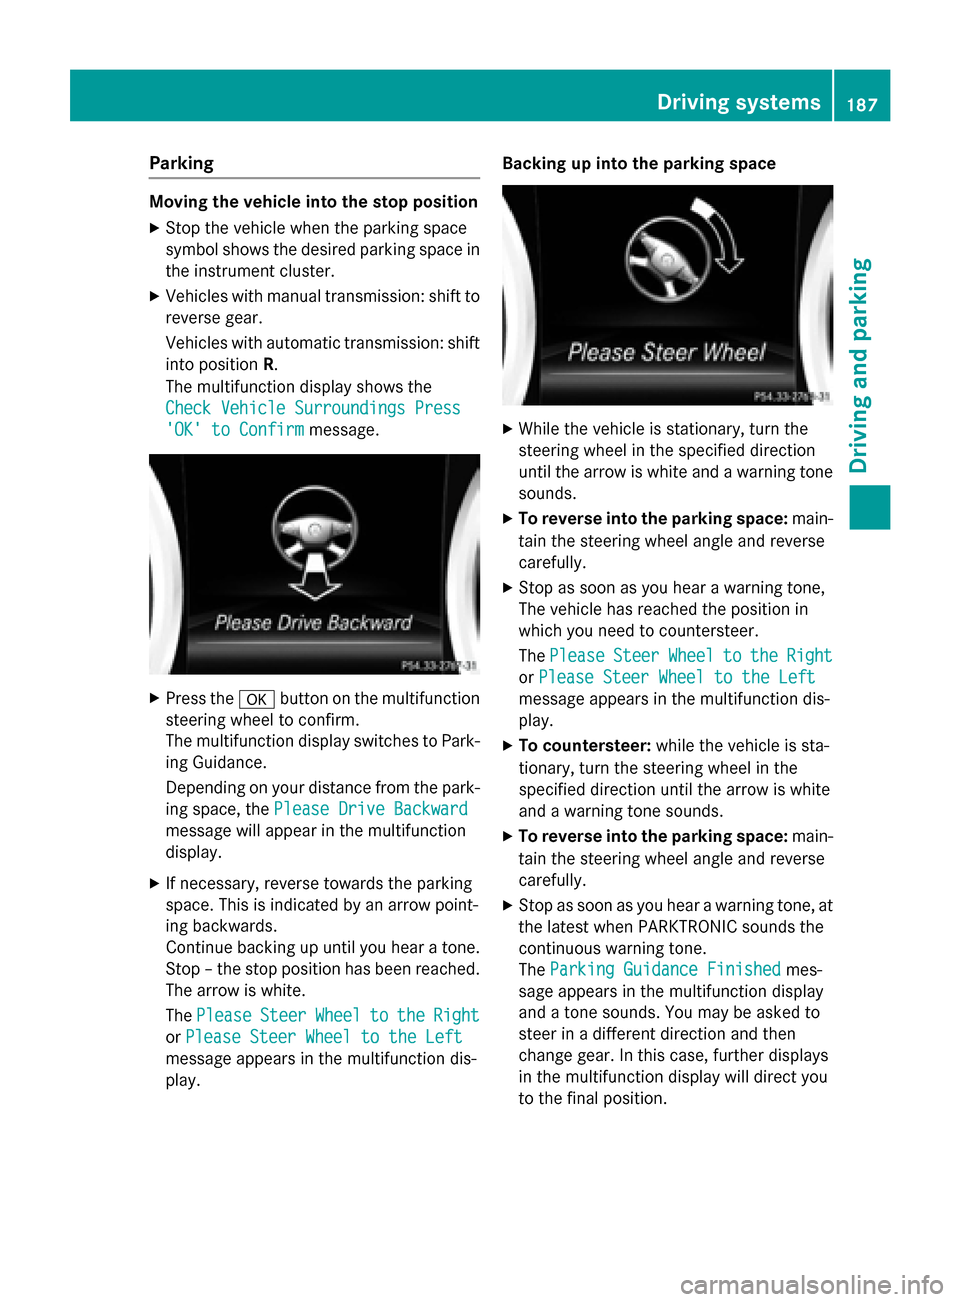
X Stop the vehicle when the parking space
symbol shows the desired parking space in
the instrument cluster.
X Vehicles with manual transmission: shift to
reverse gear.
Vehicles with automatic transmission: shift into position R.
The multifunction display shows the
Check Vehicle Surroundings Press
Check Vehicle Surroundings Press
'OK' to Confirm
'OK' to Confirm message. X
Press the 0076button on the multifunction
steering wheel to confirm.
The multifunction display switches to Park-
ing Guidance.
Depending on your distance from the park-
ing space, the Please Drive Backward Please Drive Backward
message will appear in the multifunction
display.
X If necessary, reverse towards the parking
space. This is indicated by an arrow point-
ing backwards.
Continue backing up until you hear a tone.
Stop – the stop position has been reached.
The arrow is white.
The Please
Please Steer SteerWheel
Wheelto
tothe
the Right
Right
or Please Steer Wheel to the Left
Please Steer Wheel to the Left
message appears in the multifunction dis-
play. Backing up into the parking space
X
While the vehicle is stationary, turn the
steering wheel in the specified direction
until the arrow is white and a warning tone
sounds.
X To reverse into the parking space: main-
tain the steering wheel angle and reverse
carefully.
X Stop as soon as you hear a warning tone,
The vehicle has reached the position in
which you need to countersteer.
The Please Please Steer
SteerWheel
Wheelto
tothe
the Right
Right
or Please Steer Wheel to the Left
Please Steer Wheel to the Left
message appears in the multifunction dis-
play.
X To countersteer: while the vehicle is sta-
tionary, turn the steering wheel in the
specified direction until the arrow is white
and a warning tone sounds.
X To reverse into the parking space: main-
tain the steering wheel angle and reverse
carefully.
X Stop as soon as you hear a warning tone, at
the latest when PARKTRONIC sounds the
continuous warning tone.
The Parking Guidance Finished Parking Guidance Finished mes-
sage appears in the multifunction display
and a tone sounds. You may be asked to
steer in a different direction and then
change gear. In this case, further displays
in the multifunction display will direct you
to the final position. Driving systems
187Driving and parking Z
Page 197 of 358
If the coolant temperature is over 248 ‡
(120 †), do not continue driving. The
engine will otherwise be damaged.
The coolant temperature gauge is in the
instrument cluster on the right-hand side
(Y page 31).
Under normal operating conditions and with
the specified coolant level, the coolant tem-
perature may rise to 248 ‡ (120 †). Tachometer
! Do not drive in the overrevving range, as
this could damage the engine.
The red band in the tachometer indicates the
engine's overrevving range.
The fuel supply is interrupted to protect the
engine when the red band is reached. Outside temperature display
You should pay special attention to road con-
ditions when temperatures are around freez-
ing point.
Bear in mind that the outside temperature
display indicates the temperature measured
and does not record the road temperature.
The outside temperature display is in the mul- tifunction display (Y page 196).
Changes in the outside temperature are dis-
played after a short delay. Speedometer with segments
The segments in the speedometer indicate
which speed range is available.
R Cruise control activated (Y page 169):
The segments light up from the stored
speed to the maximum speed.
R DISTRONIC PLUS activated (Y page 171):
One or two segments in the set speed
range light up.
R DISTRONIC PLUS detects a vehicle in front: The segments between the speed of the
vehicle in front and the stored speed light
up. Operating the on-board computer
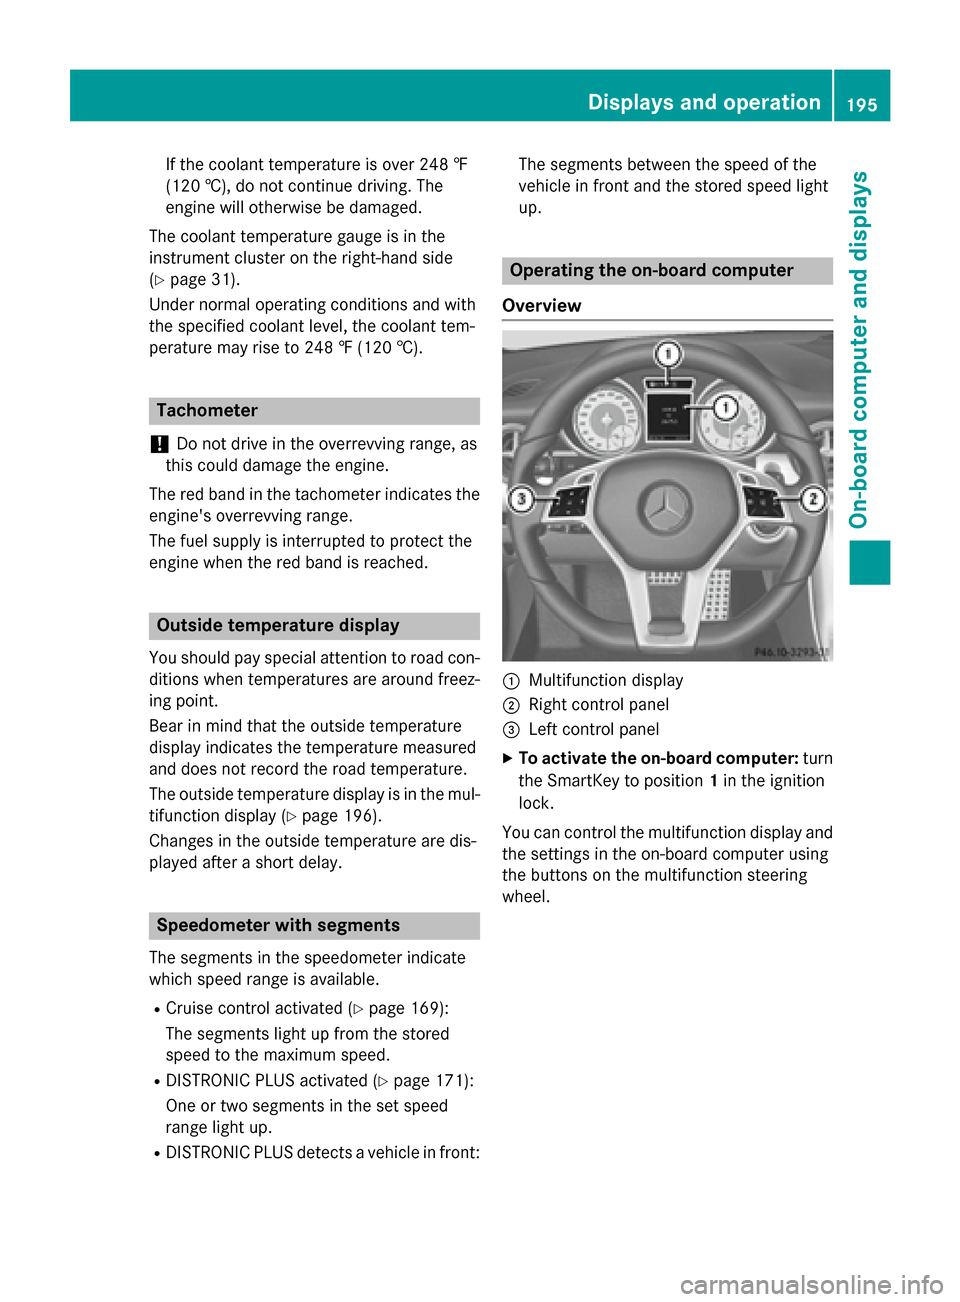
Overview 0043
Multifunction display
0044 Right control panel
0087 Left control panel
X To activate the on-board computer: turn
the SmartKey to position 1in the ignition
lock.
You can control the multifunction display and
the settings in the on-board computer using
the buttons on the multifunction steering
wheel. Displays and operation
195On-board computer and displays Z
Page 199 of 358

0083
Time
0084 Outside temperature or speed
(Ypage 205)
Text field 0087shows the selected menu or
submenu as well as display messages.
X To show menu bar 0085:press the 0059
or 0065 button on the steering wheel.
Menu bar 0085disappears after a few sec-
onds of inactivity.
i You can set the time using COMAND; see
the separate operating instructions.
Vehicles with manual transmission:
instead of transmission position 0043and drive
program 0044, the time and the outside tem-
perature or speed are shown.
The following messages may appear in the
multifunction display:
0097 Gearshift recommendation for man-
ual transmission (Y page 151) or
when shifting manually (automatic
transmission) (Y page 154)
0095005D0096 Parking Guidance (Y page 185)
CRUISE CRUISE Cruise control (Y
page 169)
00CE Adaptive Highbeam Assist
(Ypage 113)
00D6 ECO start/stop function
(Ypage 143)
00D9 HOLD function (Y page 181) Menus and submenus
Menu overview
Press the 0059or0065 button on the steer-
ing wheel to call up the menu bar and select a
menu.
Operating the on-board computer
(Y page 195).
Depending on the equipment installed in the
vehicle, you can call up the following menus:
R Trip Trip menu (Y page 197)
R Navi
Navi menu (navigation instructions)
(Y page 199) R
Audio
Audio menu (Y page 200)
R Tel
Tel menu (telephone) (Y page 201)
R DriveAssist
DriveAssist menu (assistance)
(Y page 203)
R Serv
Serv menu (Y page 204)
R Sett
Sett menu (settings) (Y page 204)
R AMG
AMG menu in AMG vehicles (Y page 208) Trip menu
Standard display X
Press and hold the 0038button on the
steering wheel until the Trip
Tripmenu with
trip odometer 0043and odometer 0044is
shown.
Trip computer "From Start" or "From
Reset" Example: trip computer "From Start"
0043 Distance
0044 Time
0087 Average speed
0085 Average fuel consumption
X Press the 0059or0065 button on the steer-
ing wheel to select the Trip
Trip menu.
X Press the 0063or0064 button to select
From Start From Start orFrom Reset
From Reset.
The values in the From Start
From Startsubmenu are
calculated from the start of a journey whilst Menus and submenus
197On-board computer and displays Z
Page 204 of 358
You will see one of the following display mes-
sages in the multifunction display:
R Phone READY
Phone READY or the name of the network
provider: the mobile phone has found a
network and is ready to receive.
R Phone No Service
Phone No Service: there is no network
available or the mobile phone is searching
for a network.
Accepting a call Example: incoming call
X Press the 0061button on the steering
wheel to accept an incoming call.
If someone calls you when you are in the Tel
Tel
menu, a display message appears in the mul- tifunction display.
You can accept a call even if you are not in the
Tel Tel menu.
Rejecting or ending a call X
Press the 0076button on the steering
wheel.
You can end or reject a call even if you are not
in the Tel
Tel menu.
Dialing an entry from the phone book X
Press the 0059or0065 button on the steer-
ing wheel to select the Tel
Tel menu.
X Press the 0063,0064or0076 button to
switch to the phone book. X
Press the 0063or0064 button to select the
desired name.
or X To begin rapid scrolling: press and hold
the 0063 or0064 button for longer than
one second.
Rapid scrolling stops when you release the button or reach the end of the list.
X If only one telephone number is stored
for a name: press the0061or0076 button
to start dialing.
or X If there is more than one number for a
particular name: press the0061or0076
button to display the numbers.
X Press the 0063or0064 button to select the
number you want to dial.
X Press the 0061or0076 button to start dial-
ing.
or
X To exit the phone book: press the0076or
0038 button.
Redialing The on-board computer saves the last names
or numbers dialed in the redial memory.
X Press the 0059or0065 button on the steer-
ing wheel to select the Tel Telmenu.
X Press the 0061button to switch to the
redial memory.
X Press the 0063or0064 button to select the
desired name or number.
X Press the 0061or0076 button to start dial-
ing.
or X To exit the redial memory: press the
0076 or0038 button. 202
Menus and submenusOn-board computer and displays
Page 205 of 358
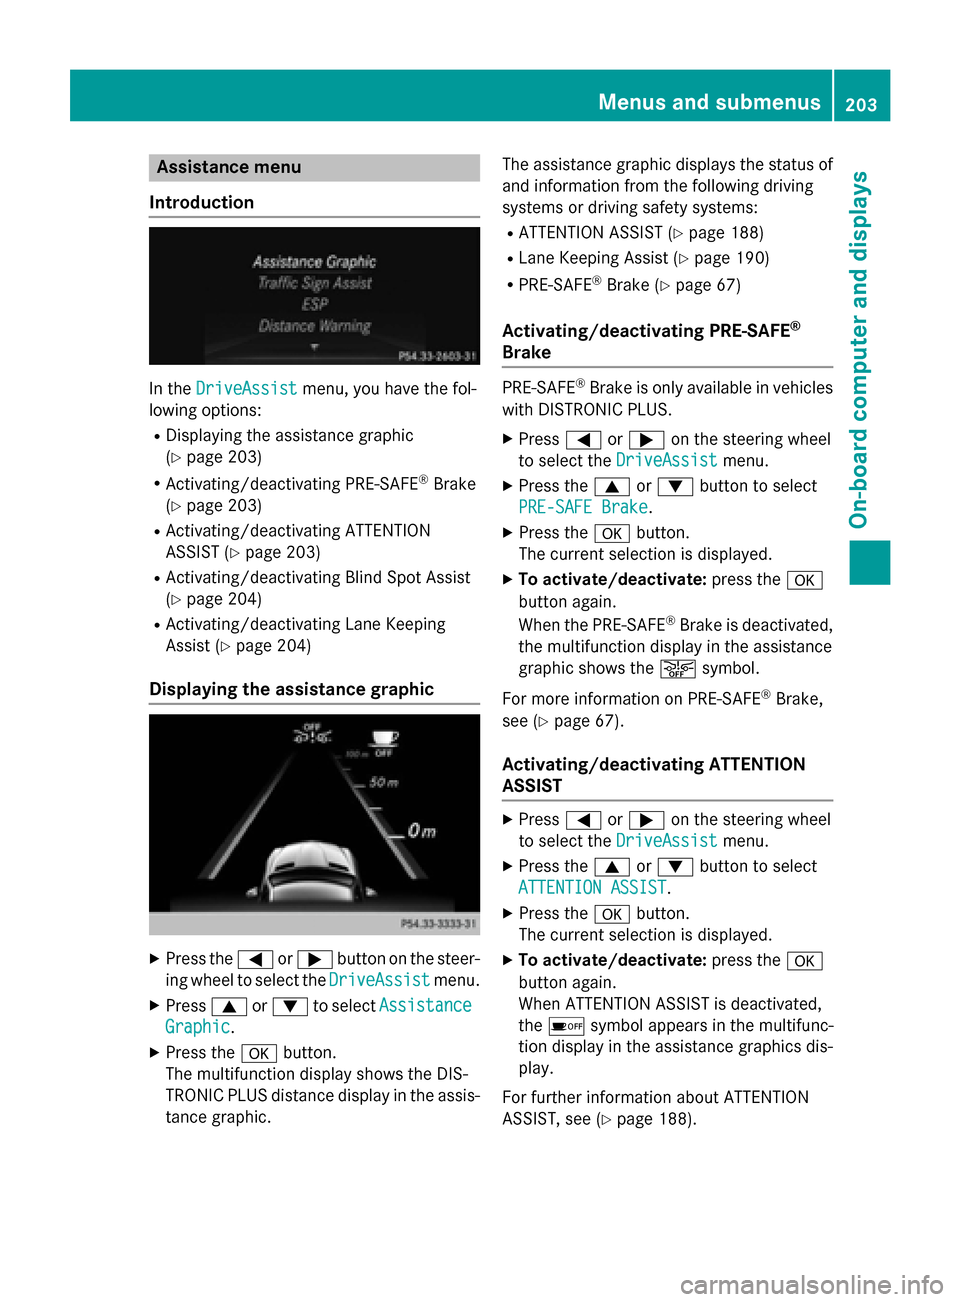
Assistance menu
Introduction In the
DriveAssist
DriveAssist menu, you have the fol-
lowing options:
R Displaying the assistance graphic
(Y page 203)
R Activating/deactivating PRE-SAFE ®
Brake
(Y page 203)
R Activating/deactivating ATTENTION
ASSIST (Y page 203)
R Activating/deactivating Blind Spot Assist
(Y page 204)
R Activating/deactivating Lane Keeping
Assist (Y page 204)
Displaying the assistance graphic X
Press the 0059or0065 button on the steer-
ing wheel to select the DriveAssist DriveAssistmenu.
X Press 0063or0064 to select Assistance
Assistance
Graphic Graphic.
X Press the 0076button.
The multifunction display shows the DIS-
TRONIC PLUS distance display in the assis- tance graphic. The assistance graphic displays the status of
and information from the following driving
systems or driving safety systems:
R ATTENTION ASSIST (Y page 188)
R Lane Keeping Assist (Y page 190)
R PRE-SAFE ®
Brake (Y page 67)
Activating/deactivating PRE-SAFE ®
Brake PRE
‑SAFE ®
Brake is only available in vehicles
with DISTRONIC PLUS.
X Press 0059or0065 on the steering wheel
to select the DriveAssist DriveAssist menu.
X Press the 0063or0064 button to select
PRE-SAFE Brake
PRE-SAFE Brake.
X Press the 0076button.
The current selection is displayed.
X To activate/deactivate: press the0076
button again.
When the PRE-SAFE ®
Brake is deactivated,
the multifunction display in the assistance
graphic shows the 00D4symbol.
For more information on PRE‑SAFE ®
Brake,
see (Y page 67).
Activating/deactivating ATTENTION
ASSIST X
Press 0059or0065 on the steering wheel
to select the DriveAssist DriveAssist menu.
X Press the 0063or0064 button to select
ATTENTION ASSIST
ATTENTION ASSIST .
X Press the 0076button.
The current selection is displayed.
X To activate/deactivate: press the0076
button again.
When ATTENTION ASSIST is deactivated,
the 00D7 symbol appears in the multifunc-
tion display in the assistance graphics dis-
play.
For further information about ATTENTION
ASSIST, see (Y page 188). Menus and sub
menus
203On-board computer and displays Z