2015 MERCEDES-BENZ SLK-Class Ambient
[x] Cancel search: AmbientPage 6 of 358
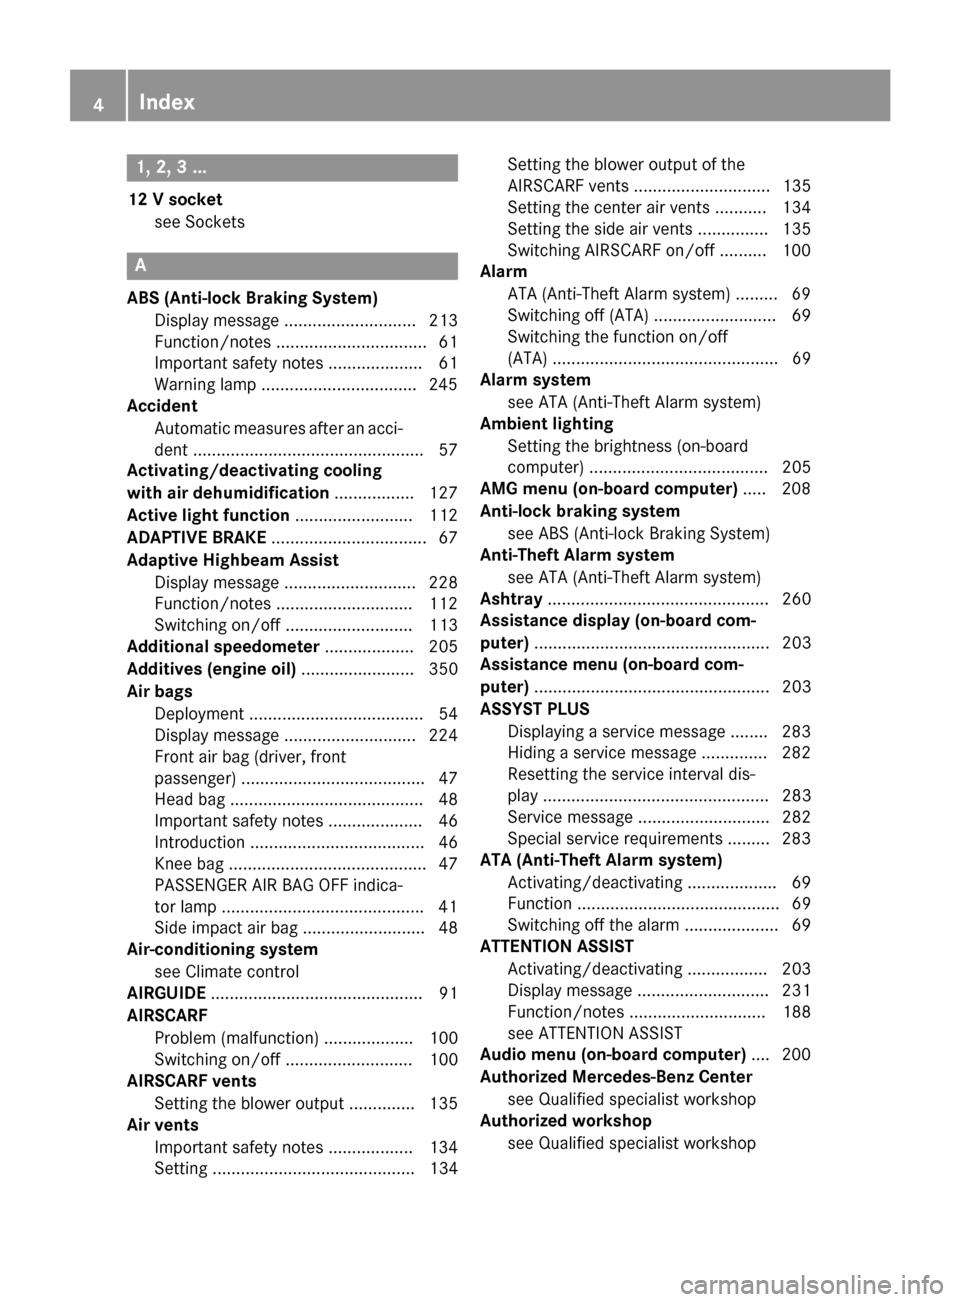
1, 2, 3 ...
12 V socket see Sockets A
ABS (Anti-lock Braking System) Display message ............................ 213
Function/notes ................................ 61
Important safety notes .................... 61
Warning lamp .................................2 45
Accident
Automatic measures after an acci-
dent ................................................. 57
Activating/deactivating cooling
with air dehumidification ................. 127
Active light function ......................... 112
ADAPTIVE BRAKE ................................. 67
Adaptive Highbeam Assist Display message ............................ 228
Function/notes ............................ .112
Switching on/off ........................... 113
Additional speedometer ................... 205
Additives (engine oil) ........................ 350
Air bags Deployment ..................................... 54
Display message ............................ 224
Front air bag (driver, front
passenger) ....................................... 47
Head bag ......................................... 48
Important safety notes .................... 46
Introduction ..................................... 46
Knee bag .......................................... 47
PASSENGER AIR BAG OFF indica-
tor lamp .......................................... .41
Side impact air ba g.......................... 48
Air-conditioning system
see Climate control
AIRGUIDE ............................................. 91
AIRSCARF Problem (malfunction) ................... 100
Switching on/of f........................... 100
AIRSCARF vents
Setting the blower output .............. 135
Air vents
Important safety notes .................. 134
Setting ........................................... 134 Setting the blower output of the
AIRSCARF vents ............................. 135
Setting the center air vents ........... 134
Setting the side air vents ............... 135
Switching AIRSCARF on/of
f.......... 100
Alarm
ATA (Anti-Theft Alarm system )......... 69
Switching off (ATA) .......................... 69
Switching the function on/off
(ATA) ................................................ 69
Alarm system
see ATA (Anti-Theft Alarm system)
Ambient lighting
Setting the brightness (on-board
computer) ...................................... 205
AMG menu (on-board computer) ..... 208
Anti-lock braking system see ABS (Anti-lock Braking System)
Anti-Theft Alarm system
see ATA (Anti-Theft Alarm system)
Ashtray ............................................... 260
Assistance display (on-board com-
puter) .................................................. 203
Assistance menu (on-board com-
puter) .................................................. 203
ASSYST PLUS Displaying a service message ........ 283
Hiding a service message .............. 282
Resetting the service interval dis-
play ................................................ 283
Service message ............................ 282
Special service requirements ......... 283
ATA (Anti-Theft Alarm system)
Activating/deactivating ................... 69
Function ........................................... 69
Switching off the alarm .................... 69
ATTENTION ASSIST
Activating/deactivating ................. 203
Display message ............................ 231
Function/note s............................. 188
see ATTENTION ASSIST
Audio menu (on-board computer) .... 200
Authorized Mercedes-Benz Center see Qualified specialist workshop
Authorized workshop
see Qualified specialist workshop 4
Index
Page 13 of 358

I
Ignition lock see Key positions
Immobilizer .......................................... 69
Indicator lamps see Warning and indicator lamps
Indicators
see Turn signals
Instrument cluster
Overview .......................................... 31
Warning and indicator lamps .......... .32
Instrument cluster lighting .............. 194
Interior lighting Automatic control .......................... 113
Delayed switch-off (on-board
computer) ...................................... 206
Emergency lighting ........................ 114
Manual control .............................. .114
Overview ........................................ 113
Reading lamp ................................. 113
Setting the brightness of the
ambient lighting (on-board com-
puter) ............................................. 205 J
Jack Storage location ............................ 292
Using ............................................. 334
Jump starting (engine) ......................301 K
KEYLESS-GO Convenience closing feature ............ 85
Display message ............................ 242
Locking ............................................ 73
Removing the Start/Stop button ... 141
Start/Stop button .......................... 140
Starting the engine ........................ 142
Unlocking ......................................... 73
Key positions
KEYLESS-GO .................................. 140
SmartKey ....................................... 139
Kickdown
Driving tips ................................... .153
Manual drive program .................... 157 Knee bag
.............................................. 47 L
Lamps see Warning and indicator lamps
Lane Keeping Assist
Activating/deactivating ................. 204
Display message ............................ 232
Function/informatio n.................... 190
Lap time (RACETIMER) ...................... 209
License plate lamp (display mes-
sage) ................................................... 226
Light function, active Display message ............................ 227
Lights
Activating/deactivating the inte-
rior lighting delayed switch-off ....... 206
Active light function ....................... 112
Automatic headlamp mode ............ 109
Cornering light function ................. 111
Driving abroad ............................... 108
Fogged up headlamp s.................... 113
Fog lamps ...................................... 109
Hazard warning lamps ................... 111
High beam flasher .......................... 111
High-beam headlamp s................... 111
Light switch ................................... 108
Low-beam headlamp s.................... 109
Parking lamps ................................ 110
Rear fog lamp ................................ 110
Setting the brightness of the
ambient lighting (on-board com-
puter) ............................................. 205
Standing lamps .............................. 110
Switching the daytime running
lamps on/off (on-board com-
puter) ............................................. 205
Switching the exterior lighting
delayed switch-off on/off (on-
board computer) ............................ 206
Switching the surround lighting
on/off (on-board computer) .......... 206
Turn signals ................................... 110
see Interior lighting
see Replacing bulbs
Light sensor (display message) ....... 228 Index
11
Page 111 of 358
Automatic headlamp mode
G
WARNING
When the light switch is set to 0058, the low-
beam headlamps may not be switched on
automatically if there is fog, snow or other
causes of poor visibility due to the weather
conditions such as spray. There is a risk of an
accident.
In such situations, turn the light switch to
0058.
The automatic headlamp feature is only an
aid. The driver is responsible for the vehicle's lighting at all times.
0058 is the favored light switch setting. The
light setting is automatically selected accord- ing to the brightness of the ambient light
(exception: poor visibility due to weather con-
ditions such as fog, snow or spray):
R SmartKey in position 1in the ignition lock:
the parking lamps are switched on or off
automatically depending on the brightness of the ambient light.
R With the engine running: if you have acti-
vated the daytime running lamps function
via the on-board computer, the daytime
running lamps or the low-beam headlamps
and parking lamps are switched on or off
automatically depending on the brightnessof the ambient light.
X To switch on automatic headlamp
mode: turn the light switch to 0058.
Only for Canada:
The daytime running lamps improve the visi-
bility of your vehicle during the day. The day-
time running lamps function is required by law in Canada. It cannot therefore be deactivated.
When the engine is running and the vehicle is
stationary: if you move the selector lever from
a drive position to P, the daytime running
lamps/low-beam headlamps go out after
three minutes.
When the engine is running, the vehicle is
stationary and in bright ambient light: if you turn the light switch to
0060, the daytime
running lamps and parking lamps switch on.
If the engine is running and you turn the light switch to 0058, the manual settings take
precedence over the daytime running lamps.
USA only:
The daytime running lamps improve the visi-
bility of your vehicle during the day. To do this,
the daytime running lamps function must be
switched on using the on-board computer
(Y page 205).
If the engine is running and you turn the light
switch to 0060or0058, the manual settings
take precedence over the daytime running
lamps.
Low-beam headlamps G
WARNING
When the light switch is set to 0058, the low-
beam headlamps may not be switched on
automatically if there is fog, snow or other
causes of poor visibility due to the weather
conditions such as spray. There is a risk of an
accident.
In such situations, turn the light switch to
0058.
Even if the light sensor does not detect that it is dark, the parking lamps and low-beam
headlamps switch on when the ignition is
switched on and the light switch is set to the 0058 position. This is a particularly useful
function in the event of rain and fog.
X To switch on the low-beam headlamps:
turn the SmartKey in the ignition lock to
position 2or start the engine.
X Turn the light switch to 0058.
The green 0058indicator lamp in the instru-
ment cluster lights up.
Front fog lamps
In conditions where visibility is poor due to
fog, snow or rain, the fog lamps improve vis-
ibility as well as making it easier for other road
users to see you. They can be operated
together with the parking lamps or together Exterior lighting
109Lights and windshield wipers Z
Page 115 of 358
Switching Adaptive Highbeam Assist
on/off X
To switch on: turn the light switch to 0058.
X Press the combination switch beyond the
pressure point in the direction of arrow 0043.
The 00CE indicator lamp in the multifunc-
tion display lights up when it is dark and the light sensor activates the low-beam head-
lamps.
If you are driving at speeds above approx-
imately 16 mph (25 km/h):
The headlamp range is set automatically
depending on the distance between the
vehicle and other road users.
If you are driving at speeds above approx-
imately 19 mph (30 km/h) and no other
road users have been detected:
The high-beam headlamps are switched on
automatically. The 0057indicator lamp in
the instrument cluster also lights up.
If you are driving at speeds below approx-
imately 16 mph (25 km/h) or other road
users have been detected or the roads are adequately lit:
The high-beam headlamps are switched off
automatically. The 0057indicator lamp in
the instrument cluster goes out. The 00CE
indicator lamp in the multifunction display
remains lit.
X To switch off: move the combination
switch back to its normal position or move
the light switch to another position.
The 00CE indicator lamp in the multifunc-
tion display goes out. Headlamps fogged up on the inside
Certain climatic and physical conditions may
cause moisture to form in the headlamp. This moisture does not affect the functionality of
the headlamp. Interior lighting
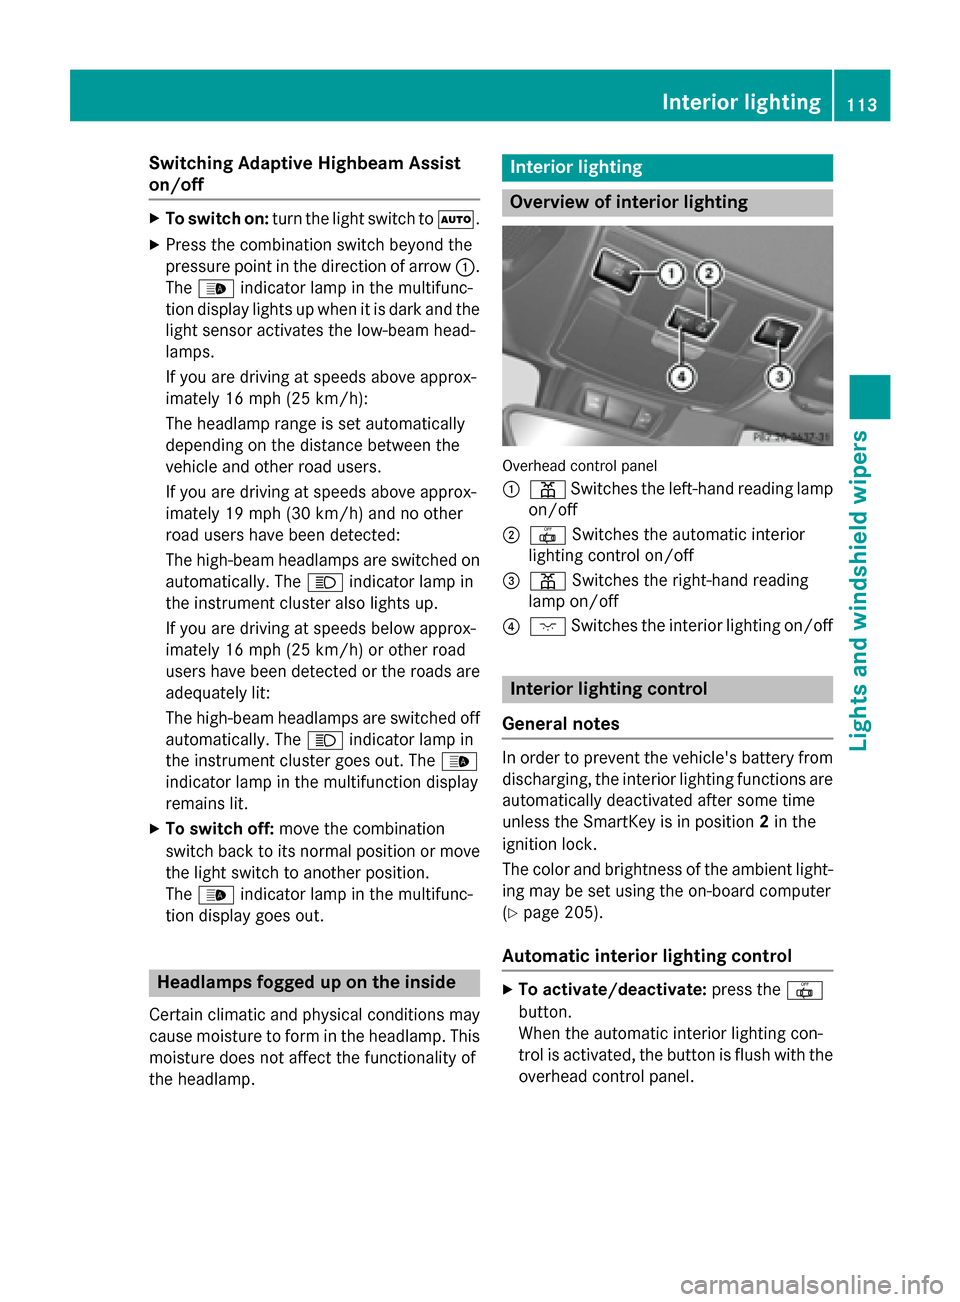
Overview of interior lighting
Overhead control panel
0043
003D Switches the left-hand reading lamp
on/off
0044 0033 Switches the automatic interior
lighting control on/off
0087 003D Switches the right-hand reading
lamp on/off
0085 004A Switches the interior lighting on/off Interior lighting control
General notes In order to prevent the vehicle's battery from
discharging, the interior lighting functions are
automatically deactivated after some time
unless the SmartKey is in position 2in the
ignition lock.
The color and brightness of the ambient light-
ing may be set using the on-board computer
(Y page 205).
Automatic interior lighting control X
To activate/deactivate: press the0033
button.
When the automatic interior lighting con-
trol is activated, the button is flush with the overhead control panel. Interior lighting
113Lights and windshield wipers Z
Page 170 of 358
Mercedes-Benz recommends that you only
have brake pads/linings installed on your
vehicle which have been approved for
Mercedes-Benz vehicles or which correspond to an equivalent quality standard. Brake
pads/linings which have not been approved
for Mercedes-Benz vehicles or which are not
of an equivalent quality could affect your vehi-
cle's operating safety.
Mercedes-Benz recommends that you only
use brake fluid that has been specially
approved for your vehicle by Mercedes-Benz,
or which corresponds to an equivalent quality standard. Brake fluid which has not been
approved for Mercedes-Benz vehicles or
which is not of an equivalent quality could
affect your vehicle's operating safety.
High performance and ceramic brake
system for AMG vehicles The high-performance brake system is only
available on AMG vehicles.
The AMG brake systems are designed for
heavy loads. This may lead to noise when
braking. This will depend on:
R speed
R braking force
R ambient conditions, e.g. temperature and
humidity
The wear of individual components of the
brake system, such as the brake pads/linings or brake discs, depends on the individual driv-
ing style and operating conditions.
For this reason, it is impossible to state a
mileage that will be valid under all circum-
stances. An aggressive driving style will lead
to high wear. You can obtain more informa-
tion on this from a qualified specialist work-
shop.
New and replaced brake pads and discs only
reach their optimum braking effect after sev-
eral hundred kilometers of driving. Compen-
sate for this by applying greater force to the
brake pedal. Keep this in mind, and adapt your driving and braking accordingly during
this break-in period.
Excessive heavy braking results in corre-
spondingly high brake wear. Observe the
brake system warning lamp in the instrument
cluster and note any brake status messages
in the multifunction display. Especially for
high performance driving, it is important to
maintain and have the brake system checked regularly. Driving on wet roads
Hydroplaning If water has accumulated to a certain depth
on the road surface, there is a danger of
hydroplaning occurring, even if:
R
you drive at low speeds.
R the tires have adequate tread depth.
For this reason, in the event of heavy rain or in
conditions in which hydroplaning may occur,
you must drive in the following manner:
R lower your speed.
R avoid ruts.
R avoid sudden steering movements.
R brake carefully.
Driving on flooded roads !
Do not drive through flooded areas.
Check the depth of any water before driving
through it. Drive slowly through standing
water. Otherwise, water may enter the
vehicle interior or the engine compartment.
This can damage the electronic compo-
nents in the engine or the automatic trans- mission. Water can also be drawn in by the engine's air suction nozzles and this can
cause engine damage. 168
Driving tipsDriving and parking
Page 192 of 358

The two radar sensors for Blind Spot Assist
are integrated into the sides of the rear
bumper. Make sure that the bumper is free of dirt, ice or slush in the vicinity of the sensors.
The sensors must not be covered, for exam-
ple by cycle racks or overhanging loads. Fol-
lowing a severe impact or in the event of dam- age to the bumpers, have the function of the
sensors checked at a qualified specialist
workshop. Blind Spot Assist may otherwise
not work properly.
Indicator and warning display 0043
Yellow indicator lamp/red warning lamp
When Blind Spot Assist is activated, indicator
lamp 0043in the exterior mirrors lights up yel-
low at speeds of up to 20 mph (30 km/h) . At
speeds above 20 mph (30 km/h), the indica-
tor lamp goes out and Blind Spot Assist is
operational.
If a vehicle is detected within the blind spot
monitoring range at speeds above 20 mph
(30 km/h), warning lamp 0043on the corre-
sponding side lights up red. This warning is
always emitted when a vehicle enters the
blind spot monitoring range from behind or
from the side. When you overtake a vehicle,
the warning only occurs if the difference in
speed is less than 7 mph (12 km/h).
The yellow indicator lamp goes out if reverse gear is engaged. In this event, Blind Spot
Assist is no longer active.
The brightness of the indicator/warning
lamps is adjusted automatically according to
the ambient light. Collision warning
If a vehicle is detected in the monitoring range
of Blind Spot Assist and you switch on the
corresponding turn signal, a double warning
tone sounds. Red warning lamp 0043flashes. If
the turn signal remains on, vehicles detected
are indicated by the flashing of red warning
lamp 0043. There are no further warning tones.
Switching on Blind Spot Assist
X Make sure that the radar sensor system
(Y page 207) and Blind Spot Assist
(Y page 204 )are activated in the on-board
computer.
X Turn the SmartKey to position 2in the igni-
tion lock.
Warning lamps 0043in the exterior mirrors
light up red for approximately 1.5 seconds
and then turn yellow.
Lane Keeping Assist General notes
Lane Keeping Assist monitors the area in
front of your vehicle with camera
0043, which is
mounted at the top of the windshield. Lane
Keeping Assist detects lane markings on the
road and warns you before you leave your
lane unintentionally.
If you select km kmon the on-board computer in
the Display Unit Speed-/Odometer
Display Unit Speed-/Odometer func-
tion (Y page 204), Lane Keeping Assist is
active starting at a speed of 60 km/h. If the
miles
miles display unit is selected, the assistance
range begins at 40 mph. 190
Driving systemsDriving and parking
Page 196 of 358
Useful information
i This Operator's manual describes all
models and all standard and optional equip- ment of your vehicle available at the time of
publication of the Operator's manual.
Country-specific differences are possible.
Please note that your vehicle may not be
equipped with all features described. This
also applies to safety-related systems and
functions.
i Read the information on qualified special-
ist workshops (Y page 26). Important safety notes
G
WARNING
If you operate information systems and com-
munication equipment integrated in the vehi- cle while driving, you will be distracted from
traffic conditions. You could also lose control of the vehicle. There is a risk of an accident.
Only operate the equipment when the traffic
situation permits. If you are not sure that this
is possible, park the vehicle paying attention
to traffic conditions and operate the equip-
ment when the vehicle is stationary.
You must observe the legal requirements for
the country in which you are currently driving when operating the on-board computer. G
WARNING
If the instrument cluster has failed or mal-
functioned, you may not recognize function
restrictions in systems relevant to safety. The operating safety of your vehicle may be
impaired. There is a risk of an accident.
Drive on carefully. Have the vehicle checked
at a qualified specialist workshop immedi-
ately.
The on-board computer only shows messages
or warnings from certain systems in the mul- tifunction display. You should therefore make
sure your vehicle is operating safely at all times. Otherwise, a vehicle that is not oper-
ating safely may cause an accident.
If the operating safety of your vehicle is
impaired, pull over as soon as it is safe to do
so. Contact a qualified specialist workshop.
For an overview, see the instrument panel
illustration (Y
page 31). Displays and operation
Instrument cluster lighting
The lighting in the instrument cluster, in the
displays and the controls in the vehicle inte-
rior can be adjusted using the brightness con-
trol knob.
The brightness control knob is on the bottom left of the instrument cluster (Y page 31).
X Turn the brightness control knob counter-
clockwise or clockwise.
If the light switch is set to 0058,0060or
0058, the brightness is dependent upon
the brightness of the ambient light.
i The light sensor in the instrument cluster
automatically controls the brightness of
the multifunction display.
In daylight, the displays in the instrument
cluster are not lit. Coolant temperature display
G
WARNING
Opening the hood when the engine is over-
heated or when there is a fire in the engine
compartment could expose you to hot gases
or other service products. There is a risk of
injury.
Let an overheated engine cool down before
opening the hood. If there is a fire in the
engine compartment, keep the hood closed
and contact the fire department.
! A display message is shown if the coolant
temperature is too high. 194
Displays and operationOn-board computer and displays
Page 207 of 358
X
Press the 0064or0063 button to select the
Display Unit Speed-/Odometer
Display Unit Speed-/Odometer func-
tion.
You will see the selected setting: km
km or
miles
miles.
X Press the 0076button to save the setting.
The selected unit of measurement for dis-
tance applies to:
R Digital speedometer in the Trip
Trip menu
R Odometer and the trip odometer
R Trip computer
R Current consumption and the range
R Navigation instructions in the Navi Navimenu
R Cruise control
R DISTRONIC PLUS
R ASSYST PLUS service interval display
Switching the additional speedometer
on/off
Only vehicles with manual transmission have this function.
X Press the 0059or0065 button on the steer-
ing wheel to select the Sett
Sett menu.
X Press the 0064or0063 button to select the
Instrument Cluster
Instrument Cluster submenu.
X Press 0076to confirm.
X Press the 0064or0063 button to select the
Additional Speedometer [mph] Additional Speedometer [mph] func-
tion.
You will see the selected setting: On
On orOff Off.
X Press the 0076button to save the setting.
i Speed is displayed in mph.
The Additional
Additional Speedometer
Speedometer [mph]
[mph]func-
tion allows you to choose whether the status area in the multifunction display always
shows the speed in mph
mph instead of the outside
temperature. Selecting the permanent display function
You can determine whether the multifunction
display permanently shows your speed or the
outside temperature.
X Press the 0059or0065 button on the steer-
ing wheel to select the Sett Settmenu.
X Press the 0064or0063 button to select the
Instrument Cluster Instrument Cluster submenu.
X Press 0076to confirm.
X Press the 0064or0063 button to select the
Permanent Display
Permanent Display function.
You will see the selected setting Outside
Outside
Temperature
Temperature orAdditional Speedome‐
Additional Speedome‐
ter [km/h]
ter [km/h] /AdditionalAdditional Speedometer
Speedometer
[mph]
[mph].
X Press the 0076button to save the setting.
i The speed is highlighted in km/h or in
mph conversely to your speedometer.
Lights Setting the daytime running lamps
i This function is not available in Canada.
X Press the 0059or0065 button on the steer-
ing wheel to select the Sett
Settmenu.
X Press the 0064or0063 button to select the
Light
Light submenu.
X Press 0076to confirm.
X Press the 0064or0063 button to select the
Daytime Running Lights
Daytime Running Lights function.
If the Daytime Running Lights
Daytime Running Lights function
has been switched on, the cone of light and
the 0086 symbol in the multifunction dis-
play are shown in orange.
X Press the 0076button to save the setting.
Further information on daytime running
lamps (Y page 109).
Setting the brightness of the ambient
lighting
X Press the 0059or0065 button on the steer-
ing wheel to select the Sett
Sett menu.
X Press the 0064or0063 button to select the
Light Light submenu. Menus and submenus
205On-board computer and displays Z