2015 MERCEDES-BENZ SLK-Class tire type
[x] Cancel search: tire typePage 19 of 358

Technical data
Capacities ...................................... 347
Emergency spare wheel ................. 344
Information .................................... 346
Tires/wheels ................................. 337
Vehicle data ................................... 353
TELEAID
Call priority .................................... 265
Downloading destinations
(COMAND) ..................................... 266
Downloading routes ....................... 269
Emergency call .............................. 263
General notes ................................ 261
Geo fencing ................................... 269
Locating a stolen vehicle ............... 268
MB info call button ....................... .265
Remote vehicle locking .................. 267
Roadside Assistance button .......... 264
Search & Send ............................... 266
Self-test ......................................... 262
Speed alert ................................... .269
System .......................................... 262
Triggering the vehicle alarm ........... 270
Vehicle remote malfunction diag-
nosis .............................................. 268
Vehicle remote unlocking .............. 267
Telephone
Accepting a call ............................ .202
Display message ............................ 241
Menu (on-board computer) ............ 201
Number from the phone book ....... .202
Redialing ........................................ 202
Rejecting/ending a call ................. 202
Temperature
Coolant .......................................... 194
Coolant (on-board computer) ......... 208
Engine oil (on-board computer) ...... 208
Outside temperature ..................... .195
Setting (climate control) ................ 129
Time
see separate operating instructions
Timing (RACETIMER) ......................... 209
TIREFIT kit .......................................... 294
Tire pressure Calling up (on-board computer) ..... 318
Checking manually ........................ 317
Display message ............................ 236 Important safety notes .................. 318
Maximum ....................................... 316
Notes ............................................. 315
Not reached (TIREFIT) .................... 295
Reached (TIREFIT) .......................... 296
Recommended ............................... 314
Tire pressure loss warning sys-
tem
General notes ................................ 317
Important safety notes .................. 317
Restarting ...................................... 318
Tire pressure monitor
Radio type approval for the tire
pressure monitor ........................... 321
Tire pressure monitoring system
Checking the tire pressure elec-
tronically ........................................ 320
Function/notes ............................ .318
General notes ................................ 318
Important safety notes .................. 319
Restarting ...................................... 321
Warning lamp ................................. 254
Warning message .......................... 320
Tires
Aspect ratio (definition) ................. 331
Average weight of the vehicle
occupants (definition) .................... 330
Bar (definition) ............................... 330
Changing a wheel .......................... 332
Characteristics .............................. 329
Checking ........................................ 311
Curb weight (definition) ................. 331
Definition of terms ......................... 329
Direction of rotatio n...................... 332
Display message ............................ 236
Distribution of the vehicle occu-
pants (definition) ............................ 332
DOT, Tire Identification Number
(TIN) ............................................... 329
DOT (Department of Transporta-
tion) (definition) ............................. 330
GAWR (Gross Axle Weight Rating)
(definition) ..................................... 330
GVW (Gross Vehicle Weight) (def-
inition) ........................................... 330
GVWR (Gross Vehicle Weight Rat-
ing) (definition) .............................. 330
Important safety notes .................. 310 Index
17
Page 21 of 358

Trunk partition
Display message ............................ 241
General notes .................................. 89
Opening/closing .............................. 90
Turn signals
Changing bulbs (front) ................... 116
Display message ............................ 225
Switching on/off ........................... 110
Type identification plate
see Vehicle identification plate U
Unlocking Emergency unlocking ....................... 80
From inside the vehicle (central
unlocking button) ............................. 79 V
Vanity mirror (in the sun visor) ........ 260
Vehicle Correct use ...................................... 26
Data acquisition ............................... 27
Display message ............................ 238
Equipment ....................................... 22
Individual settings .......................... 204
Limited Warranty ............................. 27
Loading .......................................... 322
Locking (in an emergency) ............... 80
Locking (SmartKey) .......................... 72
Lowering ........................................ 336
Maintenance .................................... 23
Parking for a long period ................ 164
Pulling away ................................... 142
Raising ........................................... 334
Reporting problems ......................... 26
Securing from rolling away ............ 333
Towing away .................................. 303
Tow-starting ................................... 303
Transporting .................................. 305
Unlocking (in an emergency) ........... 80
Unlocking (SmartKey) ...................... 72
Vehicle data ................................... 353
Vehicle battery
see Battery (vehicle)
Vehicle data ....................................... 353
Vehicle dimensions ........................... 353 Vehicle emergency locking
................ 80
Vehicle identification number see VIN
Vehicle identification plate .............. 346
Vehicle tool kit .................................. 292
Video Operating the DVD ........................ .201
VIN ...................................................... 346 W
Warning and indicator lamps ABS ................................................ 245
Brakes .......................................... .245
Check Engine ................................. 251
Coolant .......................................... 251
Distance warning ........................... 253
DISTRONIC PLUS ........................... 253
ESP ®
.............................................. 247
ESP ®
OFF ....................................... 248
Overview .......................................... 32
PASSENGER AIR BAG OFF .............. .41
Reserve fuel .................................. .251
Restraint system ............................ 250
Seat belt ........................................ 244
SPORT handling mode ................... 248
Tire pressure monitor .................... 254
Warranty .............................................. 22
Washer fluid Display message ............................ 242
Wheel and tire combination
see Tires
Wheel bolt tightening torque ........... 336
Wheel chock ...................................... 333
Wheels Changing a wheel .......................... 332
Checking ........................................ 311
Cleaning ......................................... 286
Cleaning (warning) ......................... 333
Emergency spare wheel ................. 341
Important safety notes .................. 310
Interchanging/changing ................ 332
Mounting a new wheel ................... 336
Mounting a wheel .......................... 333
Overview ........................................ 310
Removing a wheel .......................... 335
Storing .......................................... .332 Index
19
Page 66 of 358
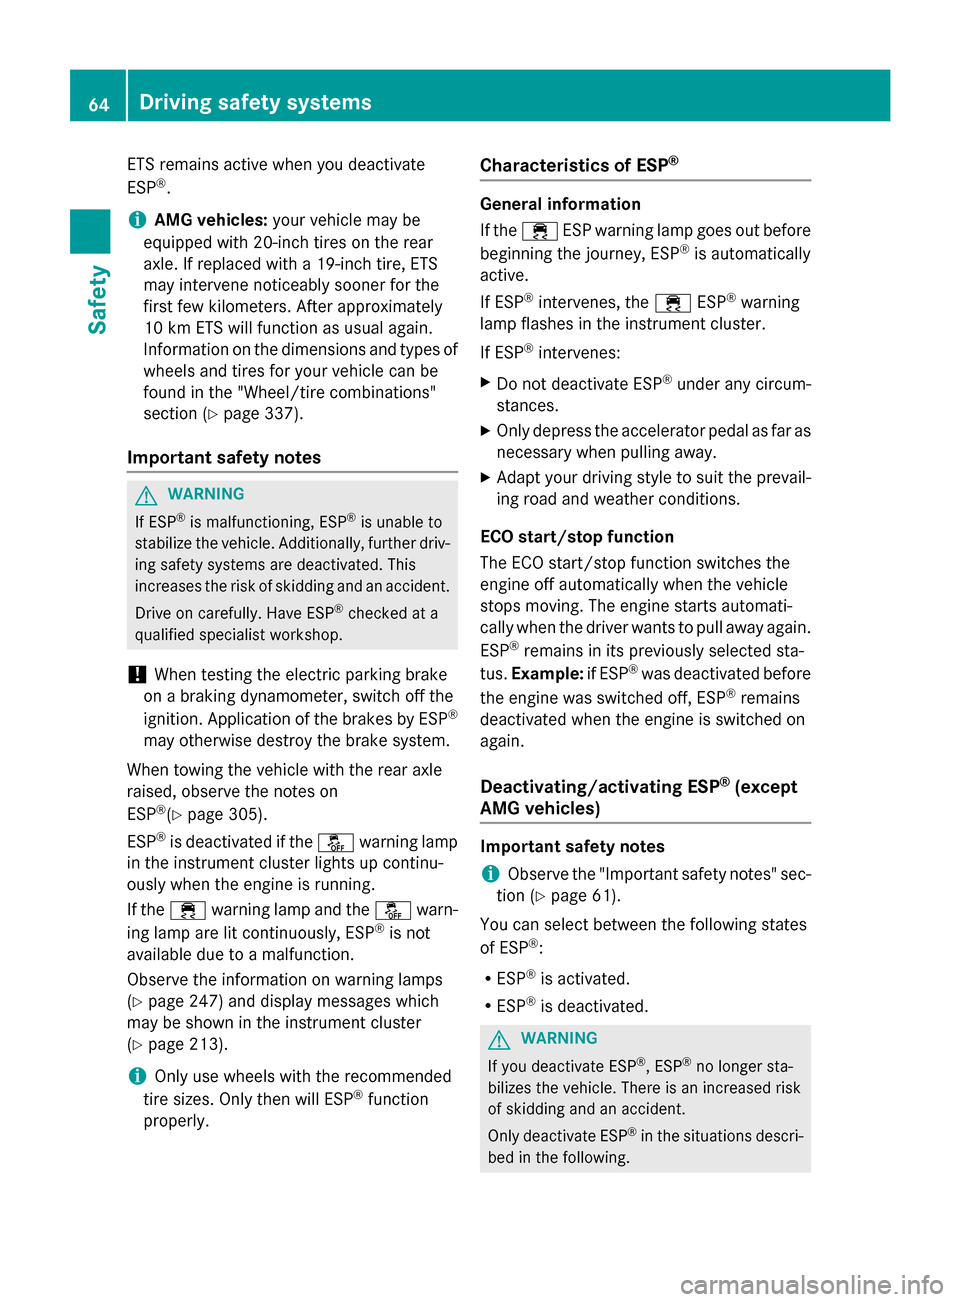
ETS remains active when you deactivate
ESP ®
.
i AMG vehicles:
your vehicle may be
equipped with 20-inch tires on the rear
axle. If replaced with a 19-inch tire, ETS
may intervene noticeably sooner for the
first few kilometers. After approximately
10 km ETS will function as usual again.
Information on the dimensions and types of
wheels and tires for your vehicle can be
found in the "Wheel/tire combinations"
section (Y page 337).
Important safety notes G
WARNING
If ESP ®
is malfunctioning, ESP ®
is unable to
stabilize the vehicle. Additionally, further driv- ing safety systems are deactivated. This
increases the risk of skidding and an accident.
Drive on carefully. Have ESP ®
checked at a
qualified specialist workshop.
! When testing the electric parking brake
on a braking dynamometer, switch off the
ignition. Application of the brakes by ESP ®
may otherwise destroy the brake system.
When towing the vehicle with the rear axle
raised, observe the notes on
ESP ®
(Y page 305).
ESP ®
is deactivated if the 00BBwarning lamp
in the instrument cluster lights up continu-
ously when the engine is running.
If the 00E5 warning lamp and the 00BBwarn-
ing lamp are lit continuously, ESP ®
is not
available due to a malfunction.
Observe the information on warning lamps
(Y page 247) and display messages which
may be shown in the instrument cluster
(Y page 213).
i Only use wheels with the recommended
tire sizes. Only then will ESP ®
function
properly. Characteristics of ESP
® General information
If the 00E5 ESP warning lamp goes out before
beginning the journey, ESP ®
is automatically
active.
If ESP ®
intervenes, the 00E5ESP®
warning
lamp flashes in the instrument cluster.
If ESP ®
intervenes:
X Do not deactivate ESP ®
under any circum-
stances.
X Only depress the accelerator pedal as far as
necessary when pulling away.
X Adapt your driving style to suit the prevail-
ing road and weather conditions.
ECO start/stop function
The ECO start/stop function switches the
engine off automatically when the vehicle
stops moving. The engine starts automati-
cally when the driver wants to pull away again.
ESP ®
remains in its previously selected sta-
tus. Example: if ESP®
was deactivated before
the engine was switched off, ESP ®
remains
deactivated when the engine is switched on
again.
Deactivating/activating ESP ®
(except
AMG vehicles) Important safety notes
i Observe the "Important safety notes" sec-
tion (Y page 61).
You can select between the following states
of ESP ®
:
R ESP ®
is activated.
R ESP ®
is deactivated. G
WARNING
If you deactivate ESP ®
, ESP ®
no longer sta-
bilizes the vehicle. There is an increased risk
of skidding and an accident.
Only deactivate ESP ®
in the situations descri-
bed in the following. 64
Driving safety systemsSafety
Page 161 of 358
and, if applicable, the auxiliary heating before
refueling. G
WARNING
Fuel is poisonous and hazardous to health.
There is a risk of injury.
You must make sure that fuel does not come into contact with your skin, eyes or clothing
and that it is not swallowed. Do not inhale fuel
vapors. Keep fuel away from children.
If you or others come into contact with fuel,
observe the following:
R Wash away fuel from skin immediately
using soap and water.
R If fuel comes into contact with your eyes,
immediately rinse them thoroughly with
clean water. Seek medical assistance with-
out delay.
R If fuel is swallowed, seek medical assis-
tance without delay. Do not induce vomit-
ing.
R Immediately change out of clothing which
has come into contact with fuel. G
WARNING
Electrostatic buildup can create sparks and
ignite fuel vapors. There is a risk of fire and
explosion.
Always touch the vehicle body before opening the fuel filler flap or touching the fuel pump
nozzle. Any existing electrostatic buildup is
thereby discharged.
! Do not use diesel to refuel vehicles with a
gasoline engine. Do not switch on the igni- tion if you accidentally refuel with the
wrong fuel. Otherwise, the fuel will enter
the fuel system. Even small amounts of the
wrong fuel could result in damage to the
fuel system and the engine. Notify a quali-
fied specialist workshop and have the fuel
tank and fuel lines drained completely.
! Overfilling the fuel tank could damage the
fuel system. !
Take care not to spill any fuel on painted
surfaces. You could otherwise damage the paintwork.
! Use a filter when refueling from a fuel can.
Otherwise, the fuel lines and/or injection
system could be blocked by particles from
the fuel can.
Do not get into the vehicle again during the
refueling process. Otherwise, electrostatic
charge could build up again.
If you overfill the fuel tank, fuel could spray
out when the fuel pump nozzle is removed.
For further information on fuel and fuel quality
(Y page 348). Refueling
General information The fuel filler flap is unlocked or locked auto-
matically when you open or close the vehicle
with the SmartKey or with KEYLESS-GO.
The position of the fuel filler cap is displayed
00B6 in the instrument cluster. The arrow
next to the filling pump indicates the side of
the vehicle.
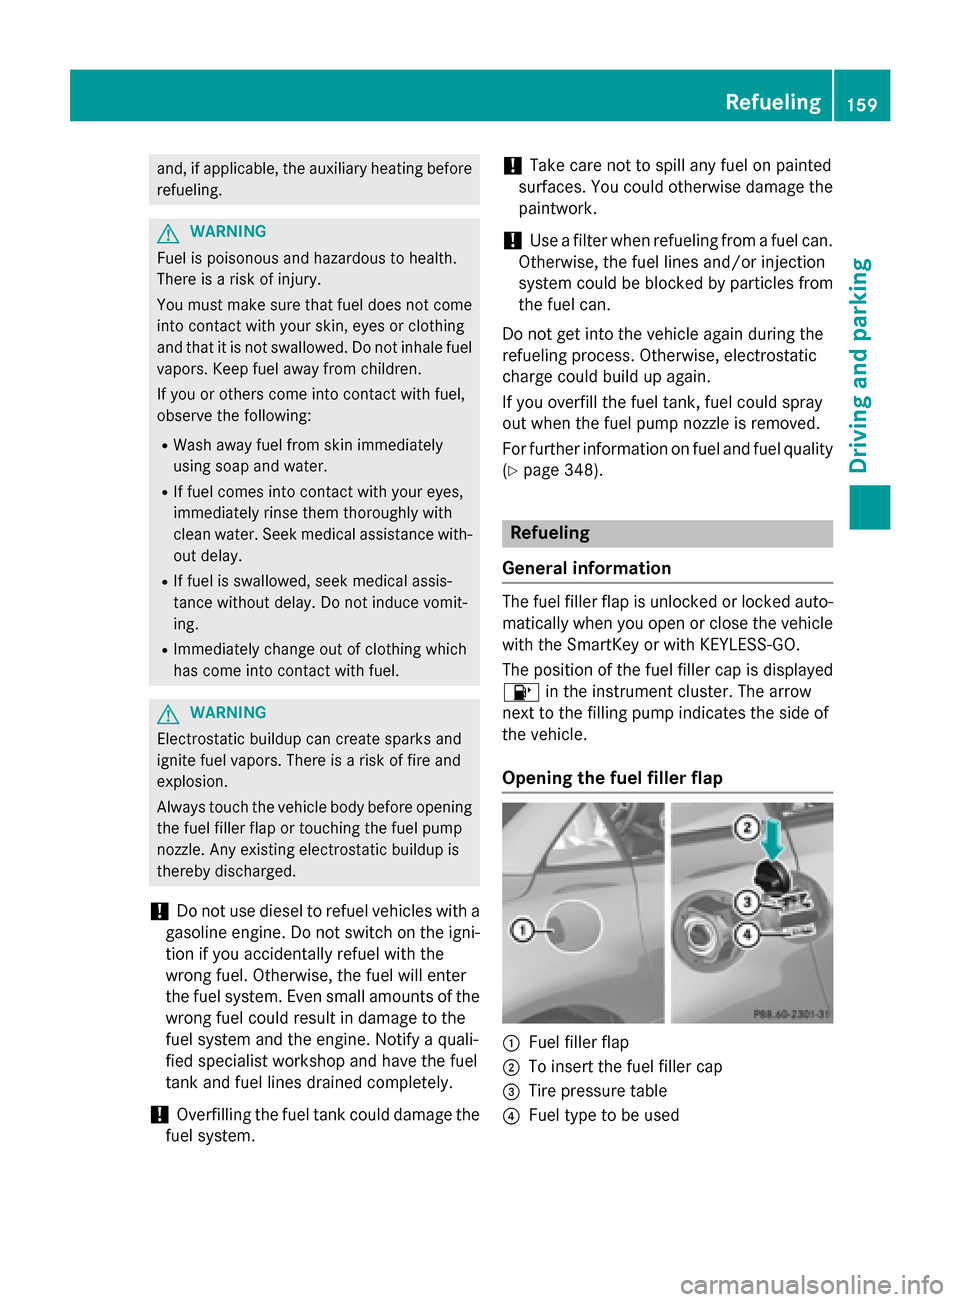
Opening the fuel filler flap 0043
Fuel filler flap
0044 To insert the fuel filler cap
0087 Tire pressure table
0085 Fuel type to be used Refueling
159Driving and parking Z
Page 168 of 358
in the ECO display does not indicate a fixed
consumption.
Apart from driving style, consumption is
dependent on many factors such as, e.g.:
R load
R tire pressure
R cold start
R choice of route
R electrical consumers switched on
These factors are not included in the ECO dis-
play.
The evaluation of your driving style is carried
out using the following three categories:
R Acceleration
Acceleration (evaluation of all accelera-
tion processes):
- The bar fills up: moderate acceleration,
especially at higher speeds
- The bar empties: sporty acceleration
R Constant
Constant (assessment of driving behavior
at all times):
- The bar fills up: constant speed and
avoidance of unnecessary acceleration
and deceleration
- The bar empties: fluctuations in speed
R Coasting Coasting (assessment of all deceleration
processes):
- The bar fills up: anticipatory driving,
keeping your distance and early release
of the accelerator. The vehicle can coast
without use of the brakes.
- The bar empties: frequent braking
i An economical driving style specially
requires driving at moderate engine
speeds.
To achieve a higher value in the categories
Acceleration
Acceleration andConstant Constant :
R observe the gearshift recommendations.
R drive in drive program E(vehicles with an
automatic transmission).
i On long journeys at a constant speed, e.g.
on the highway, only the bar for Constant
Constant
will change. i
The ECO display summarizes the driving
characteristics from the start of the journey
to its completion. For this reason, the bars change dynamically at the beginning of the
journey. On longer journeys, there are
fewer changes. For more dynamic changes, carry out a manual reset.
For further information on the ECO display,
see (Y page 198). Brakes
Important safety notes G
WARNING
If you shift down on a slippery road surface in an attempt to increase the engine's braking
effect, the drive wheels could lose their grip.
There is an increased danger of skidding and
accidents.
Do not shift down for additional engine brak-
ing on a slippery road surface.
Downhill gradients !
On long, steep gradients, you must
reduce the load on the brakes. To use
engine braking, shift to a lower gear in good time. This helps you to avoid overheating
the brakes and wearing them out exces-
sively.
When making use of the engine braking
effect, it is possible that a drive wheel may
not turn for some time, e.g. in the case of
suddenly changing or slippery road surface conditions. This could cause damage to the
drive train. This type of damage is not cov- ered by the Mercedes-Benz warranty.
Change into a lower gear in good time on long
and steep downhill gradients. This is espe-
cially important if the vehicle is laden. 166
Driving tipsDriving and parking
Page 291 of 358
X
Wipe the wooden trim and trim pieces with
a damp, lint-free cloth, e.g. a microfiber
cloth.
X Heavy soiling: use car care and cleaning
products recommended and approved by
Mercedes-Benz.
Cleaning the seat covers General notes
! Do not use microfiber cloths to clean gen-
uine leather, artificial leather or DINAMICA
covers. If used often, these can damage the cover.
i Note that regular care is essential to
ensure that the appearance and comfort of the covers is retained over time.
Genuine leather seat covers
! To retain the natural appearance of the
leather, observe the following cleaning
instructions:
R Clean genuine leather covers carefully
with a damp cloth and then wipe the cov- ers down with a dry cloth.
R Make sure that the leather does not
become soaked. It may otherwise
become rough and cracked.
R Only use leather care agents that have
been tested and approved by Mercedes-
Benz. You can obtain these from a quali- fied specialist workshop.
Leather is a natural product.
It exhibits natural surface characteristics, for
example:
R differences in the texture
R marks caused by growth and injury
R slight nuances of color
These are characteristics of leather and not
material defects. Seat covers of other materials
! Observe the following when cleaning:
R Clean artificial leather covers with a cloth
moistened with a solution containing 1% detergent (e.g. dish washing liquid).
R Clean cloth covers with a microfiber
cloth moistened with a solution contain-
ing 1% detergent (e.g. dish washing liq-
uid). Rub carefully and always wipe entire
seat sections to avoid leaving visible
lines. Leave the seat to dry afterwards.
Cleaning results depend on the type of
dirt and how long it has been there.
R Clean Alcantara® covers with a damp
cloth. Make sure that you wipe entire
seat sections to avoid leaving visible
lines.
Cleaning the seat belts G
WARNING
Seat belts can become severely weakened if
bleached or dyed. This could cause the seat
belts to tear or fail, for instance, in the event of an accident. This poses an increased risk of
injury or fatal injury.
Never bleach or dye the seat belts.
! Do not clean the seat belts using chemical
cleaning agents. Do not dry the seat belts
by heating at temperatures above 176 ‡
(80 †) or in direct sunlight.
X Use clean, lukewarm water and soap solu-
tion.
Cleaning the headliner and carpets X
Headliner: if it is very dirty, use a soft brush
or dry shampoo.
X Carpets: use the carpet and textile clean-
ing agents recommended and approved by
Mercedes-Benz. Care
289Maintenance and care Z
Page 295 of 358
X
If possible, bring the front wheels into the
straight-ahead position.
X Switch off the engine.
X Vehicles without KEYLESS-GO: remove
the SmartKey from the ignition lock.
X Vehicles with KEYLESS-GO: open the
driver's door.
The on-board electronics now have status
0. This is the same as the SmartKey having
been removed.
X Vehicles with KEYLESS-GO: remove the
Start/Stop button from the ignition lock
(Y page 140).
X All occupants must get out of the vehicle.
Make sure that they are not endangered as they do so.
X Make sure that no one is near the danger
area while a wheel is being changed. Any-
one who is not directly assisting in the
wheel change should, for example, stand
behind the barrier.
X Get out of the vehicle. Pay attention to traf-
fic conditions when doing so.
X Close the driver's door. MOExtended tires (tires with run-flat
properties)
General notes With MOExtended tires (tires with run flat
characteristics), you can continue to drive
your vehicle even if there is a total loss of
pressure in one or more tires. The affected
tire must not show any clearly visible damage.
You can recognize MOExtended tires by the
MOExtended marking which appears on the
sidewall of the tire. You will find this marking next to the tire size designation, the load-
bearing capacity and the speed index
(Y page 326).
MOExtended tires may only be used in con-
junction with an active tire pressure loss
warning system or with an active tire pressure
monitor. If the pressure loss warning message
appears in the multifunction display:
R Observe the instructions in the display
messages (Y page 236).
R Check the tire for damage.
R If driving on, observe the following notes.
The maximum driving distance is approx-
imately 50 miles (80 km) when the vehicle is
partially laden and approximately 18 miles
(30 km) when the vehicle is fully laden.
In addition to the vehicle load, the driving dis- tance possible depends upon:
R Speed
R Road condition
R Outside temperature
The driving distance possible in run-flat mode may be reduced by extreme driving condi-
tions/maneuvers, or it can be increased
through a moderate style of driving.
The maximum permissible distance which
can be driven in run-flat mode is counted fromthe moment the tire pressure loss warning
appears in the multifunction display.
You must not exceed a maximum speed of
50 mph (80 km/h).
i When replacing one or all tires, make sure
that you use only tires:
R of the size specified for the vehicle and
R marked "MOExtended"
If a tire has gone flat and cannot be
replaced with a MOExtended tire, a stand-
ard tire may be used as a temporary meas-
ure. Make sure that you use the proper size and type (summer or winter tire).
i Vehicles equipped with MOExtended tires
are not equipped with a TIREFIT kit at the
factory. It is therefore recommended that
you additionally equip your vehicle with a
TIREFIT kit if you mount tires that do not
feature run-flat properties, e.g. winter tires. A TIREFIT kit is available, for example, from
a qualified specialist workshop. Flat tire
293Breakdown assistance
Page 312 of 358
Useful information
i This Operator's manual describes all
models and all standard and optional equip- ment of your vehicle available at the time of
publication of the Operator's manual.
Country-specific differences are possible.
Please note that your vehicle may not be
equipped with all features described. This
also applies to safety-related systems and
functions.
i Read the information on qualified special-
ist workshops (Y page 26). Important safety notes
G
WARNING
If wheels and tires of the wrong size are used, the wheel brakes or suspension components
may be damaged. There is a risk of an acci-
dent.
Always replace wheels and tires with those
that fulfill the specifications of the original
part.
When replacing wheels, make sure to use the
correct:
R designation
R model
When replacing tires, make sure to use the
correct:
R designation
R manufacturer
R model G
WARNING
A flat tire severely impairs the driving, steer-
ing and braking characteristics of the vehicle.
There is a risk of accident.
Tires without run-flat characteristics:
R do not drive with a flat tire.
R immediately replace the flat tire with your
emergency spare wheel or spare wheel, or
consult a qualified specialist workshop. Tires with run-flat characteristics:
R pay attention to the information and warn-
ing notices on MOExtended tires (tires with
run-flat characteristics).
Accessories that are not approved for your
vehicle by Mercedes-Benz or are not being
used correctly can impair operating safety.
Before purchasing and using non-approved
accessories, visit a qualified specialist work-
shop and inquire about:
R suitability
R legal stipulations
R factory recommendations
Information on dimensions and types of
wheels and tires for your vehicle can be found (Y page 337).
Information on air pressure for the tires on
your vehicle can be found:
R on the vehicle's Tire and Loading Informa-
tion placard on the B-pillar (Y page 322)
R on the tire pressure label on the fuel filler
flap (Y page 159)
R in the "Tire pressure" section Operation
Information on driving
If the vehicle is heavily loaded, check the tire pressures and correct them if necessary.
While driving, pay attention to vibrations,
noises and unusual handling characteristics,
e.g. pulling to one side. This may indicate that
the wheels or tires are damaged. If you sus-
pect that a tire is defective, reduce your
speed immediately. Stop the vehicle as soon
as possible to check the wheels and tires for
damage. Hidden tire damage could also be
causing the unusual handling characteristics. If you find no signs of damage, have the tires
and wheels checked at a qualified specialist
workshop.
When parking your vehicle, make sure that
the tires do not get deformed by the curb or 310
OperationWheels and tires