2015 MERCEDES-BENZ S-Class comand
[x] Cancel search: comandPage 42 of 502

Function Page
J
Telephone, address book
and Internet button (see
separate operating instruc-
tions)
K
Vehicle and system set-
tings button (see separate
operating instructions)
L
COMAND controller (see
the separate Operator's
Manual)
i
Information on the ECO start/stop func-
tion for PLUG-IN HYBRID vehicles can be
found in the "PLUG-IN hybrid drive" section (Y page 288). 40
Center consoleAt a glance
Page 57 of 502

Rear seat belt buckle extenders
The seat belt extender is an integral part of
the PRE-SAFE ®
convenience function. It is
used on the outer rear seats.
Always ensure that it is possible to move the
belt buckle freely. Always stow objects in the
vehicle correctly.
To assist you in finding the seat belt buckle
and fastening the seat belt:
R the belt buckle moves forwards to a con-
venient position
R the belt buckle is illuminated
After the seat belt is fastened, the belt buckle returns to its normal position. The seat belt
then lies tight across the lap and thorax areas.
Incorporation into the PRE-SAFE ®
system:
the belt buckle is lowered quickly in certain
hazardous situations. This pre-tensions the
seat belt.
Incorporation into the automatic meas-
ures after the accident: in this situation, the
belt buckle is illuminated and extended after
a rear door is opened.
Releasing seat belts !
Make sure that the seat belt is fully rolled
up. Otherwise, the seat belt or belt tongue
will be trapped in the door or in the seat
mechanism. This could damage the door,
the door trim panel and the seat belt. Dam- aged seat belts can no longer fulfill their
protective function and must be replaced.
Visit a qualified specialist workshop. X
Press release button :, hold belt
tongue ;firmly and guide it back towards
belt outlet =.
Seat belt adjustment The seat-belt adjustment is an integral part of
the PRE-SAFE ®
convenience function. This
function adjusts the driver's and front-
passenger seat belt to the upper body of the
occupants.
The belt strap is tightened slightly when:
R the belt tongue is engaged in the buckle
and
R the ignition is switched on
The seat-belt adjustment will apply a certain
retraction force if any slack is detected
between the vehicle occupant and the seat
belt. Do not hold on to the seat belt tightly
while it is adjusting.
You can switch the seat-belt adjustment on
and off using COMAND. Information on
switching the belt adjustment function on and off can be found in the Digital Operator's
Manual or in the separate COMAND operating
instructions. Occupant safety
55Safety Z
Page 93 of 502

SmartKey functions
:
& To lock the vehicle
; F To open/close the trunk lid
= % To unlock the vehicle
X To unlock centrally: press button=.
If you do not open the vehicle within
approximately 40 seconds of unlocking:
R the vehicle is locked again.
R the anti-theft alarm system is armed
again.
X To lock centrally: press button:.
The SmartKey centrally locks/unlocks:
R the doors
R the trunk lid
R the fuel filler flap
The turn signals flash once when unlocking
and three times when locking.
i You can also set an audible signal to con-
firm that the vehicle has been locked. The
audible signal can be activated and deacti-
vated using COMAND (see the separate
operating instructions).
i When the surround lighting is activated in
COMAND, it comes on when it is dark after
the vehicle is unlocked using the remote
control. Information on activating and
deactivating the surround lighting can be
found in the separate operating instruc-
tions. X
To open the trunk lid automatically
from outside the vehicle: press and hold
button ;until the trunk lid opens. KEYLESS-GO
General notes Bear in mind that the engine can be started by
any of the vehicle occupants if there is a
SmartKey in the vehicle.
Locking/unlocking centrally You can start, lock or unlock the vehicle using
KEYLESS-GO. To do this, you only need carry
the SmartKey with you. You can combine the
functions of KEYLESS-GO with those of a con- ventional SmartKey. Unlock the vehicle by
using KEYLESS-GO, for instance, and lock it
using the &button on the SmartKey.
The driver's door and the door at which the
handle is used, must both be closed. The
SmartKey must be outside the vehicle. When
locking or unlocking with KEYLESS-GO, the
distance between the SmartKey and the cor-
responding door handle must not be greater
than 3 ft (1 m).
A check which periodically establishes a radio
connection between the vehicle and the
SmartKey determines whether a valid Smart- Key is in the vehicle. This occurs, for example:
R when starting the engine
R whilst driving
R when using HANDS-FREE ACCESS
R when the external door handles are
touched
R during convenience closing SmartKey
91Opening and closing Z
Page 100 of 502

If the driver's door is open, the door stays
unlocked.
Meanwhile, the fuel filler flap will not be
locked or unlocked.
You cannot unlock the vehicle centrally from
the inside if the vehicle has been locked with the SmartKey or KEYLESS-GO.
The doors can be opened from the inside. You
can only open the rear doors from inside the
vehicle if they are not secured by the child-
proof locks (Y page 75).
If the vehicle has been locked with the Smart-
Key or with KEYLESS-GO, opening a door from the inside will trigger the anti-theft alarm sys-
tem. Switch off the alarm (Y page 86).
i If a locked door is opened from the inside,
the previous unlock status of the vehicle
will be taken into consideration if:
R the vehicle was locked using the locking
button for the central locking, or
R if the vehicle was locked automatically
The vehicle will be fully unlocked if it had
previously been fully unlocked. If only the
driver's door had been previously
unlocked, only the door which has been
opened from the inside is unlocked. Automatic locking feature
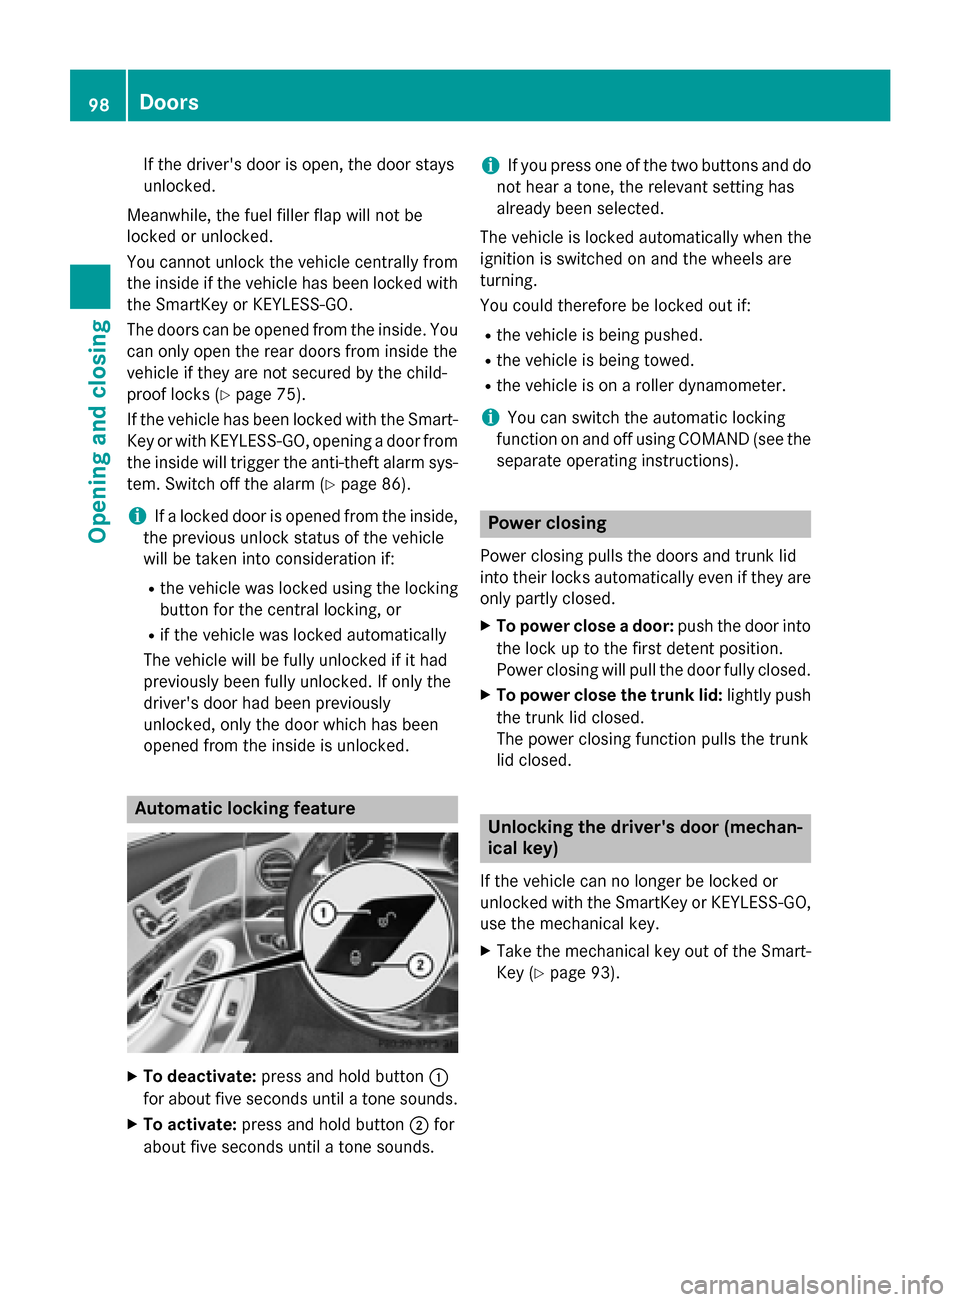
X
To deactivate: press and hold button :
for about five seconds until a tone sounds.
X To activate: press and hold button ;for
about five seconds until a tone sounds. i
If you press one of the two buttons and do
not hear a tone, the relevant setting has
already been selected.
The vehicle is locked automatically when the
ignition is switched on and the wheels are
turning.
You could therefore be locked out if:
R the vehicle is being pushed.
R the vehicle is being towed.
R the vehicle is on a roller dynamometer.
i You can switch the automatic locking
function on and off using COMAND (see the
separate operating instructions). Power closing
Power closing pulls the doors and trunk lid
into their locks automatically even if they are only partly closed.
X To power close a door: push the door into
the lock up to the first detent position.
Power closing will pull the door fully closed.
X To power close the trunk lid: lightly push
the trunk lid closed.
The power closing function pulls the trunk
lid closed. Unlocking the driver's door (mechan-
ical key)
If the vehicle can no longer be locked or
unlocked with the SmartKey or KEYLESS-GO,
use the mechanical key.
X Take the mechanical key out of the Smart-
Key (Y page 93). 98
DoorsOpening and closing
Page 102 of 502

X
Insert the mechanical key into the lock of
the driver's door as far as it will go.
X Turn the mechanical key clockwise as far as
it will go to position 1.
The locking knob drops down and the driv- er's door is locked.
X Turn the mechanical key back and remove
it.
X Make sure that the doors and the trunk lid
are locked.
X Insert the mechanical key into the Smart-
Key (Y page 93).
X Carefully press the protective cap onto the
lock cylinder until it engages and is seated
firmly. Do not pull the door handle when
doing so.
i If you lock the vehicle as described above,
the fuel filler flap is not locked. The anti-
theft alarm system is not armed. Trunk
Important safety notes
G
WARNING
If objects, luggage or loads are not secured or not secured sufficiently, they could slip, tip
over or be flung around and thereby hit vehicle
occupants. There is a risk of injury, particu-
larly in the event of sudden braking or a sud-
den change in direction.
Always store objects so that they cannot be
flung around. Secure objects, luggage or loads against slipping or tipping before the
journey.
! The trunk lid swings upwards when
opened. Therefore, make sure that there is
sufficient clearance above the trunk lid.
i You can limit the opening angle of the
trunk lid in COMAND; see the separate
operating instructions.
i The opening dimensions of the trunk lid
can be found in the "Vehicle data" section
(Y page 495).
Do not leave the SmartKey in the trunk. You
could otherwise lock yourself out.
You should preferably place luggage or loads
in the trunk. Observe the loading guidelines
(Y page 372). Obstacle recognition with trunk lid
reversing feature
On vehicles with trunk lid remote closing fea-
ture, the trunk lid is equipped with automatic obstacle recognition with reversing feature. If a solid object blocks or restricts the trunk lid
when automatically opening or closing, this
procedure is stopped. If the trunk lid is stop-
ped during the closing procedure, it will open
again automatically. The automatic obstacle
recognition with reversing feature is only an
aid. It is not a substitute for your attentive-
ness when opening and closing the trunk lid. G
WARNING
The reversing feature does not react:
R to soft, light and thin objects, e.g. small fin-
gers
R over the last 1/3 in (8 mm) of the closing
movement
This means that the reversing feature cannot
prevent someone being trapped in these sit-
uations. There is a risk of injury.
Make sure that no body parts are in close
proximity during the closing procedure. 100
TrunkOpening and closing
Page 136 of 502

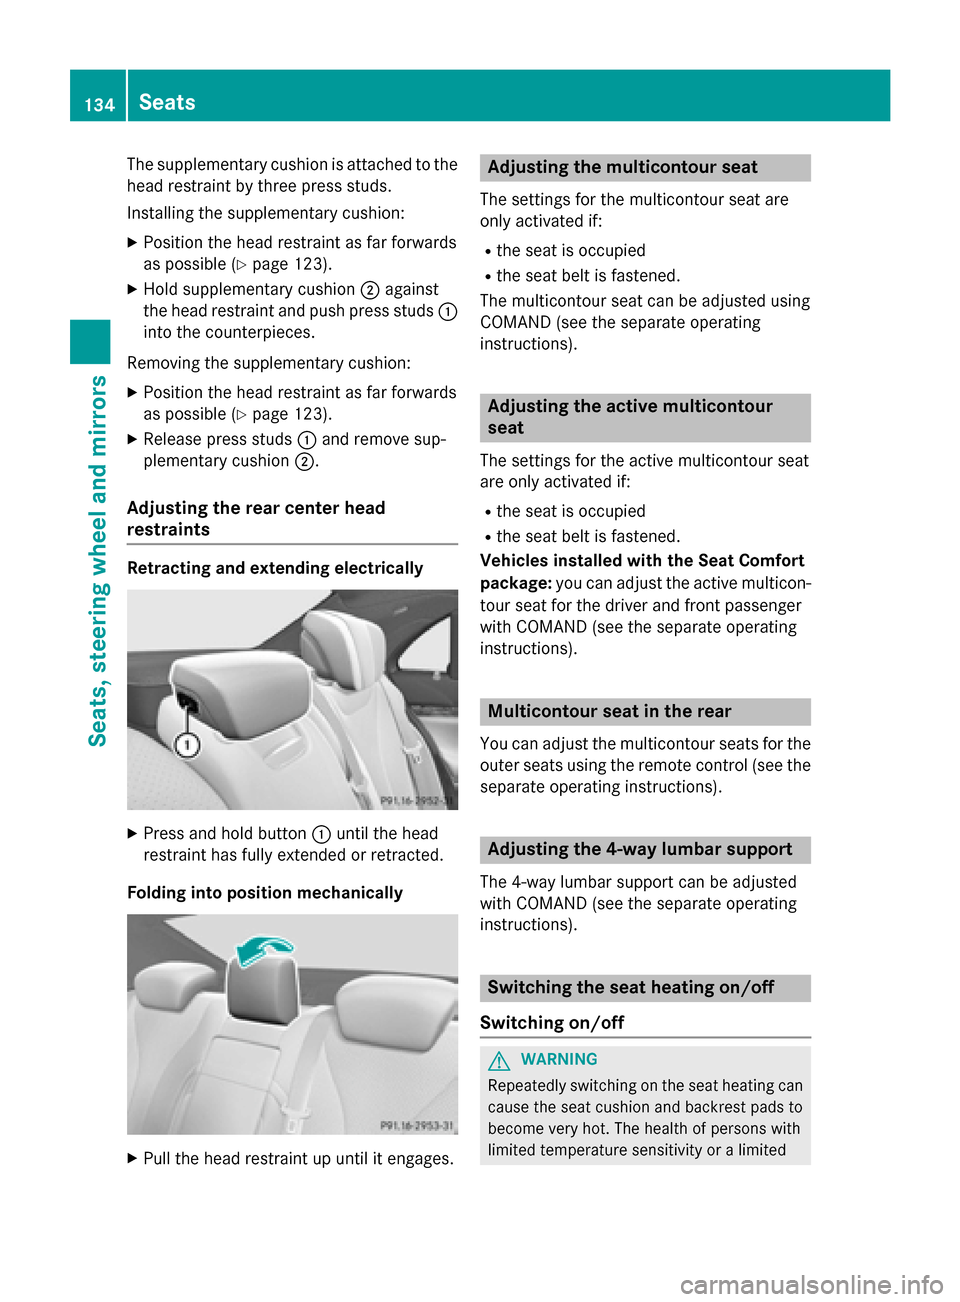
The supplementary cushion is attached to the
head restraint by three press studs.
Installing the supplementary cushion:
X Position the head restraint as far forwards
as possible (Y page 123).
X Hold supplementary cushion ;against
the head restraint and push press studs :
into the counterpieces.
Removing the supplementary cushion: X Position the head restraint as far forwards
as possible (Y page 123).
X Release press studs :and remove sup-
plementary cushion ;.
Adjusting the rear center head
restraints Retracting and extending electrically
X
Press and hold button :until the head
restraint has fully extended or retracted.
Folding into position mechanically X
Pull the head restraint up until it engages. Adjusting the multicontour seat
The settings for the multicontour seat are
only activated if:
R the seat is occupied
R the seat belt is fastened.
The multicontour seat can be adjusted using
COMAND (see the separate operating
instructions). Adjusting the active multicontour
seat
The settings for the active multicontour seat
are only activated if:
R the seat is occupied
R the seat belt is fastened.
Vehicles installed with the Seat Comfort
package: you can adjust the active multicon-
tour seat for the driver and front passenger
with COMAND (see the separate operating
instructions). Multicontour seat in the rear
You can adjust the multicontour seats for the
outer seats using the remote control (see the separate operating instructions). Adjusting the 4-way lumbar support
The 4-way lumbar support can be adjusted
with COMAND (see the separate operating
instructions). Switching the seat heating on/off
Switching on/off G
WARNING
Repeatedly switching on the seat heating can
cause the seat cushion and backrest pads to
become very hot. The health of persons with
limited temperature sensitivity or a limited 134
SeatsSeats, steering wheel and mirrors
Page 137 of 502

ability to react to excessively high tempera-
tures may be affected or they may even suffer burn-like injuries. There is a risk of injury.
Therefore, do not switch the seat heating on
repeatedly.
For vehicles equipped with the Warmth Com-
fort package: the armrest in the door and the center console can also be heated when you
switch on the seat heating of one of the front
seats. This can be set with COMAND (see the
separate operating instructions).
The three red indicator lamps in the button
indicate the heating level you have selected.
The system automatically switches down
from level 3to level 2after approximately
eight minutes.
The system automatically switches down
from level 2to level 1after approximately ten
minutes.
The system automatically switches off
approximately 20 minutes after it is set to
level 1.
Vehicles with the Seat Heating Plus package: you can set the distribution of the heated
sections of the seat cushion and backrest on the front seats via COMAND (see the sepa-
rate operating instructions).
Vehicles with the Seat Heating Plus package: you can set the distribution of the heated
sections of the seat cushion and backrest via
COMAND (see the Digital Operator's Man-
ual).
Vehicles with Rear Seat Entertainment Sys-
tem and electric seat adjustment: you can set
the distribution of the heated sections of the rear seat cushion and backrest via the Rear
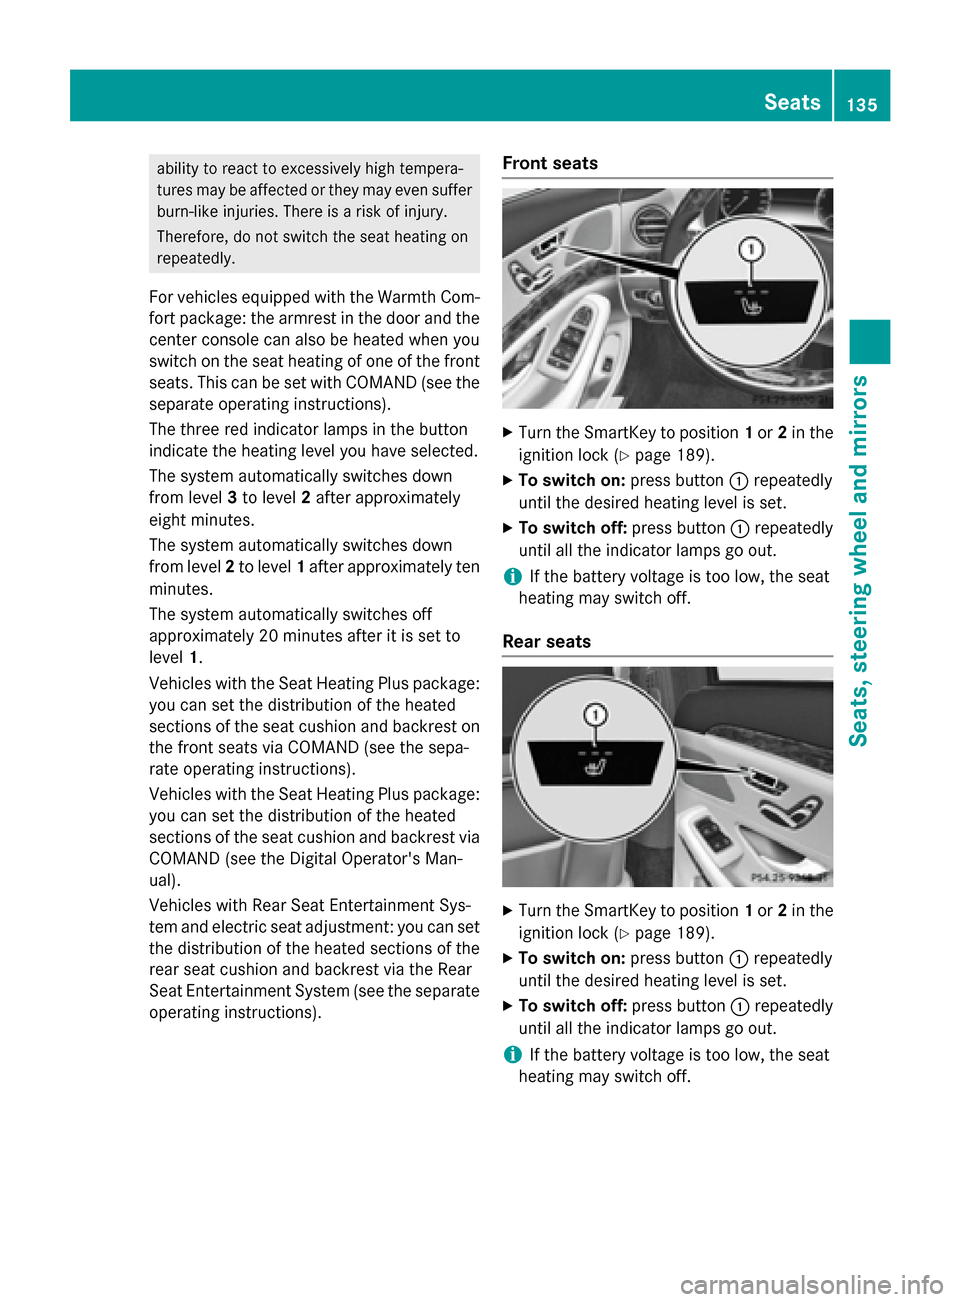
Seat Entertainment System (see the separate operating instructions). Front seats X
Turn the SmartKey to position 1or 2in the
ignition lock (Y page 189).
X To switch on: press button:repeatedly
until the desired heating level is set.
X To switch off: press button:repeatedly
until all the indicator lamps go out.
i If the battery voltage is too low, the seat
heating may switch off.
Rear seats X
Turn the SmartKey to position 1or 2in the
ignition lock (Y page 189).
X To switch on: press button:repeatedly
until the desired heating level is set.
X To switch off: press button:repeatedly
until all the indicator lamps go out.
i If the battery voltage is too low, the seat
heating may switch off. Seats
135Seats, steering wheel and mirrors Z
Page 141 of 502

Problems with the steering wheel heating
Problem
Possible causes/consequences and
M
MSolutions The steering wheel
heating has switched
off prematurely or can-
not be switched on. The on-board voltage is too low because too many electrical con-
sumers are switched on.
X Switch off electrical consumers that you do not need, such as
the rear window defroster or interior lighting. EASY-ENTRY/EXIT feature
Important safety notes G
WARNING
When the EASY-ENTRY/EXIT feature adjusts
the steering wheel and the driver's seat, you
and other vehicle occupants – particularly
children – could become trapped. There is a
risk of injury.
While the EASY-ENTRY/EXIT feature is mak-
ing adjustments, make sure that no one has
any body parts in the sweep of the seat and
the steering wheel.
If there is a risk of becoming trapped by
R the steering wheel: move the steering
wheel adjustment lever.
R the seat: press the switch for seat adjust-
ment.
The adjustment process is stopped.
Press one of the memory function position
switches. The adjustment process is stopped.
This function is only available on vehicles with
memory function. G
WARNING
If children activate the EASY-ENTRY/EXIT fea- ture, they can become trapped, particularly
when unattended. There is a risk of injury.
When leaving the vehicle, always take the
SmartKey with you and lock the vehicle. Never leave children unsupervised in the vehicle. G
WARNING
If you drive off while the EASY-ENTRY/EXIT
feature is making adjustments, you could lose control of the vehicle. There is a risk of an
accident.
Always wait until the adjustment process is
complete before driving off.
The EASY-ENTRY/EXIT feature makes getting in and out of your vehicle easier.
You can activate and deactivate the EASY-
ENTRY/EXIT feature using COMAND (see theseparate operating instructions).
Position of the steering wheel and the
driver's seat when the EASY-ENTRY/
EXIT feature is active The steering wheel tilts upwards and the driv-
er's seat moves backwards if you:
R remove the SmartKey from the ignition lock
R with KEYLESS-GO: open the driver's door;
KEYLESS-GO must be in position 1
R with the SmartKey: open the driver's
door; the SmartKey must be in position 0or
1 in the ignition lock (Y page 189)
R open the driver's door when the ignition is
switched off
i The steering wheel only tilts upwards and
the driver's seat only moves backwards if
the driving position is stored after seat or
steering wheel adjustment (Y page 144).
The last position of the steering wheel or seat is stored if:
R the ignition is switched off
R the setting is stored with the memory func-
tion (Y page 144). Steering wheel
139Seats, steering wheel and mirrors Z