2015 MERCEDES-BENZ S-CLASS COUPE ECU
[x] Cancel search: ECUPage 232 of 417
R
if you have adopted a sporty driving style
with high cornering speeds or high rates of
acceleration
R if you are predominantly driving at a speed
below 60 km/h or above 200 km/h
R if you are driving with the active Steer
Assist of DISTRONIC PLUS
R if the time has been set incorrectly
R in active driving situations, such as when
you change lanes or change your speed
The ATTENTION ASSIST tiredness assess-
ment is deleted and restarted when continu-
ing the journey, if:
R you switch off the engine
R you take off your seat belt and open the
driver's door, e.g. for a change of drivers or
to take a break
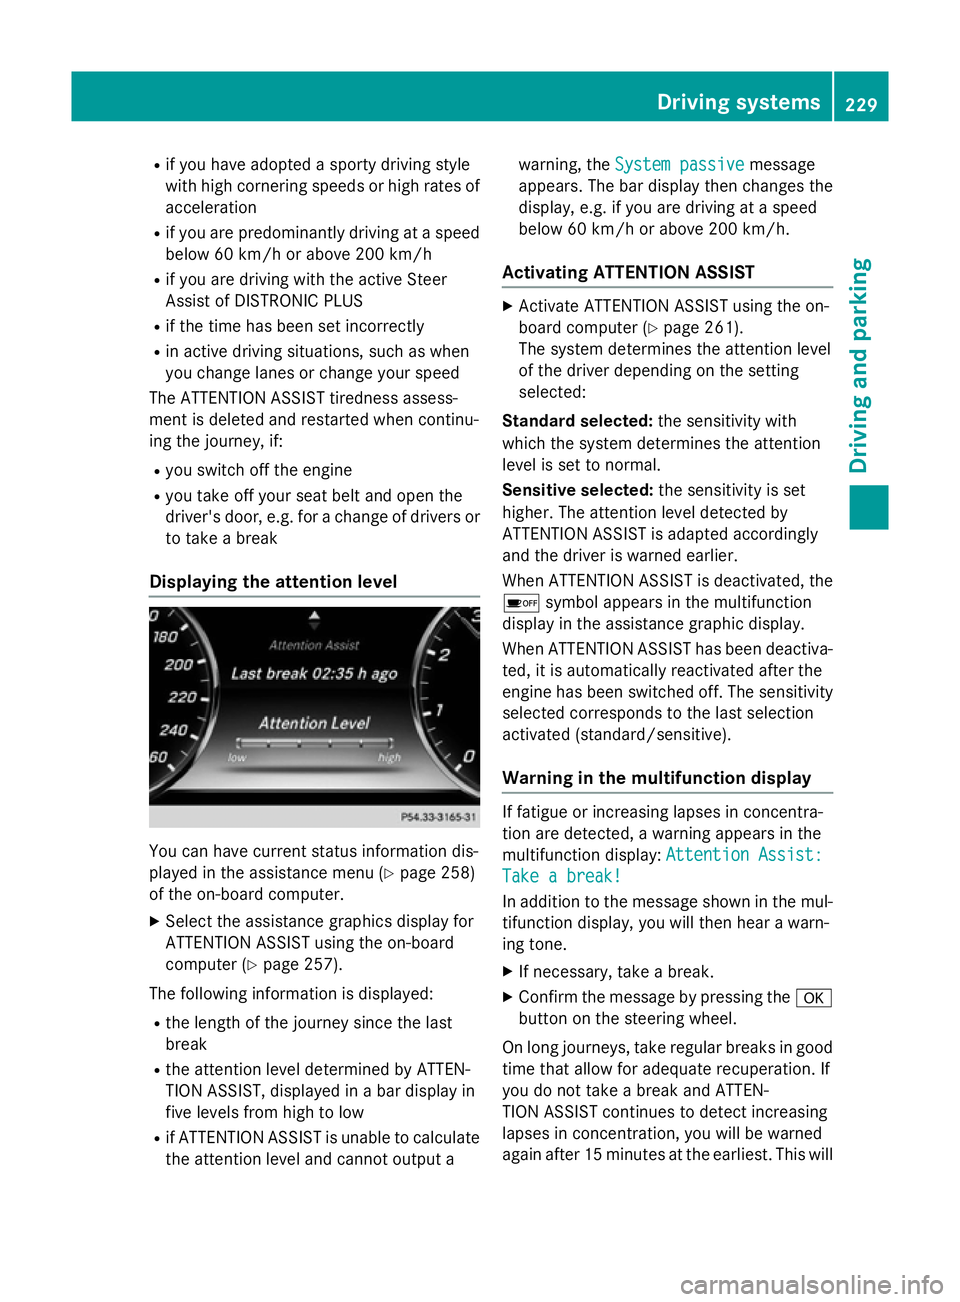
Displaying the attention level You can have current status information dis-
played in the assistance menu (Y
page 258)
of the on-board computer.
X Select the assistance graphics display for
ATTENTION ASSIST using the on-board
computer (Y page 257).
The following information is displayed: R the length of the journey since the last
break
R the attention level determined by ATTEN-
TION ASSIST, displayed in a bar display in
five levels from high to low
R if ATTENTION ASSIST is unable to calculate
the attention level and cannot output a warning, the
System passive
System passive message
appears. The bar display then changes the
display, e.g. if you are driving at a speed
below 60 km/h or above 200 km/h.
Activating ATTENTION ASSIST X
Activate ATTENTION ASSIST using the on-
board computer (Y page 261).
The system determines the attention level
of the driver depending on the setting
selected:
Standard selected: the sensitivity with
which the system determines the attention
level is set to normal.
Sensitive selected: the sensitivity is set
higher. The attention level detected by
ATTENTION ASSIST is adapted accordingly
and the driver is warned earlier.
When ATTENTION ASSIST is deactivated, the
é symbol appears in the multifunction
display in the assistance graphic display.
When ATTENTION ASSIST has been deactiva- ted, it is automatically reactivated after the
engine has been switched off. The sensitivity
selected corresponds to the last selection
activated (standard/sensitive).
Warning in the multifunction display If fatigue or increasing lapses in concentra-
tion are detected, a warning appears in the
multifunction display:
Attention Assist: Attention Assist:
Take a break!
Take a break!
In addition to the message shown in the mul-
tifunction display, you will then hear a warn-
ing tone.
X If necessary, take a break.
X Confirm the message by pressing the a
button on the steering wheel.
On long journeys, take regular breaks in good
time that allow for adequate recuperation. If
you do not take a break and ATTEN-
TION ASSIST continues to detect increasing
lapses in concentration, you will be warned
again after 15 minutes at the earliest. This will Driving systems
229Driving and parking Z
Page 253 of 417
X
Confirm by pressing aon the steering
wheel.
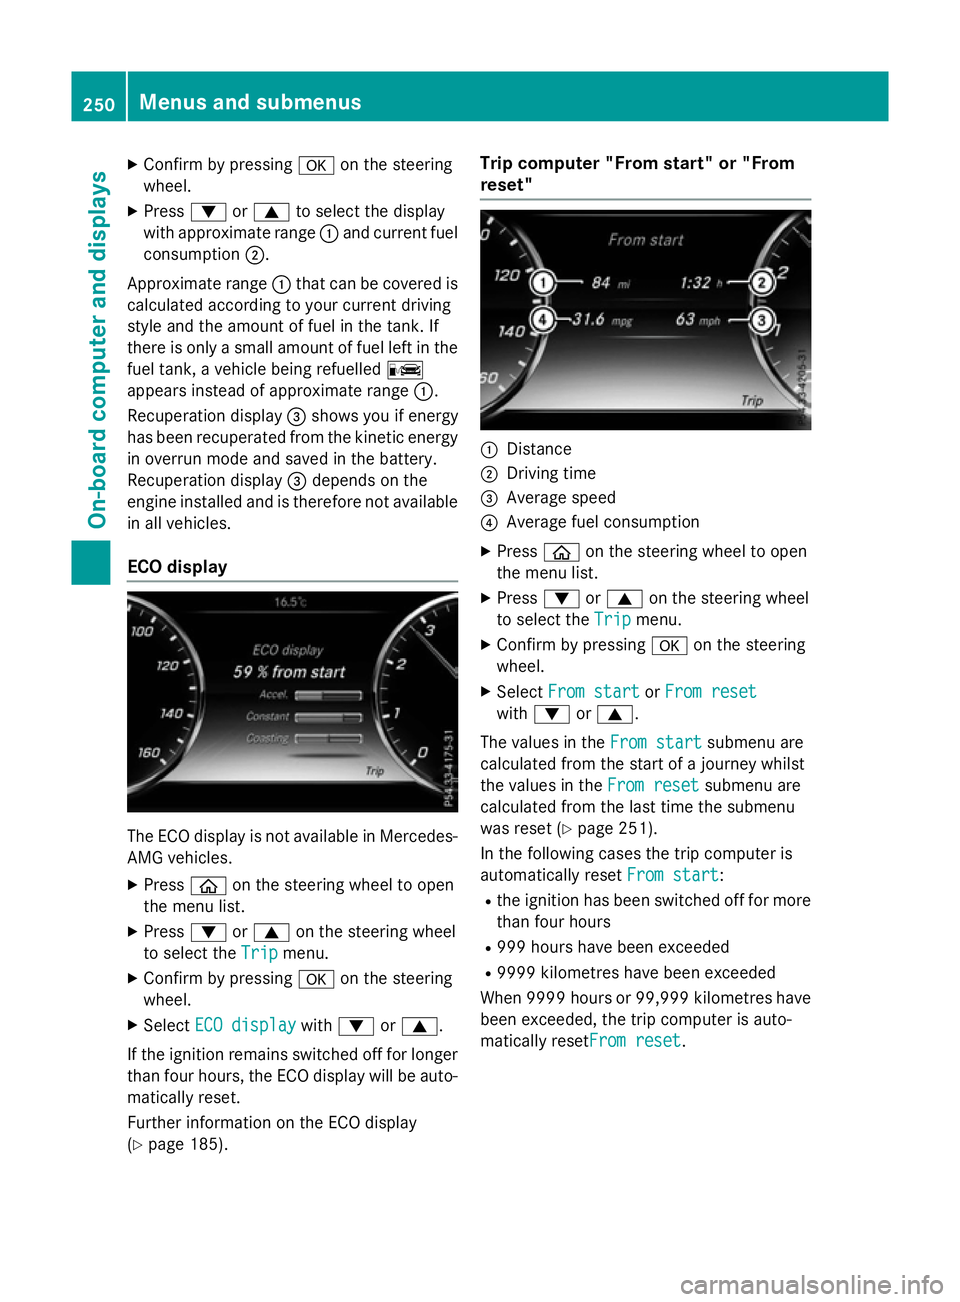
X Press :or9 to select the display
with approximate range :and current fuel
consumption ;.
Approximate range :that can be covered is
calculated according to your current driving
style and the amount of fuel in the tank. If
there is only a small amount of fuel left in the
fuel tank, a vehicle being refuelled C
appears instead of approximate range :.
Recuperation display =shows you if energy
has been recuperated from the kinetic energy
in overrun mode and saved in the battery.
Recuperation display =depends on the
engine installed and is therefore not available in all vehicles.
ECO display The ECO display is not available in Mercedes-
AMG vehicles.
X Press òon the steering wheel to open
the menu list.
X Press :or9 on the steering wheel
to select the Trip Tripmenu.
X Confirm by pressing aon the steering
wheel.
X Select ECO display
ECO display with: or9.
If the ignition remains switched off for longer than four hours, the ECO display will be auto-
matically reset.
Further information on the ECO display
(Y page 185). Trip computer "From start" or "From
reset"
:
Distance
; Driving time
= Average speed
? Average fuel consumption
X Press òon the steering wheel to open
the menu list.
X Press :or9 on the steering wheel
to select the Trip Tripmenu.
X Confirm by pressing aon the steering
wheel.
X Select From start
From start orFrom reset
From reset
with : or9.
The values in the From start
From startsubmenu are
calculated from the start of a journey whilst
the values in the From reset From resetsubmenu are
calculated from the last time the submenu
was reset (Y page 251).
In the following cases the trip computer is
automatically reset From start From start:
R the ignition has been switched off for more
than four hours
R 999 hours have been exceeded
R 9999 kilometres have been exceeded
When 9999 hour sor 99,999 kilometres have
been exceeded, the trip computer is auto-
matically resetFrom reset From reset.250
Menus and submenusOn-board computer and displays
Page 304 of 417
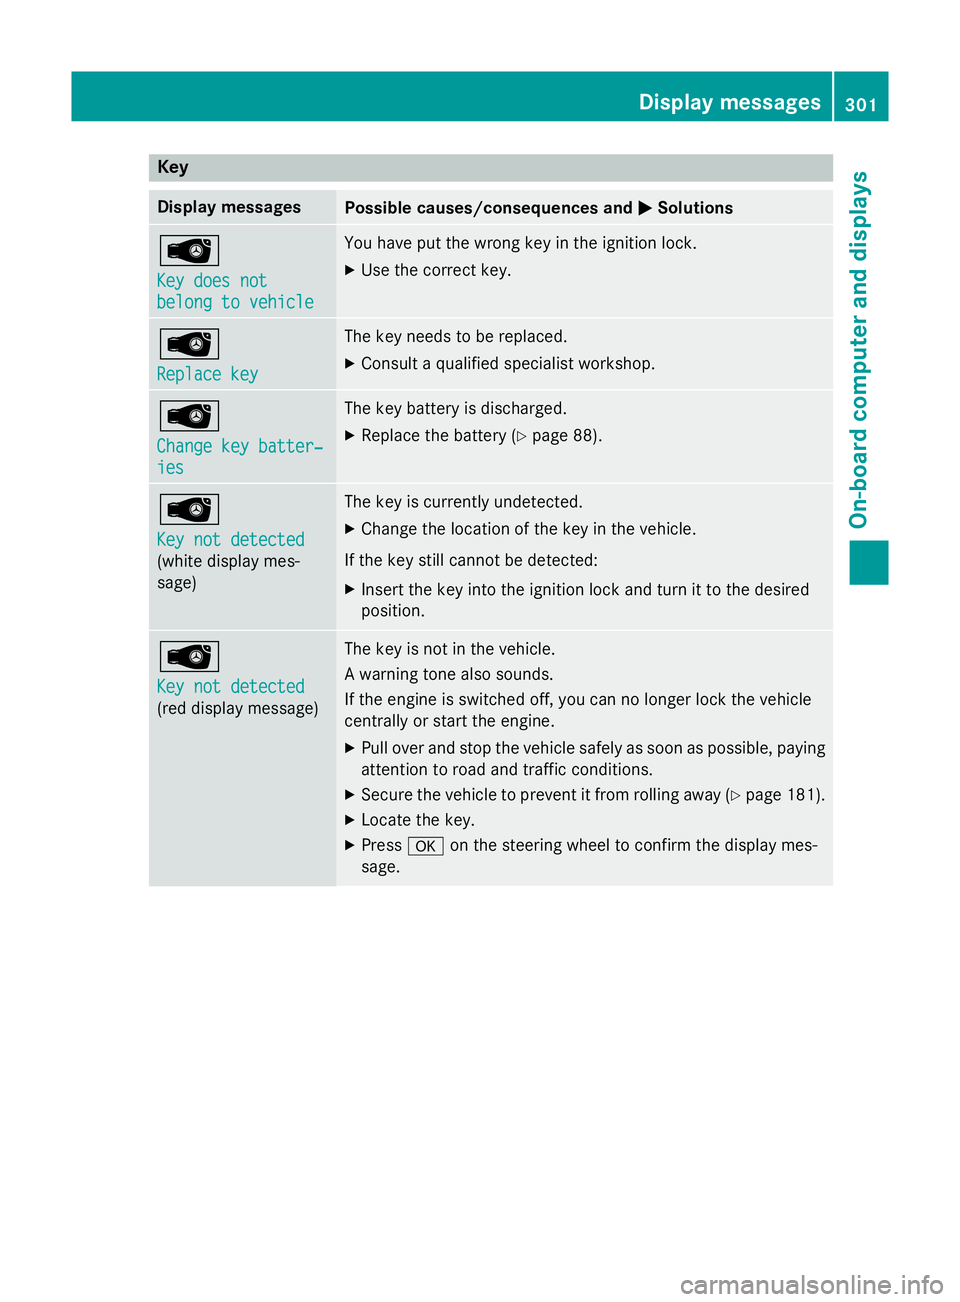
Key
Display messages
Possible causes/consequences and
M
M Solutions Â
Key does not Key does not
belong to vehicle belong to vehicle You have put the wrong key in the ignition lock.
X Use the correct key. Â
Replace key Replace key The key needs to be replaced.
X Consult a qualified specialist workshop. Â
Change key batter‐ Change key batter‐
ies ies The key battery is discharged.
X Replace the battery (Y page 88).Â
Key not detected Key not detected
(white display mes-
sage) The key is currently undetected.
X Change the location of the key in the vehicle.
If the key still cannot be detected: X Insert the key into the ignition lock and turn it to the desired
position. Â
Key not detected Key not detected
(red display message) The key is not in the vehicle.
A warning tone also sounds.
If the engine is switched off, you can no longer lock the vehicle
centrally or start the engine.
X Pull over and stop the vehicle safely as soon as possible, paying
attention to road and traffic conditions.
X Secure the vehicle to prevent it from rolling away (Y page 181).
X Locate the key.
X Press aon the steering wheel to confirm the display mes-
sage. Display
messages
301On-board computer and displays Z
Page 305 of 417
Display messages
Possible causes/consequences and
M
MSolutions Because there is interference from a strong source of radio waves,
the key is not detected whilst the engine is running.
A warning tone also sounds.
X Pull over and stop the vehicle safely as soon as possible, paying
attention to road and traffic conditions.
X Secure the vehicle to prevent it from rolling away (Y page 181).
X Insert the key into the ignition lock and bring into key mode. Â
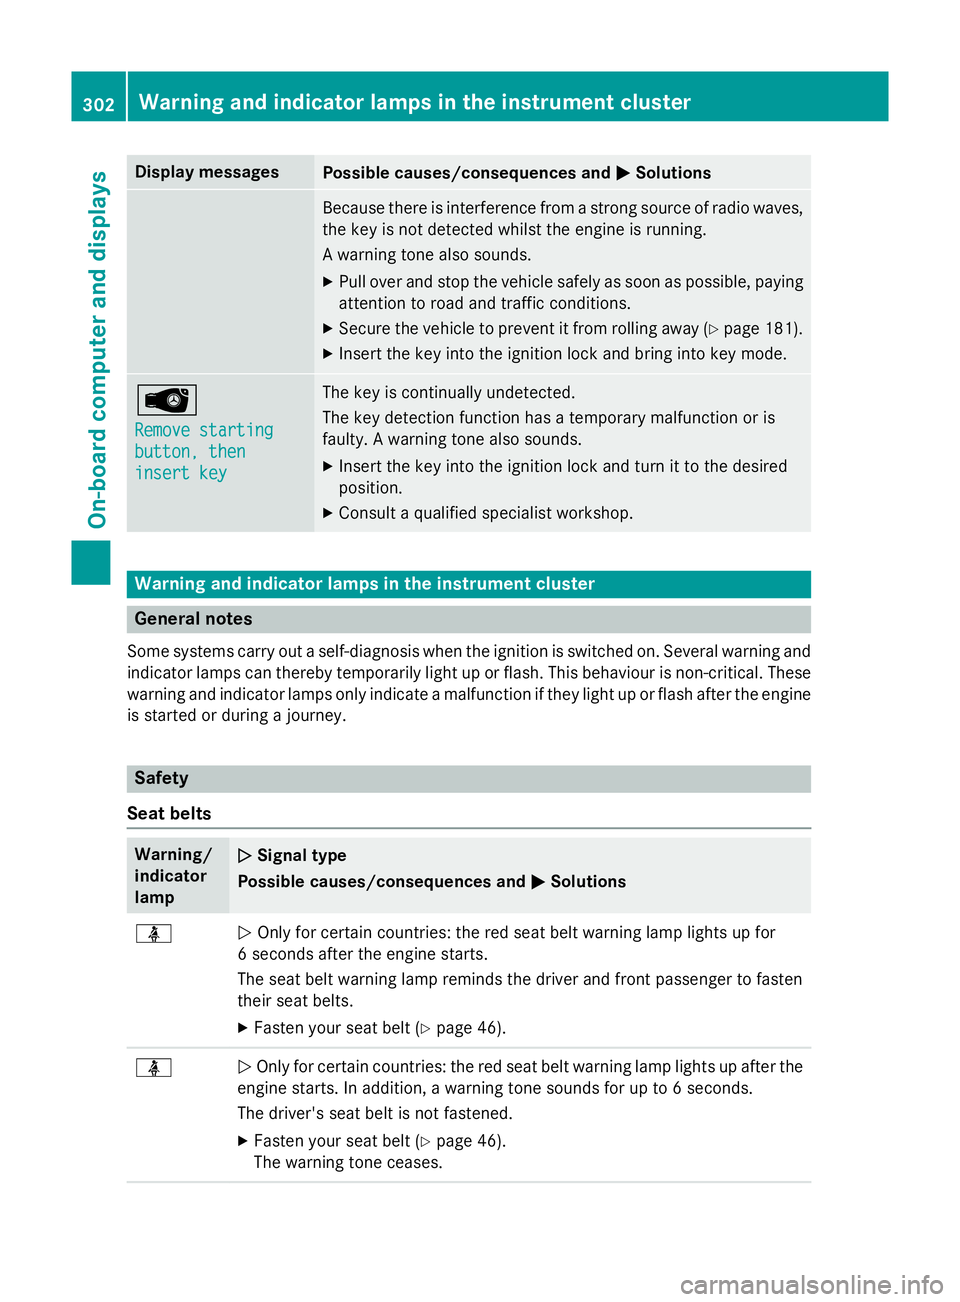
Remove starting Remove starting
button, then button, then
insert key insert key The key is continually undetected.
The key detection function has a temporary malfunction or is
faulty. A warning tone also sounds.
X Insert the key into the ignition lock and turn it to the desired
position.
X Consult a qualified specialist workshop. Warning and indicator lamps in the instrument cluster
General notes
Some systems carry out a self-diagnosis when the ignition is switched on. Several warning and indicator lamps can thereby temporarily light up or flash. This behaviour is non-critical. These
warning and indicator lamps only indicate a malfunction if they light up or flash after the engine is started or during a journey. Safety
Seat belts Warning/
indicator
lamp
N N
Signal type
Possible causes/consequences and M
MSolutions ü
N
Only for certain countries: the red seat belt warning lamp lights up for
6 seconds after the engine starts.
The seat belt warning lamp reminds the driver and front passenger to fasten
their seat belts.
X Fasten your seat belt (Y page 46).ü
N
Only for certain countries: the red seat belt warning lamp lights up after the
engine starts. In addition, a warning tone sounds for up to 6 seconds.
The driver's seat belt is not fastened.
X Fasten your seat belt (Y page 46).
The warning tone ceases. 302
Wa
rning and indi cator lamps in the instrument clusterOn-board computer and displays
Page 306 of 417
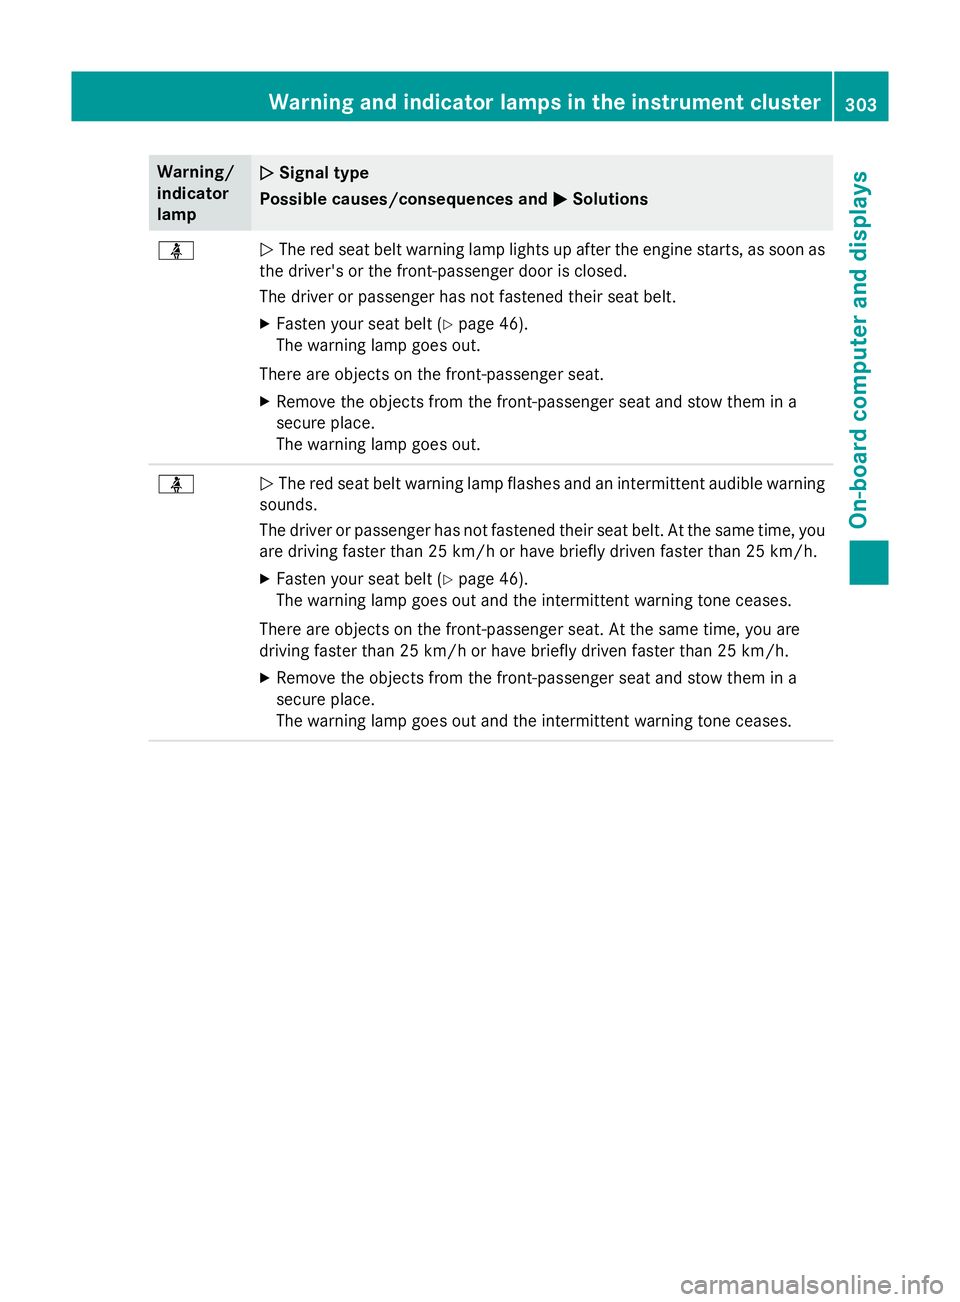
Warning/
indicator
lamp
N N
Signal type
Possible causes/consequences and M
MSolutions ü
N
The red seat belt warning lamp lights up after the engine starts, as soon as
the driver's or the front-passenger door is closed.
The driver or passenger has not fastened their seat belt.
X Fasten your seat belt (Y page 46).
The warning lamp goes out.
There are objects on the front-passenger seat.
X Remove the objects from the front-passenger seat and stow them in a
secure place.
The warning lamp goes out. ü
N
The red seat belt warning lamp flashes and an intermittent audible warning
sounds.
The driver or passenger has not fastened their seat belt. At the same time, you are driving faster than 25 km/h or have briefly driven faster than 25 km/h.
X Fasten your seat belt (Y page 46).
The warning lamp goes out and the intermittent warning tone ceases.
There are objects on the front-passenger seat. At the same time, you are
driving faster than 25 km/h or have briefly driven faster than 25 km/h.
X Remove the objects from the front-passenger seat and stow them in a
secure place.
The warning lamp goes out and the intermittent warning tone ceases. Warning and indicator lamps in the instrument cluster
303On-board computer and displays Z
Page 316 of 417
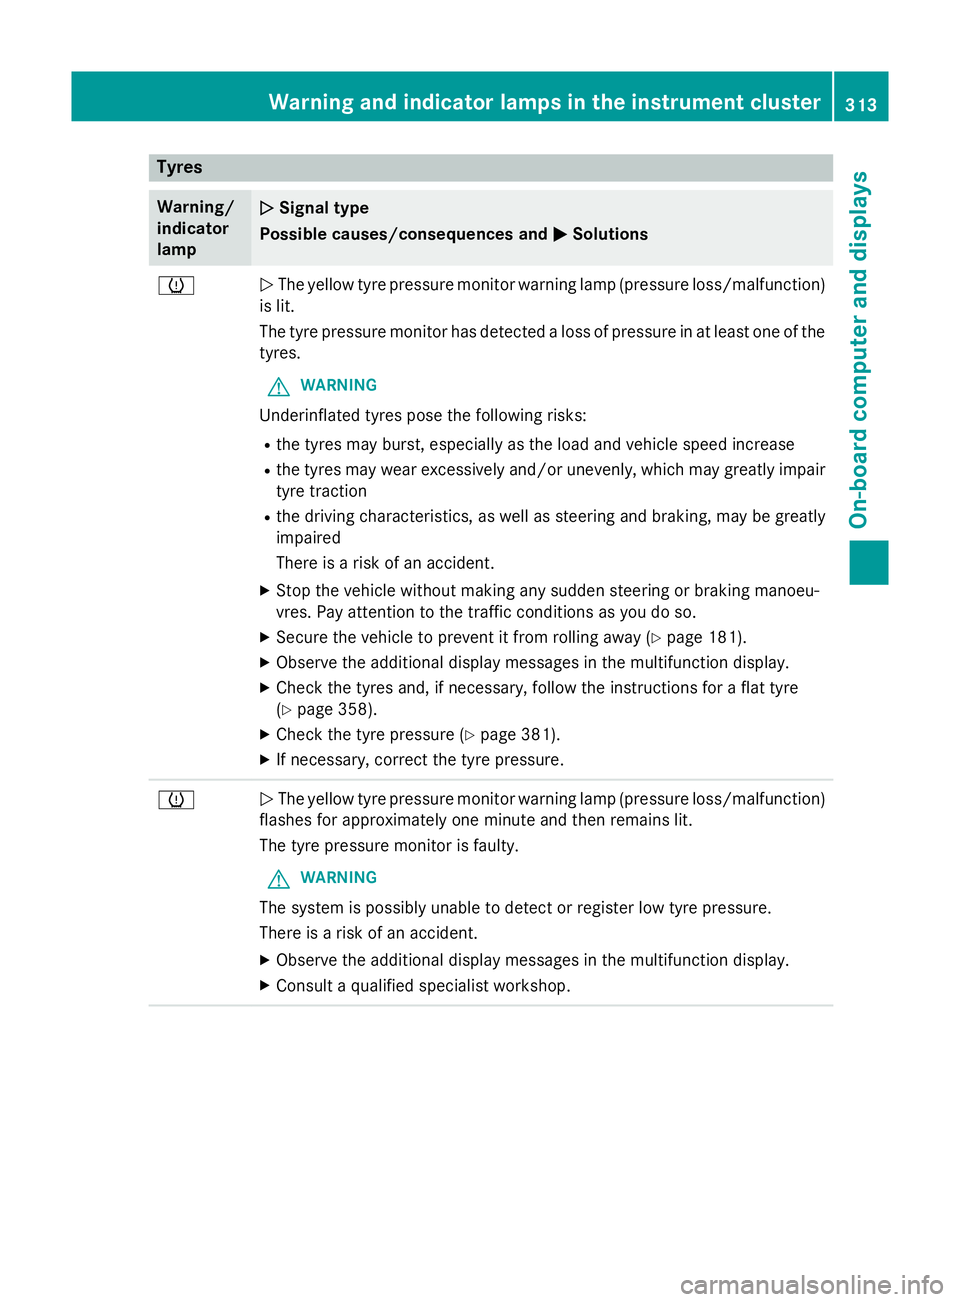
Tyres
Warning/
indicator
lamp
N N
Signal type
Possible causes/consequences and M
MSolutions h
N
The yellow tyre pressure monitor warning lamp (pressure loss/malfunction)
is lit.
The tyre pressure monitor has detected a loss of pressure in at least one of the
tyres.
G WARNING
Underinflated tyres pose the following risks:
R the tyres may burst, especially as the load and vehicle speed increase
R the tyres may wear excessively and/or unevenly, which may greatly impair
tyre traction
R the driving characteristics, as well as steering and braking, may be greatly
impaired
There is a risk of an accident.
X Stop the vehicle without making any sudden steering or braking manoeu-
vres. Pay attention to the traffic conditions as you do so.
X Secure the vehicle to prevent it from rolling away (Y page 181).
X Observe the additional display messages in the multifunction display.
X Check the tyres and, if necessary, follow the instructions for a flat tyre
(Y page 358).
X Check the tyre pressure (Y page 381).
X If necessary, correct the tyre pressure. h
N
The yellow tyre pressure monitor warning lamp (pressure loss/malfunction)
flashes for approximately one minute and then remains lit.
The tyre pressure monitor is faulty.
G WARNING
The system is possibly unable to detect or register low tyre pressure.
There is a risk of an accident.
X Observe the additional display messages in the multifunction display.
X Consult a qualified specialist workshop. Warning and indicator lamps in the instrument cluster
313On-board computer and displays Z
Page 319 of 417
Useful information
i This Owner's Manual describes all mod-
els, series and optional equipment for your
vehicle that were available at the time of
going to press. National variations are pos- sible. Note that your vehicle may not be
equipped with all of the functions descri-
bed. This is also the case for systems and
functions relevant to safety.
i Read the information on qualified special-
ist workshops: (Y page 26). Stowage areas
Loading guidelines
G
WARNING
Combustion engines emit poisonous exhaust
gases such as carbon monoxide. Exhaust
gases can enter the vehicle interior if the boot
lid is open when the engine is running, espe-
cially if the vehicle is in motion. There is a risk of poisoning.
Always switch off the engine before opening
the boot lid. Never drive with the boot lid
open. G
WARNING
If objects, luggage or loads are not secured or not secured sufficiently, they could slip, tip
over or be flung around and thereby hit vehicle
occupants. There is a risk of injury, especially when braking or abruptly changing directions.
Always store objects so that they cannot be
flung around. Secure objects, luggage or
loads against slipping or tipping before the
journey. G
WARNING
The exhaust tail pipe and tail pipe trim can
become very hot. If you come into contact
with these parts of the vehicle, you could burn
yourself. There is a risk of injury. Always be particularly careful around the
exhaust tail pipe and the tail pipe trim. Allow
these components to cool down before touch-
ing them.
The handling characteristics of a laden vehi-
cle are dependent on the distribution of the
load within the vehicle. For this reason, you
should observe the following notes when
transporting a load:
R never exceed the maximum permissible
gross vehicle weight or the permissible axle
loads for the vehicle (including occupants).
R the boot is the preferred place to carry
objects.
R position heavy loads as far forwards as pos-
sible and as low down in the boot as pos-
sible.
R the load must not protrude above the upper
edge of the seat backrests.
R always place the load behind unoccupied
seats if possible.
R secure the load with sufficiently strong and
wear-resistant lashing material. Pad sharp
edges for protection.
i Load restraints are available at any quali-
fied specialist workshop, e.g. a Mercedes-
Benz Service Centre. Stowage compartments
Important safety notes G
WARNING
If you do not correctly store objects in the
vehicle interior, they can slip or be flung
around, thus striking vehicle occupants.
There is a risk of injury, especially when brak- ing or abruptly changing directions.
R Always store objects so that they cannot be
flung around in these or in similar situa-
tions.
R Always make sure that objects do not pro-
trude from stowage compartments, lug-
gage nets or stowage nets. 316
Stowage areasStowing and features
Page 320 of 417
R
Close lockable stowage compartments
while driving.
R Stow and secure objects that are heavy,
hard, pointy, sharp-edged, fragile or too
large in the boot.
Observe the loading guidelines (Y page 316).
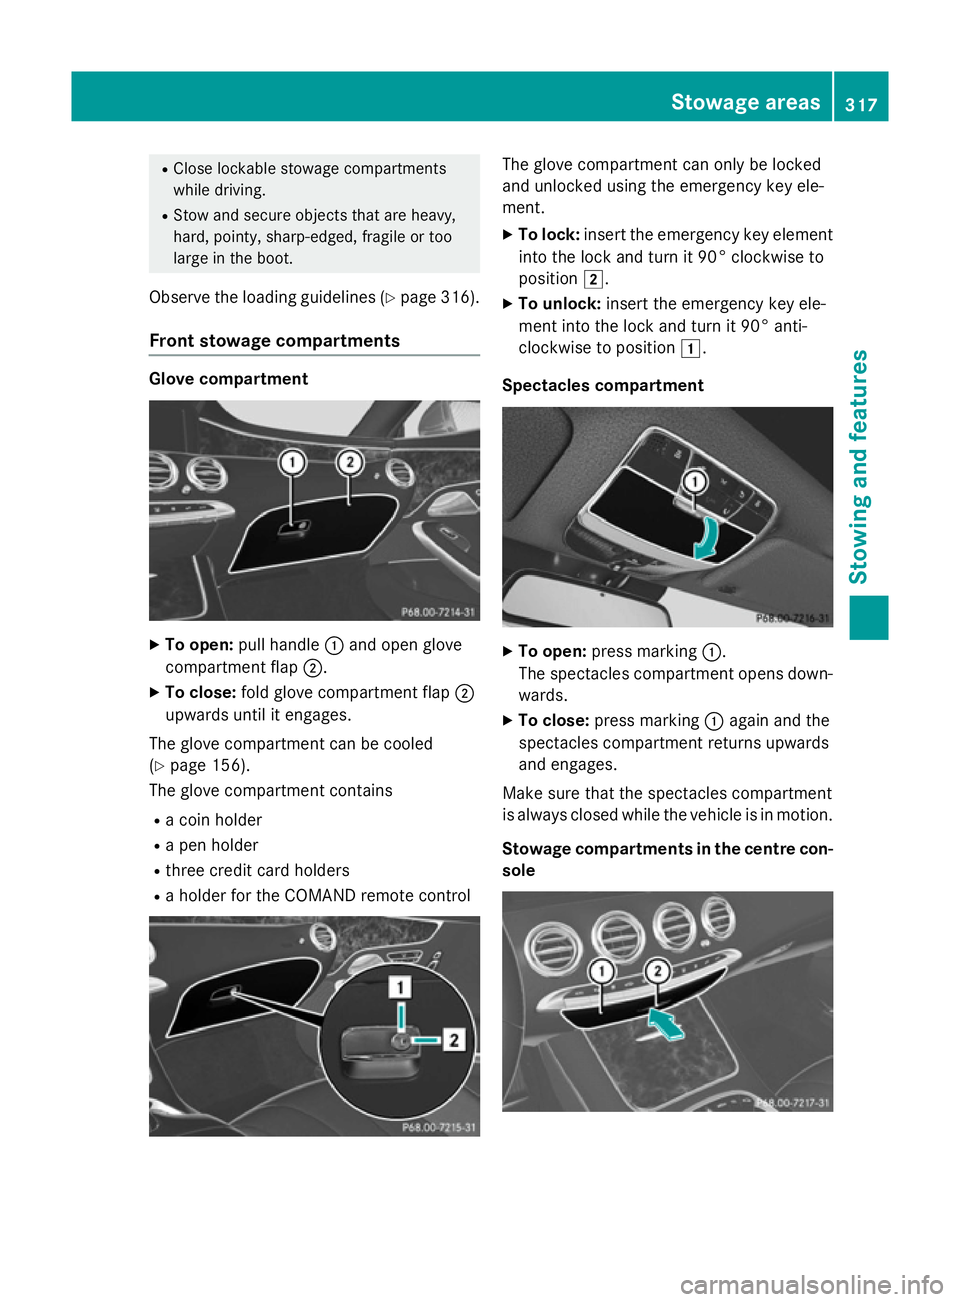
Front stowage compartments Glove compartment
X
To open: pull handle :and open glove
compartment flap ;.
X To close: fold glove compartment flap ;
upwards until it engages.
The glove compartment can be cooled
(Y page 156).
The glove compartment contains
R a coin holder
R a pen holder
R three credit card holders
R a holder for the COMAND remote control The glove compartment can only be locked
and unlocked using the emergency key ele-
ment.
X To lock: insert the emergency key element
into the lock and turn it 90° clockwise to
position 2.
X To unlock: insert the emergency key ele-
ment into the lock and turn it 90° anti-
clockwise to position 1.
Spectacles compartment X
To open: press marking :.
The spectacles compartment opens down- wards.
X To close: press marking :again and the
spectacles compartment returns upwards
and engages.
Make sure that the spectacles compartment
is always closed while the vehicle is in motion.
Stowage compartments in the centre con-
sole Stowage areas
317Stowing and features Z