2015 MERCEDES-BENZ S-CLASS COUPE trip computer
[x] Cancel search: trip computerPage 18 of 417

Night View Assist Plus
Activating/deactivating ................. 234
Cleaning ......................................... 351
Display message ............................ 290
Function/note s............................. 232
Pedestrian and animal recogni-
tion ................................................ 233
Problem (fault) ............................... 236
Switching automatic activation
on/of f............................................ 259
Notes on running in a new vehicle .. 160O
Occupant safety Automatic front-passenger front
airbag deactivation .......................... 51
Automatic measures after an acci-
dent ................................................. 60
Children in the vehicle ..................... 60
Important safety notes .................... 43
PASSENGER AIRBAG indicator
lamp ................................................. 43
Pets in the vehicle ........................... 69
PRE-SAFE ®
(anticipatory occu-
pant protection) ............................... 58
PRE-SAFE ®
PLUS (anticipatory
occupant protection PLUS) .............. 59
Restraint system introduction .......... 42
Restraint system warning lamp ........ 43
Odometer
see Total distance recorder
see Trip meter
Oil
see Engine oil
On-board computer
AMG menu ..................................... 265
Assistance graphic menu ............... 257
Assistance menu ........................... 258
Display messages .......................... 266
Displaying a service message ........ 344
DISTRONIC PLUS ........................... 201
Factory settings ............................. 264
Head-up display ............................. 247
Important safety notes .................. 244
Instrument cluster menu ............... 263
Light menu ..................................... 262
Media menu ................................... 254 Menu overview .............................. 249
Message memory .......................... 266
Navigation menu ............................ 251
Operating the TV ............................ 255
Operating video DVD ..................... 255
Operation ....................................... 245
Radio menu ................................... 253
Service menu ................................. 258
Settings menu ............................... 258
Standard display ............................ 249
Telephone menu ............................ 256
Trip menu ...................................... 249
Vehicle menu ................................. 264
Operating instructions
Vehicle equipment ........................... 24
Operating safety
Declaration of conformity ................ 25
Important safety note ...................... 24
Operating system
see On-board computer
Outside temperature display ........... 245
Overhead control panel ...................... 38
Owner's Manual
Overview .......................................... 24 P
Paint code .......................................... 404
Paintwork (cleaning instructions) ... 347
Panic alarm .......................................... 42
Panorama roof ................................... 103
Parking
Important safety notes .................. 181
Parking brake ................................ 183
Position of exterior mirror, front-
passenger side ............................... 121
Reversing camera .......................... 220
Switching off the engine ................ 182
see PARKTRONIC
Parking aid
see 360° camera
see Active Parking Assist
see Exterior mirrors
see PARKTRONIC
see Reversing camera
Parking assistance
see PARKTRONIC Index
15
Page 23 of 417

TIREFIT kit
.......................................... 359
Tyre pressure not reached ............. 361
Tyre pressure reache d................... 361
Top Tether ............................................ 62
Total distance recorder .................... 249
Tow-away protection
Activating ......................................... 81
Deactivating ..................................... 81
Function ........................................... 81
Tow-starting
Emergency engine starting ............ 372
Important safety notes .................. 369
Towing
Important safety notes .................. 369
Notes for 4MATIC vehicles ............ 372
Transporting the vehicle ................ 371
With the rear axle raised ................ 371
Towing away
Fitting the towing eye .................... 370
Removing the towing eye ............... 371
With both axles on the ground ....... 371
Towing eye ......................................... 357
Traffic Sign Assist
Activating ....................................... 231
Display message ............................ 291
Function/note s............................. 230
Important safety notes .................. 230
Instrument cluster display ............. 231
Switching on/of f........................... 259
Transmission
see Automatic transmission
Transporting the vehicle .................. 371
Trim pieces (cleaning instruc-
tions) .................................................. 352
Trip computer (on-board com-
puter) .................................................. 250
Trip meter
Calling up ....................................... 249
Resetting (on-board computer) ...... 251
Turn signals
Switching on/of f........................... 128
TV
Operating (on-board computer) ..... 255
Two-way radio
Frequencies ................................... 402
Installation ..................................... 402
Transmission output (maximum) .... 402 Windscreen (infrared reflective) ..... 336
Type identification plate
see Vehicle identification plate
Tyre pressure
Calling up (on-board computer) ..... 381
Display message ............................ 295
Not reached (TIREFIT) .................... 361
Reached (TIREFIT) .......................... 361
Recommended ............................... 380
Tyre pressure loss warning
General notes ................................ 384
Important safety notes .................. 384
Restarting ...................................... 385
Tyre pressure monitor
Checking the tyre pressure elec-
tronically ........................................ 382
Function/note s............................. 381
General notes ................................ 381
Important safety notes .................. 381
Radio type approval for the tyre
pressure monitor ........................... 384
Restarting ...................................... 383
Warning lamp ................................. 313
Warning message .......................... 383
Tyres
Changing a whee l.......................... 385
Checking ........................................ 377
Direction of rotation ...................... 386
Display message ............................ 295
General notes ................................ 391
Important safety notes .................. 376
Information on driving .................... 376
MOExtended tyre s......................... 378
Replacing ....................................... 386
Service life ..................................... 377
Snow chains .................................. 379
Storing ........................................... 386
Summer tyres in winter ................. 378
Tyre size (data ).............................. 391
Tyre tread ...................................... 377
Wheel and tyre combinations ........ 393
see Flat tyre U
Unlocking Emergency unlocking ....................... 93 20
Index
Page 249 of 417
9
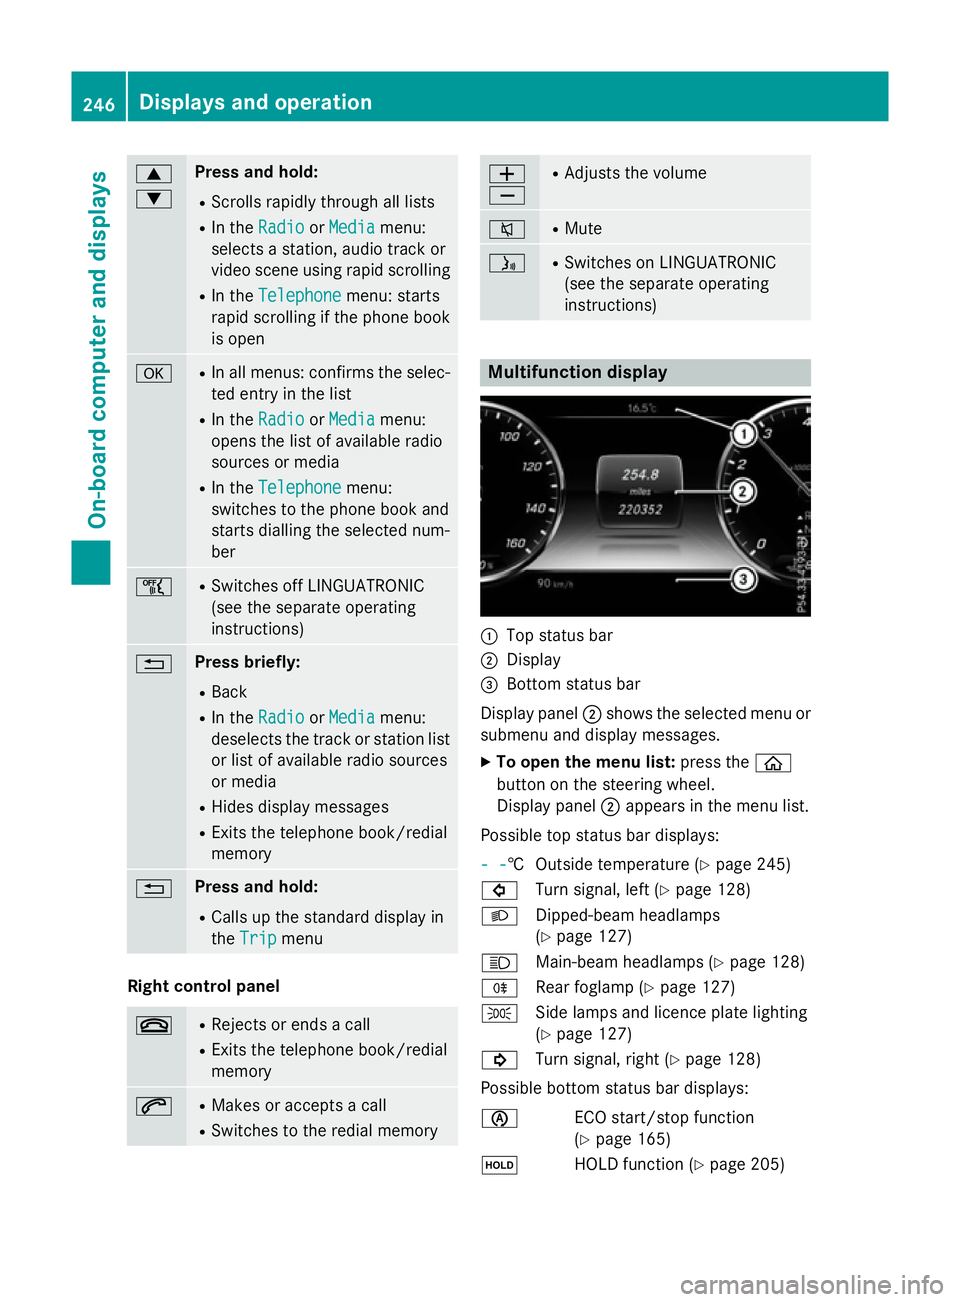
: Press and hold:
R Scrolls rapidly through all lists
R In the Radio
Radio orMedia Media menu:
selects a station, audio track or
video scene using rapid scrolling
R In the Telephone Telephone menu: starts
rapid scrolling if the phone book is open a R
In all menus: confirms the selec-
ted entry in the list
R In the Radio
Radio orMedia
Media menu:
opens the list of available radio
sources or media
R In the Telephone Telephone menu:
switches to the phone book and
starts dialling the selected num-
ber ñ R
Switches off LINGUATRONIC
(see the separate operating
instructions) % Press briefly:
R Back
R In the Radio Radio orMedia
Media menu:
deselects the track or station list or list of available radio sources
or media
R Hides display messages
R Exits the telephone book/redial
memory % Press and hold:
R Calls up the standard display in
the Trip Trip menu Right control panel
~ R
Rejects or ends a call
R Exits the telephone book/redial
memory 6 R
Makes or accepts a call
R Switches to the redial memory W
X R
Adjusts the volume 8 R
Mute ó R
Switches on LINGUATRONIC
(see the separate operating
instructions) Multifunction display
:
Top status bar
; Display
= Bottom status bar
Display panel ;shows the selected menu or
submenu and display messages.
X To open the menu list: press theò
button on the steering wheel.
Display panel ;appears in the menu list.
Possible top status bar displays:
- - - -† Outside temperature (Y
page 245)
# Turn signal, left (Y page 128)
L Dipped-beam headlamps
(Ypage 127)
K Main-beam headlamps (Y page 128)
R Rear foglamp (Y page 127)
T Side lamps and licence plate lighting
(Ypage 127)
! Turn signal, right (Y page 128)
Possible bottom status bar displays:
è ECO start/stop function
(Ypage 165)
ë HOLD function (Y page 205)246
Displays and operationOn-board computer and displays
Page 252 of 417
=
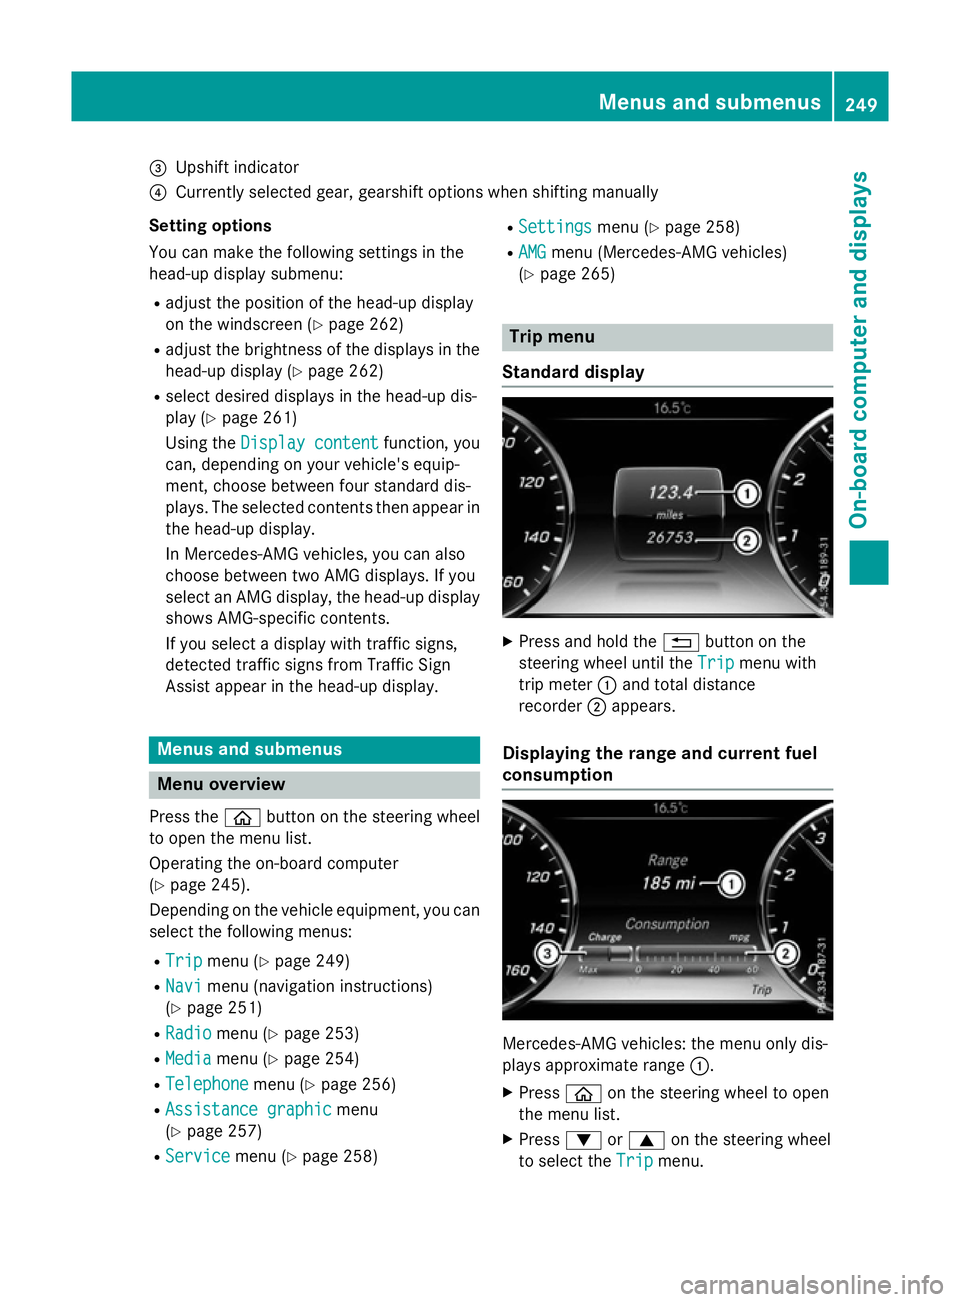
Upshift indicator
? Currently selected gear, gearshift options when shifting manually
Setting options
You can make the following settings in the
head-up display submenu:
R adjust the position of the head-up display
on the windscreen (Y page 262)
R adjust the brightness of the displays in the
head-up display (Y page 262)
R select desired displays in the head-up dis-
play (Y page 261)
Using the Display content
Display content function, you
can, depending on your vehicle's equip-
ment, choose between four standard dis-
plays. The selected contents then appear in
the head-up display.
In Mercedes-AMG vehicles, you can also
choose between two AMG displays. If you
select an AMG display, the head-up display shows AMG-specific contents.
If you select a display with traffic signs,
detected traffic signs from Traffic Sign
Assist appear in the head-up display. Menus and submenus
Menu overview
Press the òbutton on the steering wheel
to open the menu list.
Operating the on-board computer
(Y page 245).
Depending on the vehicle equipment, you can
select the following menus:
R Trip
Trip menu (Y page 249)
R Navi Navi menu (navigation instructions)
(Y page 251)
R Radio Radio menu (Y page 253)
R Media
Media menu (Y page 254)
R Telephone
Telephone menu (Ypage 256)
R Assistance graphic
Assistance graphic menu
(Y page 257)
R Service
Service menu (Ypage 258) R
Settings
Settings menu (Ypage 258)
R AMG
AMG menu (Mercedes-AMG vehicles)
(Y page 265) Trip menu
Standard display X
Press and hold the %button on the
steering wheel until the Trip
Tripmenu with
trip meter :and total distance
recorder ;appears.
Displaying the range and current fuel
consumption Mercedes-AMG vehicles: the menu only dis-
plays approximate range
:.
X Press òon the steering wheel to open
the menu list.
X Press :or9 on the steering wheel
to select the Trip Tripmenu. Menus and submenus
249On-board computer and displays Z
Page 253 of 417
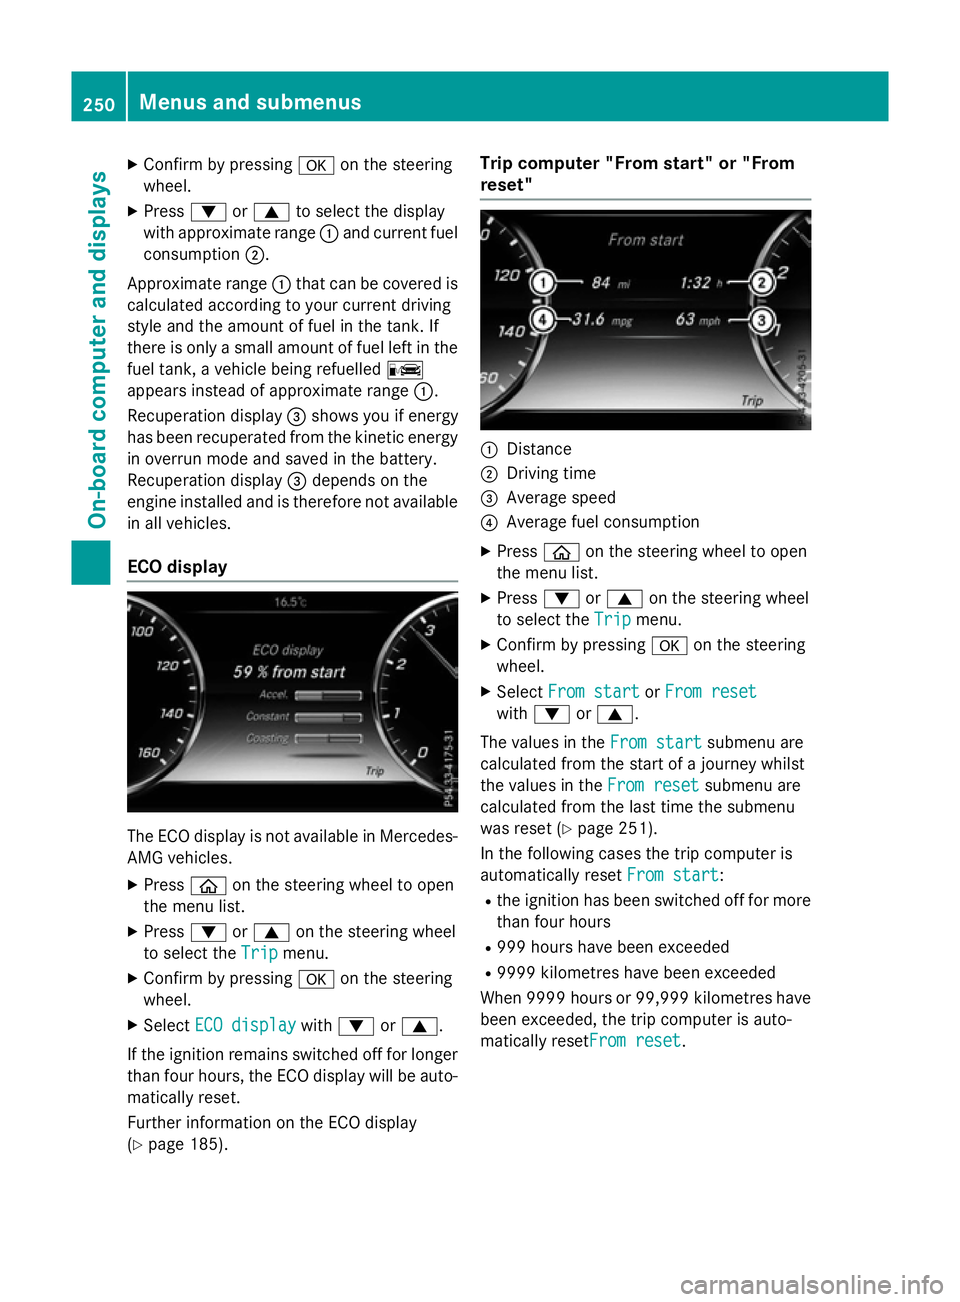
X
Confirm by pressing aon the steering
wheel.
X Press :or9 to select the display
with approximate range :and current fuel
consumption ;.
Approximate range :that can be covered is
calculated according to your current driving
style and the amount of fuel in the tank. If
there is only a small amount of fuel left in the
fuel tank, a vehicle being refuelled C
appears instead of approximate range :.
Recuperation display =shows you if energy
has been recuperated from the kinetic energy
in overrun mode and saved in the battery.
Recuperation display =depends on the
engine installed and is therefore not available in all vehicles.
ECO display The ECO display is not available in Mercedes-
AMG vehicles.
X Press òon the steering wheel to open
the menu list.
X Press :or9 on the steering wheel
to select the Trip Tripmenu.
X Confirm by pressing aon the steering
wheel.
X Select ECO display
ECO display with: or9.
If the ignition remains switched off for longer than four hours, the ECO display will be auto-
matically reset.
Further information on the ECO display
(Y page 185). Trip computer "From start" or "From
reset"
:
Distance
; Driving time
= Average speed
? Average fuel consumption
X Press òon the steering wheel to open
the menu list.
X Press :or9 on the steering wheel
to select the Trip Tripmenu.
X Confirm by pressing aon the steering
wheel.
X Select From start
From start orFrom reset
From reset
with : or9.
The values in the From start
From startsubmenu are
calculated from the start of a journey whilst
the values in the From reset From resetsubmenu are
calculated from the last time the submenu
was reset (Y page 251).
In the following cases the trip computer is
automatically reset From start From start:
R the ignition has been switched off for more
than four hours
R 999 hours have been exceeded
R 9999 kilometres have been exceeded
When 9999 hour sor 99,999 kilometres have
been exceeded, the trip computer is auto-
matically resetFrom reset From reset.250
Menus and submenusOn-board computer and displays
Page 254 of 417
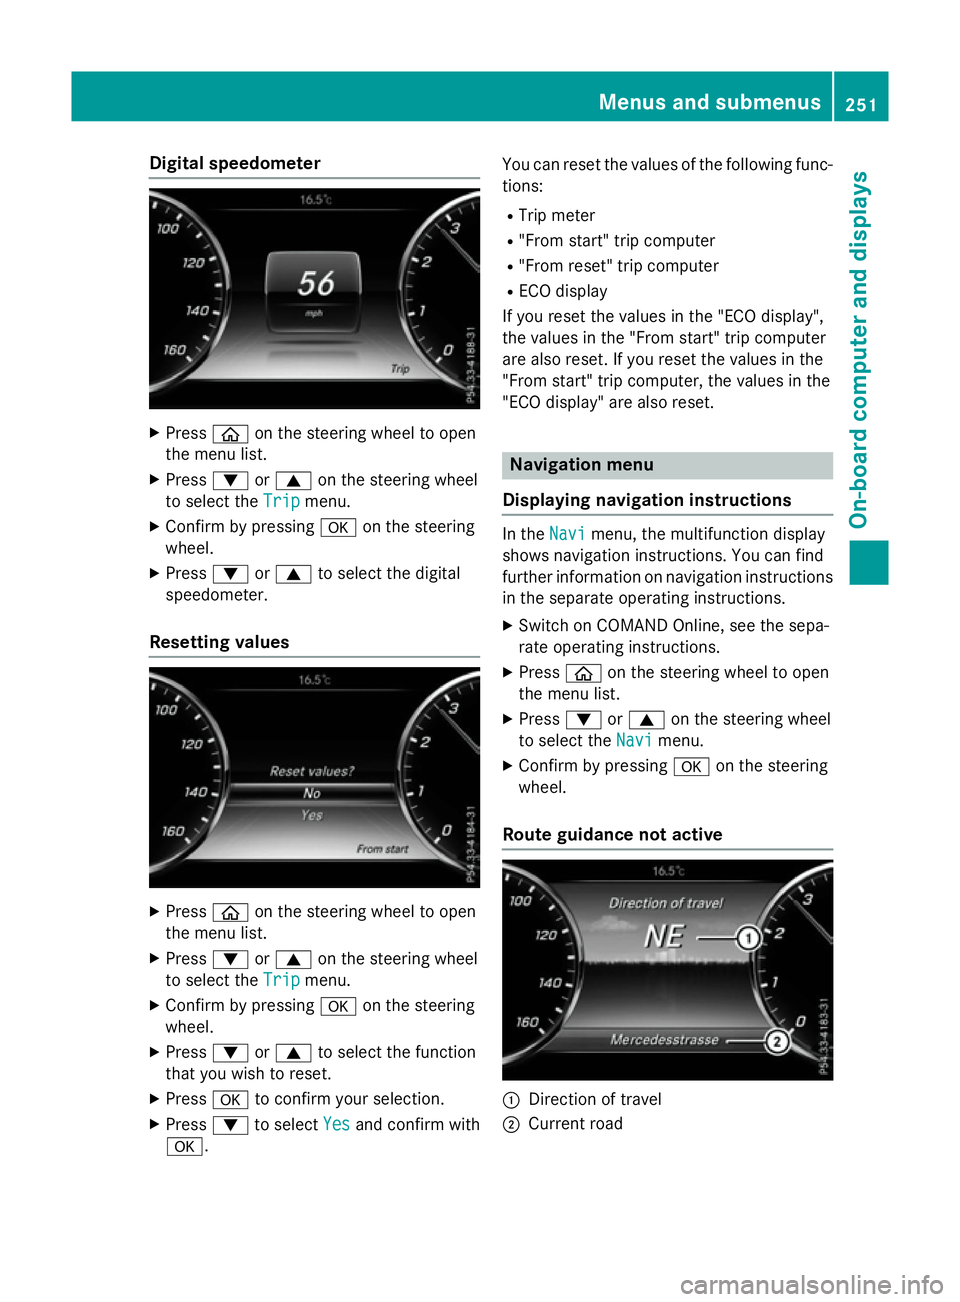
Digital speedometer
X
Press òon the steering wheel to open
the menu list.
X Press :or9 on the steering wheel
to select the Trip
Tripmenu.
X Confirm by pressing aon the steering
wheel.
X Press :or9 to select the digital
speedometer.
Resetting values X
Press òon the steering wheel to open
the menu list.
X Press :or9 on the steering wheel
to select the Trip
Tripmenu.
X Confirm by pressing aon the steering
wheel.
X Press :or9 to select the function
that you wish to reset.
X Press ato confirm your selection.
X Press :to select Yes
Yesand confirm with
a. You can reset the values of the following func-
tions:
R Trip meter
R "From start" trip computer
R "From reset" trip computer
R ECO display
If you reset the values in the "ECO display",
the values in the "From start" trip computer
are also reset. If you reset the values in the
"From start" trip computer, the values in the
"ECO display" are also reset. Navigation menu
Displaying navigation instructions In the
Navi Navimenu, the multifunction display
shows navigation instructions. You can find
further information on navigation instructions in the separate operating instructions.
X Switch on COMAND Online, see the sepa-
rate operating instructions.
X Press òon the steering wheel to open
the menu list.
X Press :or9 on the steering wheel
to select the Navi Navimenu.
X Confirm by pressing aon the steering
wheel.
Route guidance not active :
Direction of travel
; Current road Menus and submenus
251On-boardcompu ter and displays Z
Page 266 of 417
Lights
Lights
submenu instead of the Intelli‐
Intelli‐
gent Light System
gent Light System function (Ypage 263).
This display message will only appear if the
setting for driving on the left/right is set
opposite to your vehicle's country version.
Further information on the Intelligent Light
System (Y page 129).
Switching the spotlight function on or off
X Press òon the steering wheel to open
the menu list.
X Press :or9 on the steering wheel
to select the Settings
Settings menu.
X Confirm by pressing aon the steering
wheel.
X Press :or9 to select the Lights Lights
submenu.
X Press ato confirm.
X Press the :or9 button to select the
Spotlight
Spotlight function.
X Press the abutton to save the setting.
When the spotlight function is activated,
the assistance graphic shows the pedes-
trian symbol.
Further information on the spotlight function
(Y page 235).
Setting the dipped-beam headlamps for
driving on the left/right
This function is only available on vehicles with
the Intelligent Light System.
You can use this function to switch between
symmetrical and asymmetrical dipped beam
(Y page 126).
X Press òon the steering wheel to open
the menu list.
X Press the :or9 button on the steer-
ing wheel to select the Settings
Settings menu.
X Confirm by pressing aon the steering
wheel.
X Press :or9 to select the Lights Lights
submenu.
X Press ato confirm. X
Press the :or9 button to select the
Dipped beams Setting for
Dipped beams Setting for function.
You will see the selected setting, right-
right-
side traffic
side traffic orleft-side traffic
left-side traffic.
X Press the abutton to save the setting.
If you change the setting, conversion does
not take place until the next time the vehi-
cle is stationary.
If you set the dipped-beam headlamps for
driving on the right/left, then motorway
mode and the extended range foglamps are
unavailable. These are only deactivated if the
setting for driving on the left/right is set
opposite to your vehicle's country version.
A qualified specialist workshop can set the
dipped-beam headlamps for driving on the
left/right.
Instrument cluster submenu Selecting the distance unit
The
Display Display unit
unitSpeed-/odometer
Speed-/odometer func-
tion allows you to choose whether certain
displays appear in kilometres or miles in the
multifunction display.
X Press òon the steering wheel to open
the menu list.
X Press the :or9 button on the steer-
ing wheel to select the Settings Settingsmenu.
X Confirm by pressing aon the steering
wheel.
X Press :or9 to select the Instru‐
Instru‐
ment cluster
ment cluster submenu.
X Press ato confirm.
X Press the :or9 button to select the
Display unit Speed-/odometer
Display unit Speed-/odometer func-
tion.
The current setting km kmorMiles
Miles appears.
X Press the abutton to save the setting.
The selected unit of measurement for dis-
tance applies to the:
R speedometer
R digital speedometer in the Trip
Tripmenu Menus and submenus
263On-board computer and displays Z
Page 267 of 417
R
additional speedometer in the status area
of the multifunction display.
The unit in the additional speedometer is
displayed inversely to the selected dis-
tance unit.
R total distance recorder and trip meter
R trip computer
R current consumption and the range
R navigation instructions in the Navi
Navi menu
R cruise control
R SPEEDTRONIC
R DISTRONIC PLUS
R DISTRONIC PLUS with Steering Assist and
Stop&Go Pilot
R ASSYST PLUS service interval display
Switching the additional speedometer
on/off
The Digital speedo [km/h] Digital speedo [km/h] function
allows you to choose whether the status area
in the multifunction display shows the speed
digitally. The unit in the additional speedom-
eter is always inverse to the speedometer
unit.
X Press òon the steering wheel to open
the menu list.
X Press :or9 on the steering wheel
to select the Settings
Settings menu.
X Confirm by pressing aon the steering
wheel.
X Press :or9 to select the Instru‐
Instru‐
ment cluster ment cluster submenu.
X Press ato confirm your selection.
X Press the :or9 button to select the
Digital speedo [km/h]
Digital speedo [km/h] function.
The current selection appears.
X To activate/deactivate: pressa
again. Vehicle submenu Setting permanent SPEEDTRONIC
X Press òon the steering wheel to open
the menu list.
X Press the :or9 button on the steer-
ing wheel to select the Settings
Settings menu.
X Confirm by pressing aon the steering
wheel.
X Press :or9 to select the Vehicle Vehicle
submenu.
X Press ato confirm.
X Press the :or9 button to select the
Limit speed (winter tyres) Limit speed (winter tyres) function.
The current setting appears.
X Press ato confirm.
X Press :or9 to adjust permanent
SPEEDTRONIC in increments of ten
(240 km/h 240 km/h to160 km/h 160 km/h). The Off
Offsetting
switches permanent SPEEDTRONIC off.
X Press the abutton to store the entry.
For further information on permanent SPEED- TRONIC (Y page 194).
Restoring the factory settings X
Press òon the steering wheel to open
the menu list.
X Press :or9 on the steering wheel
to select the Settings
Settingsmenu.
X Confirm by pressing aon the steering
wheel.
X Press :or9 to select the Factory
Factory
settings
settings submenu.
X Press ato confirm.
The Reset all settings?
Reset all settings? function
appears.
X Press the :or9 button to select No
No
or Yes
Yes .
X Press the abutton to confirm the selec-
tion.
If you have selected Yes Yes, the multifunction
display shows a confirmation message.
For safety reasons, not all functions will be
reset: the Limit speed (winter tyres) Limit speed (winter tyres) 264
Menus and submenusOn-board computer and displays