2015 MERCEDES-BENZ GLE SUV trailer
[x] Cancel search: trailerPage 348 of 453
Warning/
indicator
lamp
N N
Signal type
Possible causes/consequences and M
MSolutions ֌
N
The yellow ESP ®
and ESP ®
OFF warning lamps are lit while the engine is running.
PLUG-IN HYBRID vehicles:
The yellow ESP ®
and ESP ®
OFF warning lamps are lit in the READY driving status.
ESP ®
, BAS, BAS PLUS with Cross-Traffic Assist, COLLISION PREVENTION ASSIST
PLUS, ESP ®
trailer stabilisation, PRE‑SAFE ®
, PRE‑SAFE ®
PLUS, PRE‑SAFE ®
Brake,
HOLD function, hill start assist, Crosswind Assist, adaptive brake lights, STEER
CONTROL, Active Lane Keeping Assist and Active Blind Spot Assist, for example,
are unavailable due to a malfunction.
ATTENTION ASSIST is deactivated.
G WARNING
The brake system continues to function normally, but without the functions listed above.
The braking distance may thus increase in an emergency braking situation.
If ESP ®
is not operational, ESP ®
is unable to stabilise the vehicle.
There is an increased danger of skidding and risk of an accident.
X Observe the additional display messages in the multifunction display.
X Drive on carefully.
X Consult a qualified specialist workshop immediately. Warning and indicator lamps in the instrument cluster
345On-board computer and displays Z
Page 349 of 453
Warning/
indicator
lamp
N N
Signal type
Possible causes/consequences and M
M Solutions ֌
N
The yellow ESP ®
and ESP ®
OFF warning lamps are lit while the engine is running.
PLUG-IN HYBRID vehicles:
The yellow ESP ®
and ESP ®
OFF warning lamps are lit in the READY driving status.
ESP ®
, BAS, BAS PLUS with Cross-Traffic Assist, COLLISION PREVENTION ASSIST
PLUS, ESP ®
trailer stabilisation, PRE‑SAFE ®
, PRE‑SAFE ®
PLUS, PRE‑SAFE ®
Brake,
HOLD function, hill start assist, Crosswind Assist, adaptive brake lights, STEER
CONTROL, Active Lane Keeping Assist and Active Blind Spot Assist, for example,
are unavailable due to a malfunction.
ATTENTION ASSIST is deactivated.
self-diagnosis is not yet complete
G WARNING
The brake system continues to function normally, but without the functions listed above.
The braking distance may thus increase in an emergency braking situation.
If ESP ®
is not operational, ESP ®
is unable to stabilise the vehicle.
There is an increased danger of skidding and risk of an accident.
X Carefully drive on a suitable stretch of road, making slight steering movements
at a speed above 20 km/h.
The functions mentioned above are available again when the warning lamp goes out.
If the warning lamp is still on: X Observe the additional display messages in the multifunction display.
X Drive on carefully.
X Consult a qualified specialist workshop immediately. !
N
The red indicator lamp for the electric parking brake flashes or is lit and/or the
yellow warning lamp for the electric parking brake is lit.
X Observe the additional display messages in the multifunction display. 6
N
The red restraint system warning lamp is lit while the engine is running.
The restraint system is faulty.
G WARNING
The airbags or belt tensioners may either be triggered unintentionally or, in the
event of an accident, may not be triggered.
This poses an increased risk of injury.
X Observe the additional display messages in the multifunction display.
X Drive on carefully.
X Contact a qualified specialist workshop immediately and have the restraint sys-
tem checked.
For further information about the restraint system, see (Y page 43).346
Warning and indicator lamps in the instrument clusterOn-board computer and displays
Page 386 of 453
Cleaning the reversing camera
!
Do not clean the camera lens and the area
around the reversing camera with a high-pres-
sure cleaner. X
Make sure that the vehicle is stationary and
that the key is in position 2in the ignition lock.
X Open the camera cover for cleaning via the
multimedia system (see separate operating
instructions).
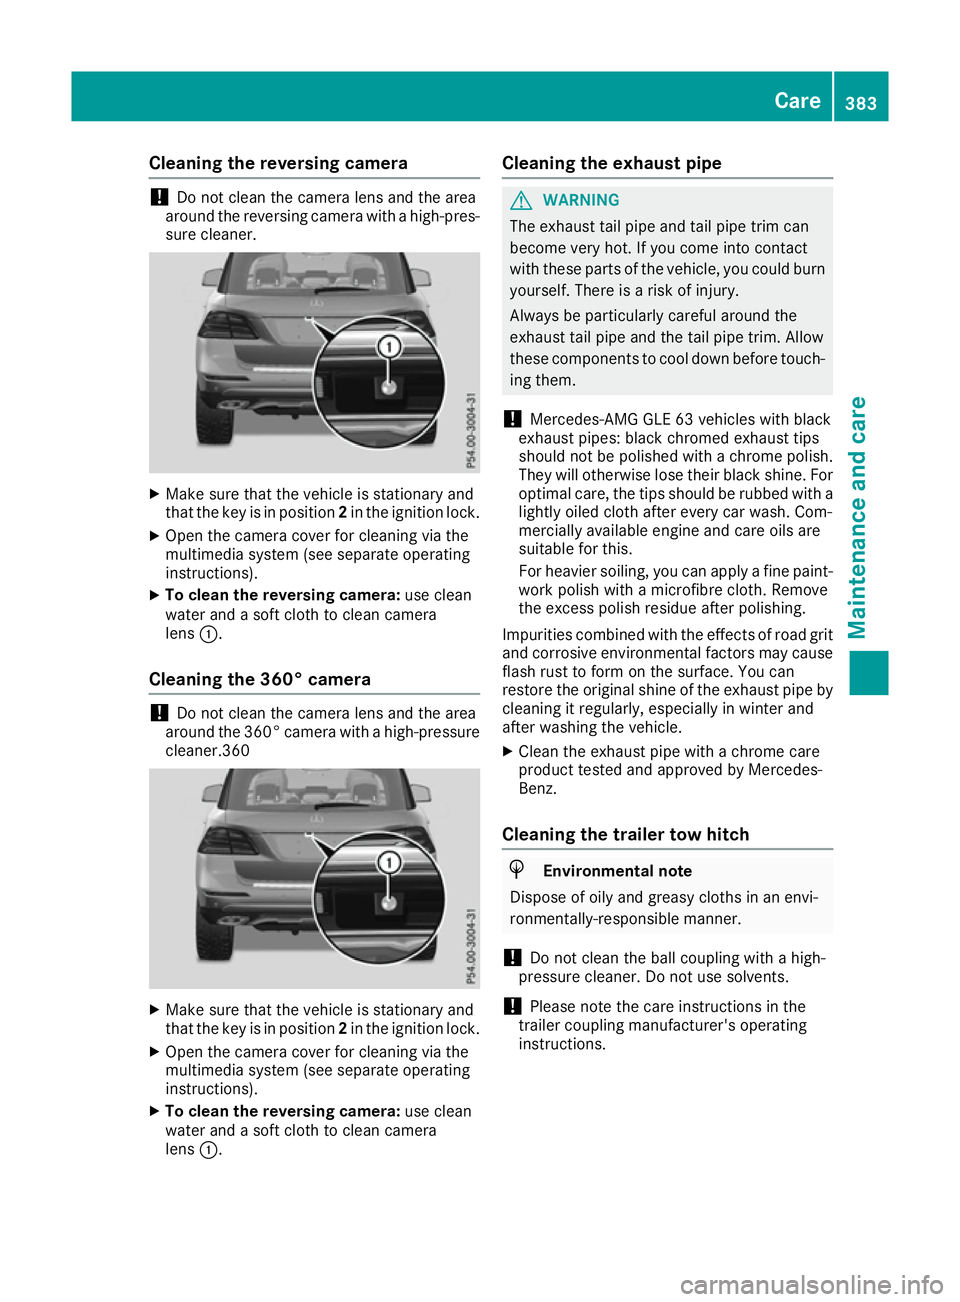
X To clean the reversing camera: use clean
water and a soft cloth to clean camera
lens :.
Cleaning the 360° camera !
Do not clean the camera lens and the area
around the 360° camera with a high-pressure cleaner.360 X
Make sure that the vehicle is stationary and
that the key is in position 2in the ignition lock.
X Open the camera cover for cleaning via the
multimedia system (see separate operating
instructions).
X To clean the reversing camera: use clean
water and a soft cloth to clean camera
lens :. Cleaning the exhaust pipe G
WARNING
The exhaust tail pipe and tail pipe trim can
become very hot. If you come into contact
with these parts of the vehicle, you could burn
yourself. There is a risk of injury.
Always be particularly careful around the
exhaust tail pipe and the tail pipe trim. Allow
these components to cool down before touch-
ing them.
! Mercedes-AMG GLE 63 vehicles with black
exhaust pipes: black chromed exhaust tips
should not be polished with a chrome polish. They will otherwise lose their black shine. For
optimal care, the tips should be rubbed with a lightly oiled cloth after every car wash. Com-
mercially available engine and care oils are
suitable for this.
For heavier soiling, you can apply a fine paint-
work polish with a microfibre cloth. Remove
the excess polish residue after polishing.
Impurities combined with the effects of road grit
and corrosive environmental factors may cause
flash rust to form on the surface. You can
restore the original shine of the exhaust pipe by cleaning it regularly, especially in winter and
after washing the vehicle.
X Clean the exhaust pipe with a chrome care
product tested and approved by Mercedes-
Benz.
Cleaning the trailer tow hitch H
Environmental note
Dispose of oily and greasy cloths in an envi-
ronmentally-responsible manner.
! Do not clean the ball coupling with a high-
pressure cleaner. Do not use solvents.
! Please note the care instructions in the
trailer coupling manufacturer's operating
instructions. Care
383Maintenance and care Z
Page 387 of 453
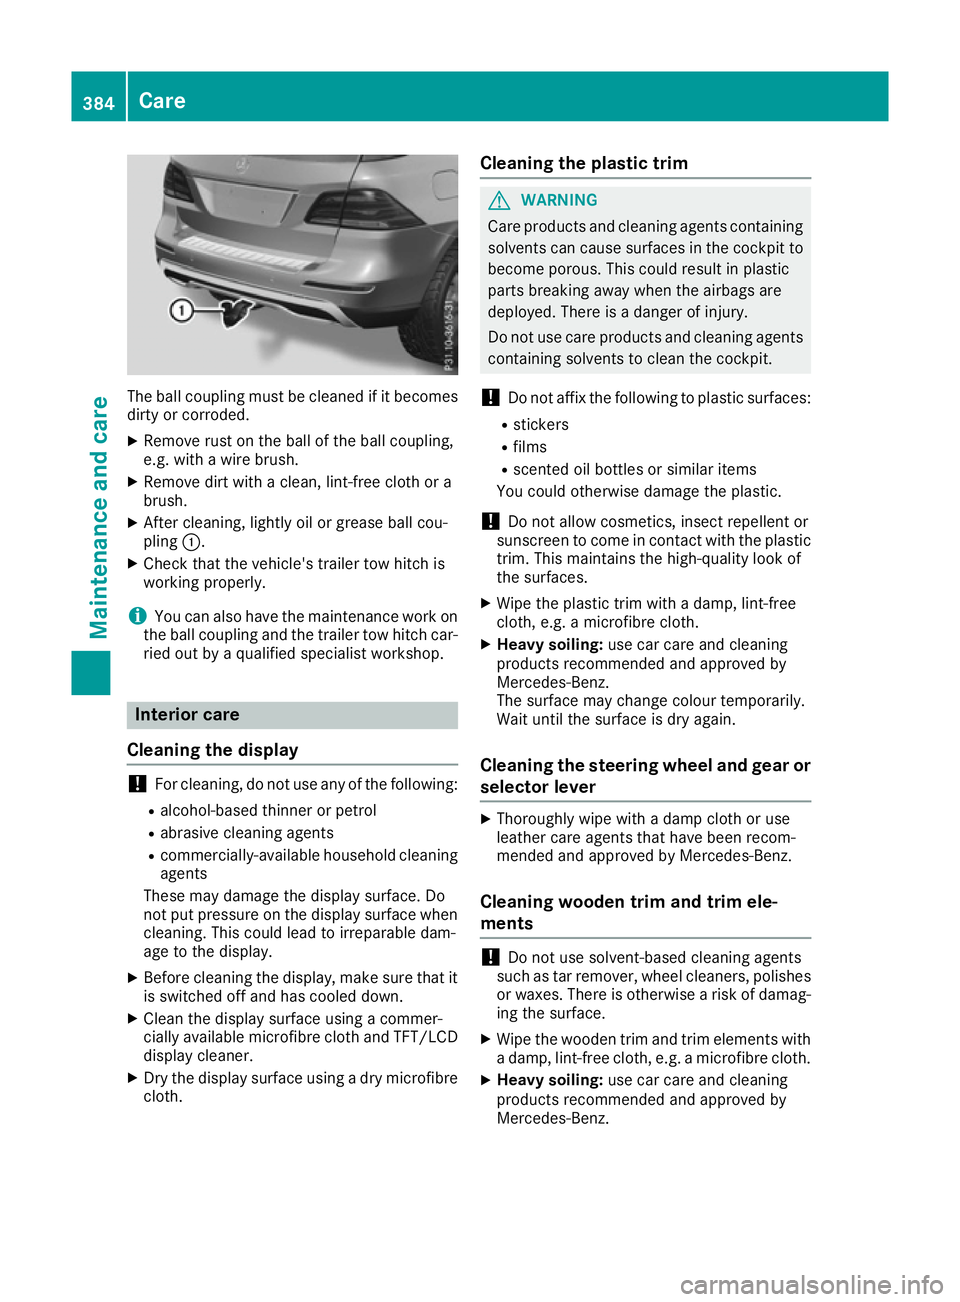
The ball coupling must be cleaned if it becomes
dirty or corroded.
X Remove rust on the ball of the ball coupling,
e.g. with a wire brush.
X Remove dirt with a clean, lint-free cloth or a
brush.
X After cleaning, lightly oil or grease ball cou-
pling :.
X Check that the vehicle's trailer tow hitch is
working properly.
i You can also have the maintenance work on
the ball coupling and the trailer tow hitch car-
ried out by a qualified specialist workshop. Interior care
Cleaning the display !
For cleaning, do not use any of the following:
R alcohol-based thinner or petrol
R abrasive cleaning agents
R commercially-available household cleaning
agents
These may damage the display surface. Do
not put pressure on the display surface when
cleaning. This could lead to irreparable dam-
age to the display.
X Before cleaning the display, make sure that it
is switched off and has cooled down.
X Clean the display surface using a commer-
cially available microfibre cloth and TFT/LCD
display cleaner.
X Dry the display surface using a dry microfibre
cloth. Cleaning the plastic trim G
WARNING
Care products and cleaning agents containing solvents can cause surfaces in the cockpit to
become porous. This could result in plastic
parts breaking away when the airbags are
deployed. There is a danger of injury.
Do not use care products and cleaning agents containing solvents to clean the cockpit.
! Do not affix the following to plastic surfaces:
R stickers
R films
R scented oil bottles or similar items
You could otherwise damage the plastic.
! Do not allow cosmetics, insect repellent or
sunscreen to come in contact with the plastic trim. This maintains the high-quality look of
the surfaces.
X Wipe the plastic trim with a damp, lint-free
cloth, e.g. a microfibre cloth.
X Heavy soiling: use car care and cleaning
products recommended and approved by
Mercedes-Benz.
The surface may change colour temporarily.
Wait until the surface is dry again.
Cleaning the steering wheel and gear or selector lever X
Thoroughly wipe with a damp cloth or use
leather care agents that have been recom-
mended and approved by Mercedes-Benz.
Cleaning wooden trim and trim ele-
ments !
Do not use solvent-based cleaning agents
such as tar remover, wheel cleaners, polishes
or waxes. There is otherwise a risk of damag- ing the surface.
X Wipe the wooden trim and trim elements with
a damp, lint-free cloth, e.g. a microfibre cloth.
X Heavy soiling: use car care and cleaning
products recommended and approved by
Mercedes-Benz. 384
CareMaintenance and care
Page 402 of 453
X
Connect negative terminal ?of donor battery Bto earth point Aof your vehicle using the jump
lead, connecting the jump lead to donor battery Bfirst.
X Start the engine.
X Before disconnecting the jump leads, let the engines run for several minutes.
X First, remove the jump leads from earth point Aand negative terminal ?, then from positive
clamp ;and positive terminal =. Begin each time at the contacts on your own vehicle first.
X After removing the jump leads, close cover :of positive terminal clamp ;.
X Have the battery checked at a qualified specialist workshop.
PLUG-IN HYBRID vehicles: if your vehicle has been jump-started, it may not be possible to use the
electric drive for approximately 30 minutes.
Jump-starting is not considered to be a normal operating condition.
i Jump-starting cables and further information regarding jump starting can be obtained at any
qualified specialist workshop. Towing away and tow-starting
Important safety notes
G
WARNING
Safety-relevant functions are restricted or not
available if:
R the engine is not running.
R the brake system or the power steering is
malfunctioning
R the voltage supply or the vehicle's electrical
system is malfunctioning.
If your vehicle is towed, significantly greater
force may be required to steer the vehicle or
to brake. There is a risk of an accident.
In such circumstances, use a towing bar.
Make sure that the steering is moving freely
before towing. G
WARNING
When towing or tow-starting another vehicle
and its weight is greater than the permissible gross weight of your vehicle, the:
R towing eye may be torn off
R car/trailer combination may swerve or
even overturn
There is a risk of an accident.
When towing or tow-starting another vehicle,
its weight should not be greater than the per- missible gross weight of your vehicle. Details on the permissible gross vehicle weight
of your vehicle can be found on the vehicle iden-
tification plate (Y page 434).
! When COLLISION PREVENTION ASSIST
PLUS, DISTRONIC PLUS or the HOLD function is activated, the vehicle brakes automatically
in certain situations.
To avoid damage to the vehicle, deactivate
these systems in the following or similar sit-
uations:
R when towing away
R in a car wash
! Make sure that the electric parking brake is
released. If the electric parking brake is faulty,
visit a qualified specialist workshop.
! Only secure the tow cable or tow bar to the
towing eyes or, if available, to the trailer tow
hitch. You could otherwise damage the vehi-
cle.
! Observe the following points when towing
with a tow rope:
R Secure the tow rope on the same side on
both vehicles.
R Make sure that the tow rope is not longer
than legally permitted. Mark the tow rope in
the middle, e.g. with a white cloth
(30 x 30 cm). This will make other road
users aware that a vehicle is being towed.
R Only secure the tow cable to the towing
eyes or, if available, to the trailer tow hitch.
R Observe the brake lamps of the towing
vehicle while driving. Always maintain a dis- Towing away and tow-starting
399Breakdown assistance Z
Page 403 of 453

tance a distance so that the tow rope does
not sag.
R Do not use steel cables or chains to tow
your vehicle. You could otherwise damage
the vehicle.
! Do not use the trailer tow hitch for recovery
or towing. Do not use the towing eye for
recovery. This could damage the vehicle. If in doubt, have the vehicle recovered using a
crane.
! When towing, pull away slowly and
smoothly. Pull the towed vehicle as straight as possible and not at an acute angle. If the trac-
tive power is too high, the vehicles could be
damaged.
When towing, it is preferable to use a rigid tow- ing bar as opposed to a tow rope. A rigid towing
bar helps to keep the tractive power low.
! To tow vehicles with KEYLESS-GO, use the
key instead of the Start/Stop button. The
automatic transmission may otherwise
switch to position Pwhen you open the driv-
er's or front-passenger door which could
damage the transmission.
! Vehicles with differential locks: make sure
the differential locks are in automatic mode.
When towing, the differential locks must not
be switched on. The transmission may other- wise be damaged.
! You may tow the vehicle for a maximum of
50km. A towing speed of 50 km/h must not
be exceeded.
For towing distances over 50 km, the entire
vehicle must be lifted up and transported.
Observe the legal requirements for the relevant countries when towing.
It is better to have the vehicle transported than
to have it towed.
If the vehicle has suffered transmission damage, have it transported on a transporter or trailer.
The automatic transmission must be in position
N when the vehicle is being towed away.
The battery must be connected and charged.
Otherwise, you:
R cannot turn the key to position 2in the igni-
tion lock
R cannot release the electric parking brake
R cannot shift the automatic transmission to
position N Deactivate the automatic locking feature before
towing the vehicle (Y page 294). You could oth-
erwise be locked out when pushing or towing
the vehicle.
Deactivate tow-away protection before the vehi-
cle is towed away (Y page 82).
PLUG-IN HYBRID vehicles:
PLUG-IN HYBRID vehicles may not be towed
away but must instead be transported, if:
R the multifunction display is not working or
R the á Towing
Towing not notpermitted
permitted See
SeeOwn‐
Own‐
er's Manual
er's Manual message appears in the multi-
function display.
If the vehicle is in a dangerous location it may be
towed from the danger zone with both axles on
the ground. In this case, the towing distance
may not be greater than 50 m andthe towing
speed must not exceed 10 km/h. For longer
distances, have the vehicle loaded and trans-
ported. Fitting/removing the towing eye
Fitting the towing eye The mountings for the removable towing eyes
are located in the bumpers. They are at the front and rear behind covers :;.
X Remove the towing eye from the vehicle tool
kit (Y page 387).
X To open the cover at the front: press the
mark on cover :inwards in the direction of
the arrow. 400
Towing away and tow-startingBreakdown assistance
Page 404 of 453
X
To open the cover at the rear: insert a flat,
blunt object into the cutout and lever
cover ;out of the bumper.
X Take cover :or; off the opening.
X Screw in the towing eye clockwise as far as it
will go and tighten it.
Removing the towing eye X
Loosen the towing eye and unscrew it.
X Position cover :or; in the bumper and
press the cover on until it engages.
X Place the towing eye in the vehicle tool kit. Towing the vehicle with both axles on
the ground
The automatic transmission automatically shifts to position Pwhen you open the driver's or front-
passenger door or when you remove the key
from the ignition lock.
In order to ensure that the automatic transmis-
sion stays in position Nwhen towing away the
vehicle, you must observe the following points:
X Make sure that the vehicle is stationary.
X Turn the key to position 2in the ignition lock.
X Depress the brake pedal and keep it
depressed.
X Shift the automatic transmission to position
N.
X Leave the key in position 2in the ignition lock.
X Release the brake pedal.
X Release the electric parking brake.
X Switch on the hazard warning lamps
(Y page 124).
In order to signal a change of direction when
towing the vehicle with the hazard warning
lamps switched on, use the combination switch
as usual. In this case, only the turn signals for
the desired direction flash. When you reset the
combination switch, the hazard warning lamps
start flashing again. Transporting the vehicle
PLUG-IN HYBRID vehicles Transportation of the vehicle should only be car-
ried out by professional recovery companies.
4MATIC vehicles/vehicles with auto-
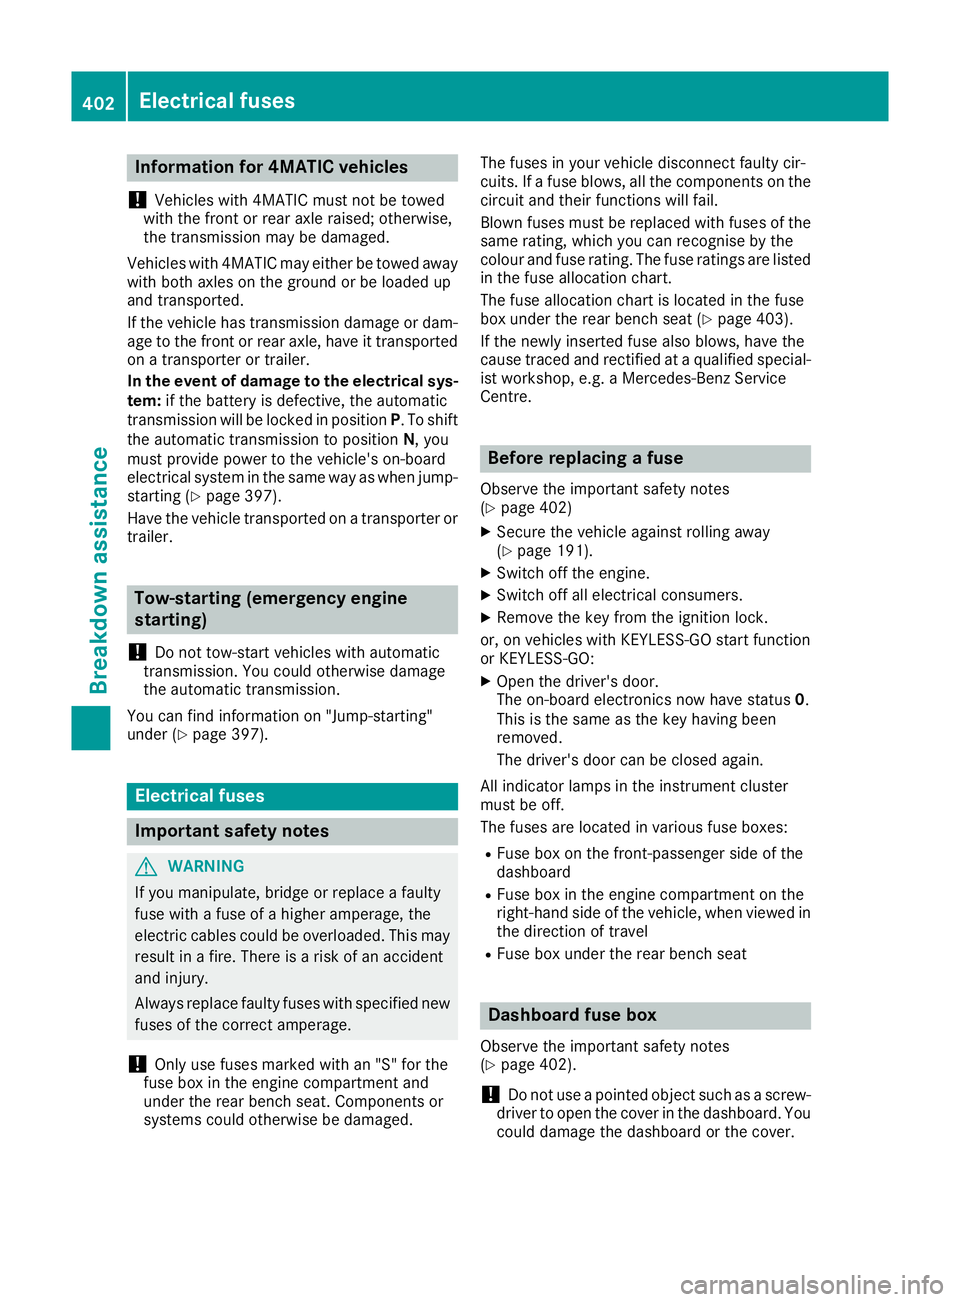
matic transmission !
When the vehicle is loaded for transport, the
front and rear axles must be stationary and on
the same transportation vehicle. Positioning
over the connection point of the transport
vehicle is not permitted. The drive train may
otherwise be damaged.
All vehicles !
You may only secure the vehicle by the
wheels, not by parts of the vehicle such as
axle or steering components. Otherwise, the
vehicle could be damaged.
The towing eye can be used to pull the vehicle
onto a trailer or transporter for transportation.
X Turn the key to position 2in the ignition lock.
X Shift the automatic transmission to position
N.
As soon as the vehicle is loaded: X Prevent the vehicle from rolling away by
applying the electric parking brake.
X Shift the automatic transmission to position
P.
X Turn the key to position 0in the ignition lock
and remove it.
X Secure the vehicle. Towing away and tow-starting
401Breakdown assis tance Z
Page 405 of 453
Information for 4MATIC vehicles
! Vehicles with 4MATIC must not be towed
with the front or rear axle raised; otherwise,
the transmission may be damaged.
Vehicles with 4MATIC may either be towed away
with both axles on the ground or be loaded up
and transported.
If the vehicle has transmission damage or dam- age to the front or rear axle, have it transportedon a transporter or trailer.
In the event of damage to the electrical sys-
tem: if the battery is defective, the automatic
transmission will be locked in position P. To shift
the automatic transmission to position N, you
must provide power to the vehicle's on-board
electrical system in the same way as when jump- starting (Y page 397).
Have the vehicle transported on a transporter or trailer. Tow-starting (emergency engine
starting)
! Do not tow-start vehicles with automatic
transmission. You could otherwise damage
the automatic transmission.
You can find information on "Jump-starting"
under (Y page 397). Electrical fuses
Important safety notes
G
WARNING
If you manipulate, bridge or replace a faulty
fuse with a fuse of a higher amperage, the
electric cables could be overloaded. This may result in a fire. There is a risk of an accident
and injury.
Always replace faulty fuses with specified new fuses of the correct amperage.
! Only use fuses marked with an "S" for the
fuse box in the engine compartment and
under the rear bench seat. Components or
systems could otherwise be damaged. The fuses in your vehicle disconnect faulty cir-
cuits. If a fuse blows, all the components on the
circuit and their functions will fail.
Blown fuses must be replaced with fuses of the same rating, which you can recognise by the
colour and fuse rating. The fuse ratings are listed
in the fuse allocation chart.
The fuse allocation chart is located in the fuse
box under the rear bench seat (Y page 403).
If the newly inserted fuse also blows, have the
cause traced and rectified at a qualified special-
ist workshop, e.g. a Mercedes-Benz Service
Centre. Before replacing a fuse
Observe the important safety notes
(Y page 402)
X Secure the vehicle against rolling away
(Y page 191).
X Switch off the engine.
X Switch off all electrical consumers.
X Remove the key from the ignition lock.
or, on vehicles with KEYLESS-GO start function
or KEYLESS‑GO: X Open the driver's door.
The on-board electronics now have status 0.
This is the same as the key having been
removed.
The driver's door can be closed again.
All indicator lamps in the instrument cluster
must be off.
The fuses are located in various fuse boxes: R Fuse box on the front-passenger side of the
dashboard
R Fuse box in the engine compartment on the
right-hand side of the vehicle, when viewed in
the direction of travel
R Fuse box under the rear bench seat Dashboard fuse box
Observe the important safety notes
(Y page 402).
! Do not use a pointed object such as a screw-
driver to open the cover in the dashboard. You
could damage the dashboard or the cover. 402
Electrical fusesBreakdown assistance