2015 MERCEDES-BENZ GLE COUPE tyre pressure
[x] Cancel search: tyre pressurePage 174 of 393
Driving tips
General notes
Important safety notes G
WARNING
If you switch off the ignition while driving,
safety-relevant functions are only available
with limitations, or not at all. This could affect, for example, the power steering and the brake
boosting effect. You will require considerably
more effort to steer and brake. There is a risk of an accident.
Do not switch off the ignition while driving.
Drive sensibly – save fuel Observe the following tips to save fuel:
X The tyres should always be inflated to the rec-
ommended tyre pressure.
X Remove unnecessary loads.
X Remove roof carriers when they are not nee-
ded.
X Warm up the engine at low engine speeds.
X Avoid frequent acceleration or braking.
X Have all maintenance work carried out as
indicated by the service intervals in the Ser-
vice Booklet or by the service interval display.
Fuel consumption also increases when driving in
cold weather, in stop-start traffic, on short jour- neys and in hilly terrain. ECO display
The ECO display shows you how economical
your driving style is. The ECO display assists you in achieving the most economical driving style
for the selected settings and prevailing condi-
tions. Consumption can be significantly influ-
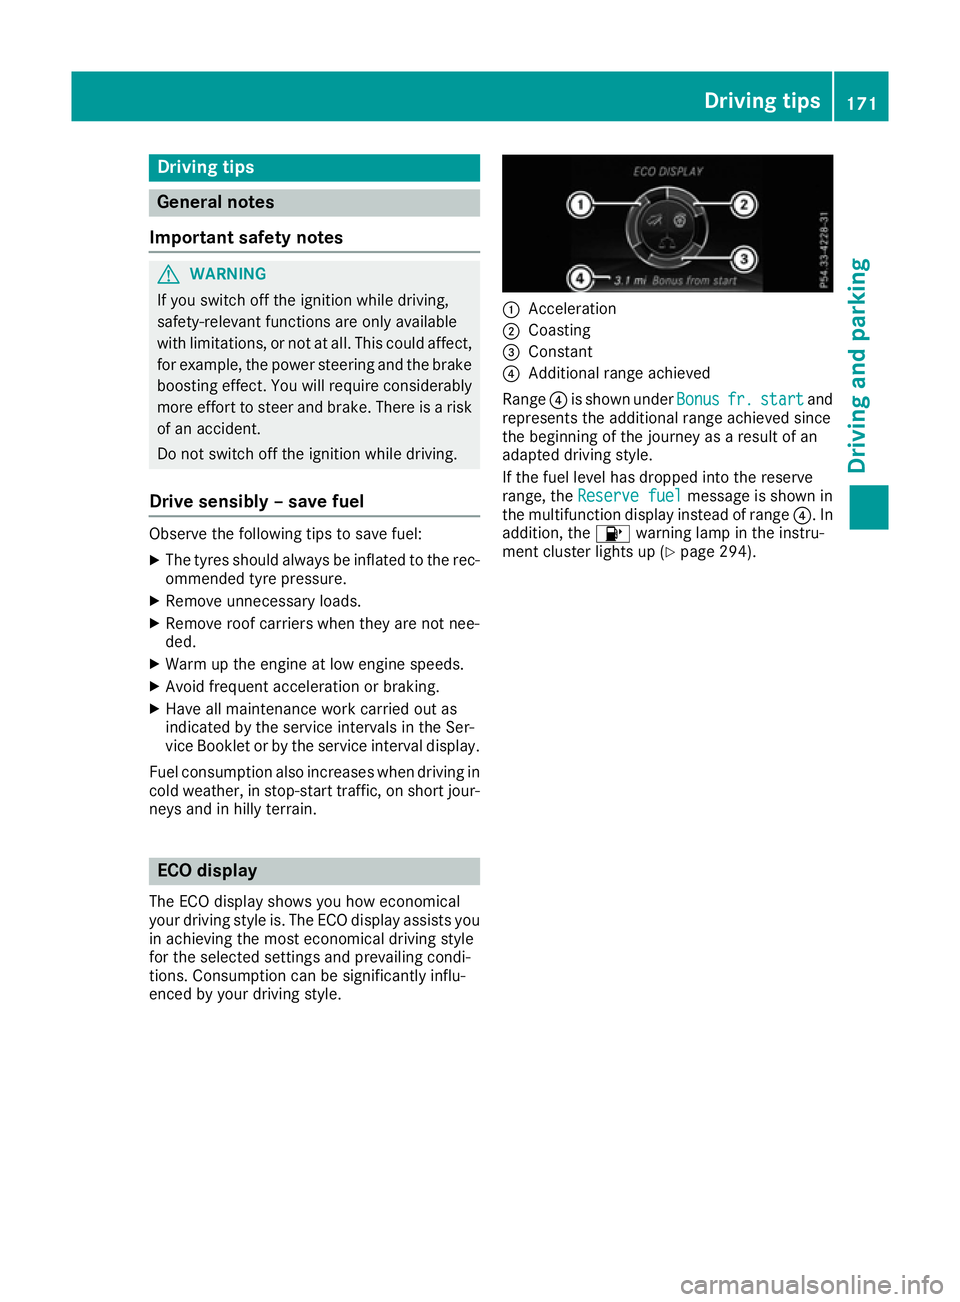
enced by your driving style. :
Acceleration
; Coasting
= Constant
? Additional range achieved
Range ?is shown under Bonus Bonusfr.
fr.start
start and
represents the additional range achieved since
the beginning of the journey as a result of an
adapted driving style.
If the fuel level has dropped into the reserve
range, the Reserve fuel
Reserve fuel message is shown in
the multifunction display instead of range ?. In
addition, the 8warning lamp in the instru-
ment cluster lights up (Y page 294). Driving tips
171Driving and pa rking Z
Page 175 of 393
The ECO display consists of three sections, with
an inner and outer area. The sections corre-
spond to the following three categories: :
Acceleration
(evaluation of all accel-
eration processes):
R the outer area fills up and the inner
area lights up green: moderate
acceleration, especially at higher
speeds
R the outer area empties and the
inner area is grey: sporty acceler-
ation ;
Coasting
(evaluation of all decelera-
tion processes):
R the outer area fills up and the inner
area lights up green: anticipatory
driving, keeping your distance and
early release of the accelerator.
The vehicle can coast without use
of the brakes.
R the outer area empties and the
inner area is grey: frequent heavy
braking =
Constant
(continuous evaluation
over the entire journey):
R the outer area fills up and the inner
area lights up green: constant
speed and avoidance of unneces-
sary acceleration and deceleration
R the outer area empties and the
inner area is grey: fluctuations in
speed The three inner areas display the current driving
style and light up green as a result of a particu-
larly economical driving style. Depending on the driving situation, up to two areas may light up
simultaneously.
At the beginning of the journey, the three outer
areas are empty and fill up as a result of eco-
nomical driving. A higher level indicates a more
economical driving style. If the three outer areas
are completely filled at the same time, the driver
has adopted the most economical driving style
for the selected settings and prevailing condi-
tions. The ECO display border lights up.
The ECO display does not indicate the actual fuel consumption. The additionally achieved range
displayed under Bonus fr. start
Bonus fr. start does not
indicate a fixed consumption reduction. In addition to driving style, the actual consump-
tion is affected by other factors, such as:
R load
R tyre pressure
R cold start
R choice of route
R the use of electrical consumers
These factors are not included in the ECO dis-
play.
An economical driving style involves driving at a moderate engine speed.
To achieve a higher value in the categories
"Acceleration" and "Constant":
R observe the gearshift recommendation
R drive the vehicle in the Comfortdrive pro-
gram.
On long journeys at a constant speed, e.g. on the
motorway, only the outer area for "Constant"
will change.
The ECO display summarises the driving style
from the start of the journey to its completion.
Therefore, there are more marked changes in
the outer areas at the start of a journey. During a prolonged driving time, these changes are
smaller. For more marked changes, perform a
manual reset (Y page 239).
Further information on the ECO display
(Y page 238). Braking
Important safety notes G
WARNING
If you shift down on a slippery road surface in an attempt to increase the engine's braking
effect, the drive wheels could lose their grip.
This increases the risk of skidding and having
an accident.
Do not shift down for additional engine brak-
ing on a slippery road surface.
Downhill gradients Do not depress the brake pedal continuously
while the vehicle is in motion, e.g. never cause
the brakes to rub by constantly applying light
pressure to the pedal. This results in excessive
and premature wear to the brake pads. 172
Driving tipsDriving and parking
Page 179 of 393
General notes
H
Environmental note
Protection of the environment is of primary
importance. Treat nature with respect.
Observe all prohibiting signs.
Read this section before driving your vehicle off- road. Practise by driving over more gentle off-
road terrain first.
The following driving systems are specially
adapted to off-road driving:
R AIRMATIC package (vehicle level)
(Y page 194)
R DSR (Downhill Speed Regulation)
(Y page 193)
Observe the following notes:
R Select a vehicle level suitable for the off-road
terrain. To avoid damaging the vehicle, make sure there is always sufficient ground clear-
ance.
R Make sure that items of luggage and loads are
stowed safely and are well secured
(Y page 303).
R Always keep the engine running and in gear
when driving on a downhill gradient. Activate
DSR (Y page 193).
R Drive slowly and evenly, if necessary at walk-
ing pace.
R Ensure that the wheels are in contact with the
ground at all times.
R Drive with extreme care on unknown off-road
routes where visibility is poor. For safety rea- sons, get out of the vehicle first and survey
the off-road route.
R Look out for obstacles such as rocks, holes,
tree stumps and furrows.
R Take care when turning on an uphill or down-
hill slope or when driving across a slope. The
vehicle could otherwise tip over.
R Always keep the doors, the tailgate and the
sliding sunroof closed while the vehicle is in
motion.
R Do not stray from marked routes or paths.
R Observe the notes on off-road fording
(Y page 174).
i Information about retrofitting special all-ter-
rain tyres is available from any qualified spe-
cialist workshop. i
Do not use the HOLD function when driving
off-road, on steep uphill or downhill gradients or on slippery or loose surfaces. The HOLD
function cannot hold the vehicle on such sur-faces.
Checklist before driving off-road X
Engine oil level: check the engine oil and top
it up if necessary.
When driving on steep gradients, the oil level must be sufficiently high to ensure a correct
oil supply in the vehicle.
X AdBlue ®
tank (BlueTEC vehicles): check
the level and top up if necessary
(Y page 164).
X Tyre-change tool kit: check that the jack is
working and make sure you have the wheel
wrench, a robust tow cable and a folding
spade in the vehicle.
X Wheels and tyres: check the tyre tread
depth and tyre pressure.
X Check for damage and remove any foreign
objects, e.g. small stones, from the wheels/
tyres.
X Replace any missing valve caps.
X Replace dented or damaged wheels.
X Wheels: dented or bent wheels can lead to a
loss of tyre pressure and damage to the tyre
bead. Before driving off-road, check the
wheels and replace them if necessary.
Checklist after driving off-road !
If you detect damage to the vehicle after
driving off-road, have the vehicle checked
immediately at a qualified specialist work-
shop.
Driving over rough terrain places greater
demands on your vehicle than driving on normal
roads. After driving off-road, check the vehicle.
This allows you to detect damage promptly and reduce the risk of an accident to yourself and
other road users.
X Deactivate DSR (Y page 193).
X Lower the vehicle level again to a level suita-
ble to the road conditions, e.g. to the normal
level.
X Clean the headlamps and rear lights and
check for damage.
X Clean the front and rear licence plates. 176
Driving tipsDriving and parking
Page 185 of 393
do not know the stored speed, store the
desired speed again.
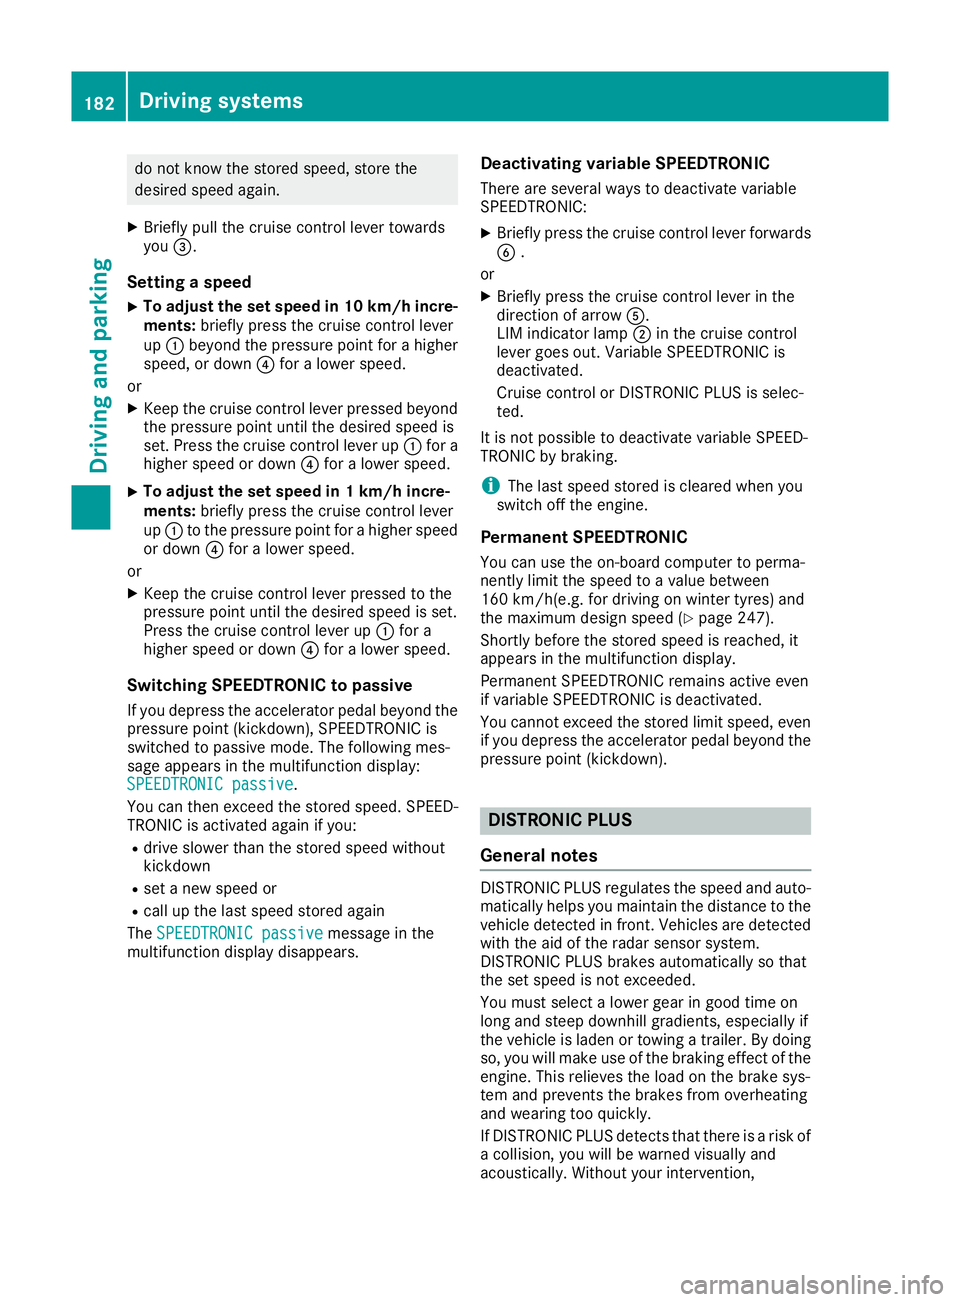
X Briefly pull the cruise control lever towards
you =.
Setting a speed X To adjust the set speed in 10 km/h incre-
ments: briefly press the cruise control lever
up : beyond the pressure point for a higher
speed, or down ?for a lower speed.
or X Keep the cruise control lever pressed beyond
the pressure point until the desired speed is
set. Press the cruise control lever up :for a
higher speed or down ?for a lower speed.
X To adjust the set speed in 1 km/h incre-
ments: briefly press the cruise control lever
up : to the pressure point for a higher speed
or down ?for a lower speed.
or
X Keep the cruise control lever pressed to the
pressure point until the desired speed is set.
Press the cruise control lever up :for a
higher speed or down ?for a lower speed.
Switching SPEEDTRONIC to passive If you depress the accelerator pedal beyond the
pressure point (kickdown), SPEEDTRONIC is
switched to passive mode. The following mes-
sage appears in the multifunction display:
SPEEDTRONIC passive
SPEEDTRONIC passive.
You can then exceed the stored speed. SPEED-
TRONIC is activated again if you:
R drive slower than the stored speed without
kickdown
R set a new speed or
R call up the last speed stored again
The SPEEDTRONIC passive SPEEDTRONIC passive message in the
multifunction display disappears. Deactivating variable SPEEDTRONIC
There are several ways to deactivate variable
SPEEDTRONIC:
X Briefly press the cruise control lever forwards
B .
or X Briefly press the cruise control lever in the
direction of arrow A.
LIM indicator lamp ;in the cruise control
lever goes out. Variable SPEEDTRONIC is
deactivated.
Cruise control or DISTRONIC PLUS is selec-
ted.
It is not possible to deactivate variable SPEED-
TRONIC by braking.
i The last speed stored is cleared when you
switch off the engine.
Permanent SPEEDTRONIC
You can use the on-board computer to perma-
nently limit the speed to a value between
160 km/h(e.g. for driving on winter tyres) and
the maximum design speed (Y page 247).
Shortly before the stored speed is reached, it
appears in the multifunction display.
Permanent SPEEDTRONIC remains active even
if variable SPEEDTRONIC is deactivated.
You cannot exceed the stored limit speed, even
if you depress the accelerator pedal beyond the
pressure point (kickdown). DISTRONIC PLUS
General notes DISTRONIC PLUS regulates the speed and auto-
matically helps you maintain the distance to the
vehicle detected in front. Vehicles are detected with the aid of the radar sensor system.
DISTRONIC PLUS brakes automatically so that
the set speed is not exceeded.
You must select a lower gear in good time on
long and steep downhill gradients, especially if
the vehicle is laden or towing a trailer. By doing
so, you will make use of the braking effect of the engine. This relieves the load on the brake sys-
tem and prevents the brakes from overheating
and wearing too quickly.
If DISTRONIC PLUS detects that there is a risk of
a collision, you will be warned visually and
acoustically. Without your intervention, 182
Driving systemsDriving and parking
Page 194 of 393
The system is switched to passive and no longer
assists you by performing steering interventions
if:
R you actively change lane
R you switch on the turn signal
R you take your hands off the steering wheel or
do not steer for a prolonged period of time
i After you have finished changing lanes,
Steering Assist and Stop&Go Pilot are auto-
matically active again.
Steering Assist and Stop&Go Pilot cannot pro-
vide assistance:
R on very sharp corners
R when towing a trailer
R a loss of tyre pressure or a defective tyre has
been detected and displayed
Pay attention also to the important safety notes for DISTRONIC PLUS (Y page 183).
The steering interventions are carried out with a
limited steering moment. The system requires
the driver to keep his hands on the steering
wheel and to steer himself.
If you do not steer yourself or if you take your
hands off the steering wheel for a prolonged
period of time, the system will first alert you with a visual warning. A steering wheel symbol
appears in the multifunction display. If you have
still not started to steer and have not taken hold
of the steering wheel after five seconds at the
latest, a warning tone also sounds to remind you to take control of the vehicle. Steering Assist
and Stop&Go Pilot switch to passive mode.
DISTRONIC PLUS remains active.
Activating Steering Assist and Stop&Go
Pilot
X Activate the DISTRONIC PLUS with Steering
Assist and Stop&Go Pilot function using the
on-board computer (Y page 244).
The DTR+: steering assistant On
DTR+: steering assistant On mes-
sage appears in the multifunction display.
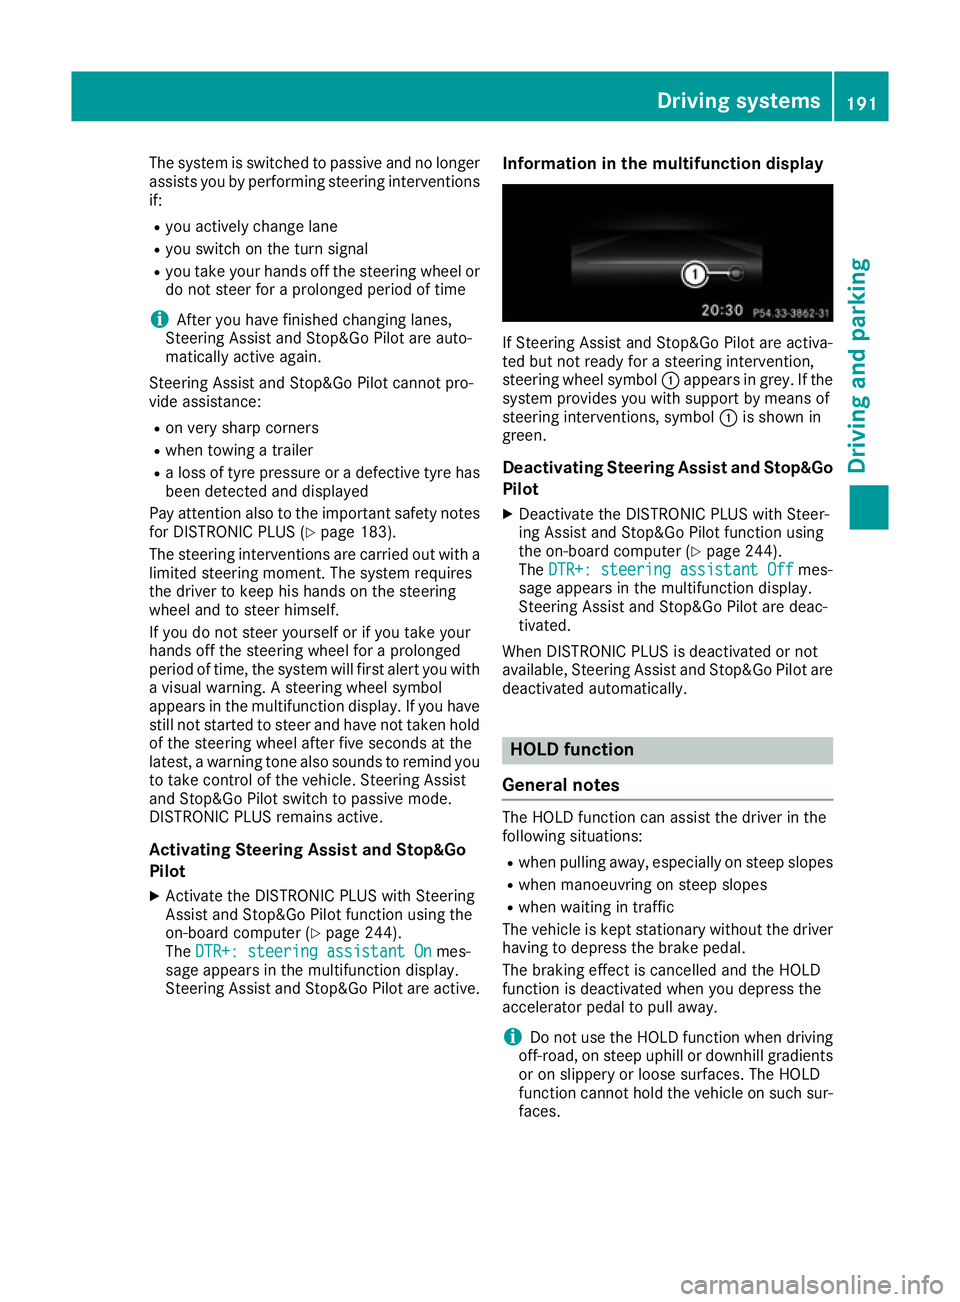
Steering Assist and Stop&Go Pilot are active. Information in the multifunction display If Steering Assist and Stop&Go Pilot are activa-
ted but not ready for a steering intervention,
steering wheel symbol :appears in grey. If the
system provides you with support by means of
steering interventions, symbol :is shown in
green.
Deactivating Steering Assist and Stop&Go
Pilot
X Deactivate the DISTRONIC PLUS with Steer-
ing Assist and Stop&Go Pilot function using
the on-board computer (Y page 244).
The DTR+: steering assistant Off DTR+: steering assistant Off mes-
sage appears in the multifunction display.
Steering Assist and Stop&Go Pilot are deac-
tivated.
When DISTRONIC PLUS is deactivated or not
available, Steering Assist and Stop&Go Pilot are deactivated automatically. HOLD function
General notes The HOLD function can assist the driver in the
following situations:
R when pulling away, especially on steep slopes
R when manoeuvring on steep slopes
R when waiting in traffic
The vehicle is kept stationary without the driver
having to depress the brake pedal.
The braking effect is cancelled and the HOLD
function is deactivated when you depress the
accelerator pedal to pull away.
i Do not use the HOLD function when driving
off-road, on steep uphill or downhill gradients or on slippery or loose surfaces. The HOLD
function cannot hold the vehicle on such sur-faces. Driving systems
191Driving and parking Z
Page 197 of 393
If the current vehicle speed is too high, the
Ã
DSR symbol appears in the multifunction display
with the Max. speed 40 km/h
Max. speed 40 km/h message.
You cannot activate DSR if the SportorSport
Plus drive program is activated. The ÃDSR
symbol and the Not
Not in
indrive
drive program
program SPORT
SPORT
message then appears in the multifunction dis-
play.
If you have activated DSR and then change drive programs, DSR is deactivated.
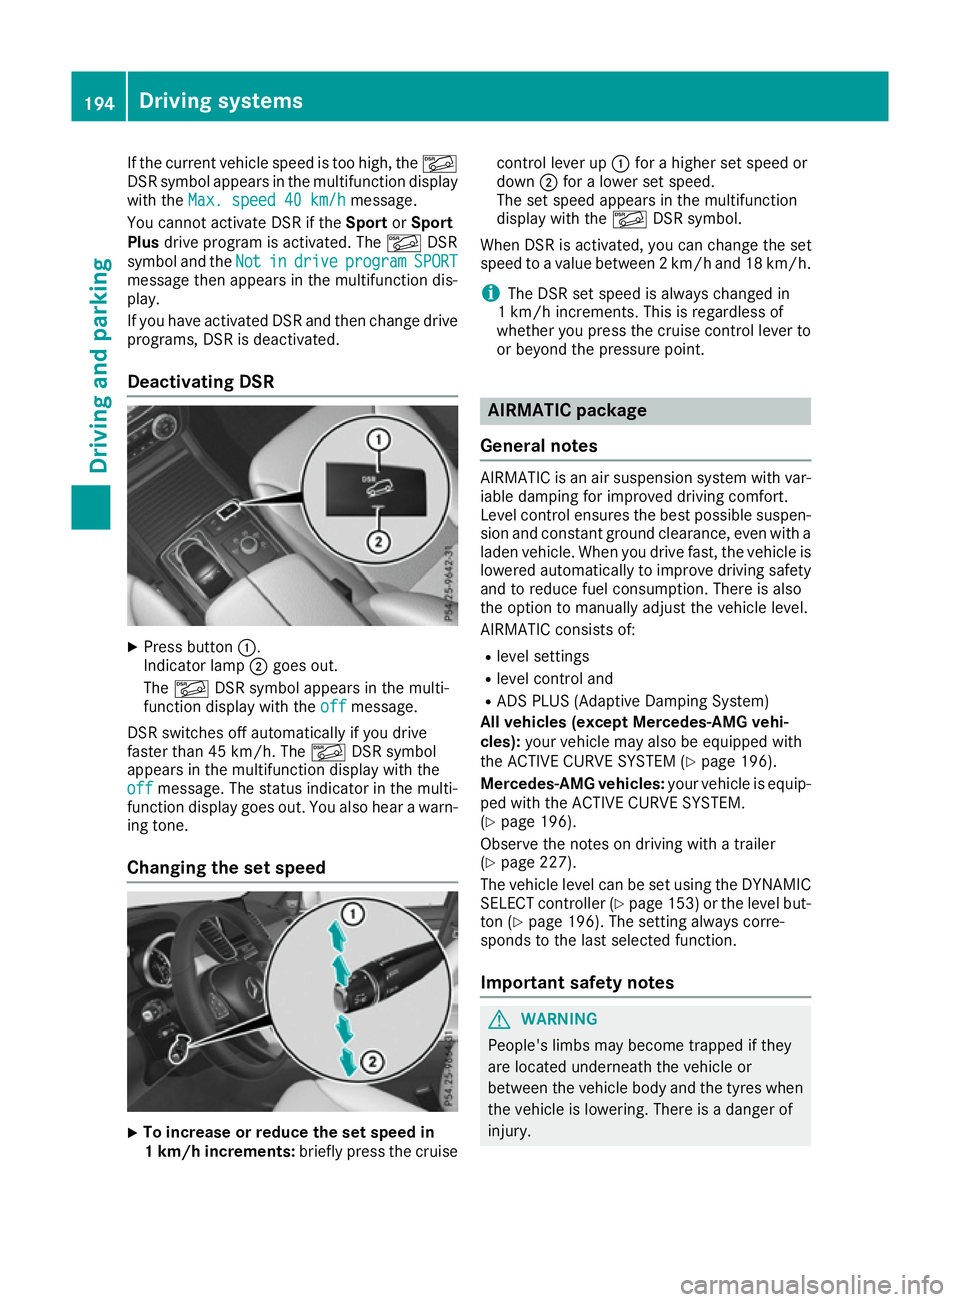
Deactivating DSR X
Press button :.
Indicator lamp ;goes out.
The à DSR symbol appears in the multi-
function display with the off offmessage.
DSR switches off automatically if you drive
faster than 45 km/h. The ÃDSR symbol
appears in the multifunction display with the
off
off message. The status indicator in the multi-
function display goes out. You also hear a warn-
ing tone.
Changing the set speed X
To increase or reduce the set speed in
1 km/h increments:
briefly press the cruise control lever up
:for a higher set speed or
down ;for a lower set speed.
The set speed appears in the multifunction
display with the ÃDSR symbol.
When DSR is activated, you can change the set
speed to a value between 2 km/h and 18 km/h.
i The DSR set speed is always changed in
1 km/h increments. This is regardless of
whether you press the cruise control lever to
or beyond the pressure point. AIRMATIC package
General notes AIRMATIC is an air suspension system with var-
iable damping for improved driving comfort.
Level control ensures the best possible suspen- sion and constant ground clearance, even with a laden vehicle. When you drive fast, the vehicle is
lowered automatically to improve driving safety
and to reduce fuel consumption. There is also
the option to manually adjust the vehicle level.
AIRMATIC consists of:
R level settings
R level control and
R ADS PLUS (Adaptive Damping System)
All vehicles (except Mercedes-AMG vehi-
cles): your vehicle may also be equipped with
the ACTIVE CURVE SYSTEM (Y page 196).
Mercedes-AMG vehicles: your vehicle is equip-
ped with the ACTIVE CURVE SYSTEM.
(Y page 196).
Observe the notes on driving with a trailer
(Y page 227).
The vehicle level can be set using the DYNAMIC
SELECT controller (Y page 153) or the level but-
ton (Y page 196). The setting always corre-
sponds to the last selected function.
Important safety notes G
WARNING
People's limbs may become trapped if they
are located underneath the vehicle or
between the vehicle body and the tyres when the vehicle is lowering. There is a danger of
injury. 194
Driving systemsDriving and parking
Page 206 of 393
R
snowfall or heavy rain may lead to a parking
space being measured inaccurately
R pay attention to the PARKTRONIC
(Y page 200) warning messages during the
parking procedure
R at any time, you can intervene in the steering
procedure to correct it. Active Parking Assist will then be cancelled.
R when transporting a load which protrudes
from your vehicle, you should not use Active
Parking Assist.
R never use Active Parking Assist when snow
chains are fitted.
R make sure that the tyre pressures are always
correct. This has a direct influence on the
parking characteristics of the vehicle.
Use Active Parking Assist for parking spaces
that are:
R parallel or at right angles to the direction of
travel
R on straight roads, not bends
R on the same level as the road, e.g. not on the
pavement
Detecting parking spaces Objects located above the height range of Active
Parking Assist will not be detected when the
parking space is measured. These are not taken into account when the parking procedure is cal-culated, e.g. overhanging loads, tail sections or
loading ramps of goods vehicles. G
WARNING
If there are objects above the detection range:
R Active Park Assist may steer too early
R the vehicle may not stop in front of these
objects
This could cause a collision. There is a risk of
an accident.
If objects are located above the detection
range, stop and deactivate Active Parking
Assist.
For further information on the detection range
(Y page 199). Active Parking Assist does not assist you park-
ing in spaces at right angles to the direction of
travel if:
R two parking spaces are located directly next
to one another
R the parking space is directly next to a low
obstacle such as a low kerb
R you forward park
Active Parking Assist does not assist you park-
ing in spaces that are parallel or at right angles
to the direction of travel if:
R the parking space is on a kerb
R the system reads the parking space as being
blocked, for example by foliage or grass pav-
ing blocks
R the area is too small for the vehicle to
manoeuvre into
R the parking space is bordered by an obstacle,
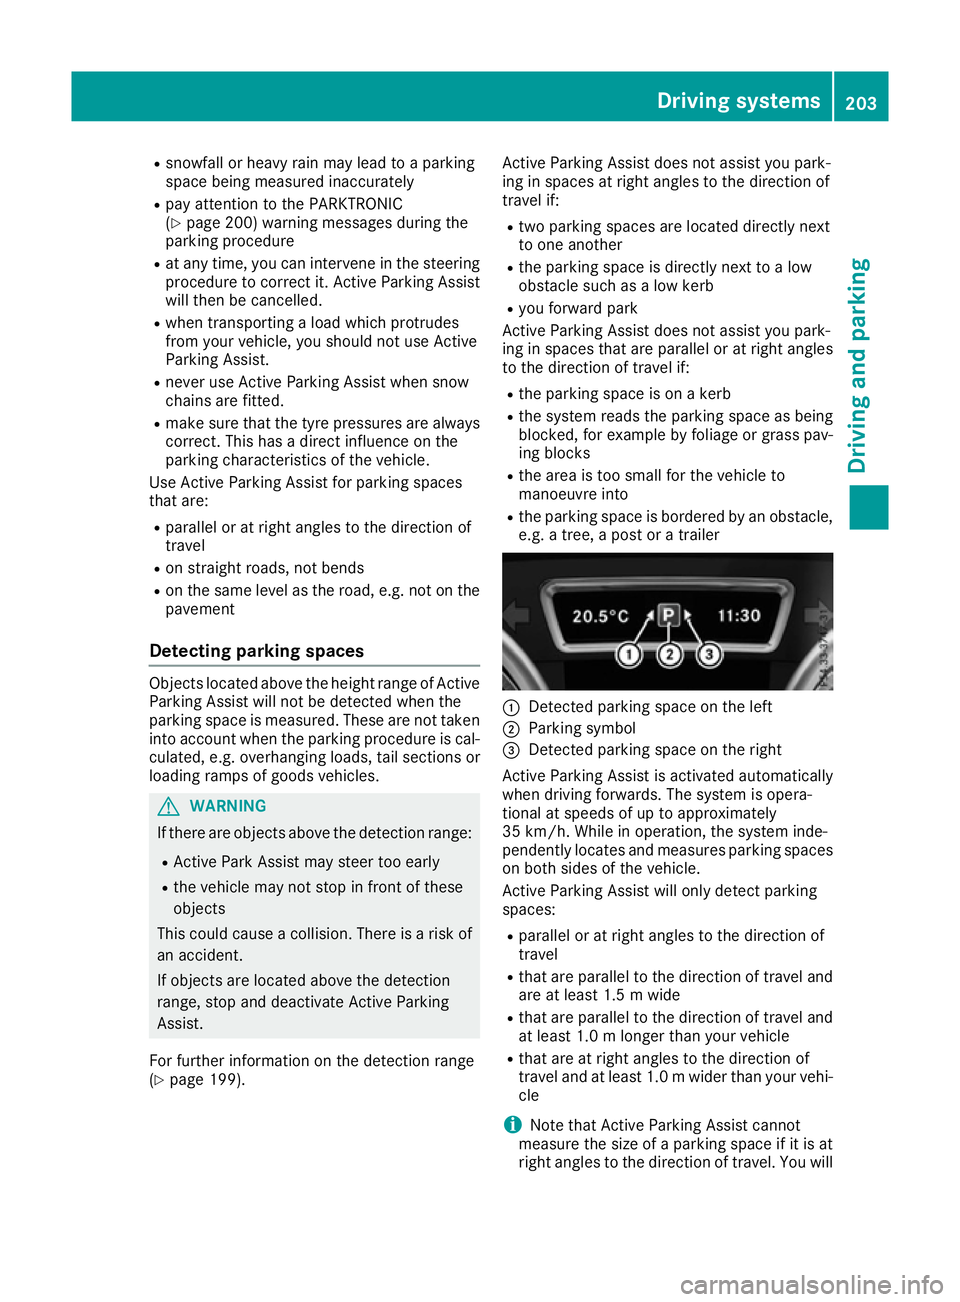
e.g. a tree, a post or a trailer :
Detected parking space on the left
; Parking symbol
= Detected parking space on the right
Active Parking Assist is activated automatically
when driving forwards. The system is opera-
tional at speeds of up to approximately
35 km/h. While in operation, the system inde-
pendently locates and measures parking spaces on both sides of the vehicle.
Active Parking Assist will only detect parking
spaces:
R parallel or at right angles to the direction of
travel
R that are parallel to the direction of travel and
are at least 1.5 m wide
R that are parallel to the direction of travel and
at least 1.0 m longer than your vehicle
R that are at right angles to the direction of
travel and at least 1.0 mwider than your vehi-
cle
i Note that Active Parking Assist cannot
measure the size of a parking space if it is at
right angles to the direction of travel. You will Driving systems
203Driving and parking Z
Page 226 of 393
Active Blind Spot Assist is not operational at
speeds below approximately 30 km/h. Vehicles
in the monitoring range are then not indicated.
If Active Blind Spot Assist is switched on, indi-
cator lamp :in the exterior mirrors lights up
yellow up to a speed of 30 km/h. At speeds
above 30 km/h, the indicator lamp goes out and Active Blind Spot Assist is operational.
If a vehicle is detected within the monitoring
range at speeds above 30 km/h, warning
lamp :on the corresponding side lights up red.
This warning lamp always lights up when a vehi- cle enters the blind spot monitoring range from
behind or from the side. When you overtake a
vehicle with a difference in speed of less than
12 km/h, a delayed warning occurs.
The yellow indicator lamp goes out if reverse
gear is engaged. Active Blind Spot Assist is not
operational.
The brightness of the indicator/warning lamps
is adjusted automatically according to the
brightness of the surroundings.
Visual and acoustic collision warning
If you switch on the turn signals to change lanes
and a vehicle is detected in the side monitoring range, you receive a visual and acoustic collision
warning. You then hear a double warning tone
and red warning lamp :flashes. If the turn sig-
nal remains on, detected vehicles are indicated
by the flashing of red warning lamp :. There are
no further warning tones.
Course-correcting brake application
If Active Blind Spot Assist detects a risk of a side impact in the monitoring range, a course-cor-
recting brake application is carried out. This is
designed to help you avoid a collision. G
WARNING
A course-correcting brake application cannot always prevent a collision. There is a risk of an
accident.
Always steer, brake or accelerate yourself,
especially if Active Blind Spot Assist warns
you or makes a course-correcting brake appli-
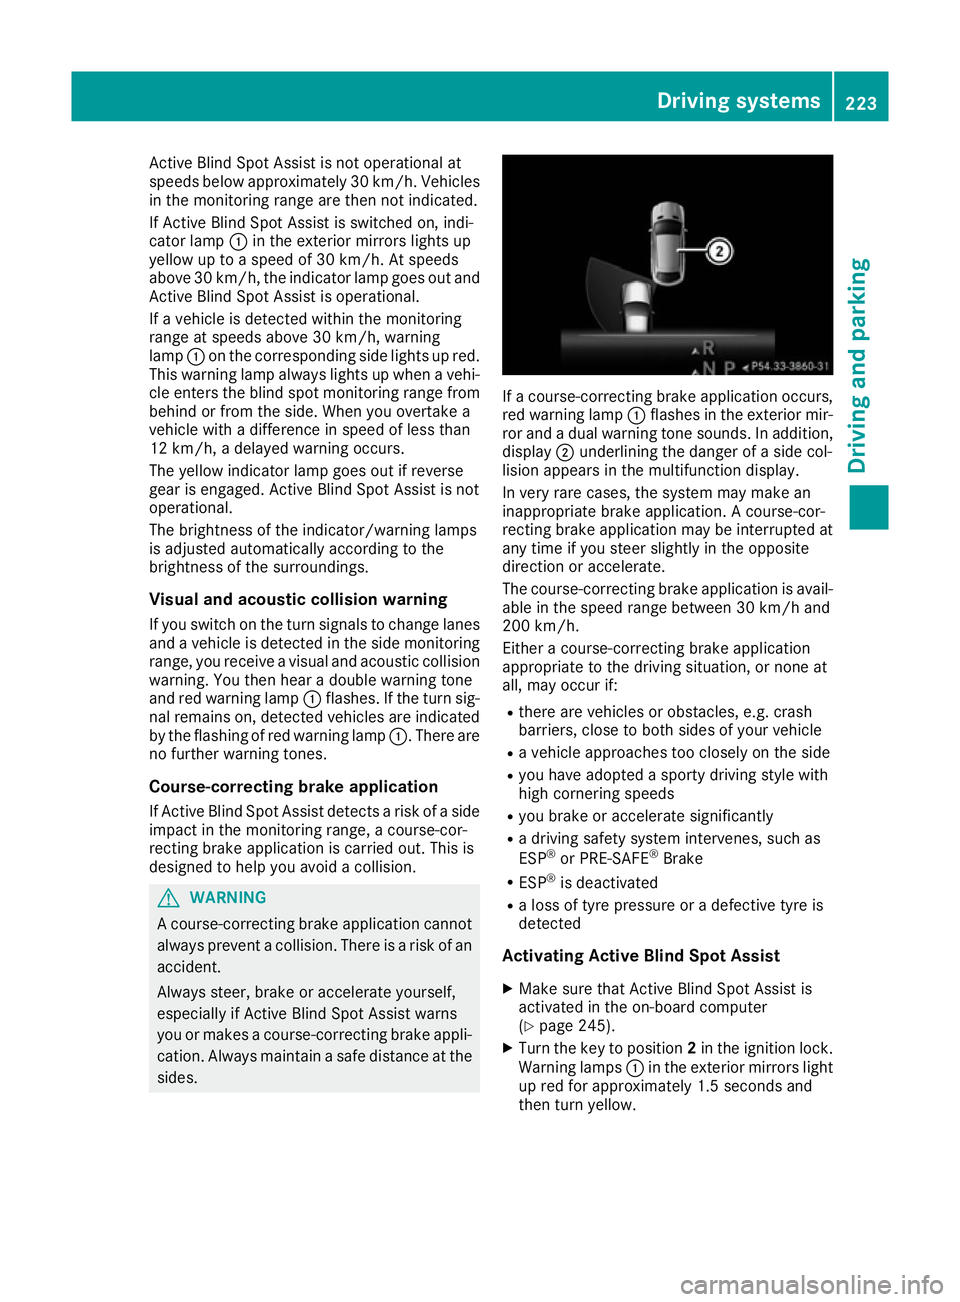
cation. Always maintain a safe distance at the sides. If a course-correcting brake application occurs,
red warning lamp :flashes in the exterior mir-
ror and a dual warning tone sounds. In addition, display ;underlining the danger of a side col-
lision appears in the multifunction display.
In very rare cases, the system may make an
inappropriate brake application. A course-cor-
recting brake application may be interrupted at
any time if you steer slightly in the opposite
direction or accelerate.
The course-correcting brake application is avail-
able in the speed range between 30 km/h and
200 km/h.
Either a course-correcting brake application
appropriate to the driving situation, or none at
all, may occur if:
R there are vehicles or obstacles, e.g. crash
barriers, close to both sides of your vehicle
R a vehicle approaches too closely on the side
R you have adopted a sporty driving style with
high cornering speeds
R you brake or accelerate significantly
R a driving safety system intervenes, such as
ESP ®
or PRE-SAFE ®
Brake
R ESP ®
is deactivated
R a loss of tyre pressure or a defective tyre is
detected
Activating Active Blind Spot Assist
X Make sure that Active Blind Spot Assist is
activated in the on-board computer
(Y page 245).
X Turn the key to position 2in the ignition lock.
Warning lamps :in the exterior mirrors light
up red for approximately 1.5 second s and
then turn yellow. Driving systems
223Driving and parking Z