2015 MERCEDES-BENZ E-CLASS SALOON wheel
[x] Cancel search: wheelPage 274 of 497
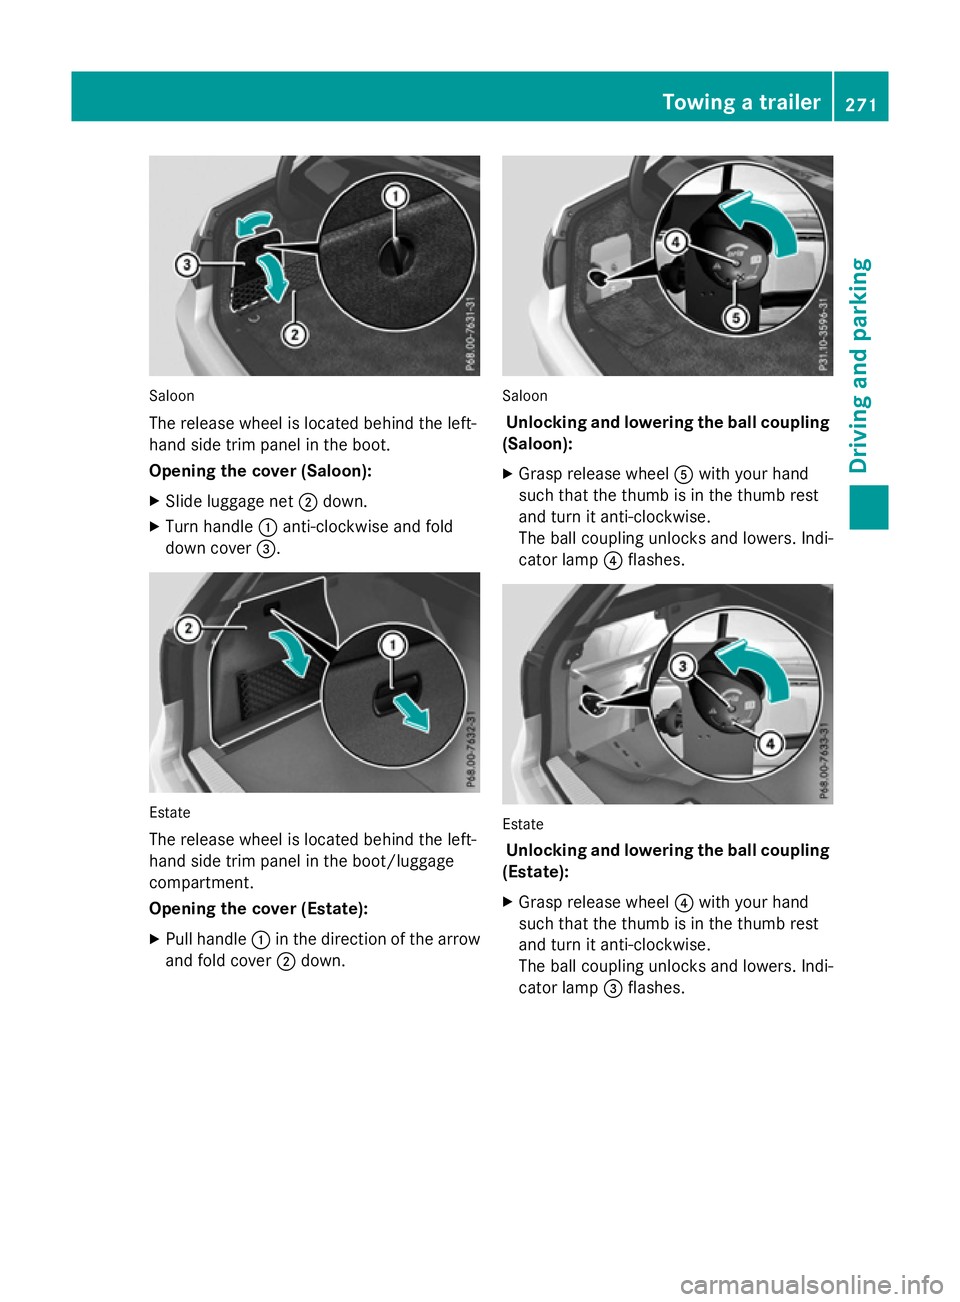
Saloon
The release wheel is located behind the left-
hand sid etrim panel in the boot.
Opening the cover (Saloon):
X Slide luggage net ;down.
X Turn handle :anti-clockwise and fold
dow ncover =. Estate
The release wheel is located behind the left-
hand sid etrim panel in the boot/luggage
compartment.
Opening the cover (Estate):
X Pull handle :in the direction of the arrow
and fol dcover ;down. Saloon
Unlockin gand lowering the bal lcou pling
(Saloon):
X Grasp release wheel Awith your hand
such that the thum bisinthe thum brest
and turn it anti-clockwise.
The ball coupling unlocks and lowers. Indi-
cator lamp ?flashes. Estate
Unlockin gand lowering the bal lcou pling
(Estate):
X Grasp release wheel ?with your hand
such that the thum bisinthe thum brest
and turn it anti-clockwise.
The ball coupling unlocks and lowers. Indi-
cator lamp =flashes. Towin
gatrailer
271Drivingand parking Z
Page 280 of 497
Outsid
etemperature display
You should pay special attention to road con-
ditions when temperatures are around the
freezing point.
Bear in mind that the outside temperature
display indicates the temperature measured
and does not recor dthe road temperature.
The outside temperature display is in the mul- tifunction display (Y page 279).
Changes in the outside temperature are dis-
played after ashort delay. Speedometer with segments
The segments in the speedometer indicate
which speed range is available.
R Cruise control activated (Y page 212):
The segments light up from the stored
speed to the maximum speed.
R Variable SPEEDTRONIC activated
(Y page 215):
The segments light up from the start of the
scale to the selected limit speed.
R DISTRONIC PLUS activated (Y page 217):
One or two segments in the set speed
range light up.
R DISTRONIC PLUS detects avehicle in front:
The segments between the speed of the
vehicle in fron tand the stored speed light
up. Operating the on-board computer
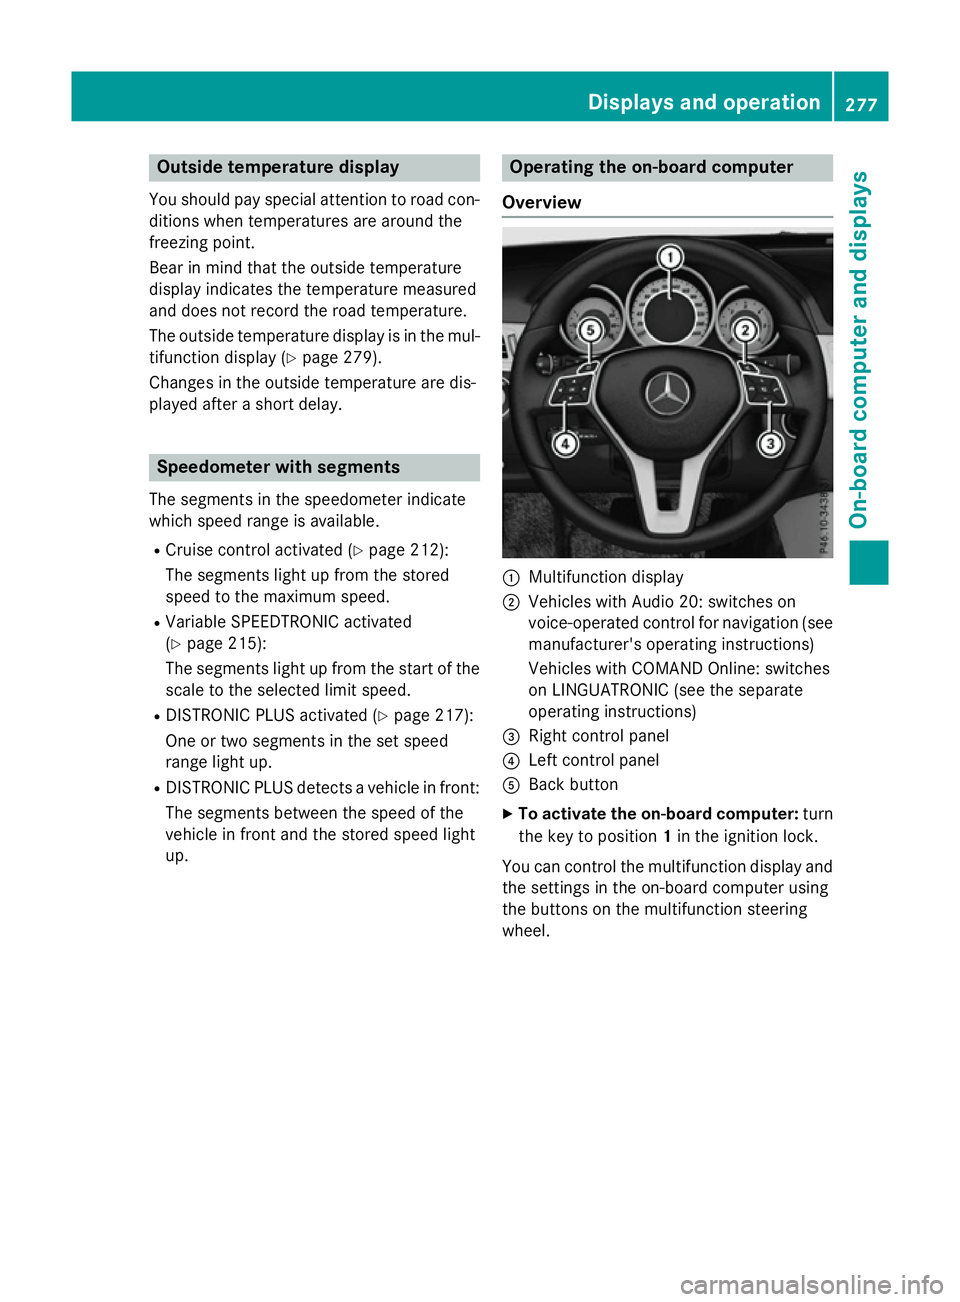
Overview :
Multifunction display
; Vehicles with Audio 20: switches on
voice-operated control for navigation (see
manufacturer's operatin ginstructions)
Vehicles with COMAND Online: switches
on LINGUATRONIC (see the separate
operatin ginstructions)
= Right control panel
? Left control panel
A Back button
X To activate the on-board computer: turn
the key to position 1in the ignition lock.
You can control the multifunction display and
the settings in the on-board computer using
the button sonthe multifunction steering
wheel. Displays and operation
277On-boardcomputer and displays Z
Page 282 of 497
Back button
% Press briefly:
R Back
R Vehicles with Audio 20:
Switches off voice-operated con-
trol for navigatio n(seem anufac-
turer's operating instructions)
R Vehicles with COMAND Online:
Switches off LINGUATRONIC
(se ethe separate operating
instructions)
R Hides display messages or calls
up the last Trip Tripmenu function
used
R Exits the telephone book/redial
memory % Press and hold:
R Call supt he standard display in
the Trip
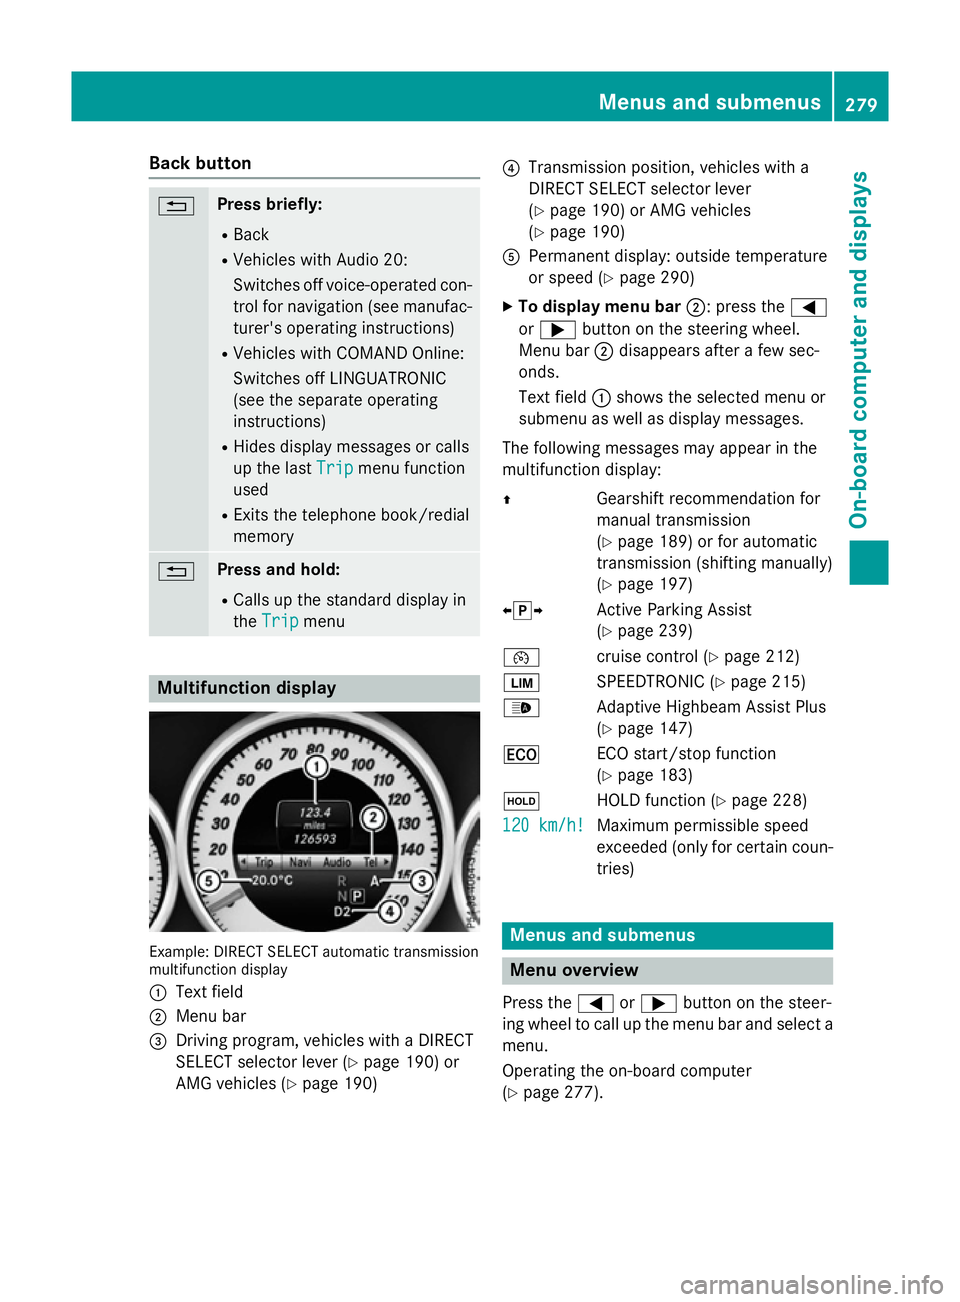
Trip menu Multifunctio
ndisplay Example: DIRECT SELEC
Tautomatic transmission
multifunctio ndisplay
: Text field
; Menu bar
= Driving program, vehicles with aDIRECT
SELECT selector lever (Y page 190)or
AMG vehicles (Y page 190) ?
Transmission position, vehicles with a
DIRECT SELECT selector lever
(Ypage 190 )orAMG vehicles
(Y page 190)
A Permanent display :outsid etemperature
or speed (Y page 290)
X To display men ubar;:p ress the =
or ; button on the steering wheel.
Menu bar ;disappears afte rafew sec-
onds.
Text field :shows the selecte dmenu or
submenu as well as display messages.
The following messages ma yappea rinthe
multifunctio ndisplay:
Z Gearshift recommendatio nfor
manua ltransmission
(Y page 189 )orfor automatic
transmission (shifting manually)
(Y page 197)
XjY Active Parking Assist
(Ypage 239)
¯ cruisecontro l(Ypage 212)
È SPEEDTRONIC (Y page 215)
_ Adaptive Highbeam Assist Plus
(Ypage 147)
¤ ECO start/sto pfunction
(Y page 183)
ë HOLD functio n(Ypage 228)
120 km/h! 120 km/h! Maximu
mpermissibl espeed
exceeded (only for certain coun-
tries) Menus and submenus
Men
uoverview
Press the =or; button on the steer-
ing whee ltocallupt he menu ba rand select a
menu.
Operating the on-boar dcomputer
(Y page 277). Menus and submenus
279On-board computer and displays Z
Page 288 of 497
You will see one of the followin
gdisplay mes-
sages in the multifunction display:
R Telephon eready
Telephon eready or the name of the net-
work provider: the mobile phon ehas found
an etwork and is ready to receive.
R Telephon eNoservice
Telephon eNoservice:t here is no net-
work available or the mobile phon eis
searching for anetwork.
i You can obtain further information about
suitable mobile phones and connecting
mobile phones via Bluetooth ®
:
R fro ma ny Mercedes-Ben zService Centre
R on the Internet at http://
www.mercedes-benz.com/connect
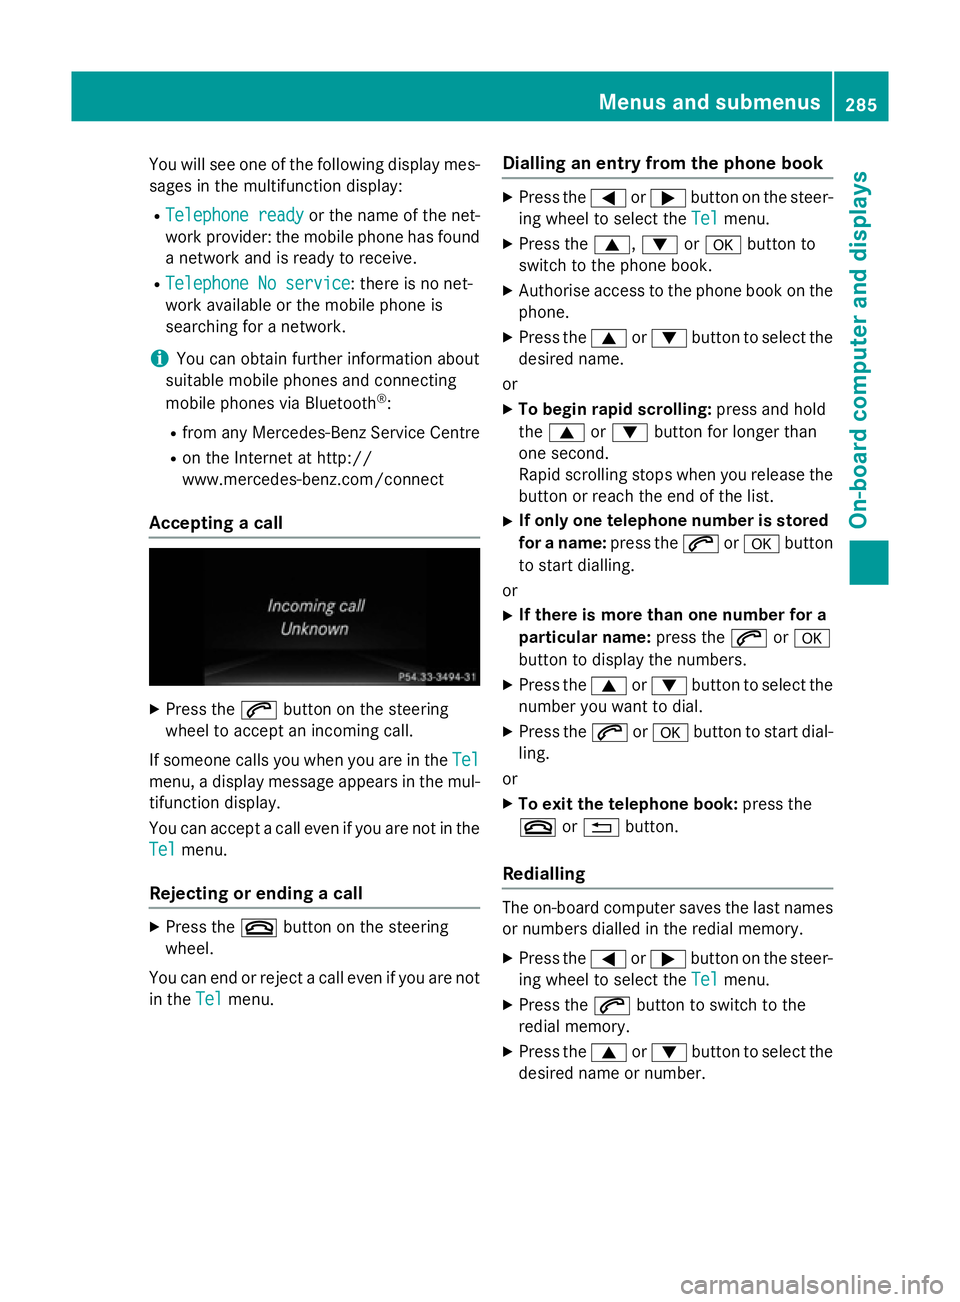
Accepting acall X
Press the 6button on the steering
wheel to accept an incomin gcall.
If someone calls you when you are in the Tel Tel
menu, adisplay message appears in the mul-
tifunction display.
You can accept acall even if you are not in the
Tel
Tel menu.
Rejecting or ending acall X
Press the ~button on the steering
wheel.
You can end or reject acall even if you are not
in the Tel
Tel menu. Dialling an entr
yfromt hephone book X
Press the =or; button on the steer-
ing wheel to selec tthe Tel Tel menu.
X Press the 9,:ora button to
switc htot he phon ebook.
X Authoris eaccess to the phon ebook on the
phone.
X Press the 9or: button to selec tthe
desired name.
or
X To begin rapid scrolling: press and hold
the 9 or: button for longer than
one second.
Rapid scrolling stops when you release the
button or reach the end of the list.
X If only one telephone number is stored
for aname: press the 6ora button
to star tdialling.
or
X If there is mor ethano ne number for a
particular name: press the6ora
button to display the numbers.
X Press the 9or: button to selec tthe
number you want to dial.
X Press the 6ora button to star tdial-
ling.
or
X To exit th etelephone book: press the
~ or% button.
Redialling The on-board computer saves the last names
or numbers dialled in the redial memory.
X Press the =or; button on the steer-
ing wheel to selec tthe Tel Tel menu.
X Press the 6button to switc htothe
redial memory.
X Press the 9or: button to selec tthe
desired name or number. Menus and submenus
285On-board computer and displays Z
Page 289 of 497
X
Press the 6ora button to start dial-
ling.
or
X To exit the redial memory: press the
~ or% button. Assistance menu
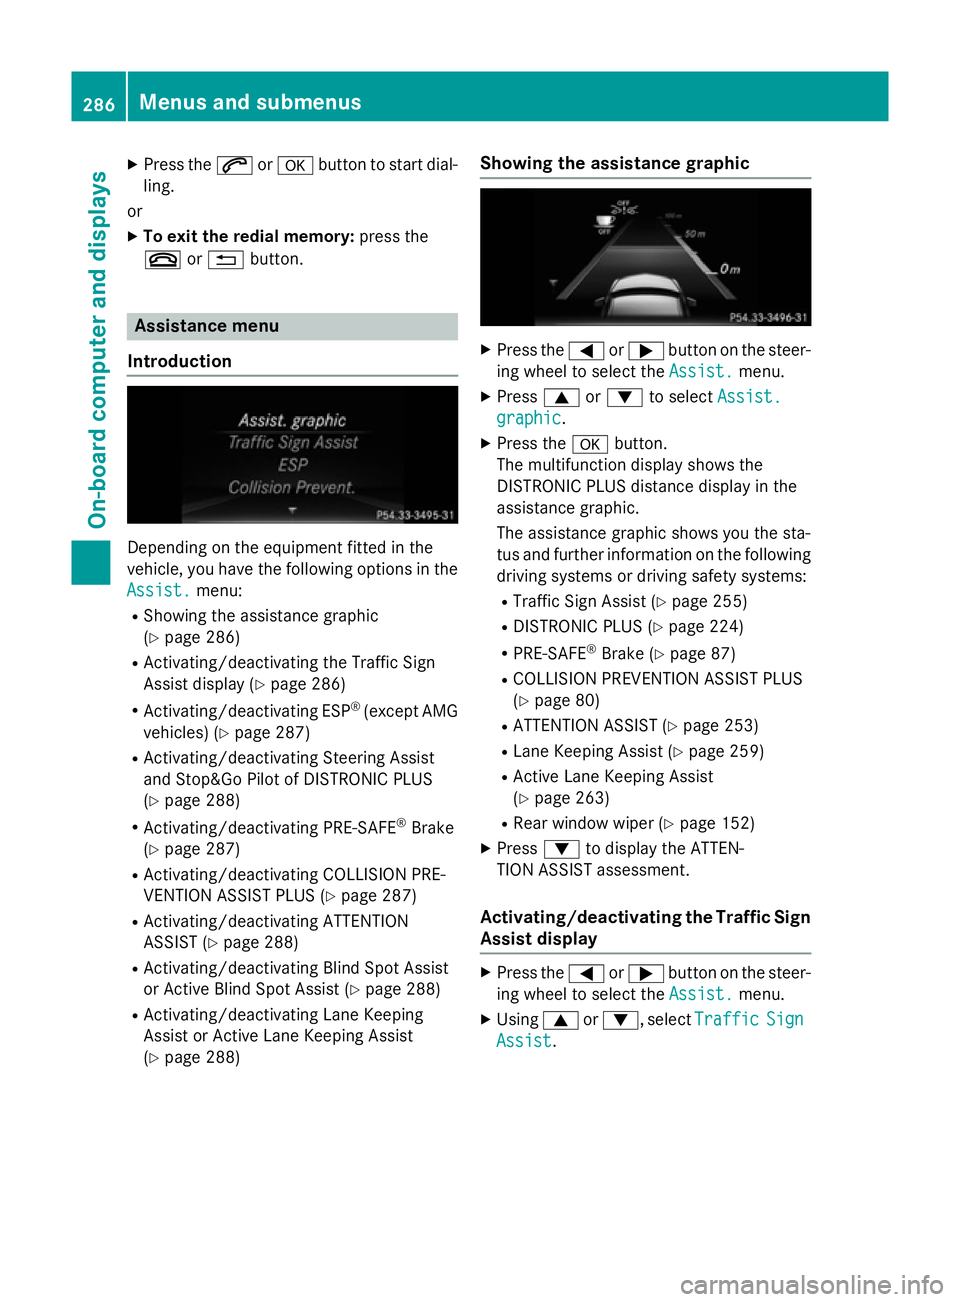
Introduction Dependin
gonthe equipment fitted in the
vehicle, you have the following options in the
Assist.
Assist. menu:
R Showing the assistanc egraphic
(Y page 286)
R Activating/deactivatin gthe Traffic Sign
Assist display (Y page 286)
R Activating/deactivatin gESP®
(except AMG
vehicles) (Y page 287)
R Activating/deactivatin gSteering Assist
and Stop&Go Pilot of DISTRONIC PLUS
(Y page 288)
R Activating/deactivatin gPRE-SAFE ®
Brake
(Y page 287)
R Activating/deactivatin gCOLLISION PRE-
VENTION ASSIST PLUS (Y page 287)
R Activating/deactivatin gATTENTION
ASSIST (Y page 288)
R Activating/deactivatin gBlind Spot Assist
or Active Blind Spot Assist (Y page 288)
R Activating/deactivatin gLane Keeping
Assist or Active Lane Keeping Assist
(Y page 288) Showing the assistance graphic X
Press the =or; button on the steer-
ing wheel to select the Assist. Assist.menu.
X Press 9or: to select Assist.
Assist.
graphic
graphic.
X Press the abutton.
The multifunction display shows the
DISTRONIC PLUS distanc edisplay in the
assistanc egraphic.
The assistanc egraphic shows you the sta-
tus and further information on the following
driving systems or driving safety systems:
R Traffic Sign Assist (Y page 255)
R DISTRONIC PLUS (Y page 224)
R PRE-SAFE ®
Brake (Y page 87)
R COLLISION PREVENTION ASSIST PLUS
(Y page 80)
R ATTENTION ASSIST (Y page 253)
R Lane Keeping Assist (Y page 259)
R Active Lane Keeping Assist
(Y page 263)
R Rear window wiper (Y page 152)
X Press :to display the ATTEN-
TION ASSIST assessment.
Activating/deactivating the Traffic Sign
Assist display X
Press the =or; button on the steer-
ing wheel to select the Assist. Assist.menu.
X Using 9or:,s electTraffic
Traffic Sign
Sign
Assist
Assist. 286
Menus and submenusOn-board computer and displays
Page 290 of 497
X
Press a.
The curren tselection is displayed.
X To activat eordeactivate: pressa.
When the display is activated, detected
traffic signs are displaye dinthe multifunc-
tion display for five seconds.
Further information about Traffic Sign Assist
(Y page 255).
Deactivating/activating ESP ®i
Observe the importan
tsafety notes on
ESP ®
(Y page 83). G
WARNING
If you deactivat eESP®
,E SP ®
no longer sta-
bilises the vehicle. There is an increased risk
of skidding and an accident.
Only deactivate ESP ®
in the situations descri-
bed in the following.
It may be best to deactivate ESP ®
in the fol-
lowing situations:
R when using snow chains
R in deep snow
R on sand or gravel
Deactivating/activating ESP ®
on AMG vehi-
cles (Y page 85).
For further information about ESP ®
,s ee
(Y page 83).
X Start the engine.
X Press the =or; button on the steer-
ing wheel to select the Assist.
Assist.menu.
X Press 9or: to select ESP
ESP.
X Press the abutton.
The curren tselection appears.
X To activate/deactivate: press thea
button again.
ESP ®
is deactivated if the åwarning lamp
in the instrument cluster lights up continu-
ously when the engine is running.
If the ÷ warning lamp and the åwarn-
ing lamp are lit continuously, ESP ®
is not
availabl edue to amalfunction. Observe the information on warning lamps
(Y
page 333).
Observe the information on display messages (Y page 300).
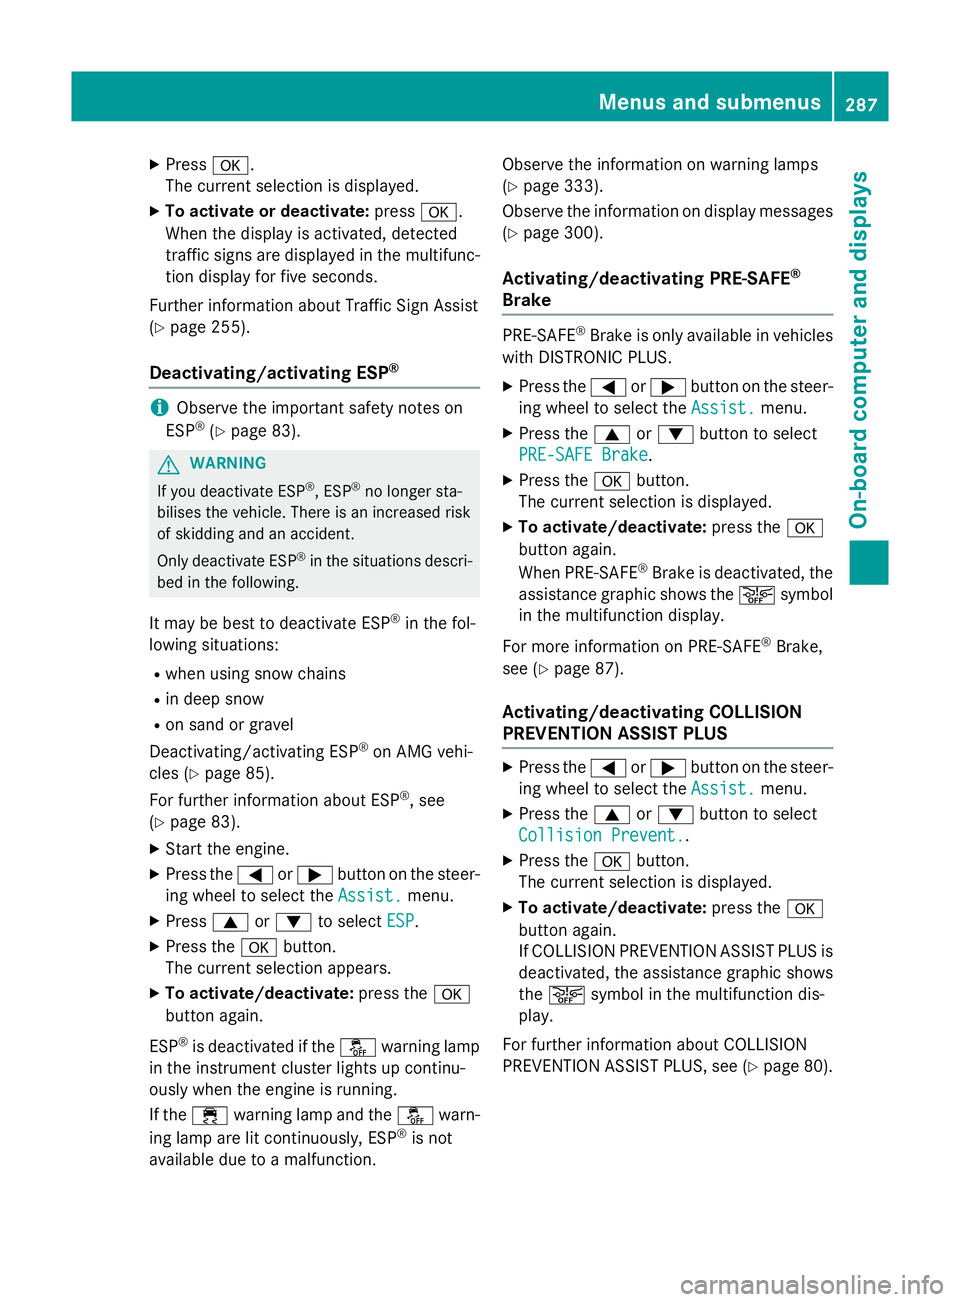
Activating/deactivating PRE-SAFE ®
Brake PRE‑SAFE
®
Brake is only availabl einvehicles
with DISTRONIC PLUS.
X Press the =or; button on the steer-
ing wheel to select the Assist. Assist.menu.
X Press the 9or: button to select
PRE-SAFE Brake
PRE-SAFE Brake.
X Press the abutton.
The curren tselection is displayed.
X To activate/deactivate: press thea
button again.
When PRE-SAFE ®
Brake is deactivated, the
assistanc egraphic shows the æsymbol
in the multifunction display.
For more information on PRE‑SAFE ®
Brake,
see (Y page 87).
Activating/deactivating COLLISION
PREVENTION ASSIST PLUS X
Press the =or; button on the steer-
ing wheel to select the Assist. Assist.menu.
X Press the 9or: button to select
Collision Prevent.
Collision Prevent..
X Press the abutton.
The curren tselection is displayed.
X To activate/deactivate: press thea
button again.
If COLLISION PREVENTION ASSIST PLUS is deactivated, the assistanc egraphic shows
the æ symbol in the multifunction dis-
play.
For further information about COLLISION
PREVENTION ASSIST PLUS, see (Y page 80). Menus and submenus
287On-board computer and displays Z
Page 292 of 497
R
Callin gupd isplay message sinthemes-
sage memory (Y page 299)
R Restarting th etyrep ressur eloss warning
system (Y page 422)
R Checkin gthe tyrep ressur eelectronically
(Y page 423)
R Callin gupt heservic edue date
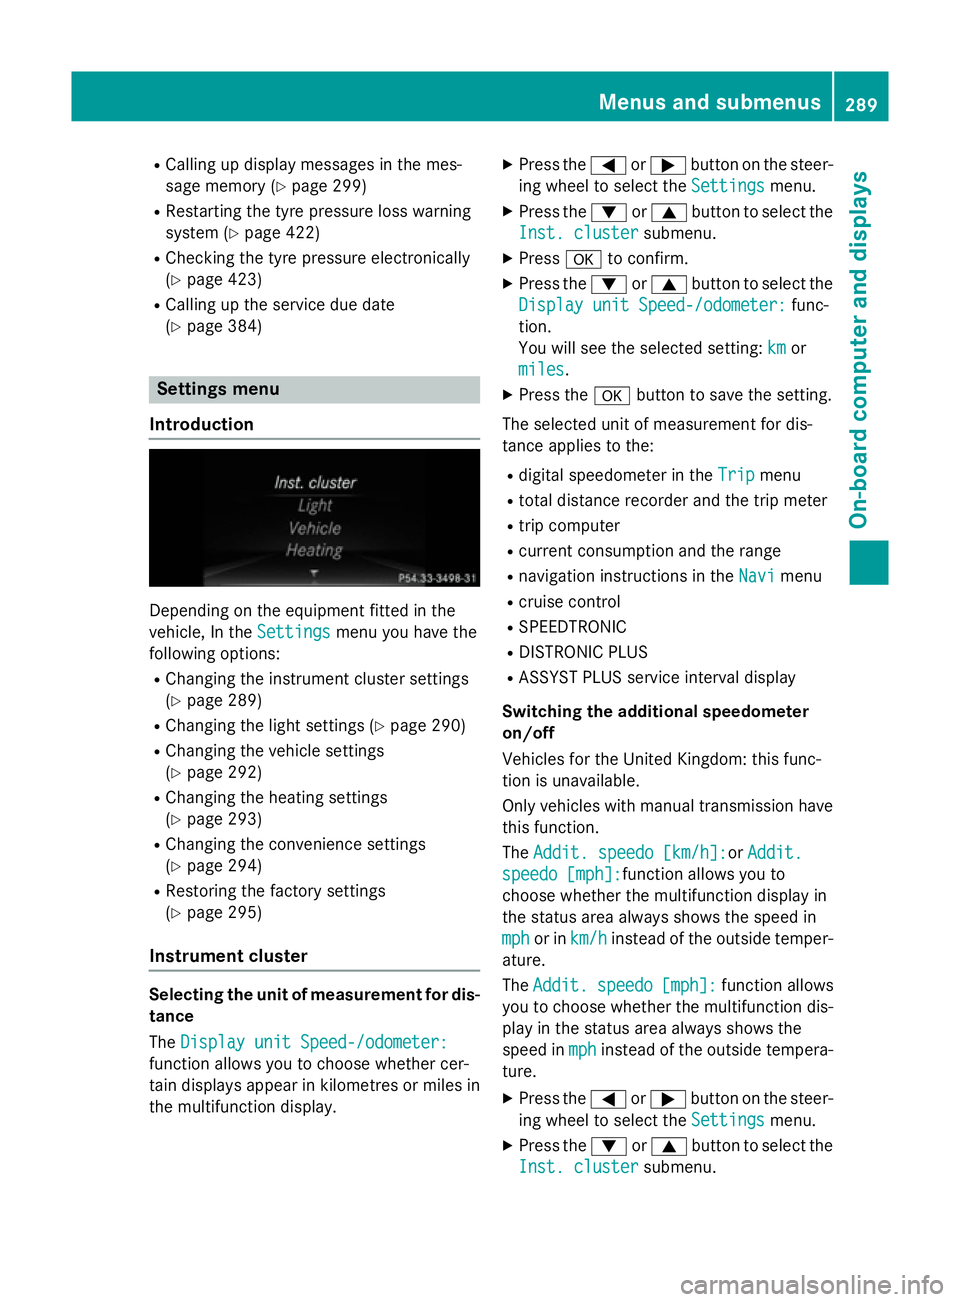
(Y page 384) Settings menu
Introduction Dependin
gontheequipmen tfitte dint he
vehicle ,Int he Settings
Settings menuyou have the
followin goptions:
R Changin gthe instrumen tcluste rsettings
(Y page 289)
R Changin gthe light settings (Y page 290)
R Changin gthe vehicle settings
(Y page 292)
R Changin gthe heating settings
(Y page 293)
R Changin gthe convenience settings
(Y page 294)
R Restoring th efactory settings
(Y page 295)
Instrumen tcluster Selecting th
eunitofm easurement for dis-
tance
The Displa yunitS peed-/odometer:
Displa yunitS peed-/odometer:
function allows you to choos ewhether cer-
tai nd isplays appear in kilometres or mile sin
th em ultifunction display. X
Press the =or; buttononthesteer-
ing wheel to select the Settings Settingsmenu.
X Press the :or9 buttontoselect the
Inst. cluster Inst. cluster submenu.
X Press ato confirm.
X Press the :or9 buttontoselect the
Displa yunitS peed-/odometer:
Displa yunitS peed-/odometer: func-
tion.
You will see th eselected setting: km kmor
miles
miles.
X Press the abuttontos ave th esetting.
The selected unit of measuremen tfor dis-
tance applie stothe:
R digital speedometer in the Trip
Trip menu
R total distanc erecorder and th etripm eter
R trip computer
R curren tconsum ption and th erange
R navigation instruction sintheNavi
Navi menu
R cruise control
R SPEEDTRONIC
R DISTRONI CPLUS
R ASSYS TPLUSs ervic einterval display
Switchin gthe additiona lspe edometer
on/off
Vehicle sfor th eUnite dKingdom :thisf unc-
tion is unavailable.
Only vehicle swithm anual transmission have
this function.
The Addit. speedo [km/h]: Addit. speedo [km/h]:or Addit.
Addit.
speedo [mph]:
speedo [mph]: function allows you to
choos ewhether th emultifunction display in
th es tatus area always shows th espee din
mph
mph or in km/h
km/h instead of th eoutside temper-
ature.
The Addit. Addit. speedo
speedo[mph]:
[mph]:function allows
you to choos ewhether th emultifunction dis-
play in th estatus area always shows the
spee dinmph
mph instead of th eoutside tempera-
ture.
X Press the =or; buttononthesteer-
ing wheel to select the Settings
Settingsmenu.
X Press the :or9 buttontoselect the
Inst. cluster
Inst. cluster submenu. Menu
sand submenus
289On-boardcomputer and displays Z
Page 293 of 497
![MERCEDES-BENZ E-CLASS SALOON 2015 Owners Manual X
Press ato confirm.
X Press the :or9 button to select the
Addit. speedo [mph]:
Addit. speedo [mph]: orAddit.
Addit.
speedo [km/h]:
speedo [km/h]: function.
Press the :or9 button to select the
Addit. MERCEDES-BENZ E-CLASS SALOON 2015 Owners Manual X
Press ato confirm.
X Press the :or9 button to select the
Addit. speedo [mph]:
Addit. speedo [mph]: orAddit.
Addit.
speedo [km/h]:
speedo [km/h]: function.
Press the :or9 button to select the
Addit.](/manual-img/4/55517/w960_55517-292.png)
X
Press ato confirm.
X Press the :or9 button to select the
Addit. speedo [mph]:
Addit. speedo [mph]: orAddit.
Addit.
speedo [km/h]:
speedo [km/h]: function.
Press the :or9 button to select the
Addit. speedo [mph]:
Addit. speedo [mph]: function.
You will see the selected setting: on
onoroff
off.
X Press the abutton to save the setting.
Selecting the permanent display function
Vehicles for the United Kingdom: this func-
tion is unavailable.
You can determin ewhether the multifunction
display permanently shows your speed or the
outside temperature.
X Press the =or; button on the steer-
ing wheel to select the Settings Settingsmenu.
X Press the :or9 button to select the
Inst. cluster
Inst. cluster submenu.
X Press ato confirm.
X Press the :or9 button to select the
Permanent display
Permanent display function.
You will see the selected setting: outside
outside
temperature
temperature orAddit.
Addit. speedo
speedo[km/h]
[km/h]/
Addit. speedo [mph]
Addit. speedo [mph].
X Press the abutton to save the setting.
i The speed is highlighted in km/ho
rin
mph inverse to your speedometer.
Lights Setting the brightness for the instrument
cluster lighting and switches
The lighting in the instrument cluster, in the
displays and the controls in the vehicle inte-
rior can be adjusted with the Brightness Brightness
Display/switches:
Display/switches: function.
X Press the =or; button on the steer-
ing wheel to select the Settings
Settingsmenu.
X Press the :or9 button to select the
Lights
Lights submenu.
X Press ato confirm. X
Press the :or9 button to select the
Brightnes sDisplay/switches:
Brightnes sDisplay/switches: func-
tion.
You will see the selected setting.
X Press ato confirm.
X Press the :or9 button to adjust the
brightness to any level from Level 1 Level 1to
Level 5
Level 5 (bright).
X Press the aor% button to save the
setting.
If the light switch is set to Ã,Tor
L,t he brightness is dependent upon
the brightness of the ambient light.
i The light sensor in the instrument cluster
automatically controls the brightness of
the multifunction display.
In daylight, the displays in the instrument
cluster are not illuminated.
Switching the daytime driving lights
on/off
The Day lights Day lights function can only be
switched on with the engine turned off.
X Press the =or; button on the steer-
ing wheel to select the Settings
Settingsmenu.
X Press the :or9 button to select the
Light
Light submenu.
X Press ato confirm.
X Press the :or9 button to select the
Day lights
Day lights function.
If the Day lights
Day lights function has been
switched on, the cone of light and the W
symbol in the multifunction display are
shown in orange.
X Press the abutton to save the setting.
Further information on daytime driving lights
(Y page 143).
Switching the Intelligent Light System
on/off
X Press the =or; button on the steer-
ing wheel to select the Settings Settingsmenu.
X Press the :or9 button to select the
Light
Light submenu.
X Press ato confirm. 290
Menus and submenusOn-board computer and displays