2015 MERCEDES-BENZ E-CLASS COUPE fuel consumption
[x] Cancel search: fuel consumptionPage 13 of 345

Warning lamp (engine diagnos-
tics) ............................................... 252
Engine electronics
Notes ............................................. 327
Problem (fault) ...............................1 38
Engine jump starting
see Jump starting (engine)
Engine oil
Additives ........................................ 333
Checking the oil level ..................... 285
Checking the oil level using the
dipstick .......................................... 285
Display message ............................ 232
Filling capacity ............................... 333
Notes about oil grades ................... 332
Notes on oil level/consumption .... 285
Topping up ..................................... 286
Entering an address
See also Digital Owner's Manual ... 256
Environmental protection
Returning an end-of-life vehicle ....... 23
ESP ®
(Electronic Stability Pro-
gram)
Characteristics ................................. 67
Deactivating/activating ................. 214
Deactivating/activating (notes) ....... 68
Display message ............................ 223
Function/notes ................................ 67
General notes .................................. 67
Important safety guidelines ............. 67
Trailer stabilisatio n.......................... 68
Warning lamp ................................. 249
ETS/4ETS (Electronic Traction Sys-
tem) ...................................................... 67
Exhaust pipe (cleaning instruc-
tions) .................................................. 293
Exterior lighting
Settings options ............................. 106
see Lights
Exterior mirrors
Adjusting ....................................... 102
Anti-dazzle mode (automatic) ........ 103
Folding in when locking (on-boardcomputer) ...................................... 220
Folding in/out (automatically )....... 103
Folding in/out (electrically) ........... 103
Out of position (troubleshooting) ... 103 Parking position ............................. 104
Resetting ....................................... 103
Storing settings (memory func-
tion) ............................................... 104 F
Fault message see Display messages
Favourites
Overview ........................................ 257
Filler cap
see Fuel filler flap
Fire extinguisher ............................... 296
First-aid kit ......................................... 296
Fitting a wheel
Fitting a wheel ............................... 324
Lowering the vehicle ...................... 324
Preparing the vehicle ..................... 321
Raising the vehicl e......................... 322
Removing a whee l.......................... 323
Securing the vehicle against roll-
ing away ........................................ 322
Flat tyre
MOExtended tyre s......................... 298
Preparing the vehicle ..................... 298
TIREFIT kit ...................................... 299
see Emergency spare wheel
Floormat ............................................. 281
Foglamps
Extended rang e.............................. 109
Frequencies
Garage door opener ....................... 279
Mobile phone ................................. 327
Two-way radio ................................ 327
Fuel
Additives ........................................ 331
Consumption statistics .................. 209
Displaying the current consump-
tion ................................................ 209
Displaying the range ...................... 209
Fuel gaug e....................................... 30
Grade (petrol) ................................ 330
Important safety notes .................. 330
Notes for E 200, E 250, E400 ........ 331
Problem (malfunction) ................... 150
Quality (diesel )............................... 331
Refuelling ....................................... 147 10
Index
Page 26 of 345

Protection of the environment
General notes
H
Environmental note
Daimler's declared policy is one of compre-
hensive environmental protection.
Our objectives are to use the natural resour-
ces which form the basis of our existence on
this planet sparingly and in a manner which
takes the requirements of both nature and
humanity into consideration.
You too can help to protect the environment
by operating your vehicle in an environmen-
tally-responsible manner.
Fuel consumption and the rate of engine,
transmission, brake and tyre wear depend on
the following factors:
R operating conditions of your vehicle
R your personal driving style
You can influence both factors. Therefore,
please bear the following in mind:
Operating conditions:
R avoid short trips, as these increase fuel
consumption.
R observe the correct tyre pressure.
R do not carry any unnecessary weight in the
vehicle.
R remove the roof rack once you no longer
need it.
R a regularly serviced vehicle will contribute
to environmental protection. You should
therefore adhere to the service intervals.
R all maintenance work should be carried out
at a qualified specialist workshop.
Personal driving style:
R do not depress the accelerator pedal when
starting the engine.
R do not warm up the engine when the vehicle
is stationary.
R drive carefully and maintain a safe distance
from the vehicle in front.
R avoid frequent, sudden acceleration and
braking. R
change gear in good time and use each gear
only up to Ôof its maximum engine speed.
R switch off the engine in stationary traffic.
R monitor the vehicle's fuel consumption. Returning an end-of-life vehicle
EU countries only:
Mercedes-Benz will take back your old vehicle to
dispose of it in an environmentally-responsible
manner in accordance with the European Union (EU) End of Life Vehicles Directive.
There is a network of return points and disas-
sembly plants available. You can return your
vehicle to these plants free of charge. This
makes a valuable contribution to the recycling
process and the conservation of resources.
For further information on recycling old vehi-
cles, recovery and the terms of the policy, visit
the Mercedes-Benz homepage. Genuine Mercedes-Benz parts
H
Environmental note
Daimler AG also supplies reconditioned
assemblies and parts which are of the same
quality as new parts. For these, the same war-
ranty applies as for new parts.
! Airbags and seat belt tensioners, as well as
control units and sensors for these restraint
systems, may be installed in the following
areas of your vehicle:
R doors
R door pillars
R door sills
R seats
R dashboard
R instrument cluster
R centre console
Do not install accessories such as audio sys-
tems in these areas. Do not carry out repairs
or welding. You could impair the operating
efficiency of the restraint systems.
Have accessories retrofitted at a qualified
specialist workshop. Genuine Mercedes-Benz parts
23Introduction Z
Page 138 of 345
after a cold start. This helps the catalytic con-
verter to reach its operating temperature
more quickly.
Hill start assist Hill start assist helps you when pulling away for-
wards or in reverse on an uphill gradient. It holds the vehicle for a short time after you have
removed your foot from the brake pedal. This
gives you enough time to move your foot from
the brake pedal to the accelerator pedal and
depress it before the vehicle begins to roll. G
WARNING
After a while, hill start assist no longer holds
the vehicle and it may roll away. There is a risk of an accident and injury.
Therefore, quickly move your foot from the
brake pedal to the accelerator pedal. Never
leave the vehicle when it is held by hill start
assist.
Hill start assist is not active if:
R you are pulling away on a level road or a
downhill gradient
R on vehicles with automatic transmission, the
transmission is in position N
R the parking brake is applied
R ESP ®
is malfunctioning ECO start/stop function
Introduction The ECO start/stop function switches the
engine off automatically if the vehicle is stopped
under certain conditions.
When pulling away again, the engine starts auto-
matically. The ECO start/stop function thereby
helps you to reduce the fuel consumption and
emissions of your vehicle.
Important safety notes G
WARNING
If the engine is switched off automatically and you exit the vehicle, the engine is restarted
automatically. The vehicle may begin moving. There is a risk of accident and injury. If you wish to exit the vehicle, always turn off
the ignition and secure the vehicle against
rolling away.
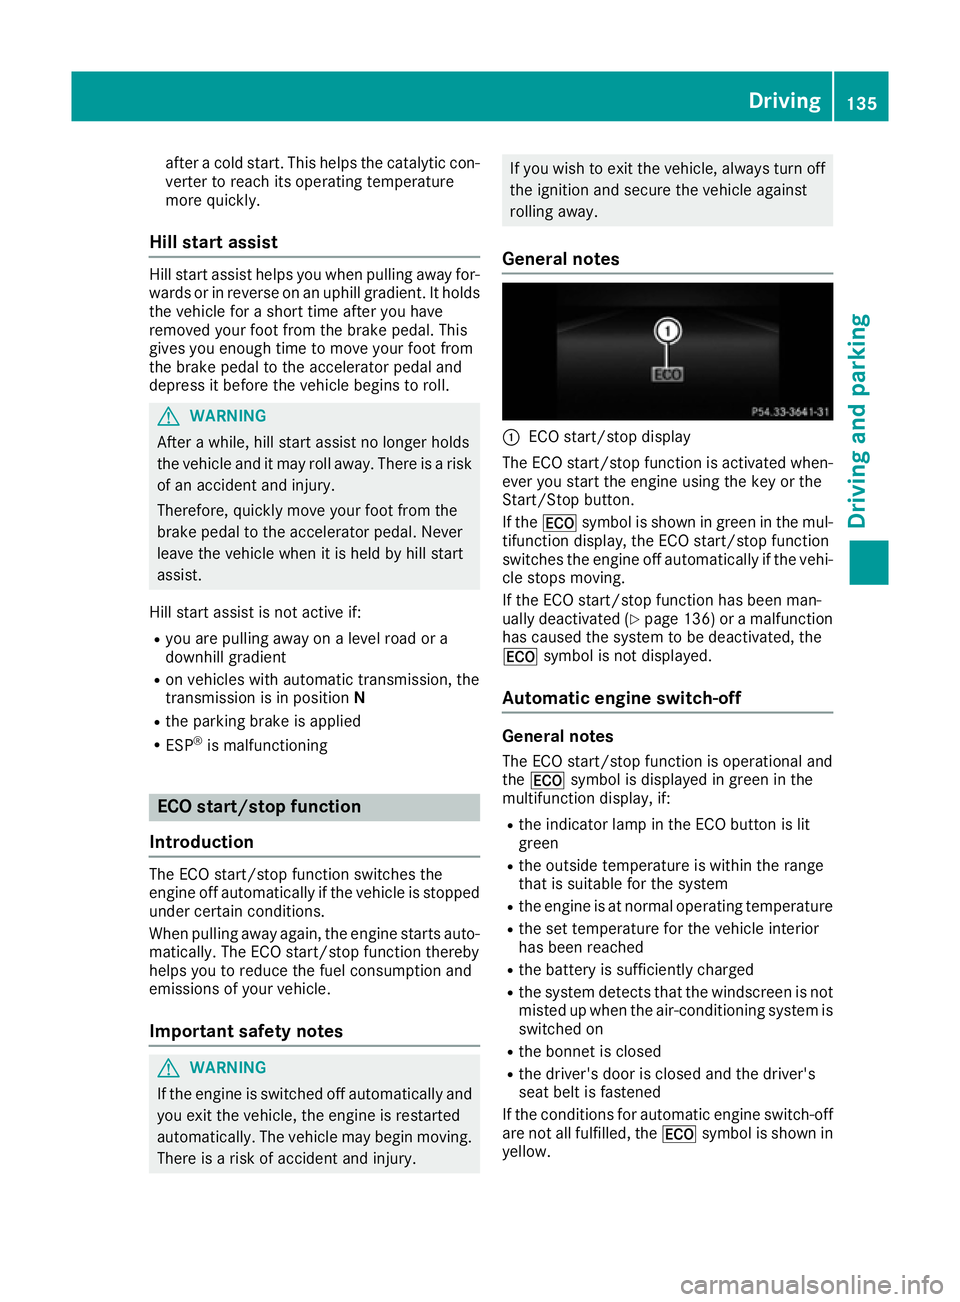
General notes :
ECO start/stop display
The ECO start/stop function is activated when-
ever you start the engine using the key or the
Start/Stop button.
If the ¤ symbol is shown in green in the mul-
tifunction display, the ECO start/stop function
switches the engine off automatically if the vehi- cle stops moving.
If the ECO start/stop function has been man-
ually deactivated (Y page 136) or a malfunction
has caused the system to be deactivated, the
¤ symbol is not displayed.
Automatic engine switch-off General notes
The ECO start/stop function is operational and
the ¤ symbol is displayed in green in the
multifunction display, if:
R the indicator lamp in the ECO button is lit
green
R the outside temperature is within the range
that is suitable for the system
R the engine is at normal operating temperature
R the set temperature for the vehicle interior
has been reached
R the battery is sufficiently charged
R the system detects that the windscreen is not
misted up when the air-conditioning system is switched on
R the bonnet is closed
R the driver's door is closed and the driver's
seat belt is fastened
If the conditions for automatic engine switch-off
are not all fulfilled, the ¤symbol is shown in
yellow. Driving
135Driving and parking Z
Page 147 of 345
Steering wheel gearshift paddles
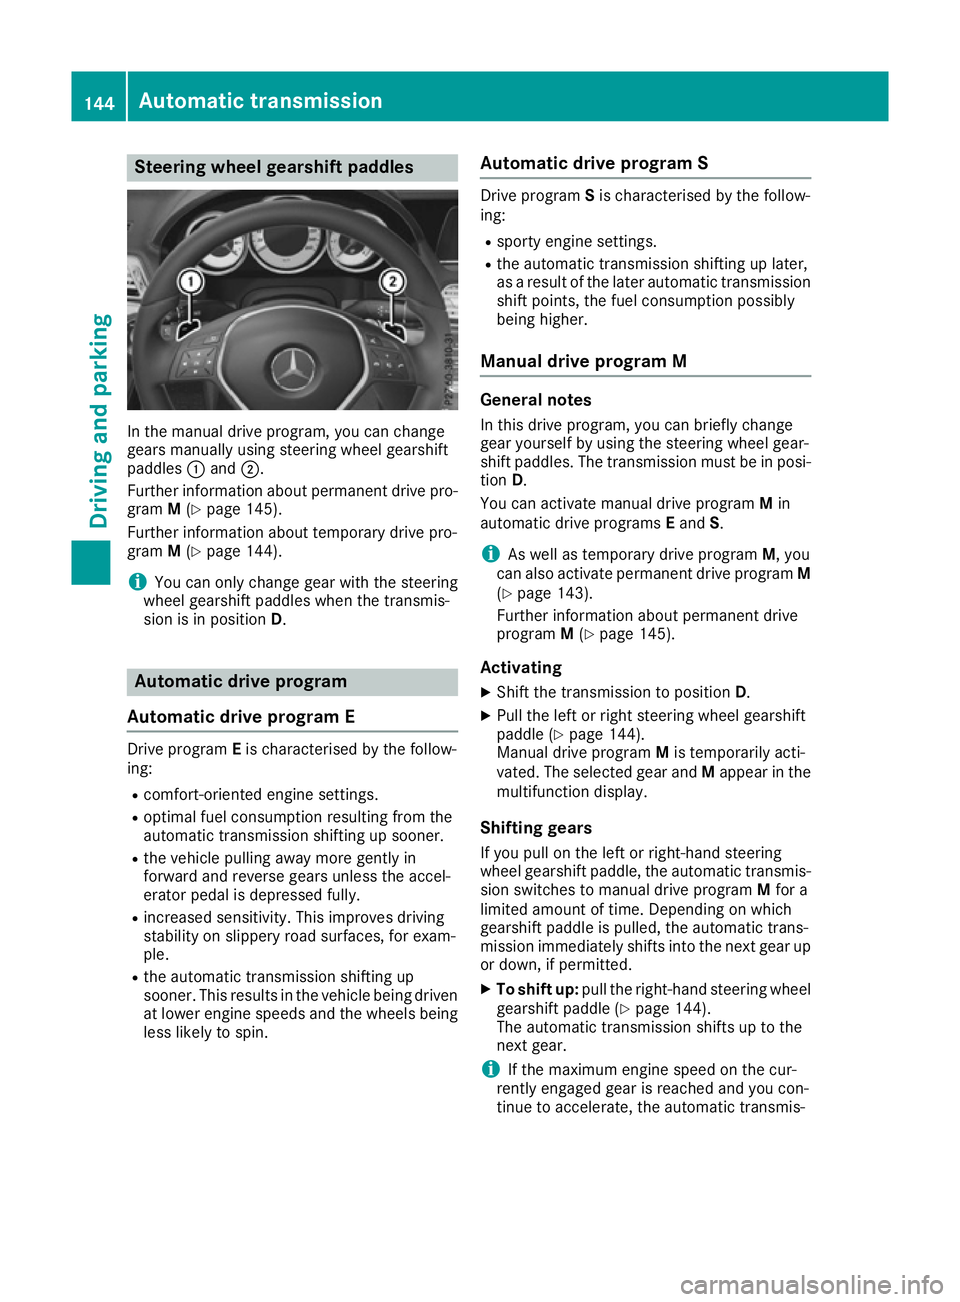
In the manual drive program, you can change
gears manually using steering wheel gearshift
paddles :and ;.
Further information about permanent drive pro-
gram M(Y page 145).
Further information about temporary drive pro-
gram M(Y page 144).
i You can only change gear with the steering
wheel gearshift paddles when the transmis-
sion is in position D. Automatic drive program
Automatic drive program E Drive program
Eis characterised by the follow-
ing:
R comfort-oriented engine settings.
R optimal fuel consumption resulting from the
automatic transmission shifting up sooner.
R the vehicle pulling away more gently in
forward and reverse gears unless the accel-
erator pedal is depressed fully.
R increased sensitivity. This improves driving
stability on slippery road surfaces, for exam-
ple.
R the automatic transmission shifting up
sooner. This results in the vehicle being driven
at lower engine speeds and the wheels being less likely to spin. Automatic drive program S Drive program
Sis characterised by the follow-
ing:
R sporty engine settings.
R the automatic transmission shifting up later,
as a result of the later automatic transmission
shift points, the fuel consumption possibly
being higher.
Manual drive program M General notes
In this drive program, you can briefly change
gear yourself by using the steering wheel gear-
shift paddles. The transmission must be in posi-
tion D.
You can activate manual drive program Min
automatic drive programs Eand S.
i As well as temporary drive program
M, you
can also activate permanent drive program M
(Y page 143).
Further information about permanent drive
program M(Y page 145).
Activating X Shift the transmission to position D.
X Pull the left or right steering wheel gearshift
paddle (Y page 144).
Manual drive program Mis temporarily acti-
vated. The selected gear and Mappear in the
multifunction display.
Shifting gears
If you pull on the left or right-hand steering
wheel gearshift paddle, the automatic transmis- sion switches to manual drive program Mfor a
limited amount of time. Depending on which
gearshift paddle is pulled, the automatic trans-
mission immediately shifts into the next gear up
or down, if permitted.
X To shift up: pull the right-hand steering wheel
gearshift paddle (Y page 144).
The automatic transmission shifts up to the
next gear.
i If the maximum engine speed on the cur-
rently engaged gear is reached and you con-
tinue to accelerate, the automatic transmis- 144
Automatic transmissionDriving and parking
Page 156 of 345
ECO display assists you in achieving the most
economical driving style for the selected set-
tings and prevailing conditions. Consumption
can be significantly influenced by your driving
style.
The ECO display consists of three bars:
R Acceleration Acceleration
R Constant
Constant
R Coasting
Coasting
The percentage count is the mean value of the
three bar values. The three bars and the mean
value begin at the value of 50%. A higher per-
centage count indicates a more economical
driving style.
The ECO display does not indicate the actual fuel
consumption. A fixed percentage count in the
ECO display does not indicate a fixed consump- tion.
In addition to driving style, the consumption is
affected by many other factors, such as:
R load
R tyre pressure
R cold start
R choice of route
R the use of electrical consumers
These factors are not included in the ECO dis-
play.
The evaluation of your driving style takes the
following three categories into consideration:
R Acceleration
Acceleration (evaluation of all acceleration
processes):
- the bar fills up: moderate acceleration,
especially at higher speeds
- the bar empties: sporty acceleration
R Constant
Constant (assessment of driving behaviour
at all times):
- the bar fills up: constant speed and avoid-
ance of unnecessary acceleration and
deceleration
- the bar empties: fluctuations in speed
R Coasting Coasting (assessment of all deceleration
processes):
- the bar fills up: anticipatory driving, keep-
ing your distance and early release of the
accelerator. The vehicle can coast without
use of the brakes.
- the bar empties: frequent braking
i An economical driving style involves driving
at a moderate engine speed. To achieve a higher value in the categories
Acceleration Acceleration andConstant
Constant:
R observe the gearshift recommendation
R drive the vehicle in drive program E(vehi-
cles with automatic transmission)
i On long journeys at a constant speed, e.g.
on the motorway, only the bar for Constant
Constant
will change.
i The ECO display summarises the driving
characteristics from the start of the journey to
its completion. Therefore, there are dynamic
changes in the bars at the start of a journey.
During a prolonged driving time, these
changes are smaller. For more dynamic
changes, perform a manual reset.
Further information on the ECO display
(Y page 209). Brakes
Important safety notes G
WARNING
If you shift down on a slippery road surface in an attempt to increase the engine's braking
effect, the drive wheels could lose their grip.
This increases the risk of skidding and having
an accident.
Do not shift down for additional engine brak-
ing on a slippery road surface.
Downhill gradients Do not depress the brake pedal continuously
while the vehicle is in motion, e.g. never cause
the brakes to rub by constantly applying light
pressure to the pedal. This results in excessive
and premature wear to the brake pads.
Change into a lower gear in good time on long
and steep downhill gradients.
Take particular note of this when driving a laden vehicle and when towing a trailer.
i This also applies if you have activated cruise
control, SPEEDTRONIC or DISTRONIC PLUS.
This will use the braking effect of the engine, so
less braking will be required to maintain vehicle
speed. This relieves the load on the brake sys-
tem and prevents the brakes from overheating
and wearing too quickly. Driving
tips
153Driving an d parking Z
Page 212 of 345
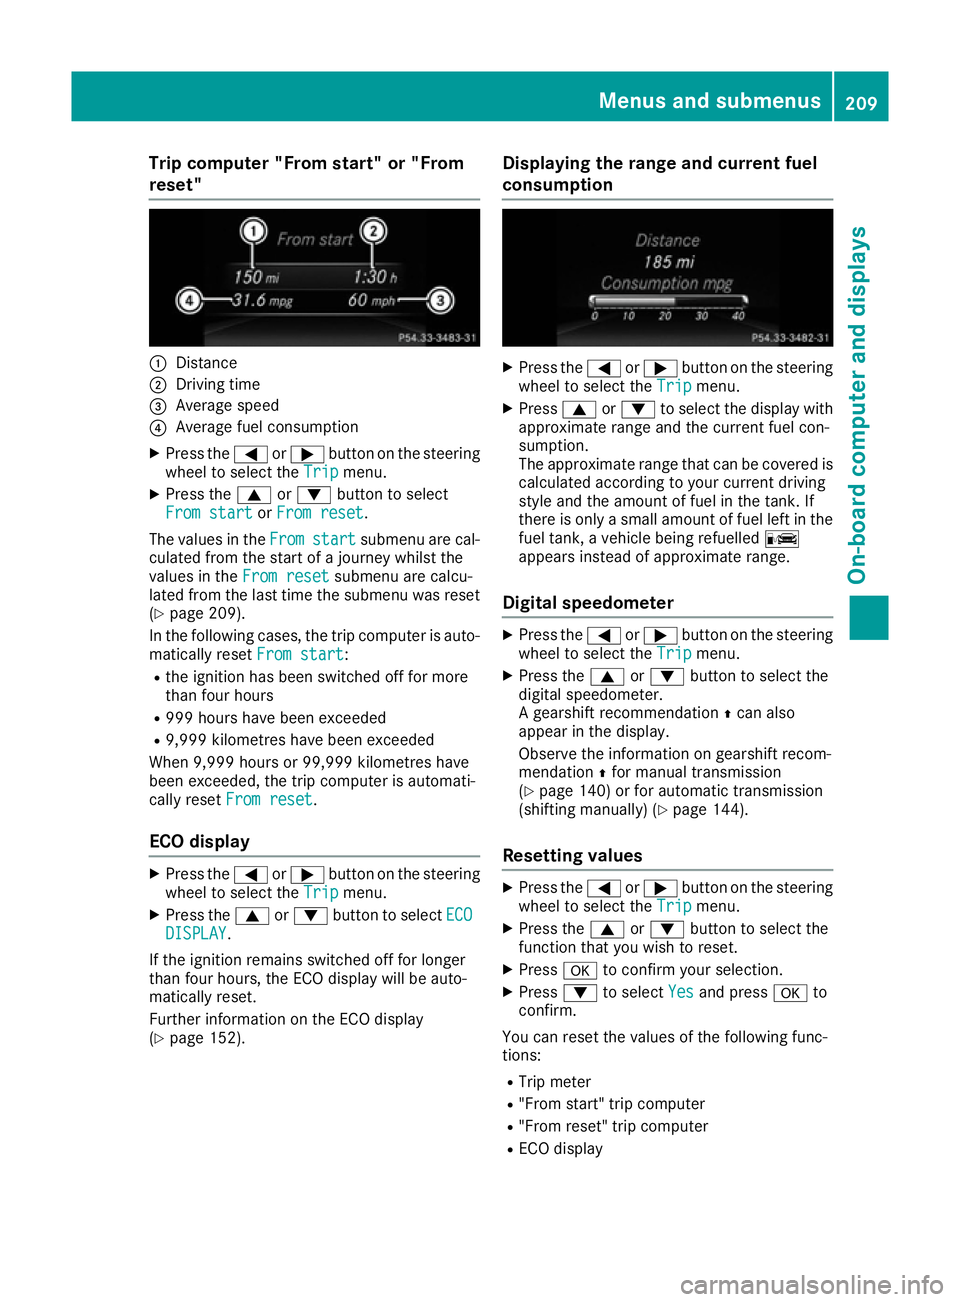
Trip computer "From start" or "From
reset" :
Distance
; Driving time
= Average speed
? Average fuel consumption
X Press the =or; button on the steering
wheel to select the Trip
Tripmenu.
X Press the 9or: button to select
From start
From start orFrom reset
From reset.
The values in the From
Fromstart
start submenu are cal-
culated from the start of a journey whilst the
values in the From reset
From reset submenu are calcu-
lated from the last time the submenu was reset
(Y page 209).
In the following cases, the trip computer is auto-
matically reset From start
From start:
R the ignition has been switched off for more
than four hours
R 999 hours have been exceeded
R 9,999 kilometres have been exceeded
When 9,999 hours or 99,999 kilometres have
been exceeded, the trip computer is automati-
cally reset From reset
From reset.
ECO display X
Press the =or; button on the steering
wheel to select the Trip
Tripmenu.
X Press the 9or: button to select ECO
ECO
DISPLAY
DISPLAY.
If the ignition remains switched off for longer
than four hours, the ECO display will be auto-
matically reset.
Further information on the ECO display
(Y page 152). Displaying the range and current fuel
consumption X
Press the =or; button on the steering
wheel to select the Trip Tripmenu.
X Press 9or: to select the display with
approximate range and the current fuel con-
sumption.
The approximate range that can be covered is calculated according to your current driving
style and the amount of fuel in the tank. If
there is only a small amount of fuel left in the
fuel tank, a vehicle being refuelled C
appears instead of approximate range.
Digital speedometer X
Press the =or; button on the steering
wheel to select the Trip Tripmenu.
X Press the 9or: button to select the
digital speedometer.
A gearshift recommendation Zcan also
appear in the display.
Observe the information on gearshift recom-
mendation Zfor manual transmission
(Y page 140) or for automatic transmission
(shifting manually) (Y page 144).
Resetting values X
Press the =or; button on the steering
wheel to select the Trip Tripmenu.
X Press the 9or: button to select the
function that you wish to reset.
X Press ato confirm your selection.
X Press :to select Yes
Yesand press ato
confirm.
You can reset the values of the following func-
tions: R Trip meter
R "From start" trip computer
R "From reset" trip computer
R ECO display Menus and submenus
209On-board computer and displays Z
Page 328 of 345

tem or the tyre pressure monitor cannot func-
tion reliably. Only restart the tyre pressure loss
warning system or tyre pressure monitor when
the defective wheel has been replaced with a
new wheel.
Vehicles with a tyre pressure monitor: all fit-
ted wheels must be equipped with functioning
sensors. Wheel and tyre combinations
You can ask for information regarding permitted wheel-tyre combinations at a Mercedes-Benz
Service Centre.
! For safety reasons, Mercedes-Benz recom-
mends that you only use tyres and wheels
which have been approved by Mercedes-Benz specifically for your vehicle.
These are specially adapted to the control
systems, such as ABS or ESP ®
and are
marked as follows:
R MO = Mercedes-Benz Original
R MOE = Mercedes-Benz Original Extended
(tyres featuring run-flat characteristics)
R MO1 = Mercedes-Benz Original (only cer-
tain AMG tyres)
Mercedes-Benz Original Extended tyres may
only be used on wheels that have been spe-
cifically approved by Mercedes-Benz.
Only use tyres, wheels or accessories tested
and approved by Mercedes-Benz. Certain
characteristics, e.g. handling, vehicle noise
emissions or fuel consumption, may other-
wise be adversely affected. In addition, when driving with a load, tyre dimension variations
could cause the tyres to come into contact
with the bodywork and axle components. This
could result in damage to the tyres or the
vehicle.
Mercedes-Benz accepts no liability for dam-
age resulting from the use of tyres, wheels or
accessories other than those tested and
approved.
Further information about wheels, tyres and
approved combinations can be obtained from any qualified specialist workshop.
! Retreaded tyres are neither tested nor rec-
ommended by Mercedes-Benz, since previ-
ous damage cannot always be detected on
retreaded tyres. As a result, Mercedes-Benz cannot guarantee vehicle safety if retreaded
tyres are fitted. Do not fit used tyres if you
have no information about their previous
usage.
! Large wheels: the lower the section width
for a certain wheel size, the lower the ride
comfort is on poor road surfaces. Roll comfort and suspension comfort are reduced and therisk of damage to the wheels and tyres as a
result of driving over obstacles increases.
The recommended tyre pressures can be found
in the tyre pressure table on the fuel filler flap.
For further information on tyre pressure, see
(Y page 316). Check tyre pressures regularly
and only when the tyres are cold.
Notes on the vehicle equipment – always fit the
vehicle:
R with tyres of the same size across an axle
(left/right)
R with the same type of tyres at a given time
(summer tyres, winter tyres, MOExtended
tyres)
Exception: it is permissible to fit a different
type or make in the event of a flat tyre.
Observe the "MOExtended tyres (tyres with
run-flat characteristics)" section
(Y page 298).
Vehicles with MOExtended tyres are not equip-
ped with a TIREFIT kit at the factory. It is there-
fore recommended that you additionally equip
your vehicle with a TIREFIT kit if you fit tyres that do not feature run-flat characteristics, e.g. win-
ter tyres. A TIREFIT kit can be obtained from a
qualified specialist workshop. Emergency spare wheel
Important safety notes
G
WARNING
The wheel/tyre dimensions and the tyre type of the spare wheel/emergency spare wheel
and the wheel to be replaced may differ. Fit-
ting a spare wheel/emergency spare wheel
may severely impair the driving characteris-
tics. There is a risk of accident. Emergency spare
wheel
325Wheels an d tyres
Z
Page 333 of 345
Fuel
Important safety notes G
WARNING
Fuel is highly flammable. If you handle fuel
incorrectly, there is a risk of fire and explo-
sion.
You must avoid fire, naked flames, creating
sparks and smoking. Switch off the engine
and, if applicable, the auxiliary heating before refuelling. G
WARNING
Fuels are poisonous and hazardous to health. There is a danger of injury.
Do not swallow fuel or let it come into contact
with skin, eyes or clothing. Do not inhale fuel
vapours. Keep fuels out of the reach of chil-
dren.
If you or others come into contact with fuel,
observe the following:
R Wash the fuel off any affected areas of skin
with water and soap immediately.
R If you get fuel in your eyes, rinse them thor-
oughly with clean water immediately. Seek immediate medical attention.
R If fuel is swallowed, seek immediate medi-
cal attention. Do not induce vomiting.
R Change any clothing that has come into
contact with fuel immediately.
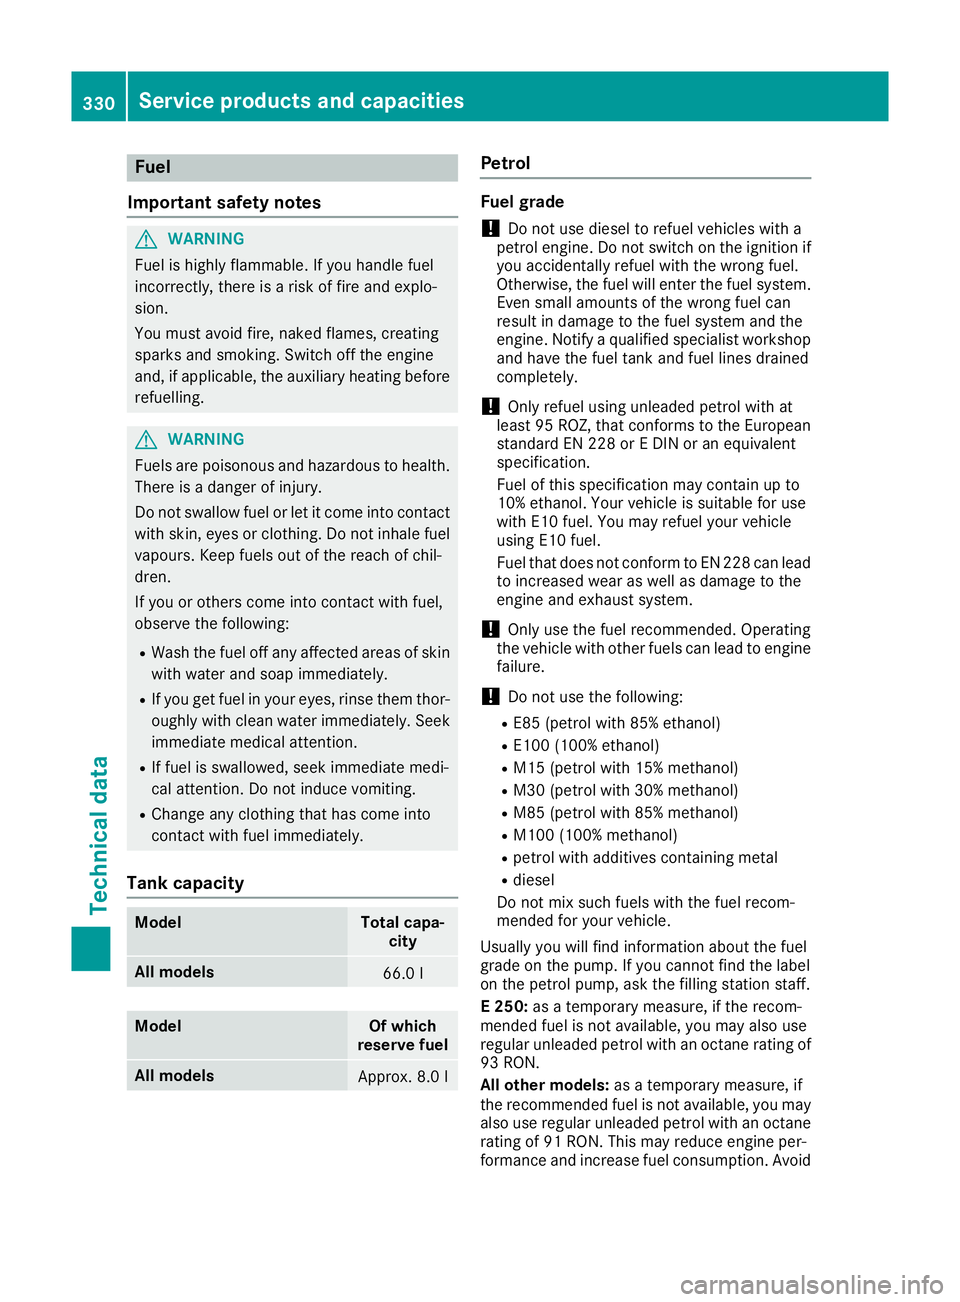
Tank capacity Model Total capa-
city All models
66.0 l
Model Of which
reserve fuel All models
Approx. 8.0 l Petrol
Fuel grade
!
Do not use diesel to refuel vehicles with a
petrol engine. Do not switch on the ignition if
you accidentally refuel with the wrong fuel.
Otherwise, the fuel will enter the fuel system. Even small amounts of the wrong fuel can
result in damage to the fuel system and the
engine. Notify a qualified specialist workshop
and have the fuel tank and fuel lines drained
completely.
! Only refuel using unleaded petrol with at
least 95 ROZ, that conforms to the European standard EN 228 or E DIN or an equivalent
specification.
Fuel of this specification may contain up to
10% ethanol. Your vehicle is suitable for use
with E10 fuel. You may refuel your vehicle
using E10 fuel.
Fuel that does not conform to EN 228 can lead
to increased wear as well as damage to the
engine and exhaust system.
! Only use the fuel recommended. Operating
the vehicle with other fuels can lead to engine
failure.
! Do not use the following:
R E85 (petrol with 85% ethanol)
R E100 (100% ethanol)
R M15 (petrol with 15% methanol)
R M30 (petrol with 30% methanol)
R M85 (petrol with 85% methanol)
R M100 (100% methanol)
R petrol with additives containing metal
R diesel
Do not mix such fuels with the fuel recom-
mended for your vehicle.
Usually you will find information about the fuel
grade on the pump. If you cannot find the label
on the petrol pump, ask the filling station staff.
E 250: as a temporary measure, if the recom-
mended fuel is not available, you may also use
regular unleaded petrol with an octane rating of 93 RON.
All other models: as a temporary measure, if
the recommended fuel is not available, you may
also use regular unleaded petrol with an octane rating of 91 RON. This may reduce engine per-
formance and increase fuel consumption. Avoid 330
Service products and capacitiesTechnical data