2015 MERCEDES-BENZ CLA SHOOTING BRAKE brakes
[x] Cancel search: brakesPage 226 of 421
X
To cancel the procedure: press the%
button on the multifunction steering wheel or pull away.
or
X To park using Active Parking Assist:
press the abutton on the multifunction
steering wheel.
The Park Assist active Accelerate
Park Assist active Accelerate
and brake and brake Observe surroundings
Observe surroundings mes-
sage appears in the multifunction display.
X Release the multifunction steering wheel.
X Reverse the vehicle, being ready to brake at
all times. When reversing, drive at a speed
below 10 km/h. Otherwise, Active Parking Assist will be cancelled.
Vehicles with automatic transmission:
Active Parking Assist brakes the vehicle to a standstill when the vehicle approaches
the rear border of the parking space.
Manoeuvring may be required in tight park-
ing spaces.
X Vehicles with manual transmission:
stop as soon as PARKTRONIC sounds the
continuous warning tone, if not before.
Manoeuvring may be required in tight park-
ing spaces.
Vehicles with automatic transmission: the
Park Assist active Select D
Park Assist active Select D Observe Observe
surroundings
surroundings message appears in the mul-
tifunction display.
Vehicles with manual transmission: the
Park Assist active Engage forward
Park Assist active Engage forward
gear
gear Observe surroundings Observe surroundings message
appears in the multifunction display.
X Vehicles with manual transmission:
shift to first gear while the vehicle is sta-
tionary.
Vehicles with automatic transmission:
select transmission position Dwhile the
vehicle is stationary.
Active Parking Assist immediately steers in
the other direction. The
Park Assist active Accelerate
Park Assist active Accelerate
and brake and brake Observe surroundings
Observe surroundings mes-
sage appears in the multifunction display.
i You will achieve the best results by wait-
ing for the steering procedure to complete before pulling away.
X Drive forwards and be ready to brake at all
times.
Vehicles with automatic transmission:
Active Parking Assist brakes the vehicle to a standstill when the vehicle approaches
the front border of the parking space.
Manoeuvring may be required in tight park-
ing spaces.
X Vehicles with manual transmission:
stop as soon as PARKTRONIC sounds the
continuous warning tone, if not before.
Vehicles with automatic transmission: the
Park Assist active Select R
Park Assist active Select R Observe Observe
surroundings
surroundings message appears in the mul-
tifunction display.
Vehicles with manual transmission: the
Park Assist active Engage reverse Park Assist active Engage reverse
gear gear Observe surroundings
Observe surroundings message
appears in the multifunction display.
As soon as the parking procedure is com-
plete, the Park ParkAssist
Assist switched
switched off
offmes-
sage appears and a warning tone sounds. The
vehicle is now parked.
Vehicles with automatic transmission: the
vehicle is kept stationary without the driver
having to depress the brake pedal. The brak-
ing effect is cancelled when you depress the
accelerator pedal.
Active Parking Assist no longer supports you
with steering interventions and brake appli-
cations. When Active Parking Assist is fin-
ished, you must steer and brake again your-
self. PARKTRONIC is still available.
Parking tips:
R The way your vehicle is positioned in the
parking space after parking is dependent
on various factors. These include the posi-
tion and shape of the vehicles parked in
front and behind it and the conditions of the Driving systems
223Driving and parking Z
Page 227 of 421
location. It may be the case that Active
Parking Assist guides you too far into a
parking space, or not far enough into it. In
some cases, it may also lead you across or
onto the kerb. If necessary, you should can-
cel the parking procedure with Active Park- ing Assist.
R You can also preselect transmission posi-
tion D. The vehicle redirects and does not
drive as far into the parking space. Should
the transmission change take place too
early, the parking procedure will be cancel- led. A sensible parking position can no lon-
ger be achieved from this position.
Exiting a parking space In order that Active Parking Assist can sup-
port you when exiting the parking space:
R you need to have parked using Active Park-
ing Assist.
R the border of the parking space must be
high enough at the front and the rear. A
kerb stone is too small, for example.
R the border of the parking space must not be
too wide, as the position of the vehicle must
not exceed an angle of 45° to the starting
position as it is manoeuvred into the park-
ing space.
R a manoeuvring distance of at least 1.0 m
must be available.
Active Parking Assist can only assist you with exiting a parking space if you have parked thevehicle parallel to the direction of travel using
Active Parking Assist.
i Vehicles with automatic transmission:
If PARKTRONIC detects obstacles, Active
Parking Assist brakes automatically whilst
the vehicle exits the parking space. You are
responsible for braking in good time.
X Start the engine.
X Release the electric parking brake.
X Switch on the turn signal in the direction
you will drive out of the parking space. X
Vehicles with automatic transmission:
shift the transmission to position Dor R.
Vehicles with manual transmission:
shift to forward or reverse gear.
The Start Park Assist? Yes: OK No:
Start Park Assist? Yes: OK No:
message appears in the multifunction dis-
play %.
X To cancel the procedure: press the%
button on the multifunction steering wheel or pull away.
or
X To exit a parking space using Active
Parking Assist: press theabutton on
the multifunction steering wheel.
The Park Assist active Accelerate Park Assist active Accelerate
and
and brake
brake Observe
Observe surroundings
surroundings mes-
sage appears in the multifunction display.
X Release the multifunction steering wheel.
X Pull away, being ready to brake at all times.
Do not exceed a maximum speed of
approximately 10 km/h when exiting a
parking space. Otherwise, Active Parking
Assist will be cancelled.
X Vehicles with manual transmission:
stop, at the latest when PARKTRONIC
sounds the continuous warning tone.
X Vehicles with automatic transmission:
depending on the message or as required,
shift the transmission to position Dor R.
Vehicles with manual transmission:
depending on the message or as required,
engage forward or reverse gear.
Active Parking Assist immediately steers in the other direction. The Park Assist Park Assist
active Accelerate and brake
active Accelerate and brake
Observe Observe surroundings
surroundings message appears
in the multifunction display.
i You will achieve the best results by wait-
ing for the steering procedure to complete before pulling away.
If you reverse after activation, the steering
wheel is moved to the straight-ahead posi- tion. 224
Driving systemsDriving and parking
Page 239 of 421
Activating Blind Spot Assist
X Make sure that Blind Spot Assist is activa-
ted in the on-board computer
(Y page 257).
X Turn the key to position 2in the ignition
lock.
Warning lamps :in the exterior mirrors
light up red for approximately 1.5 seconds
and then turn yellow.
Towing a trailer
If you couple up a trailer, make sure that you have correctly established the electrical con-
nection. This can be accomplished by check- ing the trailer lighting. Blind Spot Assist is
then deactivated. The indicator lamps in the
exterior mirrors light up yellow and the
Blind
Blind Spot SpotAssist
Assist not
notavailable
available when
when
towing a trailer See Owner's Manual
towing a trailer See Owner's Manual
message appears in the multifunction dis-
play.
i You can deactivate the indicator lamps in
the exterior mirrors.
To do so, you will need to deactivate Blind
Spot Assist if:
R the key is in position 2in the ignition lock
R the engine is not running
R the electrical connection to the trailer
has been established
Lane Keeping Assist General notes
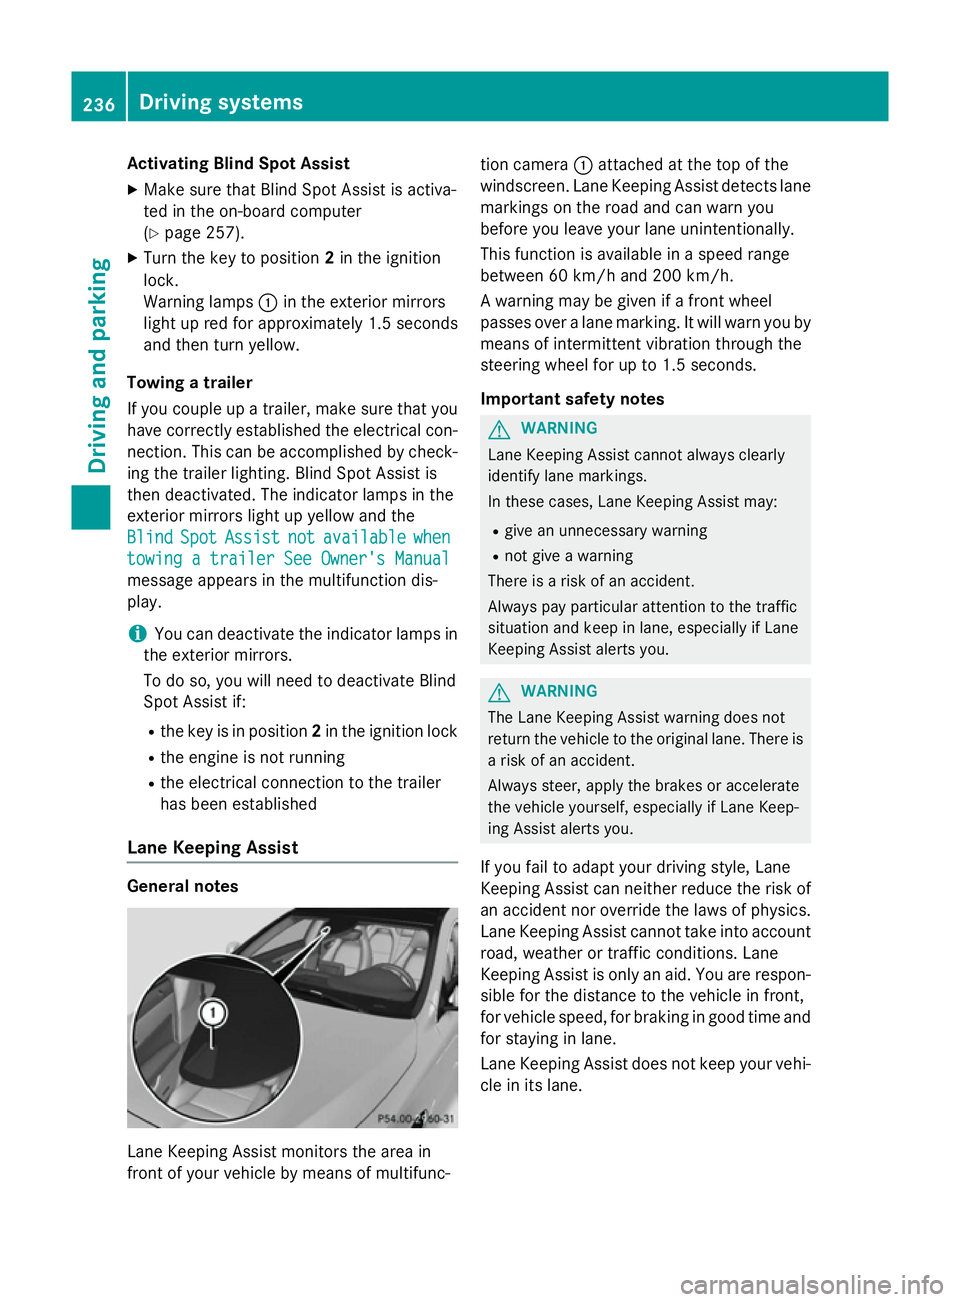
Lane Keeping Assist monitors the area in
front of your vehicle by means of multifunc- tion camera
:attached at the top of the
windscreen. Lane Keeping Assist detects lane markings on the road and can warn you
before you leave your lane unintentionally.
This function is available in a speed range
between 60 km/h and 200 km/h.
A warning may be given if a front wheel
passes over a lane marking. It will warn you by
means of intermittent vibration through the
steering wheel for up to 1.5 seconds.
Important safety notes G
WARNING
Lane Keeping Assist cannot always clearly
identify lane markings.
In these cases, Lane Keeping Assist may:
R give an unnecessary warning
R not give a warning
There is a risk of an accident.
Always pay particular attention to the traffic
situation and keep in lane, especially if Lane
Keeping Assist alerts you. G
WARNING
The Lane Keeping Assist warning does not
return the vehicle to the original lane. There is a risk of an accident.
Always steer, apply the brakes or accelerate
the vehicle yourself, especially if Lane Keep-
ing Assist alerts you.
If you fail to adapt your driving style, Lane
Keeping Assist can neither reduce the risk of
an accident nor override the laws of physics. Lane Keeping Assist cannot take into account
road, weather or traffic conditions. Lane
Keeping Assist is only an aid. You are respon- sible for the distance to the vehicle in front,
for vehicle speed, for braking in good time and
for staying in lane.
Lane Keeping Assist does not keep your vehi- cle in its lane. 236
Driving systemsDriving and pa
rking
Page 242 of 421
Notes on towing a trailer
General notes Trailer towing is not permissible on the fol-
lowing models:
R
Mercedes‑ AMG CLA 45 4MATIC
R Vehicles with AMG Line
When towing a trailer, set the tyre pressure on
the rear axle of the towing vehicle for the
maximum load. Further information on the
tyre pressure table in the fuel filler flap
(Y page 374).
Please note that when towing a trailer, the
following driving systems have limited avail-
ability or are not available at all.
R PARKTRONIC (Y page 216)
R Blind Spot Assist (Y page 234)
The height of the ball coupling changes with
the load of the vehicle. If necessary, use a
trailer with a height-adjustable drawbar.
You will find fitting dimensions and loads
under "Technical data" (Y page 411).
Driving tips Observe the notes on ESP
®
trailer stabilisa-
tion (Y page 79).
The maximum permissible speed for vehicle/
trailer combinations depends on the type of
trailer. Before beginning the journey, check
the trailer's documents to see what the max- imum permitted speed is. Observe the legally
prescribed maximum speed in the relevant
country.
For certain Mercedes-Benz vehicles, the max-
imum permissible rear axle load is increased
when towing a trailer. See the "Technical
data" section to find out whether this applies to your vehicle. If you utilise any of the added
maximum rear axle load when towing a trailer, the vehicle/trailer combination may not
exceed a maximum speed of 100 km/h for
reasons concerning the operating permit.
This also applies in countries in which the permissible maximum speed for vehicle/
trailer combinations is above 100 km/h.
When towing a trailer, your vehicle's handling
characteristics will be different in comparison to when driving without a trailer and it will
consume more fuel.
Change into a lower gear in good time on long
and steep downhill gradients. For vehicles
with automatic transmission, you need to
have selected manual drive program M
(Y page 185).
This also applies if you have activated cruise
control, SPEEDTRONIC or DISTRONIC PLUS.
This will use the braking effect of the engine,
so less braking will be required to maintain
vehicle speed. This relieves the load on the
brake system and prevents the brakes from
overheating and wearing too quickly. If you
need additional braking, depress the brake
pedal repeatedly rather than continuously.
Briefly depressing the accelerator pedal on
downhill gradients while the manual drive
program Mis temporarily activated (vehicles
with automatic transmission): the automatic
transmission may switch back to the last
active automatic drive program Eor S. The
automatic transmission may shift to a higher
gear. This can reduce the engine's braking
effect.
Driving tips If the trailer swings from side to side:
X Do not accelerate.
X Do not countersteer.
X Brake if necessary.
R Maintain a greater distance to the vehicle in
front than when driving without a trailer.
R Avoid braking abruptly. If possible, brake
gently at first to allow the trailer to run on.
Then, increase the braking force rapidly.
R The values given for gradient-climbing
capabilities from a standstill refer to sea
level. When driving in mountainous areas,
note that the power output of the engine,
and consequently the vehicle's gradient- Towing a trailer
239Driving and parking Z
Page 344 of 421
R
solvents
R cleaning agents containing solvents
Do not scrub.
Do not touch the surfaces or protective
films with hard objects, e.g. a ring or ice
scraper. You could otherwise scratch or
damage the surfaces and protective film.
! Do not park up the vehicle for an extended
period straight after cleaning it, particularly after having cleaned the wheels with wheel
cleaner. Wheel cleaners could cause
increased corrosion of the brake discs and
brake pads/linings. For this reason, you
should drive for a few minutes after clean-
ing. Braking heats the brake discs and the
brake pads/linings, thus drying them. The
vehicle can then be parked up.
Regular care of your vehicle is a condition for
retaining the quality in the long term.
Use care products and cleaning agents rec-
ommended and approved by Mercedes-Benz. Washing the vehicle and cleaning the
paintwork
Automatic car wash G
WARNING
Braking efficiency is reduced after the vehicle has been washed. There is a risk of an acci-
dent.
After washing the vehicle, brake carefully
while paying attention to the traffic conditions in order to restore full braking efficiency.
! When DISTRONIC PLUS or the HOLD
function is activated, the vehicle brakes
automatically in certain situations.
To avoid damage to the vehicle, deactivate DISTRONIC PLUS and the HOLD function in
the following or similar situations:
R when towing away
R in a car wash !
Make sure that the automatic transmis-
sion is in position Nwhen washing your
vehicle in a tow-through car wash. The vehi-
cle could be damaged if the transmission is
in another position.
! Make sure that:
R the side windows and sliding sunroof are
closed completely.
R the blower for the ventilation/heating is
switched off (OFF button is depressed/
airflow control is turned to position 0).
R the windscreen wiper switch is at posi-
tion 0.
The vehicle could otherwise be damaged.
You can wash the vehicle in an automatic car
wash from the very start.
Wash off excess dirt before cleaning the vehi-
cle in an automatic car wash.
After using an automatic car wash, wipe off
wax from the windscreen and the wiper
blades. This will prevent smears and reduce
wiping noises caused by residue on the wind- screen.
Washing by hand In some countries, washing by hand is only
allowed at specially equipped washing bays.
Observe the legal requirements for each indi- vidual country.
X Do not use hot water and do not wash the
vehicle in direct sunlight.
X Use a soft sponge to clean.
X Use a mild cleaning agent, such as a car
shampoo approved by Mercedes-Benz.
X Thoroughly hose down the vehicle with a
gentle jet of water.
X Do not point the water jet directly towards
the air inlet.
X Use plenty of water and rinse out the
sponge frequently. Care
341Maintenance and care Z
Page 365 of 421
X
Start the engine of the donor vehicle and run it at idling speed.
X Connect negative terminal ?of donor battery Bto earth point Aof your vehicle using the
jump lead, connecting the jump lead to donor battery Bfirst.
X If the battery is fully discharged, leave the battery that is being used to jump-start connected
for a few minutes before attempting to start. This charges the empty battery a little.
X Start the engine.
X Before disconnecting the jump leads, let the engines run for several minutes.
X First, remove the jump leads from earth point Aand negative terminal ?, then from pos-
itive clamp ;and positive terminal =. Begin each time at the contacts on your own vehicle
first.
X Close cover :of positive clamp ;after removing the jump leads.
X Close the bonnet.
X Have the battery checked at a qualified specialist workshop.
i Jump-starting is not considered to be a normal operating condition.
i Jump-starting cables and further information regarding jump starting can be obtained at
any qualified specialist workshop. Towing away and tow-starting
Important safety notes
G
WARNING
Safety relevant functions are restricted or no
longer available if:
R the engine is not running
R the brake system or power steering is mal-
functioning
R there is a malfunction in the voltage supply
or the vehicle's electrical system
When your vehicle is towed away or towed
started, you may require considerably more
effort to steer and brake. There is a risk of an
accident.
In such cases use a rigid towing bar. Before
being towed away or tow started, make sure
the steering moves freely. G
WARNING
If the steering wheel lock is engaged, the vehi- cle can no longer be steered. There is a risk of
an accident.
Always switch on the ignition when towing
with a tow rope or a towing bar. G
WARNING
When towing or tow-starting another vehicle
and its weight is greater than the permissible gross weight of your vehicle, the:
R towing eye may be torn off
R car/trailer combination may swerve or
even overturn
There is a risk of an accident.
When towing or tow-starting another vehicle,
its weight should not be greater than the per- missible gross weight of your vehicle.
Details on the permissible gross vehicle
weight of your vehicle can be found on the
vehicle identification plate (Y page 402).
! When COLLISION PREVENTION ASSIST
PLUS, DISTRONIC PLUS or the HOLD func- tion is activated, the vehicle brakes auto-
matically in certain situations. To avoid
damage to the vehicle, deactivate these
systems in the following or similar situa-
tions:
R when towing away
R in a car wash 362
Towing away and tow-startingBreakdown assistance
Page 373 of 421
Useful information
i This Owner's Manual describes all mod-
els, series and optional equipment for your
vehicle that were available at the time of
going to press. National variations are pos- sible. Note that your vehicle may not be
equipped with all of the functions descri-
bed. This is also the case for systems and
functions relevant to safety.
i Read the information on qualified special-
ist workshops: (Y page 25). Important safety notes
G
WARNING
If wheels and tyres of the wrong size are used, the wheel brakes or suspension components
may be damaged. There is a risk of an acci-
dent.
Always replace wheels and tyres with those
that fulfil the specifications of the original
part.
When replacing wheels, make sure to fit the
correct:
R designation
R type
When replacing tyres, make sure to fit the
correct:
R designation
R manufacturer
R type G
WARNING
A flat tyre severely impairs the driving, steer-
ing and braking characteristics of the vehicle.
There is a risk of accident.
Tyres without run-flat characteristics:
R do not drive with a flat tyre.
R immediately replace the flat tyre with your
emergency spare wheel or spare wheel, or
consult a qualified specialist workshop. Tyres with run-flat characteristics:
R pay attention to the information and warn-
ing notices on MOExtended tyres (tyres
with run-flat characteristics).
Accessories that are not approved for your
vehicle by Mercedes-Benz or are not being
used correctly can impair the operating
safety.
Before purchasing and using non-approved
accessories, visit a qualified specialist work-
shop and enquire about:
R suitability
R legal stipulations
R factory recommendations
Information on the sizes and types of wheels
and tyres for your vehicle can be found under
"Wheel/tyre combinations" (Y page 384).
Information on tyre pressures can be found:
R in the tyre pressure table in the fuel filler
flap (Y page 189)
R under "Tyre pressure" (Y page 374)
Modification work on the brake system and
wheels is not permitted. The use of spacers or
brake dust shields is not permitted. This inva- lidates the general operating permit for the
vehicle.
i Further information on wheels and tyres
can be obtained at any qualified specialist
workshop. Operation
Information on driving
Check the tyre pressure when the vehicle is
heavily laden and adjust prior to a trip.
While driving, pay attention to vibrations,
noises and unusual handling characteristics,
e.g. pulling to one side. This may indicate that
the wheels or tyres are damaged. If you sus-
pect that a tyre is defective, reduce your
speed immediately. Stop the vehicle as soon
as possible to check the wheels and tyres for damage. Hidden tyre damage could also be 370
OperationWheels and tyres
Page 382 of 421
Radio type approval for the tyre pres-
sure monitor Country Radio type approval number
Argen-
tina MW2433A
H-12337
GG4
H-12338
Brazil 2770-12-8001
Model: MW2433A
0381-13-8001
Model: GG4
Abu
Dhabi
Dubai TRA, Registered NO
ER0092100/12
TRA, Registered NO
ER0099792/12
TRA, Registered NO
ER0076990/11
Dealer NO: DA0047074/10
Jordan Model: Gen Alpha Wal 2 TPMS
transmitter
Type Approval Number:
TRC/LPD/2012/114
Model: Gen Gamma Gen
4 433.92 Mhz.
Type Approval Number:
TRC/LPD/2012/190
Model: Corax 3 MRXMC34MA4
Type Approval Number:
TRC/LPD/2011/158
Type Number: LPD Morocco MR7319 ANRT 2012/
11/07/2012
MR7672 ANRT 2012/
23/11/2012
MR6706 ANRT 2011
Moldova 1024
Philip-
pines No: ESD-1206394C
No: ESD-1306871C
Serbia И 011 12 Country Radio type approval number
Singa-
pore Compliance with IDA Standard
DA- 103365
South
Africa TA-2012/719
TA-2012/1540
TA-2011/1370
Changing a wheel
Flat tyre
You can find information on what to do in the event of a flat tyre in the "Breakdown assis-
tance" section (Y page 352). Information on
driving with MOExtended tyres in the event of a flat tyre can be found under "Breakdown
assistance" (Y page 352).
Vehicles with an emergency spare wheel: in the event of a flat tyre, the emergency
spare wheel is fitted according to the descrip-
tion under "Fitting a wheel" (Y page 380). Interchanging the wheels
G
WARNING
Interchanging the front and rear wheels may
severely impair the driving characteristics if
the wheels or tyres have different dimensions. The wheel brakes or suspension components may also be damaged. There is a risk of acci-
dent.
Interchange front and rear wheels only if the
wheels and tyres are of the same dimensions.
! On vehicles fitted with a tyre pressure
monitor, electronic components are loca-
ted in the wheel.
Tyre-fitting tools should not be applied in
the area of the valve, as this could damage
the electronic components.
Only have tyres changed at a qualified spe- cialist workshop. Changing a wheel
379Wheels and tyres Z