2015 MERCEDES-BENZ CLA SHOOTING BRAKE ad blue
[x] Cancel search: ad bluePage 132 of 421

Combination switch
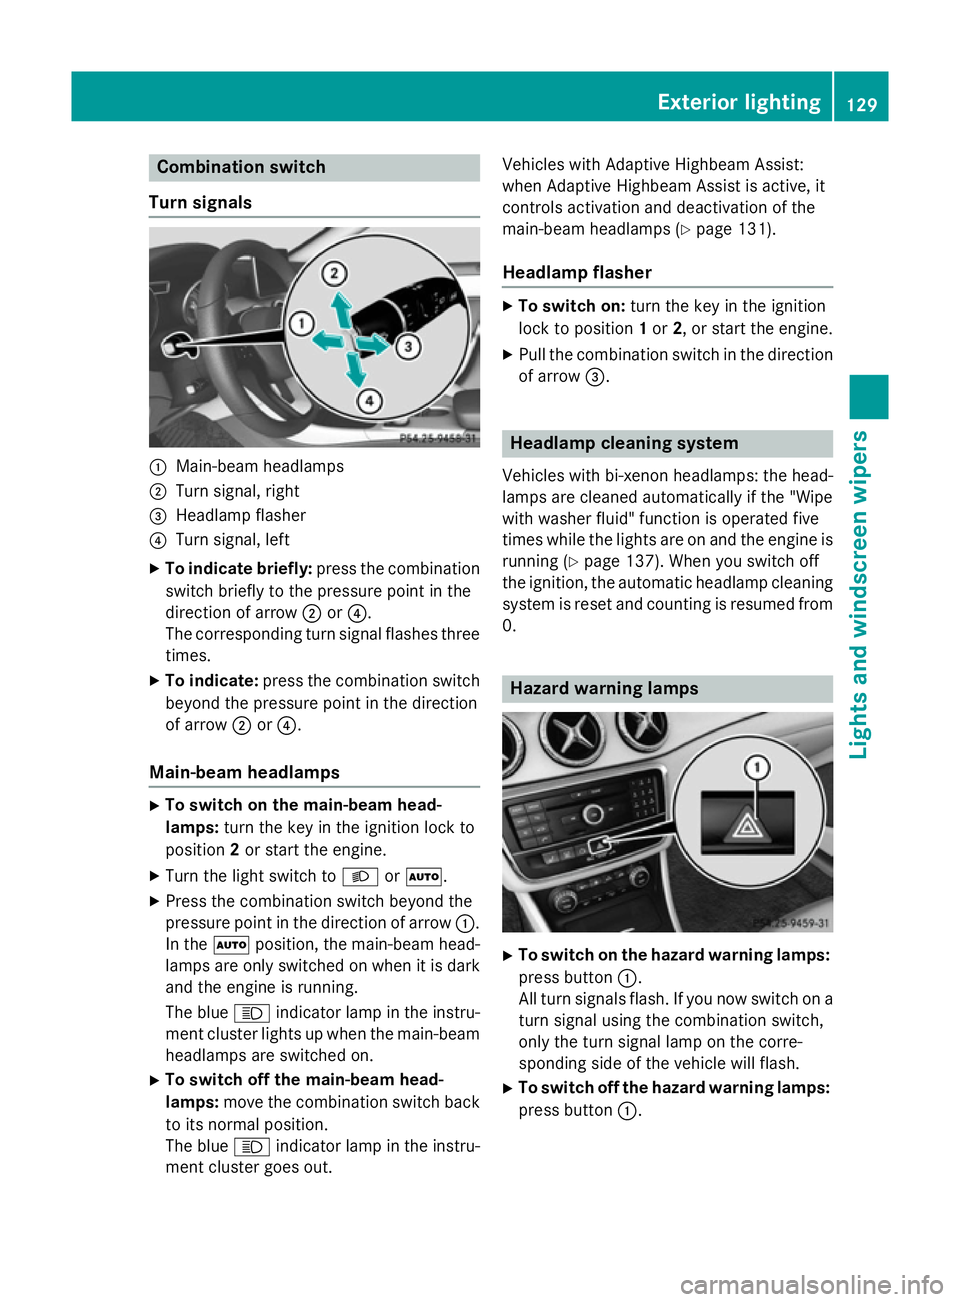
Turn signals :
Main-beam headlamps
; Turn signal, right
= Headlamp flasher
? Turn signal, left
X To indicate briefly: press the combination
switch briefly to the pressure point in the
direction of arrow ;or?.
The corresponding turn signal flashes three
times.
X To indicate: press the combination switch
beyond the pressure point in the direction
of arrow ;or?.
Main-beam headlamps X
To switch on the main-beam head-
lamps: turn the key in the ignition lock to
position 2or start the engine.
X Turn the light switch to LorÃ.
X Press the combination switch beyond the
pressure point in the direction of arrow :.
In the Ãposition, the main-beam head-
lamps are only switched on when it is dark
and the engine is running.
The blue Kindicator lamp in the instru-
ment cluster lights up when the main-beam headlamps are switched on.
X To switch off the main-beam head-
lamps: move the combination switch back
to its normal position.
The blue Kindicator lamp in the instru-
ment cluster goes out. Vehicles with Adaptive Highbeam Assist:
when Adaptive Highbeam Assist is active, it
controls activation and deactivation of the
main-beam headlamps (Y
page 131).
Headlamp flasher X
To switch on: turn the key in the ignition
lock to position 1or 2, or start the engine.
X Pull the combination switch in the direction
of arrow =. Headlamp cleaning system
Vehicles with bi-xenon headlamps: the head- lamps are cleaned automatically if the "Wipe
with washer fluid" function is operated five
times while the lights are on and the engine isrunning (Y page 137). When you switch off
the ignition, the automatic headlamp cleaning system is reset and counting is resumed from0. Hazard warning lamps
X
To switch on the hazard warning lamps:
press button :.
All turn signals flash. If you now switch on a turn signal using the combination switch,
only the turn signal lamp on the corre-
sponding side of the vehicle will flash.
X To switch off the hazard warning lamps:
press button :. Exterior lighting
129Lights and windscreen wipers Z
Page 147 of 421

Useful information
i This Owner's Manual describes all mod-
els, series and optional equipment for your
vehicle that were available at the time of
going to press. National variations are pos- sible. Note that your vehicle may not be
equipped with all of the functions descri-
bed. This is also the case for systems and
functions relevant to safety.
i Read the information on qualified special-
ist workshops: (Y page 25). Overview of climate control systems
General notes
Observe the settings recommended on the
following pages. The windows could other-
wise mist up.
To prevent the windows from misting up:
R switch off climate control only briefly
R activate air-recirculation mode only briefly
R activate the "Cooling with air dehumidifica-
tion" function
R activate the windscreen demisting function
briefly, if required
The air-conditioning system/
THERMOTRONIC automatic climate control
regulates the temperature and the humidity
of the vehicle interior and filters undesirable
substances from the air.
The air-conditioning system/
THERMOTRONIC automatic climate control
can only be operated when the engine is run-
ning. Optimum operation is only achieved
with the side windows and panorama sliding
sunroof closed.
The residual heat function can only be acti-
vated or deactivated with the ignition
switched off (Y page 155).
Always keep the ventilation flaps behind the
side panelling clear (Y page 136). Otherwise
the vehicle will not be ventilated correctly. i
Ventilate the vehicle for a brief period
during warm weather, e.g. using the con-
venience opening feature (Y page 102).
This will speed up the cooling process and
the desired interior temperature will be
reached more quickly.
i The integrated filter filters out most par-
ticles of dust and soot and completely fil-
ters out pollen. With THERMOTRONIC auto-
matic climate control, gaseous pollutants
and odours will also be reduced. A clogged
filter reduces the amount of air supplied to the vehicle interior. For this reason, you
should always observe the interval for
replacing the filter, which is specified in the
Service Booklet. As this depends on envi-
ronmental conditions, e.g. heavy air pollu-
tion, the interval may be shorter than stated in the Service Booklet.
i Vehicles with auxiliary heating:
under
certain environmental conditions, the
residual heat function may be activated
automatically an hour after the key has
been removed in order to dry the automatic climate control. When the automatic cli-
mate control drying function is active, the
blue LED lamp is lit in the rocker switch in
the centre console. The vehicle is then ven-
tilated for 30 minutes.
Vehicles without auxiliary heating:
under certain environmental conditions,
the residual heat function may be activated automatically an hour after the key has
been removed in order to dry the automatic
climate control. The vehicle is then ventila-
ted for 30 minutes. 144
Overview of climate control systemsClimate control
Page 160 of 421

The auxiliary heating switches off when the
engine is switched off. The auxiliary ventila-
tion switches off when you turn the key to key
position 2(Y page 165).
The auxiliary heating switches off automati-
cally after 50 minutes.
You cannot use the auxiliary ventilation to
cool the vehicle interior to a temperature
lower than the outside temperature.
Before switching on X
Turn the key to position 2in the ignition
lock (Y page 165).
X Set the desired temperature.
Auxiliary heating or ventilation can also be
switched on if the manually set climate con-
trol is activated. Optimum comfort is attained by setting the system to automatic mode. Set
the temperature to 22 †.
The auxiliary heating/ventilation can be acti- vated or deactivated using the remote control or the button on the centre console.
The on-board computer can be used to spec-
ify up to three departure times, one of which
may be preselected (Y page 260).
Switching the auxiliary heating/venti-
lation on or off using the button on the
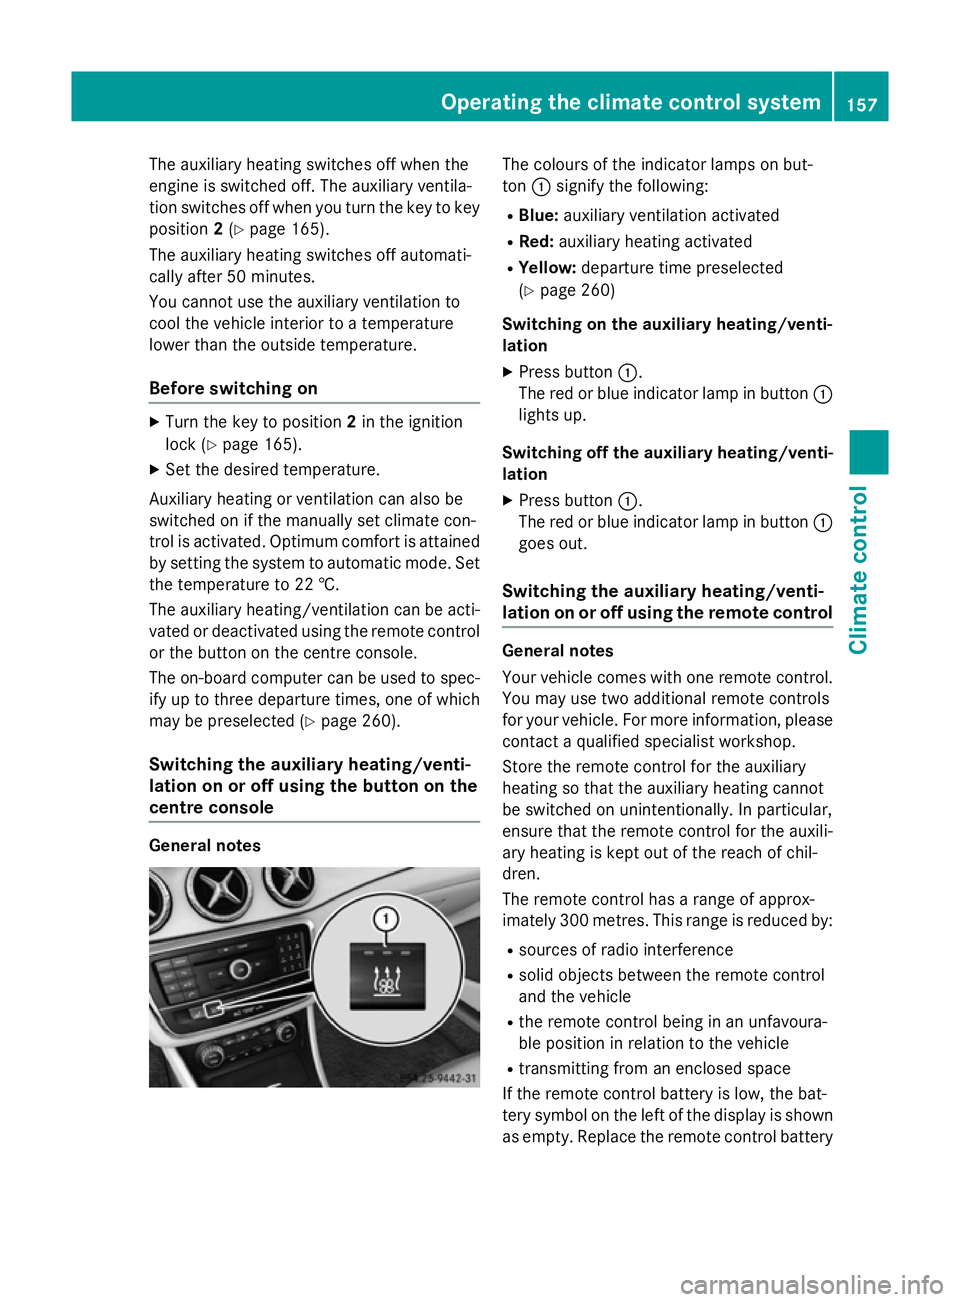
centre console General notes The colours of the indicator lamps on but-
ton
:signify the following:
R Blue: auxiliary ventilation activated
R Red: auxiliary heating activated
R Yellow: departure time preselected
(Y page 260)
Switching on the auxiliary heating/venti-
lation
X Press button :.
The red or blue indicator lamp in button :
lights up.
Switching off the auxiliary heating/venti-
lation
X Press button :.
The red or blue indicator lamp in button :
goes out.
Switching the auxiliary heating/venti-
lation on or off using the remote control General notes
Your vehicle comes with one remote control.
You may use two additional remote controls
for your vehicle. For more information, please
contact a qualified specialist workshop.
Store the remote control for the auxiliary
heating so that the auxiliary heating cannot
be switched on unintentionally. In particular,
ensure that the remote control for the auxili-
ary heating is kept out of the reach of chil-
dren.
The remote control has a range of approx-
imately 300 metres. This range is reduced by:
R sources of radio interference
R solid objects between the remote control
and the vehicle
R the remote control being in an unfavoura-
ble position in relation to the vehicle
R transmitting from an enclosed space
If the remote control battery is low, the bat-
tery symbol on the left of the display is shown as empty. Replace the remote control battery Operating the climate control system
157Climate control Z
Page 257 of 421

X
Switch on COMAND Online and select
video DVD (see the separate operating
instructions).
X Press the =or; button on the steer-
ing wheel to select the Audio Audiomenu.
X To select the next or previous scene:
briefly press the 9or: button.
X To select a scene from the scene list
(rapid scrolling): press and hold the 9
or : button until desired scene :
appears. Telephone menu
Introduction G
WARNING
Operating the integrated information systems and communications equipment in the vehicle
while driving will distract you from traffic con-
ditions. You could then lose control of the
vehicle. There is a risk of an accident.
Only operate these devices if road traffic con-
ditions permit. If you are unsure about the
surrounding conditions, pull over to a safe
location and make entries only while the vehi-
cle is stationary.
When telephoning, you must observe the
legal requirements for the country in which
you are currently driving.
X Switch on the mobile phone (see the man-
ufacturer's operating instructions).
X Switch on Audio 20 or COMAND Online;
see the separate operating instructions.
X Insert the mobile phone into the bracket
(Y page 329).
or
X Establish a Bluetooth ®
connection to Audio
20 or COMAND Online; see the separate
operating instructions.
X Press the =or; button on the steer-
ing wheel to select the Tel
Tel menu. You will see one of the following display mes-
sages in the multifunction display:
R Telephone ready Telephone ready or the name of the net-
work provider: the mobile phone has found
a network and is ready to receive.
R Telephone No service Telephone No service: there is no net-
work available or the mobile phone is
searching for a network.
i You can obtain further information about
suitable mobile phones and connecting
mobile phones via Bluetooth ®
:
R at any Mercedes-Benz Service Centre
R on the Internet at http://
www.mercedes-benz.com/connect
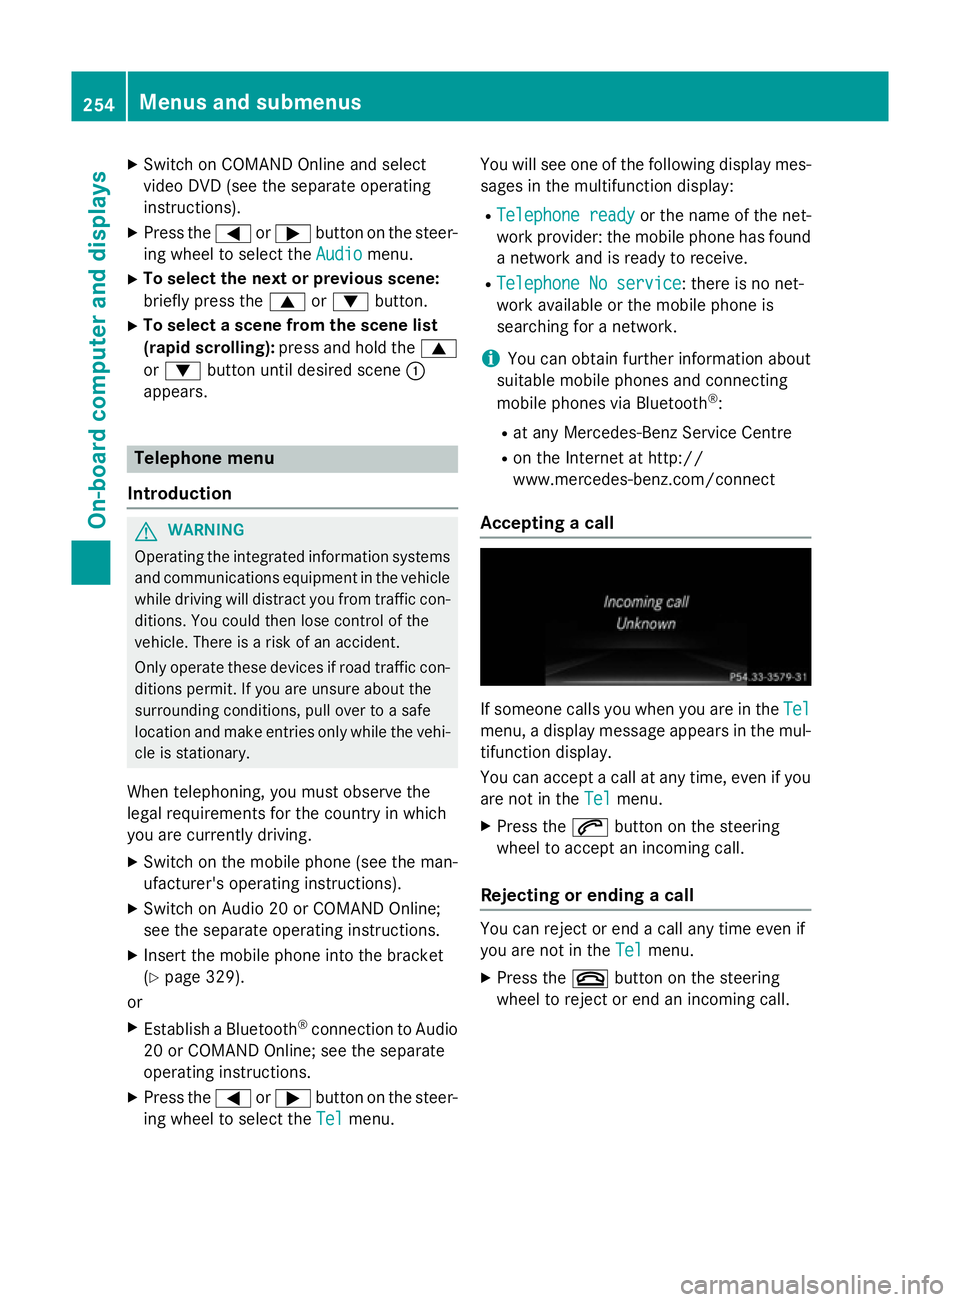
Accepting a call If someone calls you when you are in the
Tel Tel
menu, a display message appears in the mul- tifunction display.
You can accept a call at any time, even if you
are not in the Tel
Tel menu.
X Press the 6button on the steering
wheel to accept an incoming call.
Rejecting or ending a call You can reject or end a call any time even if
you are not in the
Tel Telmenu.
X Press the ~button on the steering
wheel to reject or end an incoming call. 254
Menus and submenusOn-board computer and displays
Page 265 of 421

ically. The exterior mirrors can then only be
folded out using the button on the door.
X Press the =or; button on the steer-
ing wheel to select the Settings
Settingsmenu.
X Press the :or9 button to select the
Convenience
Convenience submenu.
X Press ato confirm.
X Press the :or9 button to select the
Auto. fold-in mirrors
Auto. fold-in mirrors function.
If the Auto.
Auto. fold-in
fold-in mirrors
mirrorsfunction is
switched on, the multifunction display
shows the exterior mirror in orange.
X Press the abutton to save the setting.
Resetting to factory settings X
Press the =or; button on the steer-
ing wheel to select the Settings Settingsmenu.
X Press the :or9 button to select the
Factory setting
Factory setting submenu.
X Press ato confirm.
The Reset all settings?
Reset all settings? function
appears.
X Press the :or9 button to select No
No
or Yes
Yes.
X Press the abutton to confirm the selec-
tion.
If you have selected Yes Yes, the multifunction
display shows a confirmation message.
For safety reasons, not all functions are reset: the Limit
Limit speed
speed(winter
(winter tyres)
tyres)function
in permanent SPEEDTRONIC can only be set
in the Vehicle
Vehicle submenu. AMG menu (Mercedes-AMG vehicles)
WARMUP :
Digital speedometer
; Gear indicator
= Upshift indicator
? Engine oil temperature
A Coolant temperature
B Transmission oil temperature
X Press the =or; button on the steer-
ing wheel to select the AMG
AMG menu.
Upshift indicator: upshift indicatorUP
UP=
indicates that the engine has reached the
overrevving range when in the manual drive
program.
Engine and transmission oil tempera-
ture: when the engine and transmission
are at normal operating temperature, oil
temperature ?and Bare displayed in
white in the multifunction display.
If the multifunction display shows oil tem-
perature ?orB in blue, the engine or the
transmission are not yet at normal operat-
ing temperature. Avoid using the full output
of the engine during this time.
SETUP :
Drive system Comfort Comfort/SportSport/Sport +Sport+
; Suspension Comfort
Comfort/SportSport/Sport +
Sport + 262
Menus and submenusOn-board computer and displays
Page 333 of 421

You must observe the legal requirements for
the country in which you are currently driving when operating mobile communications
equipment in the vehicle.
If it is permitted by law to operate communi-
cations equipment while the vehicle is in
motion, you may only do so if the traffic sit-
uation permits. You may otherwise be dis-
tracted from the traffic conditions, cause an
accident and injure yourself and others.
Excessive levels of electromagnetic radiation
may cause damage to your health and to the
health of others. The use of an exterior aerial
takes into consideration the scientific discus- sion surrounding the possible health risk
posed by electromagnetic fields.
Mercedes-Benz recommends the use of an
approved exterior aerial. This ensures:
R optimal mobile phone reception quality in
the vehicle
R that mutual interference between the vehi-
cle electronics and mobile phones is mini-
mised
An exterior aerial has the following advan-
tages:
R it conducts the electromagnetic fields gen-
erated by a wireless device to the exterior
R the field strength in the vehicle interior is
lower than in a vehicle that does not have
an exterior aerial
Information on retrofitting two-way radios
and mobile phones (RF transmitters)
(Y page 400).
General notes There are various mobile phone brackets that
may be fitted in your vehicle; in some cases,
these are country-specific. More information on suitable mobile phones,
mobile phone brackets and on connecting
Bluetooth ®
-capable mobile phones to
COMAND Online/Audio 20 can be obtained:
R at your Mercedes-Benz Service Centre
R on the Internet at http://www.mercedes-
benz.com/connect
The functions and services available when
you use the phone depend on your mobile
phone model and service provider.
Using a mobile phone To connect a mobile phone to the exterior
aerial and charge it, insert it into the mobile
phone bracket.
X Open the telephone compartment
(Y page 318).
X Place the mobile phone bracket into the
pre-installed fitting; see the separate instal-
lation instructions for the mobile phone fit-
ting.
X Insert the mobile phone into the mobile
phone bracket; see the separate installa-
tion instructions for the mobile phone fit-
ting.
i The mobile phone can also be operated
without being in the bracket. However, the charging function and aerial function are
not available.
In order to use Bluetooth ®
(SAP profile) on
your telephone module, you must first insert
the telephone module into the pre-installed
fitting. This connects it to the exterior aerial.
If you wish to charge the mobile phone, then
you must connect it to a USB port.
Further information on the telephone module
with Bluetooth ®
(SAP profile) can be found in
the Digital Owner's Manual.
Operating the mobile phone You can operate the telephone using the
6 and~ buttons on the multifunction
steering wheel. You can operate other mobile 330
FeaturesStowing and features