2015 MERCEDES-BENZ C-Class light
[x] Cancel search: lightPage 89 of 214
X
To switch to navigation mode: press the
00BE button.
X To show the menu: slide6the control-
ler.
X To select Traffic
Traffic: turn and press the con-
troller.
If satellite signals cannot be received or
there are no traffic reports, you will see a
message to this effect.
X To close the report: press the controller.
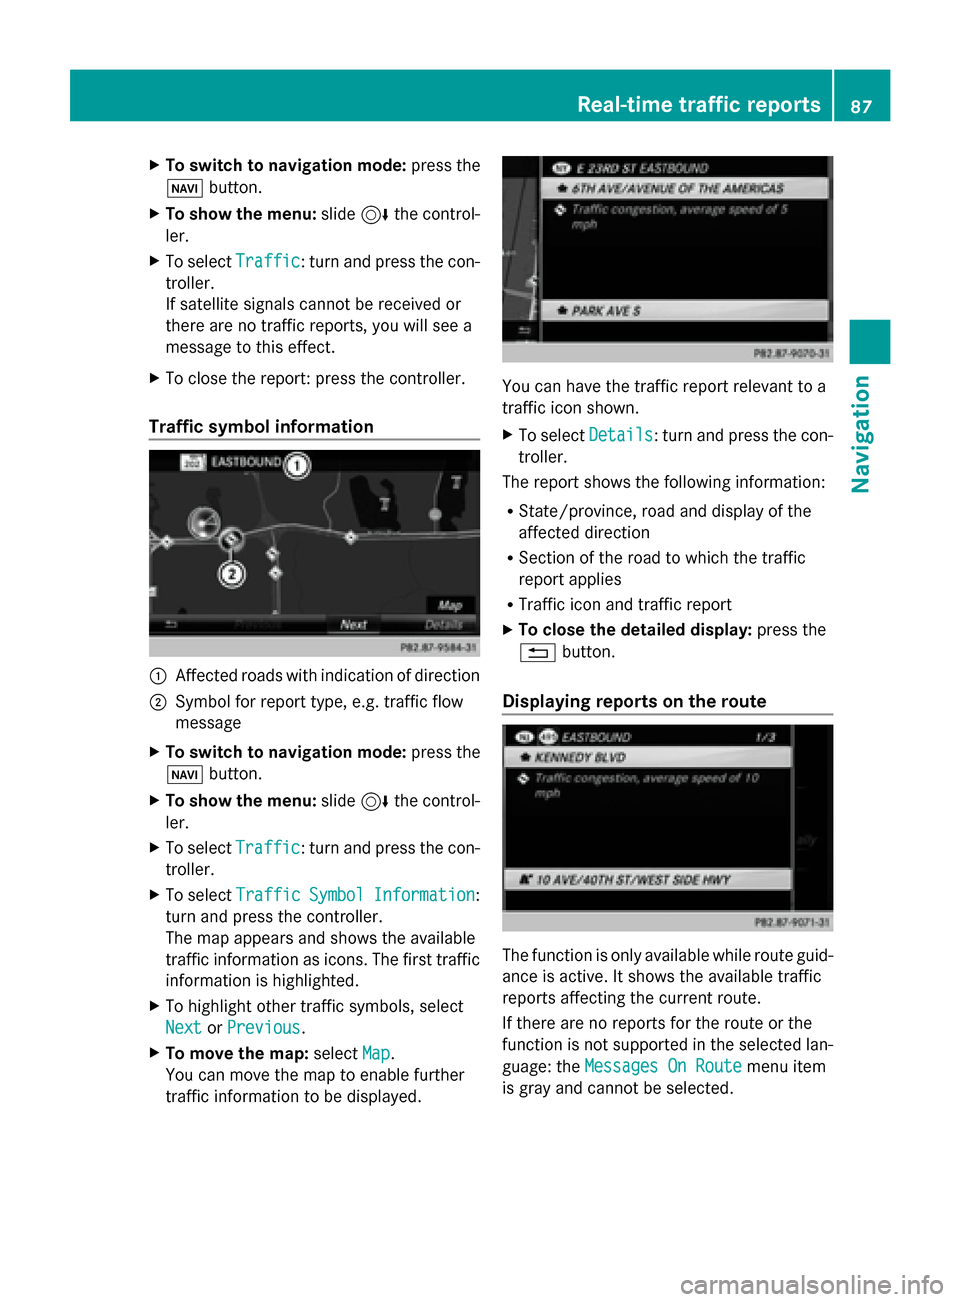
Traffic symbol information 0043
Affected roads with indication of direction
0044 Symbol for report type, e.g. traffic flow
message
X To switch to navigation mode: press the
00BE button.
X To show the menu: slide6the control-
ler.
X To select Traffic
Traffic: turn and press the con-
troller.
X To select Traffic
Traffic Symbol
Symbol Information Information:
turn and press the controller.
The map appears and shows the available
traffic information as icons. The first traffic
information is highlighted.
X To highlight other traffic symbols, select
Next
Next orPrevious Previous.
X To move the map: selectMap
Map.
You can move the map to enable further
traffic information to be displayed. You can have the traffic report relevant to a
traffic icon shown.
X
To select Details Details: turn and press the con-
troller.
The report shows the following information:
R State/province, road and display of the
affected direction
R Section of the road to which the traffic
report applies
R Traffic icon and traffic report
X To close the detailed display: press the
0038 button.
Displaying reports on the route The function is only available while route guid-
ance is active. It shows the available traffic
reports affecting the current route.
If there are no reports for the route or the
function is not supported in the selected lan-
guage: the
Messages On Route Messages On Route menu item
is gray and cannot be selected. Real-time traffic reports
87Navigation Z
Page 92 of 214
X
To add to a contact: selectAdd to Con‐
Add to Con‐
tact
tact.
The address book appears.
X Search for the address book entry (contact)
(Y page 117).
X Press the controller.
You will see the Saving
Saving Successful Successful mes-
sage. The destination address is allocated
to a contact in the address book.
Telephone numbers are not transferred to
the telephone number fields of the address
book. After selecting the destination
address from the address book for naviga-
tion, the associated telephone number will
be displayed.
If the contact already has two destination
addresses, a prompt will appear asking if a
destination address should be overwritten.
X Select Yes
Yes orNo No.
If you select Yes
Yes, a list showing both des-
tination addresses appears.
X To select the destination address: turn and
press the controller.
The destination address is overwritten. Saving the current vehicle position
X To switch to navigation mode: press the
00CB button.
X To show the menu: slide6the control-
ler.
X To select Position
Position: turn and press the
controller.
X Select Save
Save.
The current vehicle position is saved in
"Last destinations". Saving the crosshair position
X To switch to navigation mode: press the
00CB button.
X To display the crosshair: press the con-
troller. X
Move the map to the desired position
(Y page 64).
X To show the menu: press the controller.
X To select Position
Position: turn and press the
controller.
X Select Save Save.
The crosshair position is saved in the last
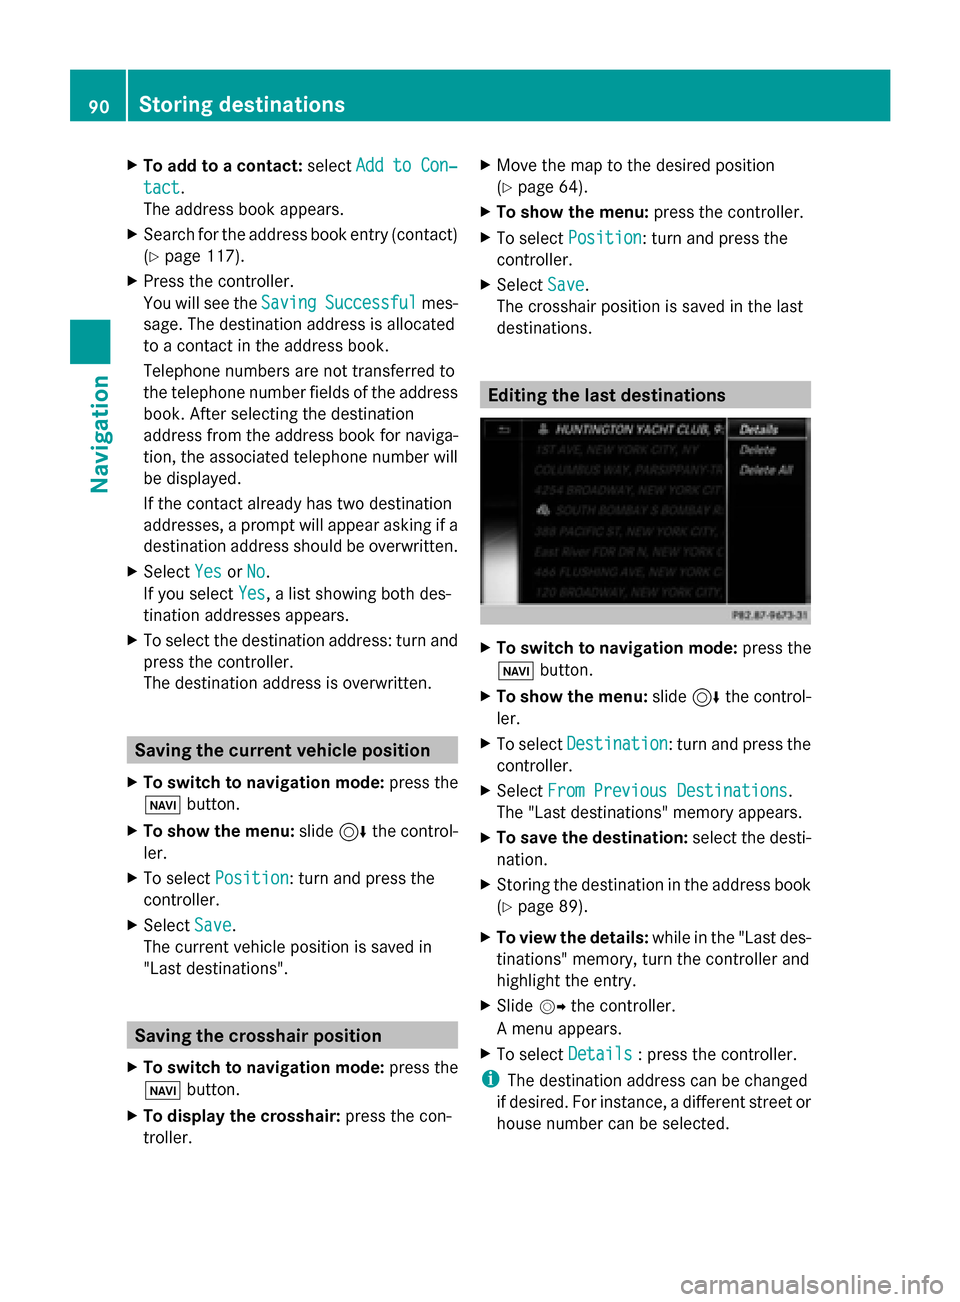
destinations. Editing the last destinations
X
To switch to navigation mode: press the
00CB button.
X To show the menu: slide6the control-
ler.
X To select Destination Destination: turn and press the
controller.
X Select From Previous Destinations
From Previous Destinations .
The "Last destinations" memory appears.
X To save the destination: select the desti-
nation.
X Storing the destination in the address book
(Y page 89).
X To view the details: while in the "Last des-
tinations" memory, turn the controller and
highlight the entry.
X Slide 00520096the controller.
A menu appears.
X To select Details Details: press the controller.
i The destination address can be changed
if desired. For instance, a different street or
house number can be selected. 90
Storing destinationsNavigation
Page 93 of 214
X
To delete one or all destinations: while
in the "Last destinations" memory, turn the
controller and highlight the entry.
X Slide 00520096the controller.
A menu appears.
X To select Delete
Delete orDelete All
Delete All : turn and
press the controller.
A prompt appears.
X Select Yes
Yes orNo No.
Selecting Yes
Yesdeletes the selected desti-
nation or all destinations. Map functions
General notes
Company logos displayed on the map are
trademarks of the respective companies and
used solely for the purpose of indicating the
locations of these companies. The use of such
logos on the map does not indicate approval
of, support of or advertising by these compa-
nies for the navigation system itself. Map settings
Setting the map scale Requirement: the map is in full screen mode,
the menu is faded out (Y page 63).
The lower left-hand section of the map shows
the currently set map scale and compass nee-
dle.
Right-hand-drive vehicles: the currently set
map scale and compass needle are displayed
in the lower right-hand section of the map.
Displaying the map in full screen mode
X To hide the menu: press the 0038button.
or
X Slide the controller to the center of the map
and press to confirm. X
To set the map scale: as soon as you turn
the controller, the scale bar appears on the
bottom of the display.
X Turn the controller until the needle points
to the desired map scale.
Once you are finished selecting a map
scale, the new map scale will be shown.
i Alternatively, you can carry out this oper-
ation using the touchpad (Y page 21).
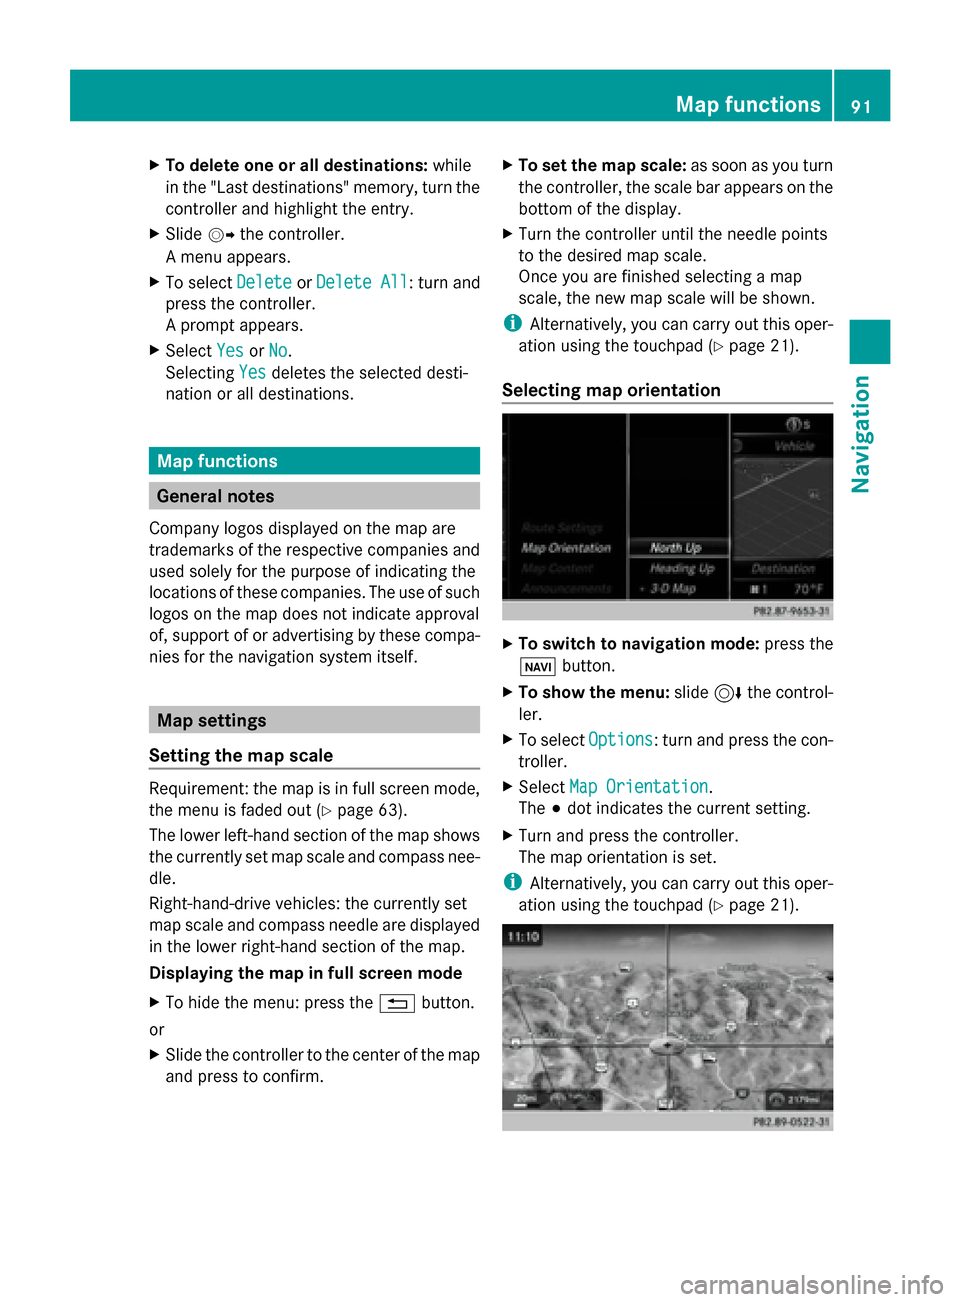
Selecting map orientation X
To switch to navigation mode: press the
00CB button.
X To show the menu: slide6the control-
ler.
X To select Options Options: turn and press the con-
troller.
X Select Map Orientation
Map Orientation.
The 003Bdot indicates the current setting.
X Turn and press the controller.
The map orientation is set.
i Alternatively, you can carry out this oper-
ation using the touchpad (Y page 21). Map functions
91Navigation Z
Page 99 of 214
system in conjunction with the most up-to-
date map software.
Information about new versions of the digital
map can be obtained from an authorized
Mercedes-Benz Center. You can have the dig-
ital map updated there using a data medium,
or you can update it yourself. Navigation functions
Calling up the navigation system
menu
X
To switch to navigation mode: press the
00CB button.
X To show the menu: slide5the control-
ler.
Navi Navi is highlighted in the main function bar.
X Press the controller.
The navigation menu appears.
X Turn the controller to display the navigation
functions one after another.
X To switch to the map: turn the controller
until Navigation Navigation is displayed and press
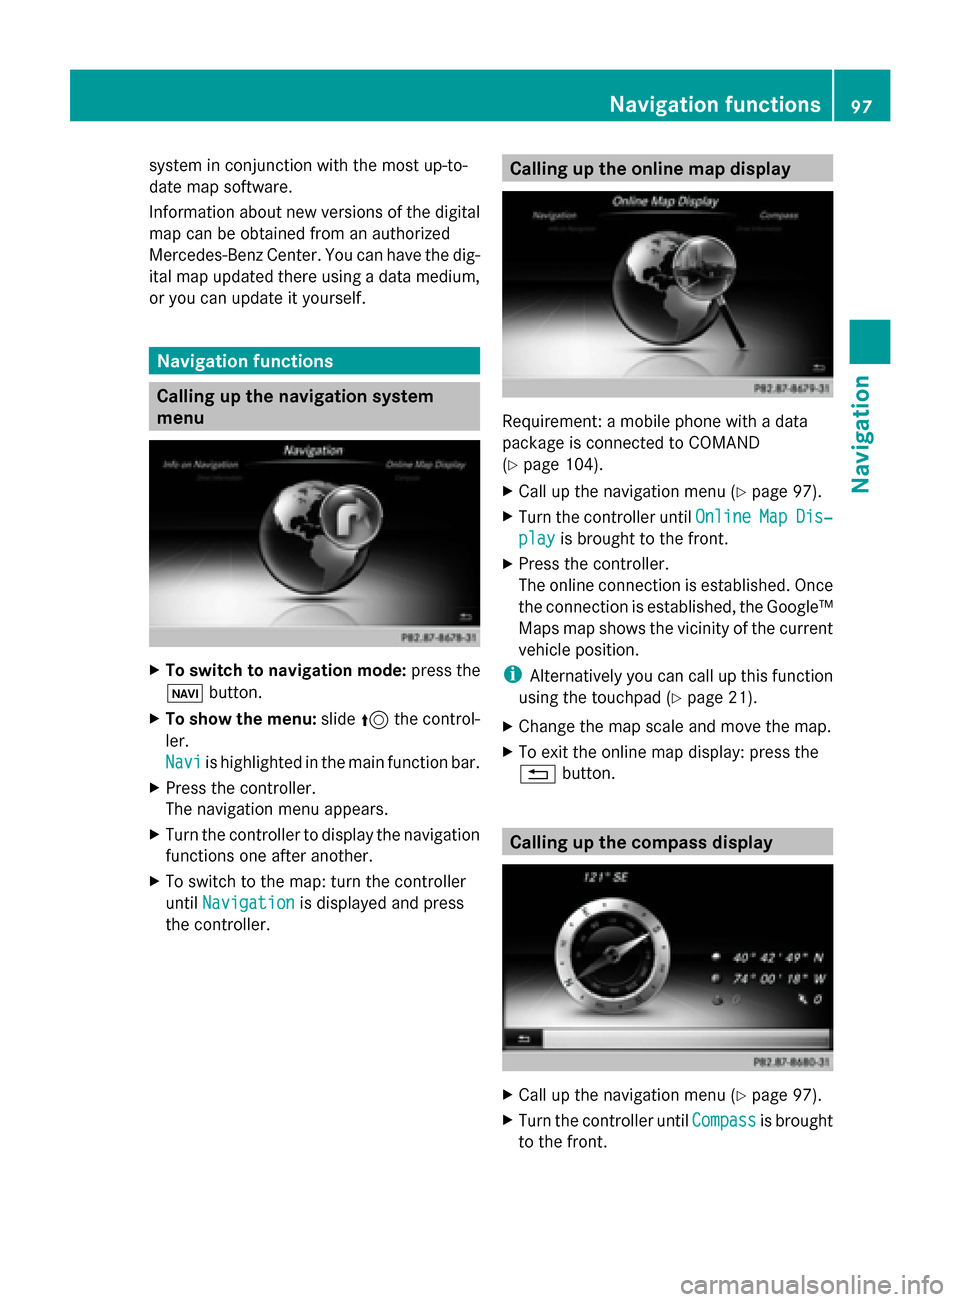
the controller. Calling up the online map display
Requirement: a mobile phone with a data
package is connected to COMAND
(Y
page 104).
X Call up the navigation menu (Y page 97).
X Turn the controller until Online OnlineMap
MapDis‐
Dis‐
play
play is brought to the front.
X Press the controller.
The online connection is established. Once
the connection is established, the Google™
Maps map shows the vicinity of the current
vehicle position.
i Alternatively you can call up this function
using the touchpad (Y page 21).
X Change the map scale and move the map.
X To exit the online map display: press the
0038 button. Calling up the compass display
X
Call up the navigation menu (Y page 97).
X Turn the controller until Compass Compassis brought
to the front. Navigation functions
97Navigation Z
Page 110 of 214
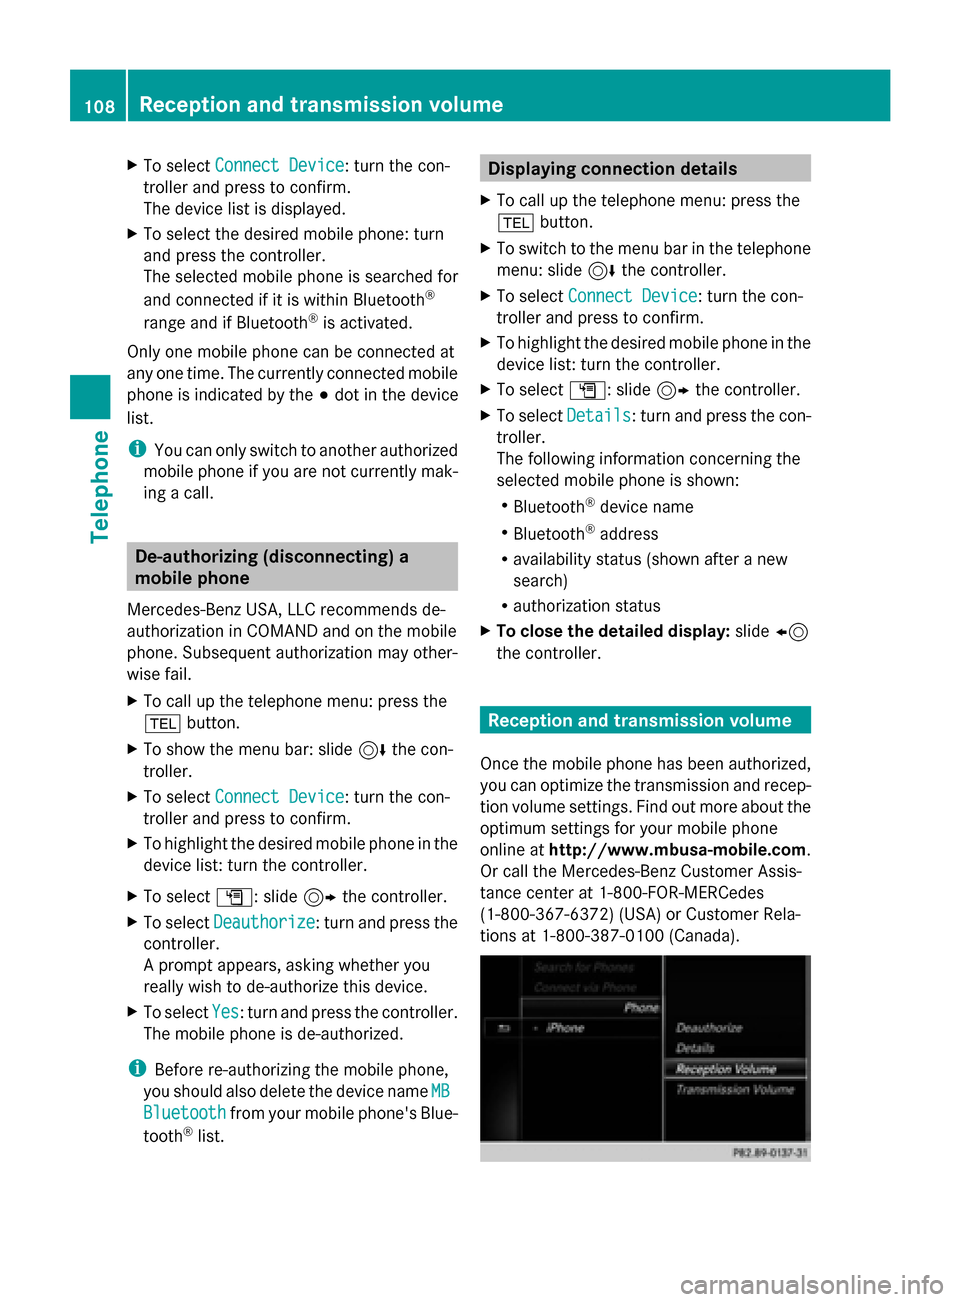
X
To select Connect Device
Connect Device: turn the con-
troller and press to confirm.
The device list is displayed.
X To select the desired mobile phone: turn
and press the controller.
The selected mobile phone is searched for
and connected if it is within Bluetooth ®
range and if Bluetooth ®
is activated.
Only one mobile phone can be connected at
any one time. The currently connected mobile
phone is indicated by the 003Bdot in the device
list.
i You can only switch to another authorized
mobile phone if you are not currently mak-
ing a call. De-authorizing (disconnecting) a
mobile phone
Mercedes-Benz USA, LLC recommends de-
authorization in COMAND and on the mobile
phone. Subsequent authorization may other-
wise fail.
X To call up the telephone menu: press the
002B button.
X To show the menu bar: slide 6the con-
troller.
X To select Connect Device
Connect Device: turn the con-
troller and press to confirm.
X To highlight the desired mobile phone in the
device list: turn the controller.
X To select G: slide 9the controller.
X To select Deauthorize
Deauthorize: turn and press the
controller.
A prompt appears, asking whether you
really wish to de-authorize this device.
X To select Yes Yes: turn and press the controller.
The mobile phone is de-authorized.
i Before re-authorizing the mobile phone,
you should also delete the device name MB
MB
Bluetooth
Bluetooth from your mobile phone's Blue-
tooth ®
list. Displaying connection details
X To call up the telephone menu: press the
002B button.
X To switch to the menu bar in the telephone
menu: slide 6the controller.
X To select Connect Device Connect Device: turn the con-
troller and press to confirm.
X To highlight the desired mobile phone in the
device list: turn the controller.
X To select G: slide 9the controller.
X To select Details Details: turn and press the con-
troller.
The following information concerning the
selected mobile phone is shown:
R Bluetooth ®
device name
R Bluetooth ®
address
R availability status (shown after a new
search)
R authorization status
X To close the detailed display: slide8
the controller. Reception and transmission volume
Once the mobile phone has been authorized,
you can optimize the transmission and recep-
tion volume settings. Find out more about the
optimum settings for your mobile phone
online at http://www.mbusa-mobile.com.
Or call the Mercedes-Benz Customer Assis-
tance center at 1-800-FOR-MERCedes
(1-800-367-6372) (USA) or Customer Rela-
tions at 1-800-387-010 0(Canada). 108
Reception and transmission volumeTelephone
Page 111 of 214
X
To call up the telephone menu: press the
002B button.
X To switch to the menu bar: slide 6the
controller.
X To select Connect Device
Connect Device: turn the con-
troller and press to confirm.
The device list appears.
X To highlight the desired mobile phone in the
device list: turn the controller.
X To select G: slide 9the controller.
X To select Reception Volume
Reception Volume orTrans‐ Trans‐
mission Volume
mission Volume: turn and press the con-
troller.
X To select a volume setting: turn the con-
troller.
X To accept changes: press the controller.
i Incorrect settings may have an impact on
the quality of calls. Using the telephone
Accepting a call
X To select Accept Accept: press the controller.
or
X Press 0061on the multifunction steering
wheel.
The call is accepted.
Additional functions available during a call
(Y page 110).
Adjusting the call volume (Y page 108).
Further information about ending a call
(Y page 113).
i You can also accept the call by voice com-
mand using the Voice Control System (see
the separate operating instructions).
i If the phone number of the caller is trans-
ferred, it appears in the display. If the
phone number is saved in the phone book,
the contact's name is also displayed. If the
phone number is not transferred,
Unknown Unknown is shown in the display. Rejecting a call
X To select Reject
Reject: turn the controller and
press to confirm.
or
X Press 0076on the multifunction steering
wheel. Making a call
Using the telephone menu X
To call up the telephone menu: press the
002B button.
X To select all numbers one after the other in
the telephone menu: turn and press the
controller each time.
X To select 0097in the telephone menu: turn
and press the controller.
The call is made.
Further information about ending a call
(Y page 113).
Redial X
To call up the telephone menu: press the
002B button.
X To select 0097in the telephone menu: turn
and press the controller.
The list of outgoing calls is displayed. The
most recently dialed number is at the top.
X To select an entry and make a call: turn and
press the controller.
Further information about ending a call
(Y page 113).
Using call lists X
To call up the telephone menu: press the
002B button.
X To switch to the menu bar: slide 6the
controller.
X To select Call Lists
Call Lists: turn and press the
controller. Using the telephone
109Telephone Z
Page 112 of 214
X
To select Calls Received
Calls Received orCalls
Calls
Dialed
Dialed: turn and press the controller.
The relevant list is displayed.
X To select an entry and make a call: turn and
press the controller.
Further information about ending a call
(Y page 113).
Using the phone book X
To call up the telephone menu: press the
002B button.
X To select Name
Name in the telephone menu: turn
and press the controller.
X Search for a contact (Y page 114).
X To make a call: press the controller.
Further information about ending a call
(Y page 113).
Using speed dial Option 1
X
To call up the telephone menu: press the
002B button.
X To highlight a number from the character
bar: turn the controller.
X Press the controller for longer than two
seconds.
The telephone menu displays the selected
entry. The number is dialed.
Option 2:
X To call up the telephone menu: press the
002B button.
X To switch to the menu bar: slide 6the
controller.
X To select Call Lists
Call Lists: turn and press the
controller.
X To select Speed Dial Preset List
Speed Dial Preset List : turn
and press the controller.
The speed dial list is displayed.
X To select an entry and make a call: turn and
press the controller.
The telephone menu displays the selected
entry. The number is dialed. Further information on setting up speed dial
(Y
page 126).
Further information about ending a call
(Y page 113). Functions available during a call
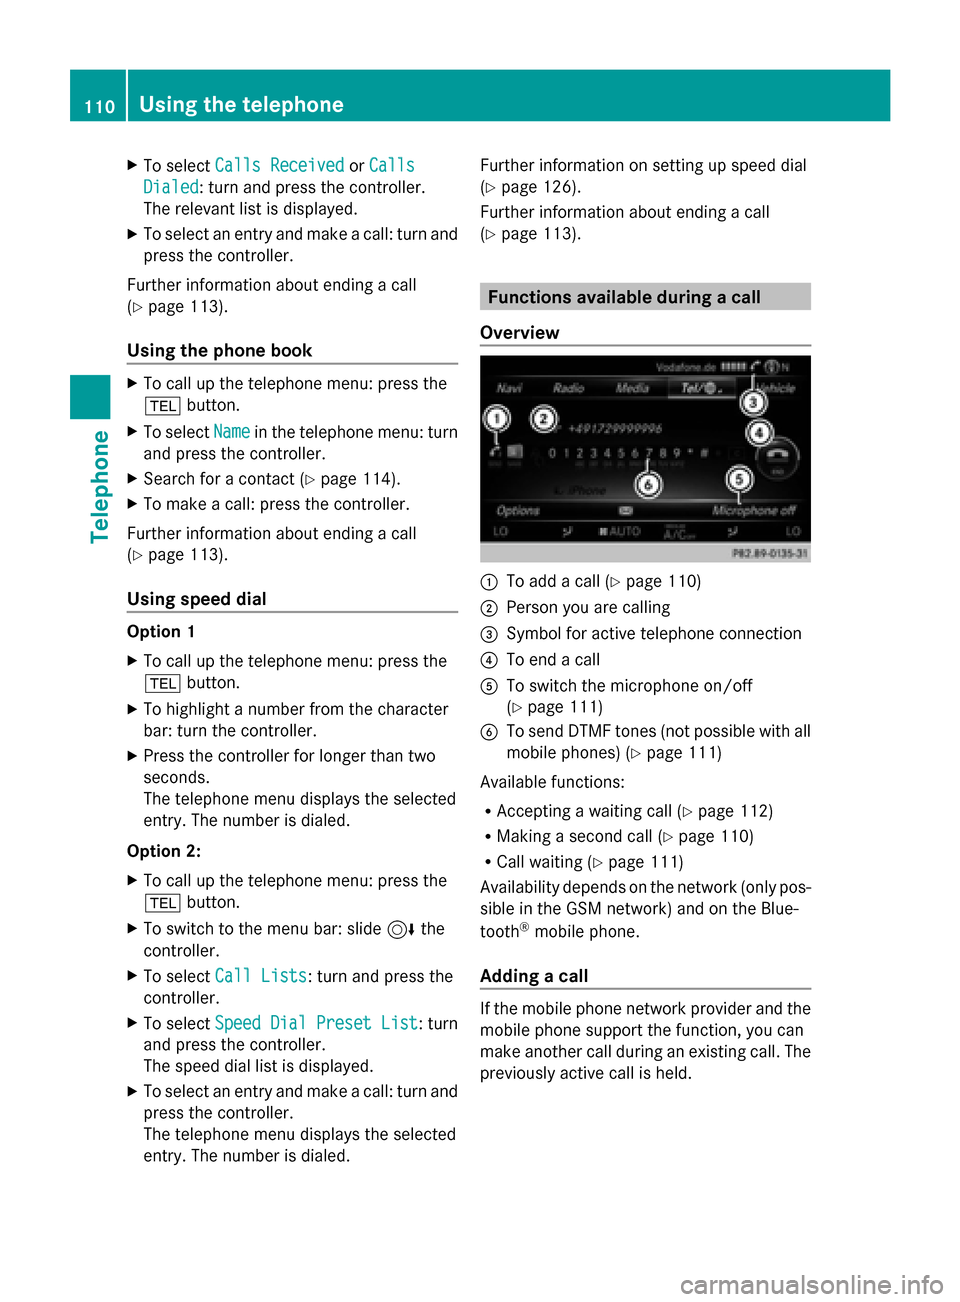
Overview 0043
To add a call (Y page 110)
0044 Person you are calling
0087 Symbol for active telephone connection
0085 To end a call
0083 To switch the microphone on/off
(Ypage 111)
0084 To send DTMF tones (not possible with all
mobile phones) (Y page 111)
Available functions:
R Accepting a waiting call (Y page 112)
R Making a second call (Y page 110)
R Call waiting (Y page 111)
Availability depends on the network (only pos-
sible in the GSM network) and on the Blue-
tooth ®
mobile phone.
Adding a call If the mobile phone network provider and the
mobile phone support the function, you can
make another call during an existing call. The
previously active call is held.110
Using the telephoneTelephone
Page 113 of 214
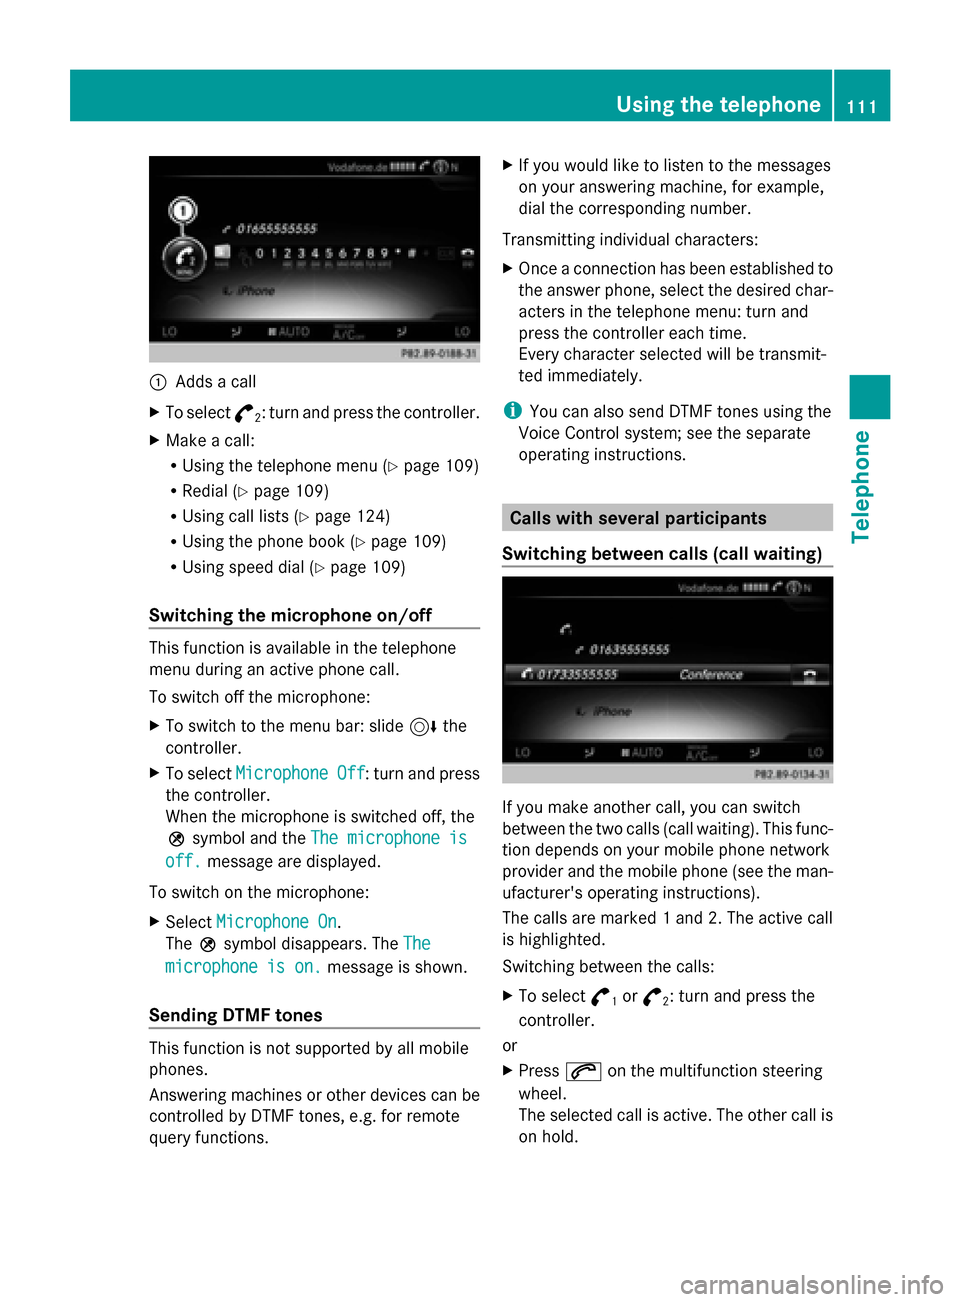
0043
Adds a call
X To select °
2: turn and press the controller.
X Make a call:
R
Using the telephone menu (Y page 109)
R Redial (Y page 109)
R Using call lists (Y page 124)
R Using the phone book (Y page 109)
R Using speed dial (Y page 109)
Switching the microphone on/off This function is available in the telephone
menu during an active phone call.
To switch off the microphone:
X To switch to the menu bar: slide 6the
controller.
X To select Microphone Off
Microphone Off : turn and press
the controller.
When the microphone is switched off, the
004D symbol and the The microphone is
The microphone is
off. off. message are displayed.
To switch on the microphone:
X Select Microphone On
Microphone On.
The 004Dsymbol disappears. The The
The
microphone is on.
microphone is on. message is shown.
Sending DTMF tones This function is not supported by all mobile
phones.
Answering machines or other devices can be
controlled by DTMF tones, e.g. for remote
query functions. X
If you would like to listen to the messages
on your answering machine, for example,
dial the corresponding number.
Transmitting individual characters:
X Once a connection has been established to
the answer phone, select the desired char-
acters in the telephone menu: turn and
press the controller each time.
Every character selected will be transmit-
ted immediately.
i You can also send DTMF tones using the
Voice Control system; see the separate
operating instructions. Calls with several participants
Switching between calls (call waiting) If you make another call, you can switch
between the two calls (call waiting). This func-
tion depends on your mobile phone network
provider and the mobile phone (see the man-
ufacturer's operating instructions).
The calls are marked 1 and 2. The active call
is highlighted.
Switching between the calls:
X
To select °
1or
°
2: turn and press the
controller.
or
X Press 0061on the multifunction steering
wheel.
The selected call is active. The other call is
on hold. Using the telephone
111Telephone Z