2015 MERCEDES-BENZ C-Class Location
[x] Cancel search: LocationPage 146 of 214
X
Select Presets
Presets.
X To select a preset: turn the controller.
X Press the COMAND controller for longer
than two seconds.
When the location is saved, the number of
the selected preset comes before the name
of the place in the caption.
Selecting a location from the memory X
From the weather memory: to select
Location
Location in the information chart: turn
and press the controller.
X Select Presets
Presets.
X Select the desired preset.
The information chart appears and displays
the weather information. Mercedes-Benz Apps
General notes
To be able to use Mercedes-Benz Apps, you
first have to register. To do so, you have to
enter your name and postal address once in
the vehicle and confirm the general terms and
conditions. A message to this effect appears
the first time you call up the online and Inter-
net functions.
For individual Mercedes-Benz Apps, it may be
necessary to pay license fees before using.
Use is then limited to a certain period of time.
License fees must be paid again for use
beyond this time period. Mercedes-Benz Mobile Website
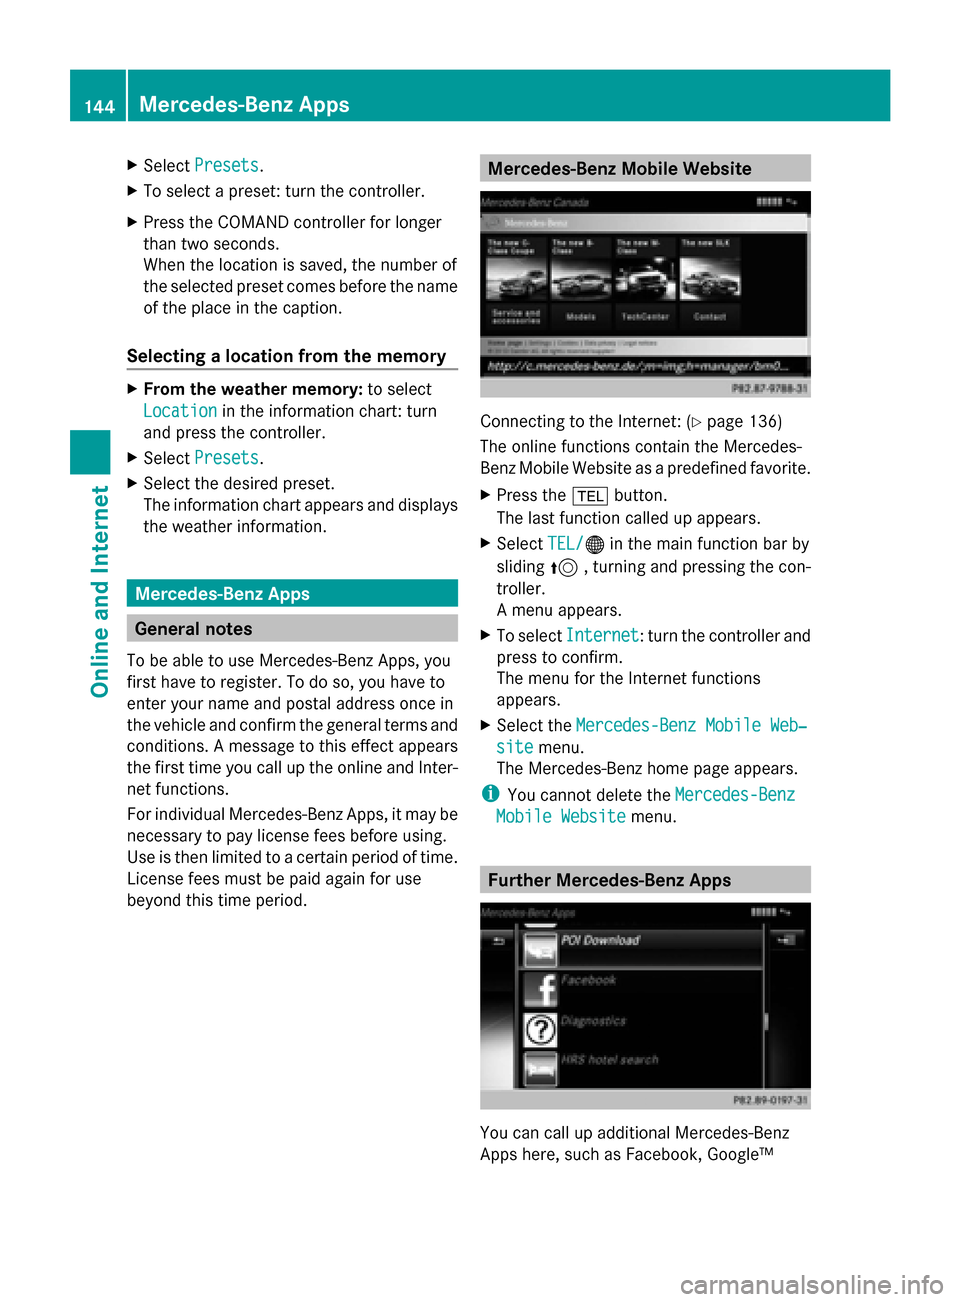
Connecting to the Internet: (
Ypage 136)
The online functions contain the Mercedes-
Benz Mobile Website as a predefined favorite.
X Press the 002Bbutton.
The last function called up appears.
X Select TEL/ TEL/00A7 in the main function bar by
sliding 5, turning and pressing the con-
troller.
A menu appears.
X To select Internet Internet: turn the controller and
press to confirm.
The menu for the Internet functions
appears.
X Select the Mercedes-Benz Mobile Web‐ Mercedes-Benz Mobile Web‐
site
site menu.
The Mercedes-Benz home page appears.
i You cannot delete the Mercedes-Benz
Mercedes-Benz
Mobile Website
Mobile Website menu. Further Mercedes-Benz Apps
You can call up additional Mercedes-Benz
Apps here, such as Facebook, Google™144
Mercedes-Benz AppsOnline and Internet
Page 160 of 214
These include:
R
tunnels
R parking garages
R locations inside or next to buildings
R locations in the vicinity of other structures
SIRIUS XM Satellite Radio offers more than
140 digital-quality radio channels providing
100% commercial-free music, sports, news
and entertainment.
SIRIUS XM Satellite Radio employs a fleet of
high-performance satellites to broadcast
around the clock throughout the USA and
Canada.
The satellite radio program is available for a
monthly fee. Details are available from the
SIRIUS XM Service Center and at
http://www.siriusxm.com (USA) or
http://www.siriusxm.ca (Canada).
Your new Mercedes-Benz vehicle comes with
SIRIUS XM Satellite Radio pre-installed at the
factory. This service is free for a six-month
trial period. About a month before the trial
period ends, information will be provided on
how to extend this subscription. An acoustic
signal sounds and a message is shown,
describing how the subscription can be
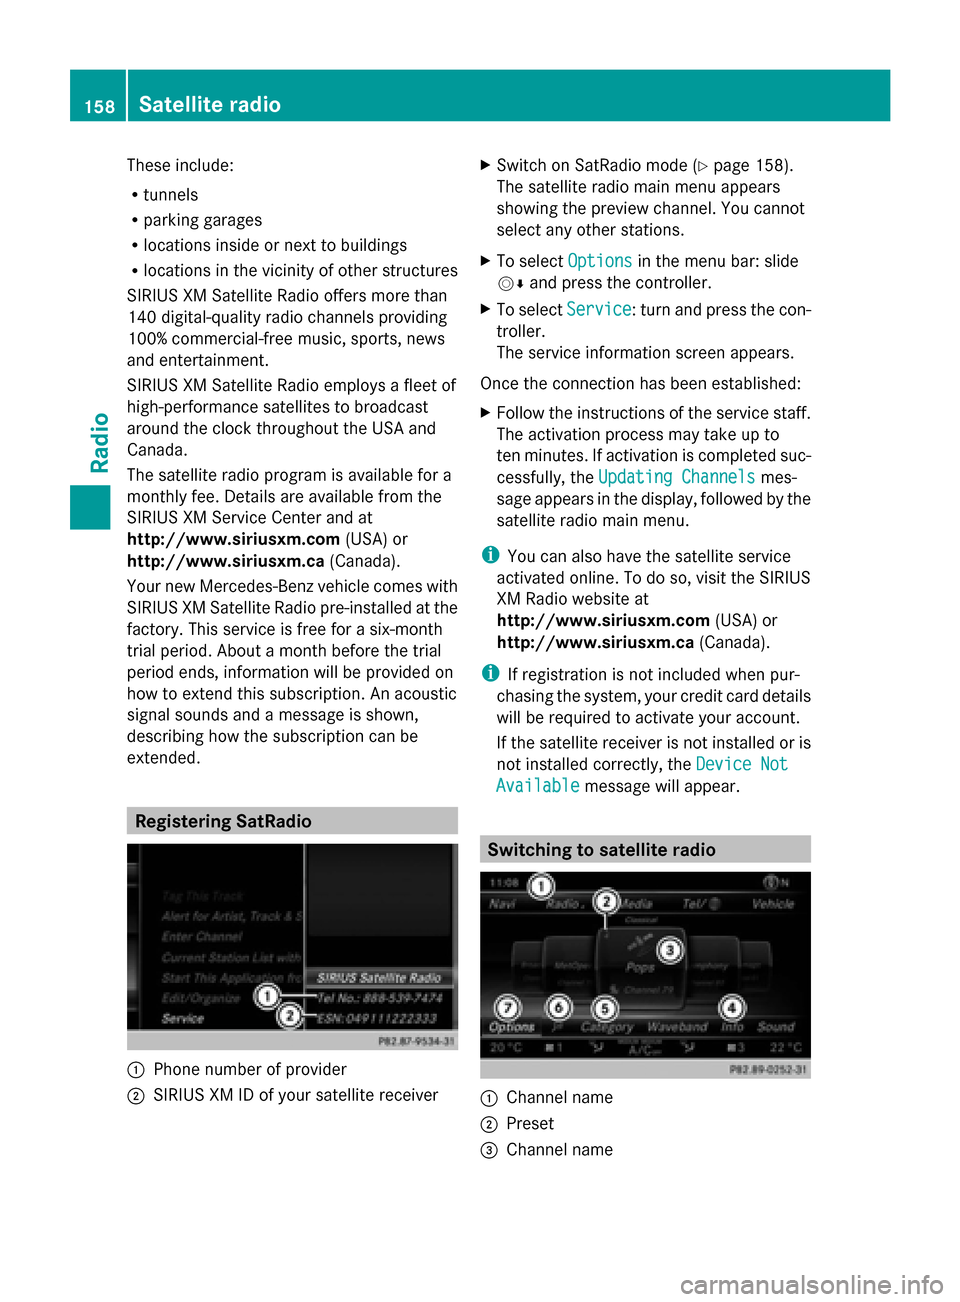
extended. Registering SatRadio
0043
Phone number of provider
0044 SIRIUS XM ID of your satellite receiver X
Switch on SatRadio mode (Y page 158).
The satellite radio main menu appears
showing the preview channel. You cannot
select any other stations.
X To select Options Optionsin the menu bar: slide
00520064 and press the controller.
X To select Service Service: turn and press the con-
troller.
The service information screen appears.
Once the connection has been established:
X Follow the instructions of the service staff.
The activation process may take up to
ten minutes. If activation is completed suc-
cessfully, the Updating Channels Updating Channels mes-
sage appears in the display, followed by the
satellite radio main menu.
i You can also have the satellite service
activated online. To do so, visit the SIRIUS
XM Radio website at
http://www.siriusxm.com (USA) or
http://www.siriusxm.ca (Canada).
i If registration is not included when pur-
chasing the system, your credit card details
will be required to activate your account.
If the satellite receiver is not installed or is
not installed correctly, the Device Not Device Not
Available
Available message will appear. Switching to satellite radio
0043
Channel name
0044 Preset
0087 Channel name 158
Satellite radioRadio
Page 178 of 214
X
Select a track.
The basic display appears and playback
starts. MEDIA REGISTER
General notes
i Keep your original music files, photos and
video files in a secure location. An error in
COMAND may result in the loss of music
files stored in the MEDIA REGISTER.
Mercedes-Benz is not liable for any loss of
data.
You can store music files, photos or video files
in the MEDIA REGISTER. The memory has a
capacity of 10 GB. Switching on the MEDIA REGISTER
X Press the 00FDbutton repeatedly until the
MEDIA REGISTER is switched on.
Pressing the button repeatedly changes
the operating mode in the following order:
R Disc
Disc;
R Memory Card Memory Card;
R Media Register
Media Register;
R USB 1
USB 1 (vehicles without Media Interface)
R Media Interface 1
Media Interface 1 (vehicles without
Media Interface)
R USB 2
USB 2 (vehicles without Media Interface)
R Media Interface 2
Media Interface 2 (vehicles with
Media Interface) R
Bluetooth Audio Bluetooth Audio;
R Aux Aux .
Playback begins at the point last listened to.
If there are no files, you will see a message to
this effect.
Further options for switching on:
R Using the number keypad: (Y page 165)
R Using the main function bar: (Y page 165)
R Using the device list: (Y page 165)
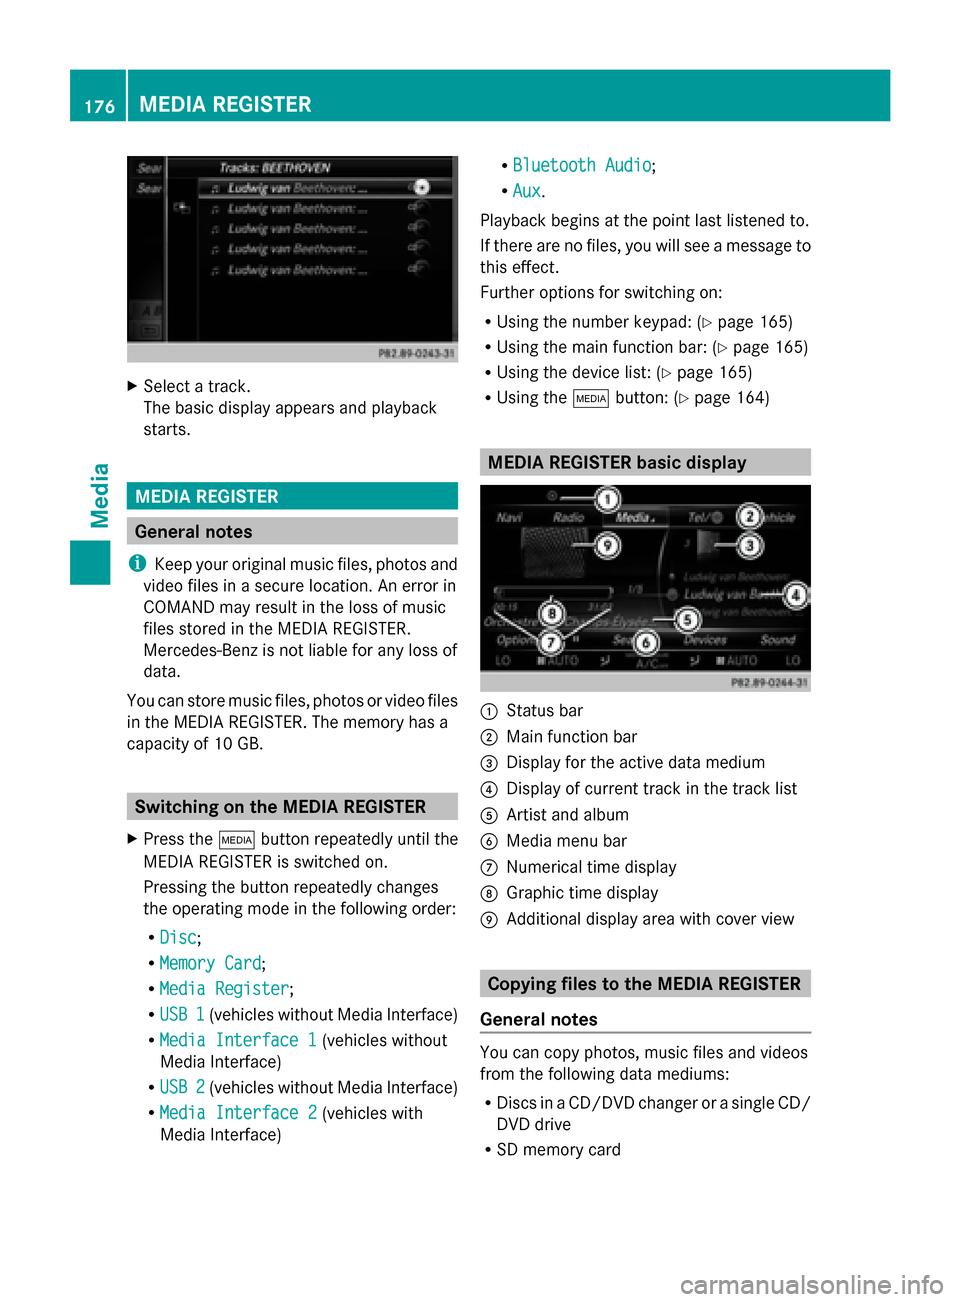
R Using the 00FDbutton: (Y page 164) MEDIA REGISTER basic display
0043
Status bar
0044 Main function bar
0087 Display for the active data medium
0085 Display of current track in the track list
0083 Artist and album
0084 Media menu bar
006B Numerical time display
006C Graphic time display
006D Additional display area with cover view Copying files to the MEDIA REGISTER
General notes You can copy photos, music files and videos
from the following data mediums:
R
Discs in a CD/DVD changer or a single CD/
DVD drive
R SD memory card 176
MEDIA REGISTERMedia
Page 184 of 214
X
Select Start Search
Start Search .
COMAND searches for Bluetooth ®
audio
devices within range and adds them to the
Bluetooth ®
device list.
The duration of the search depends on the
number of Bluetooth ®
audio devices within
range and their characteristics.
i With some Bluetooth ®
audio devices,
playback must first be started on the device
itself so that COMAND can play the audio
files. Bluetooth ®
must also be given as a
media output location for the audio device
used.
Authorizing Bluetooth ®
audio
X Select a Bluetooth ®
audio device that has
not yet been authorized from the list: turn
and press the controller.
Authorization starts.
Depending on the Bluetooth ®
audio device
used, you now have two options for con-
tinuing with authorization.
Option 1: entering the passkey
X You can find information on this in the
"Authorizing (registering) a mobile phone"
section (Y page 106).
After successful authorization, the Blue-
tooth ®
audio device is connected and
starts playing.
Option 2: Secure Simple Pairing
i The Bluetooth ®
audio device must sup-
port Bluetooth ®
version 2.1 for connection
via Secure Simple Pairing. COMAND cre-
ates a six-digit code, which is displayed on
both devices that are to be connected
For some Bluetooth ®
audio devices, the
pairing must be confirmed within 10 sec-
onds.
X If the number code displayed on
COMAND and on the Bluetooth ®
audio device is the same, select
Yes
Yes : press the
controller.
If you select Yes
Yes , authorization continues
and the Bluetooth ®
audio device is con-
nected. Playback starts.
If you select No
No, authorization will be can-
celed. External authorization
If COMAND does not find your Bluetooth ®
audio device, this may be due to particular
security settings on your Bluetooth ®
audio
device. In this case, check whether your Blue-
tooth ®
audio device can locate COMAND.
The Bluetooth ®
device name for COMAND is
MB Bluetooth MB Bluetooth .
X Switch on Bluetooth ®
audio mode
(Y page 184).
X To select Options
Options: slide 005200C5and press
the controller.
X To select Bluetooth Audio Devices
Bluetooth Audio Devices :
press the controller.
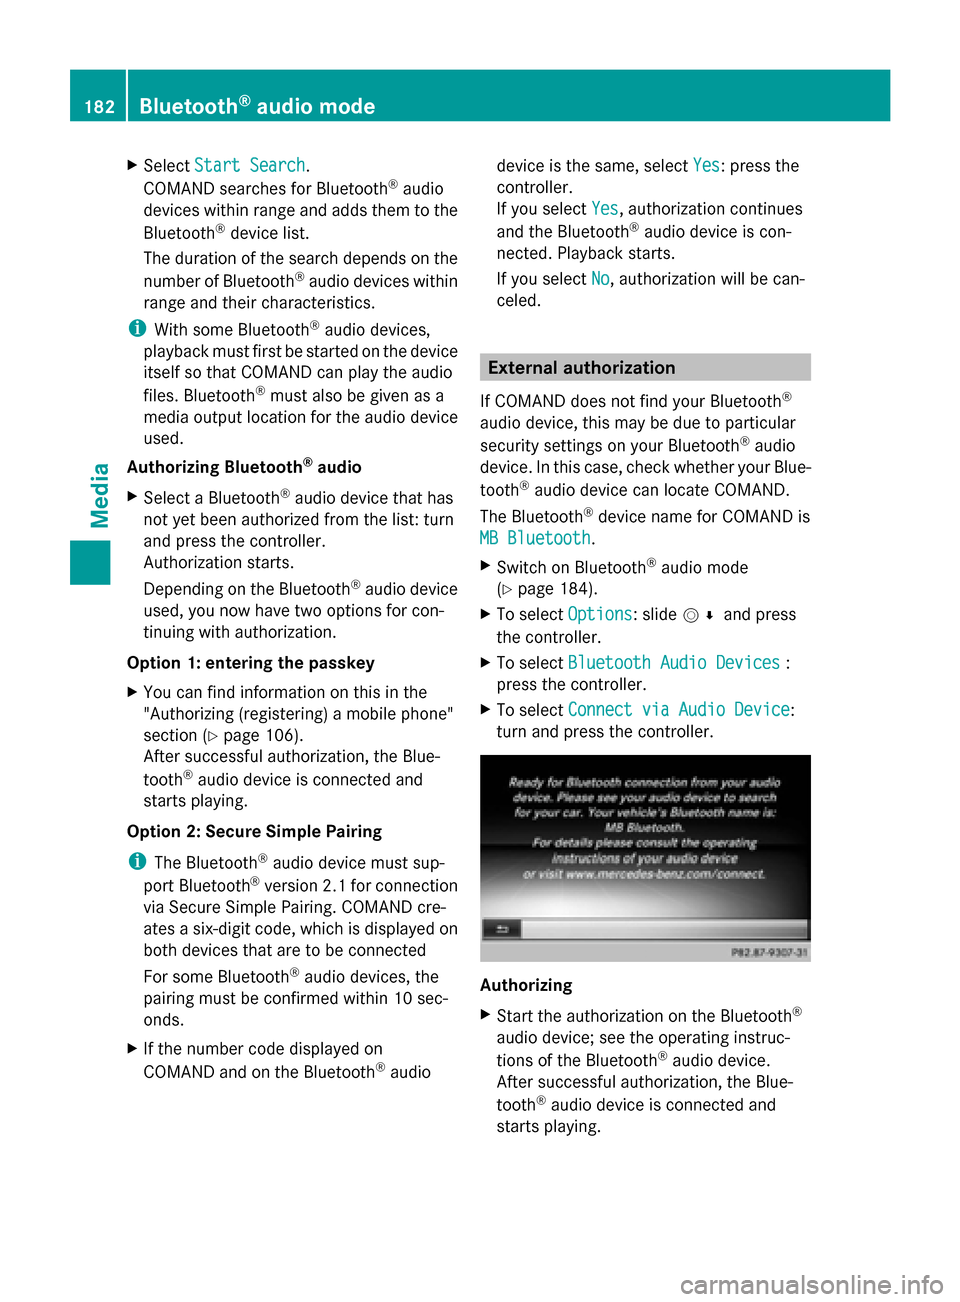
X To select Connect via Audio Device
Connect via Audio Device :
turn and press the controller. Authorizing
X
Start the authorization on the Bluetooth ®
audio device; see the operating instruc-
tions of the Bluetooth ®
audio device.
After successful authorization, the Blue-
tooth ®
audio device is connected and
starts playing. 182
Bluetooth ®
audio modeMedia
Page 207 of 214
X
Press the 002Bbutton.
X To select TEL/ 00A7in the main function bar:
slide 5, turn and press the controller.
The menu for selecting telephone and Inter-
net applications appears.
X To select SIRIUS Weather
SIRIUS Weather : turn and press
the controller.
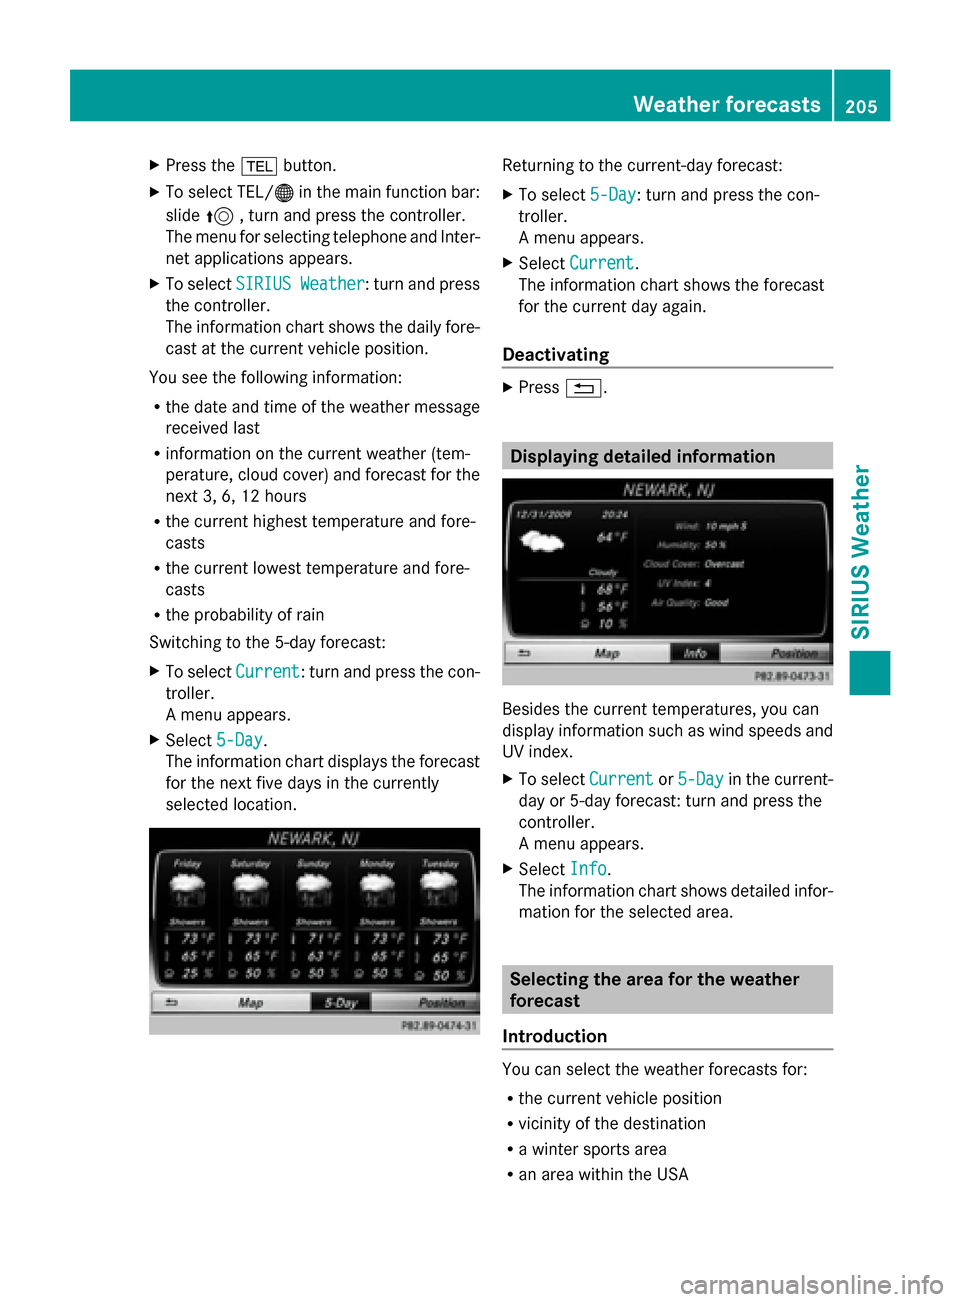
The information chart shows the daily fore-
cast at the current vehicle position.
You see the following information:
R the date and time of the weather message
received last
R information on the current weather (tem-
perature, cloud cover) and forecast for the
next 3, 6, 12 hours
R the current highest temperature and fore-
casts
R the current lowest temperature and fore-
casts
R the probability of rain
Switching to the 5-day forecast:
X To select Current
Current: turn and press the con-
troller.
A menu appears.
X Select 5-Day
5-Day.
The information chart displays the forecast
for the next five days in the currently
selected location. Returning to the current-day forecast:
X
To select 5-Day 5-Day: turn and press the con-
troller.
A menu appears.
X Select Current Current.
The information chart shows the forecast
for the current day again.
Deactivating X
Press 0038. Displaying detailed information
Besides the current temperatures, you can
display information such as wind speeds and
UV index.
X
To select Current Currentor5-Day
5-Day in the current-
day or 5-day forecast: turn and press the
controller.
A menu appears.
X Select Info Info.
The information chart shows detailed infor-
mation for the selected area. Selecting the area for the weather
forecast
Introduction You can select the weather forecasts for:
R
the current vehicle position
R vicinity of the destination
R a winter sports area
R an area within the USA Weather forecasts
205SIRIUS Weather
Page 208 of 214
You can select a location in the information
chart (option 1) or in the map (option 2). You
can store frequently selected locations in the
memory (Y page 207).
i COMAND receives the data for the
weather forecasts from the nearest
weather station to the selected location.
Option 1: selecting the area in the infor-
mation chart X
To select Position Position in the information
chart: turn and press the controller.
X To select the current vehicle position:
select Current Position
Current Position from the menu.
COMAND receives the weather data for the
current vehicle position from the nearest
weather station and displays it automati-
cally.
Requirement for "Selecting the vicinity of the
destination": a route is calculated to a desti-
nation (Y page 69). The menu item is other-
wise grayed out.
X To select the vicinity of the destina-
tion: select Near Destination
Near Destination from the
menu: turn the controller and press to con-
firm. X
To select a winter sports area: selectAt At
Ski
Ski Area
Area from the menu: turn the control-
ler and press to confirm.
X Select a state, e.g. Colorado
Colorado.
X Select a winter sports area from the menu.
The weather data and other information is
displayed for the winter sports area that has been selected. The data is supplied by
the nearest weather station.
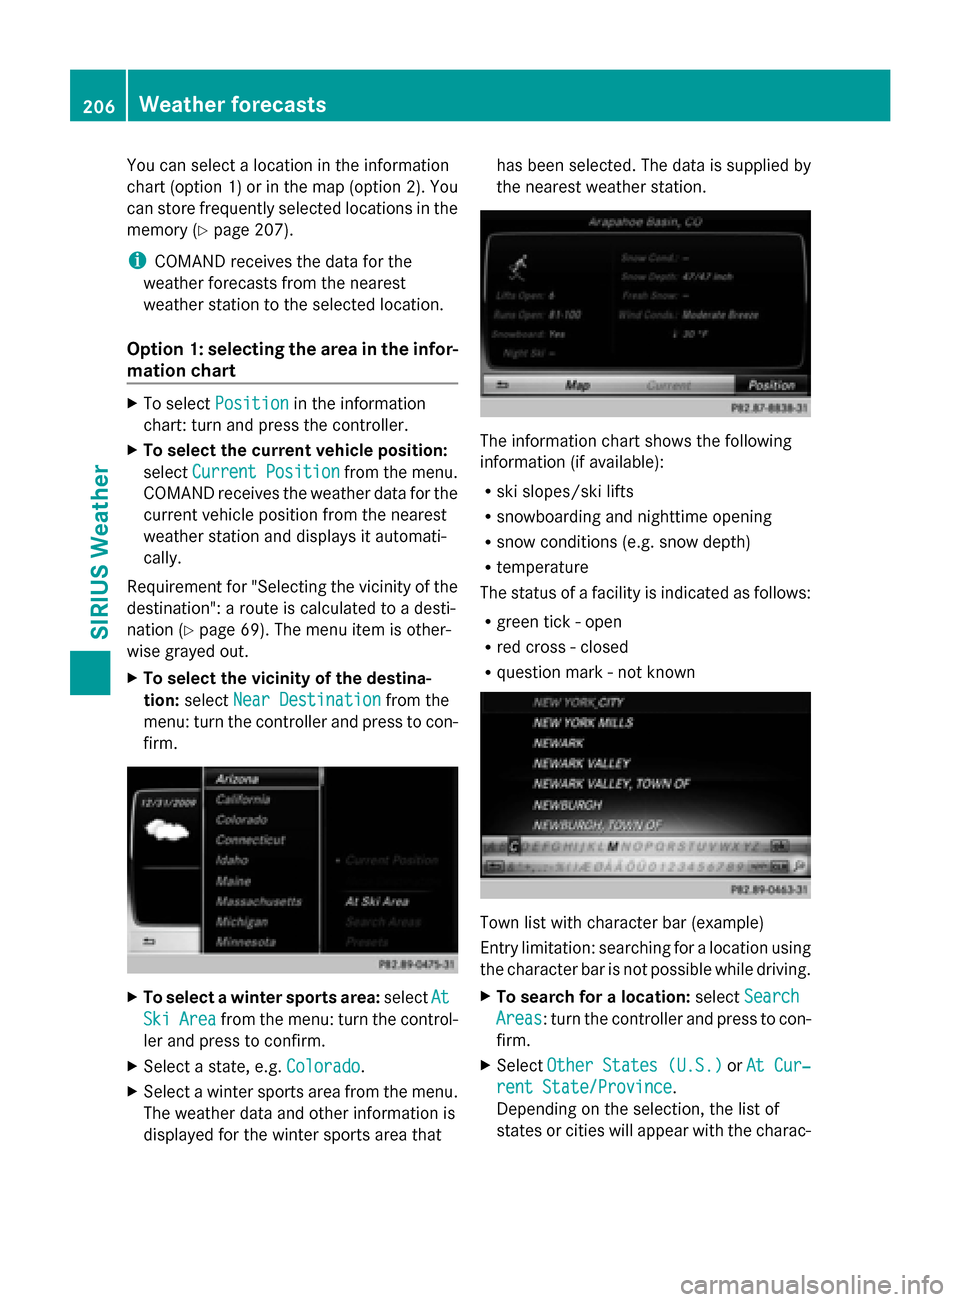
The information chart shows the following
information (if available):
R ski slopes/ski lifts
R snowboarding and nighttime opening
R snow conditions (e.g. snow depth)
R temperature
The status of a facility is indicated as follows:
R green tick - open
R red cross - closed
R question mark - not known Town list with character bar (example)
Entry limitation: searching for a location using
the character bar is not possible while driving.
X
To search for a location: selectSearch Search
Areas
Areas: turn the controller and press to con-
firm.
X Select Other States (U.S.) Other States (U.S.) orAt Cur‐
At Cur‐
rent State/Province
rent State/Province.
Depending on the selection, the list of
states or cities will appear with the charac- 206
Weather forecastsSIRIUS Weather
Page 209 of 214
ter bar. You can limit the search using the
character bar.
X To select the state or town: enter the initial
letter by turning the controller and then
press to confirm.
X To switch to the list without the character
bar: slide 5or select ok ok.
X To delete an entry: select 0084from the
character bar and press the controller.
Pressing briefly deletes the last letter
entered.
Pressing and holding longer deletes the
entire entry.
X To select the state/province or town in the
list: turn the controller and press to con-
firm.
After selecting a state (or province), the list
of towns appears.
After choosing a town, the information
chart displays the weather forecast for the
selected location. The data is supplied by
the nearest weather station.
Option 2: selecting the area in the
weather map X
Call up the weather map (Y page 207).
X Move the weather map so that the cross-
hair is over the desired area (Y page 208).
X Press the controller.
The information chart shows the weather
forecast for the selected area. The data is
supplied by the nearest weather station. Memory functions
Storing the area in the weather memory You can save locations that are called up fre-
quently in ten preset positions (0, 1-9) in the
weather memory. X
In the weather memory: select the area
for the weather forecast (Y page 205).
The selected location appears at the top in
the status bar.
X To select Position
Position in the information
chart: turn and press the controller.
X Select Presets Presets.
X Select a preset using the controller.
X Press and hold the controller until you hear
a tone.
The area is entered on the selected preset.
Selecting an area from the weather
memory X
Directly from the weather memory:
select Position Position from the information
chart: turn and press the controller.
X Select Presets
Presets.
X Select the memory position which contains
the location you require.
The weather data for the selected area is
displayed. Weather map
Calling up the weather map X
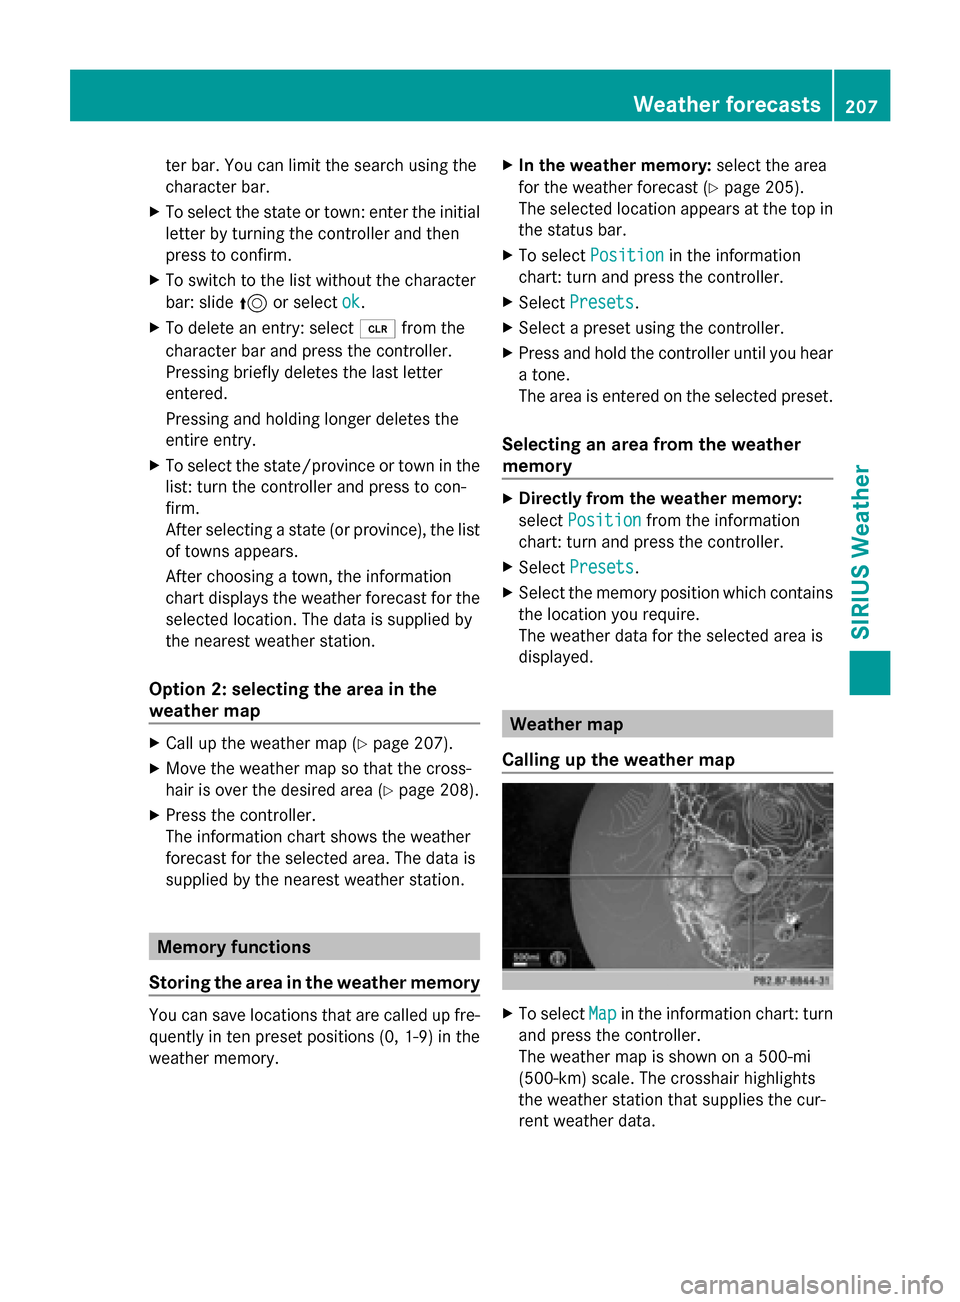
To select Map Mapin the information chart: turn
and press the controller.
The weather map is shown on a 500-mi
(500-km) scale. The crosshair highlights
the weather station that supplies the cur-
rent weather data. Weather forecasts
207SIRIUS Weather
Page 212 of 214
Weather
front Explanation
Stationary
front
(red and blue
line with red
semi-circles
and blue tri-
angles) The weather front moves
minimally. The weather
remains changeable in this
area.
Occlusion
(purple line
with purple
semi-circles
and trian-
gles) When the faster cold front
catches up and joins the
warm front ahead of it, an
occluded front is formed.
The weather remains
changeable and rainy
within an occlusion.
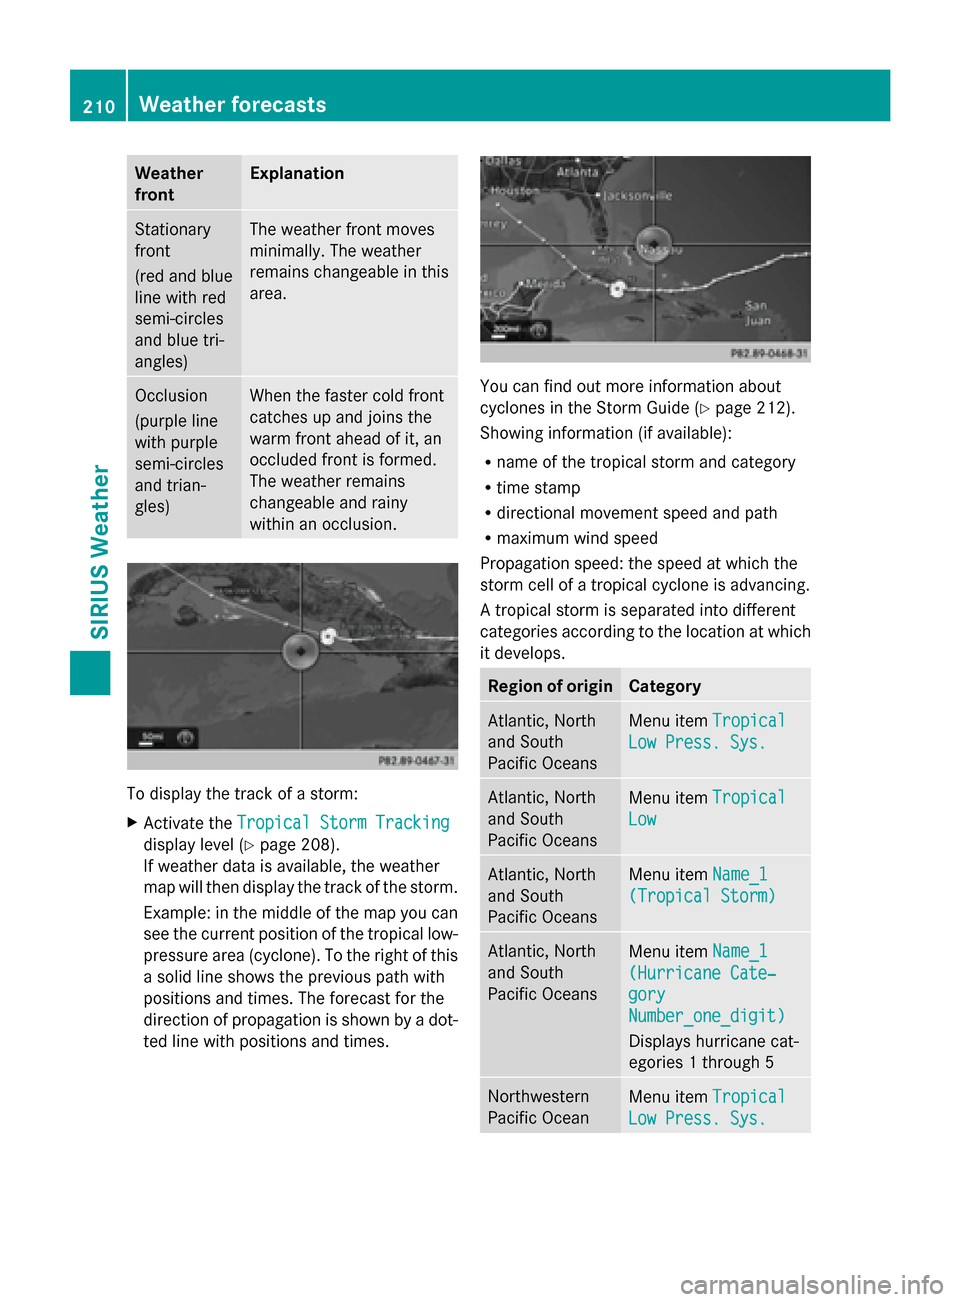
To display the track of a storm:
X
Activate the Tropical Storm Tracking Tropical Storm Tracking
display level (Y page 208).
If weather data is available, the weather
map will then display the track of the storm.
Example: in the middle of the map you can
see the current position of the tropical low-
pressure area (cyclone). To the right of this
a solid line shows the previous path with
positions and times. The forecast for the
direction of propagation is shown by a dot-
ted line with positions and times. You can find out more information about
cyclones in the Storm Guide (Y
page 212).
Showing information (if available):
R name of the tropical storm and category
R time stamp
R directional movement speed and path
R maximum wind speed
Propagation speed: the speed at which the
storm cell of a tropical cyclone is advancing.
A tropical storm is separated into different
categories according to the location at which
it develops. Region of origin Category
Atlantic, North
and South
Pacific Oceans
Menu item
Tropical Tropical
Low Press. Sys.
Low Press. Sys. Atlantic, North
and South
Pacific Oceans
Menu item
Tropical Tropical
Low
Low Atlantic, North
and South
Pacific Oceans
Menu item
Name_1 Name_1
(Tropical Storm)
(Tropical Storm) Atlantic, North
and South
Pacific Oceans
Menu item
Name_1 Name_1
(Hurricane Cate‐
(Hurricane Cate‐
gory gory
Number_one_digit) Number_one_digit)
Displays hurricane cat-
egories 1 through 5 Northwestern
Pacific Ocean
Menu item
Tropical Tropical
Low Press. Sys.
Low Press. Sys. 210
Weather forecastsSIRIUS Weather