Page 18 of 214
Overview
Components
0043
COMAND display
0044 DVD changer/single DVD drive
0087 Touchpad
0085 Controller
COMAND consists of:
R the display
The COMAND display has 960 x 540 pixels.
R the DVD changer/single DVD drive
R the buttons
R the controller
R the touchpad
R ports in the center console (2 x USB, AUX)
An iPod ®
is connected via USB cable.
The controller and touchpad provide two options for entering characters and selecting func-
tions. Functions
R Radio/DAB radio
Internet radio, see Communication
R Media
-Media support: audio CD, MP3 CD, DVD
video, two connection options for USB or
Media Interface (e.g. iPod ®
), SD card, Bluetooth audio, 10 GB Media Register
on the hard drive
- Music search using all media
R Sound system
You can select from two sound systems:
-Standard sound system
- Burmester ®
surround sound system 16
OverviewOverview and operation
Page 21 of 214

Buttons and controller
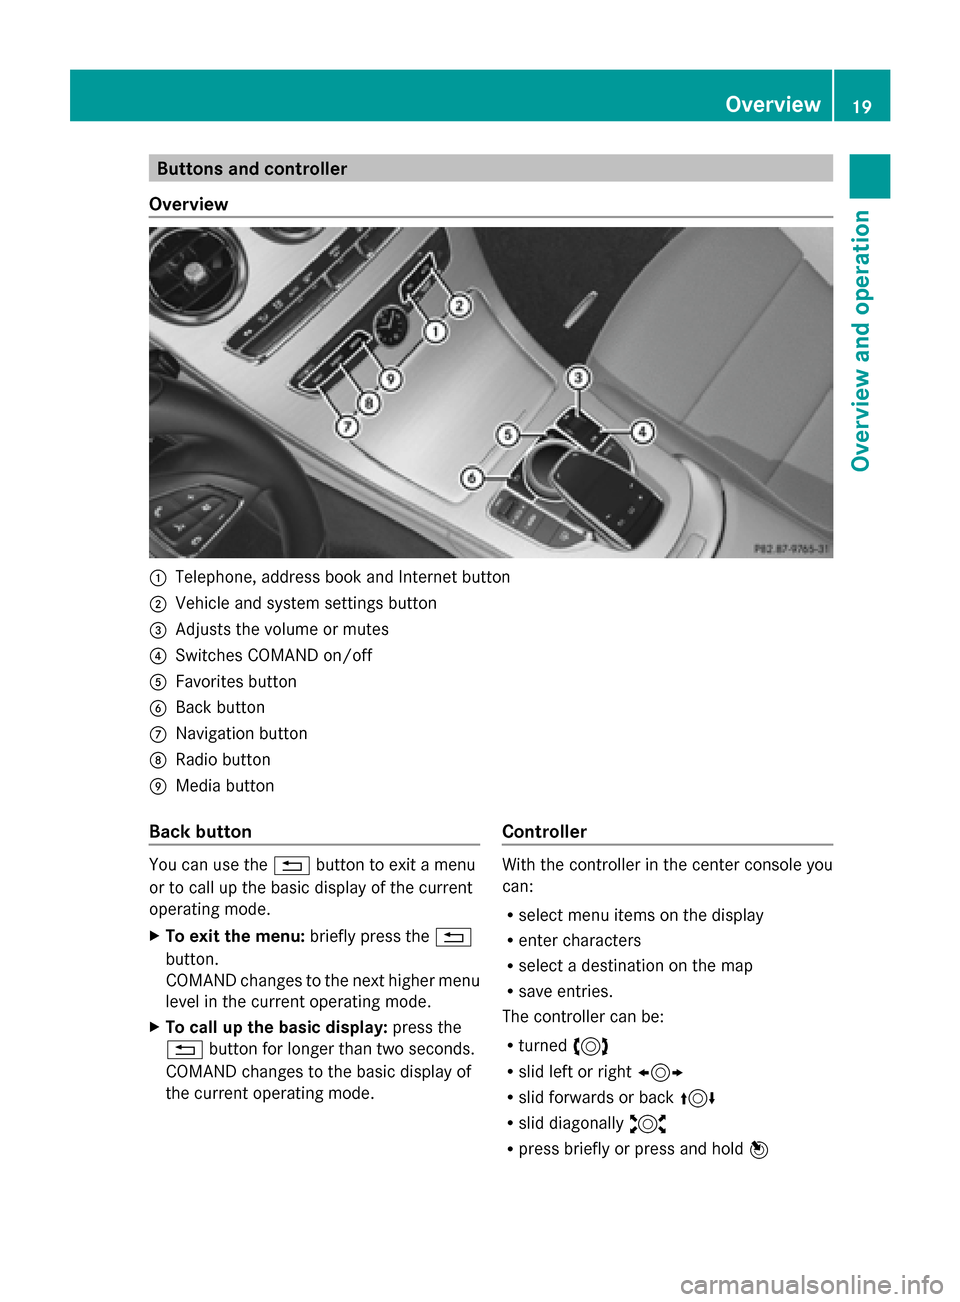
Overview 0043
Telephone, address book and Internet button
0044 Vehicle and system settings button
0087 Adjusts the volume or mutes
0085 Switches COMAND on/off
0083 Favorites button
0084 Back button
006B Navigation button
006C Radio button
006D Media button
Back button You can use the
0038button to exit a menu
or to call up the basic display of the current
operating mode.
X To exit the menu: briefly press the0038
button.
COMAND changes to the next higher menu
level in the current operating mode.
X To call up the basic display: press the
0038 button for longer than two seconds.
COMAND changes to the basic display of
the current operating mode. Controller With the controller in the center console you
can:
R
select menu items on the display
R enter characters
R select a destination on the map
R save entries.
The controller can be:
R turned 3
R slid left or right 1
R slid forwards or back 4
R slid diagonally 2
R press briefly or press and hold 7 Overview
19Overview and operation
Page 191 of 214

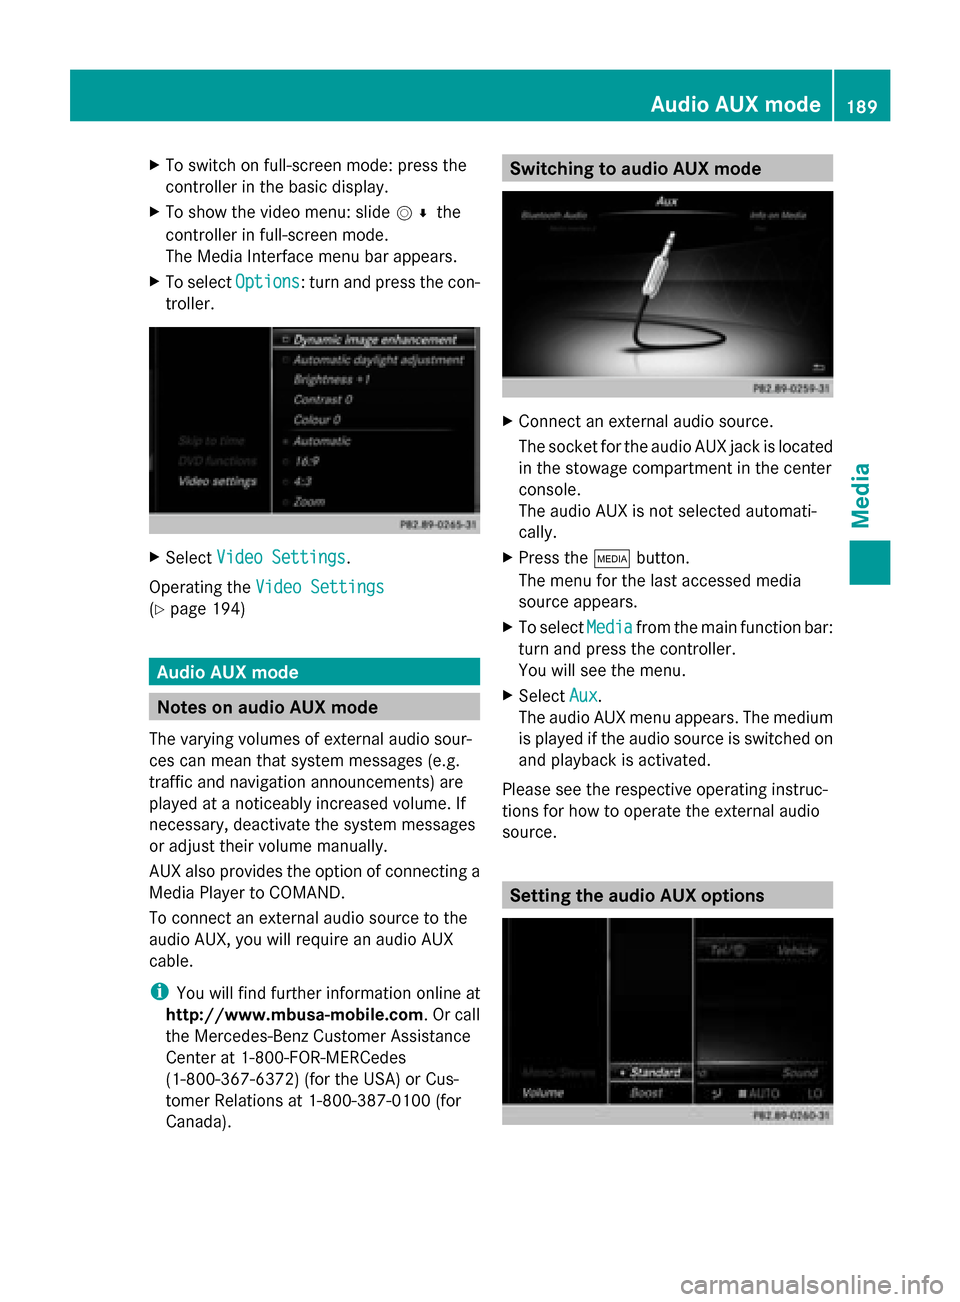
X
To switch on full-screen mode: press the
controller in the basic display.
X To show the video menu: slide 005200C5the
controller in full-screen mode.
The Media Interface menu bar appears.
X To select Options
Options: turn and press the con-
troller. X
Select Video Settings
Video Settings.
Operating the Video Settings Video Settings
(Y page 194) Audio AUX mode
Notes on audio AUX mode
The varying volumes of external audio sour-
ces can mean that system messages (e.g.
traffic and navigation announcements) are
played at a noticeably increased volume. If
necessary, deactivate the system messages
or adjust their volume manually.
AUX also provides the option of connecting a
Media Player to COMAND.
To connect an external audio source to the
audio AUX, you will require an audio AUX
cable.
i You will find further information online at
http://www.mbusa-mobile.com. Or call
the Mercedes-Benz Customer Assistance
Center at 1-800-FOR-MERCedes
(1-800-367-6372) (for the USA) or Cus-
tomer Relations at 1-800-387-010 0(for
Canada). Switching to audio AUX mode
X
Connect an external audio source.
The socket for the audio AUX jack is located
in the stowage compartment in the center
console.
The audio AUX is not selected automati-
cally.
X Press the 00FDbutton.
The menu for the last accessed media
source appears.
X To select Media Mediafrom the main function bar:
turn and press the controller.
You will see the menu.
X Select Aux Aux.
The audio AUX menu appears. The medium
is played if the audio source is switched on
and playback is activated.
Please see the respective operating instruc-
tions for how to operate the external audio
source. Setting the audio AUX options Audio AUX mode
189Media Z
Page 192 of 214

X
To select Options
Optionsin the menu bar: slide
005200C5 and press the controller.
A menu appears. You can set Mono/
Mono/
Stereo
Stereo andVolume
Volume.
Mono/stereo:
X To select Mono/Stereo
Mono/Stereo: turn and press the
controller.
A menu appears.
X Select Mono
Mono orStereo Stereo.
The 003Bdot indicates the current setting.
Volume:
X To select Volume
Volume: turn and press the con-
troller.
X Select Standard
Standard orBoost Boost.
Standard
Standard: the volume of the external audio
source is adjusted to a standard value.
Boost
Boost: the volume of the external audio
source is raised by approximately 10 dB.
The 003Bdot indicates the current setting.
A device which is connected as an external
audio source may seem quieter or louder in
the vehicle, or the usual maximum volume
cannot be achieved. On some devices, it is
possible to adjust the volume separately. In
this case, start at a medium volume and
increase it gradually. This enables you to
determine whether the system is able to play
the music at high volume without distorting
it. Video AUX mode
Connecting external video sources
G
WARNING
External video sources may have different vol-
umes, which can mean that system messages
such as traffic announcements and navigation
system announcements are much louder. If
necessary, please deactivate the system mes-
sages or adjust their volume manually.
Video AUX is another option for showing vid-
eos using COMAND. To connect an external video source to the
video AUX, you will require a video AUX cable.
i
If you only use an audio AUX cable, you
will only be able to hear the sound from the
video being played.
Videos cannot be shown on the driver's
side while the vehicle is in motion. Switching to AUX video mode
X Connect the external video source.
The socket for the video AUX jack is located
in the stowage compartment in the center
console.
The video AUX is not selected automati-
cally.
X Press the 00FDbutton.
The menu for the last accessed media
source appears.
X To select Media
Media from the main function bar:
turn and press the controller.
You will see the menu.
X Select Aux Aux.
The AUX video menu appears.
X To select Audio/Video Audio/Video in the menu bar:
slide 005200C5 and press the controller.
A Source Type Selection
Source Type Selection menu
appears.
X Select Video Video.
The 003Bdot indicates the current setting.
If the video source is connected and play-
back selected, the image from the external
video source will appear if Video Videois
selected.
Please see the corresponding device operat-
ing instructions for information on how to
operate the external video source.
Information about sound settings
(Y page 200) 190
Video AUX modeMedia