2015 MERCEDES-BENZ B-Class ELECTRIC battery
[x] Cancel search: batteryPage 144 of 338
charge immediately
charge immediately
message. This pro-
tects the battery from exhaustive discharge.
It is not possible to restart the drive system
until after charging.
Do not leave the vehicle parked for longer
than 14 days with a high-voltage battery con-
dition of charge below 20%.
You can check the condition of charge in the charge level display (Y page 184).
Further information on the "Energy flow dis-
play" can be found in the "Trip" menu
(Y page 187).
High and low outside temperatures Low outside temperatures
The efficiency of the high-voltage battery is
significantly reduced at very low outside tem-
peratures. The high-voltage battery is then no longer able to provide the normal electrical
power output.
High outside temperatures
To prevent damage to the high-voltage bat-
tery due to very high outside temperatures,
the maximum power output of the high-volt-
age battery is reduced automatically.
The E-CELL display indicates the maximum
amount of power available (Y page 183).
Energy consumption and range This range is reduced by:
R high and low outside temperatures
R a non-anticipatory driving style
R switching on consumers, e.g. air-condition-
ing system or heating.
The battery's physical characteristics are
such that leaving the vehicle parked for an
extended period at low outdoor temperatures
without charging it can lead to:
R a reduction in battery performance
R longer charge times
In extreme cases, this could mean that the
vehicle cannot be started. For this reason,
connect the charging cable when leaving the vehicle parked for long periods at low outdoor
temperatures.
As a result of its basic characteristics, the
amount of energy available from the high-
voltage battery decreases over the course of its life.
This reduces:
R the maximum range that can be achieved
by the vehicle
R the maximum output (acceleration) of the
vehicle
You can actively reduce the energy consump- tion of your vehicle in a number of ways, for
example, by:
R an anticipatory driving style
R reducing the use of electrical consumers
R having the vehicle regularly maintained
The charging time of the high-voltage battery may change over the course of its life.
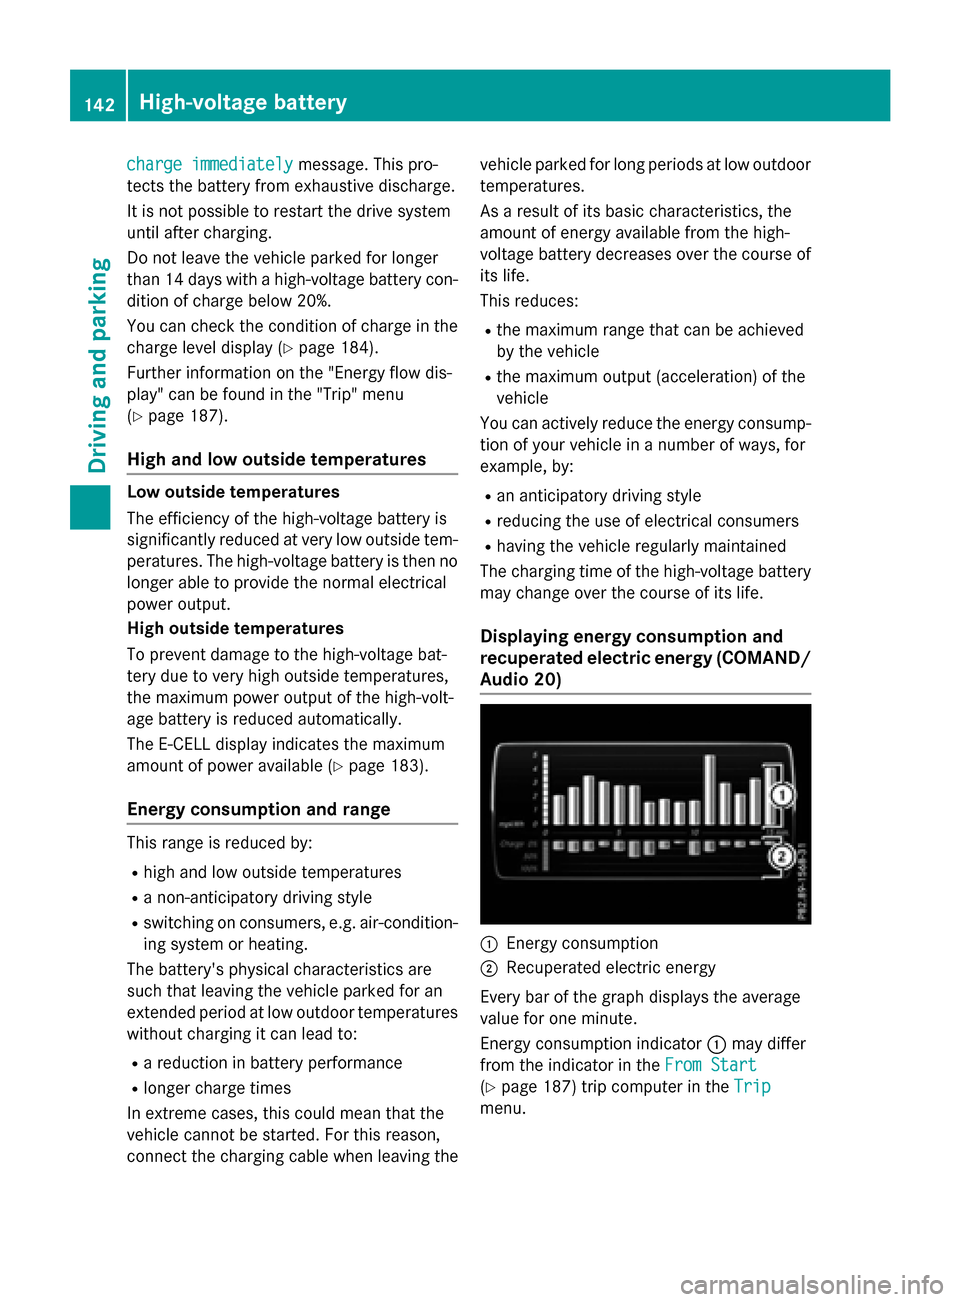
Displaying energy consumption and
recuperated electric energy (COMAND/ Audio 20) :
Energy consumption
; Recuperated electric energy
Every bar of the graph displays the average
value for one minute.
Energy consumption indicator :may differ
from the indicator in the From Start From Start
(Y page 187) trip computer in the Trip
Trip
menu. 142
High-voltage batteryDriving and parking
Page 146 of 338
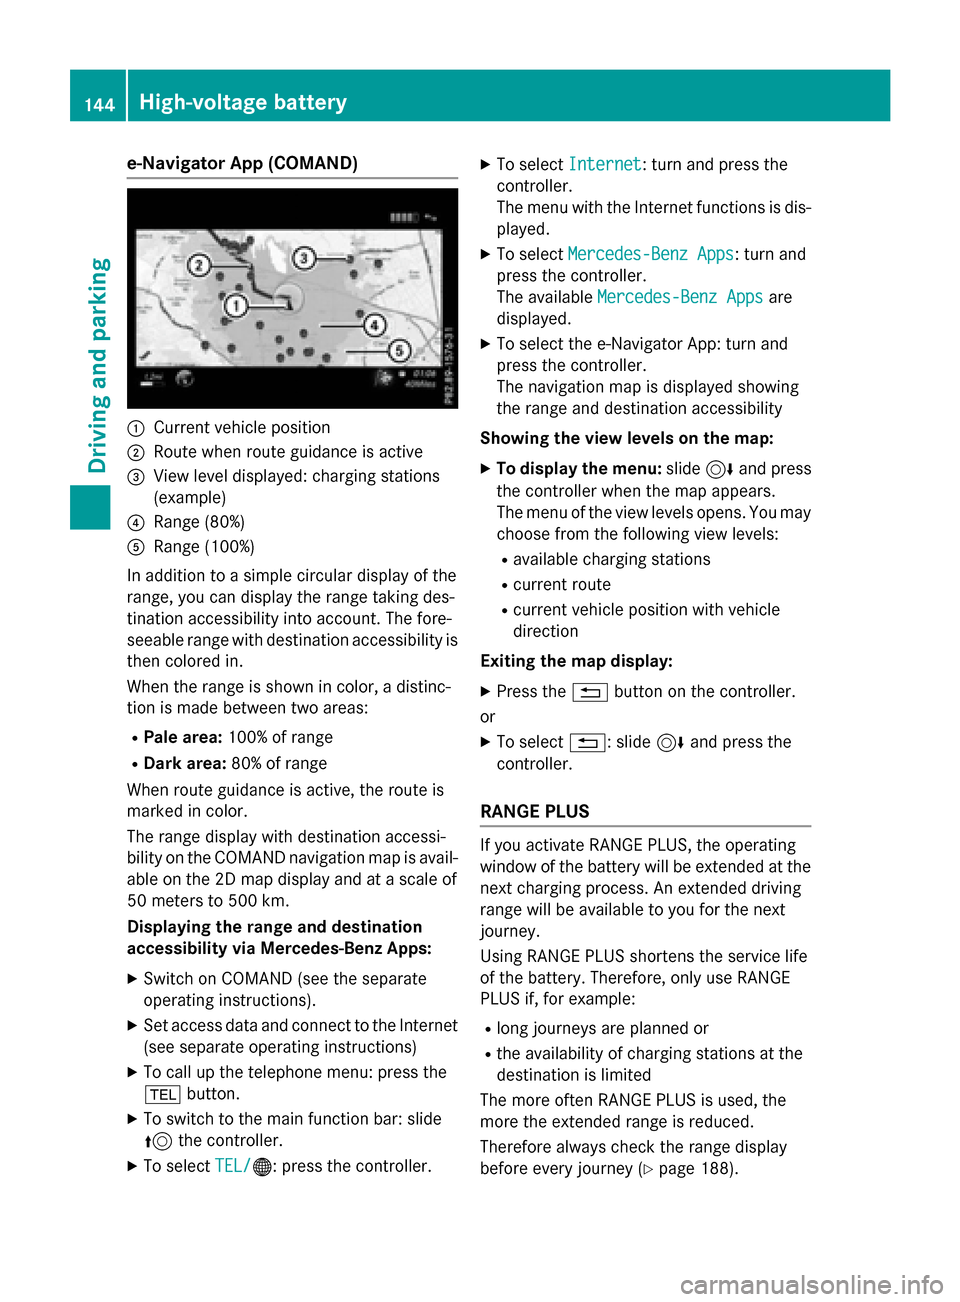
e-Navigator App (COMAND)
:
Current vehicle position
; Route when route guidance is active
= View level displayed: charging stations
(example)
? Range (80%)
A Range (100%)
In addition to a simple circular display of the
range, you can display the range taking des-
tination accessibility into account. The fore-
seeable range with destination accessibility is
then colored in.
When the range is shown in color, a distinc-
tion is made between two areas:
R Pale area: 100% of range
R Dark area: 80% of range
When route guidance is active, the route is
marked in color.
The range display with destination accessi-
bility on the COMAND navigation map is avail-
able on the 2D map display and at a scale of
50 meters to 500 km.
Displaying the range and destination
accessibility via Mercedes-Benz Apps:
X Switch on COMAND (see the separate
operating instructions).
X Set access data and connect to the Internet
(see separate operating instructions)
X To call up the telephone menu: press the
% button.
X To switch to the main function bar: slide
5 the controller.
X To select TEL/ TEL/®: press the controller. X
To select Internet Internet: turn and press the
controller.
The menu with the Internet functions is dis-
played.
X To select Mercedes-Benz Apps Mercedes-Benz Apps: turn and
press the controller.
The available Mercedes-Benz Apps Mercedes-Benz Apps are
displayed.
X To select the e-Navigator App: turn and
press the controller.
The navigation map is displayed showing
the range and destination accessibility
Showing the view levels on the map: X To display the menu: slide6and press
the controller when the map appears.
The menu of the view levels opens. You may
choose from the following view levels:
R available charging stations
R current route
R current vehicle position with vehicle
direction
Exiting the map display: X Press the %button on the controller.
or
X To select %: slide 6and press the
controller.
RANGE PLUS If you activate RANGE PLUS, the operating
window of the battery will be extended at the
next charging process. An extended driving
range will be available to you for the next
journey.
Using RANGE PLUS shortens the service life
of the battery. Therefore, only use RANGE
PLUS if, for example:
R long journeys are planned or
R the availability of charging stations at the
destination is limited
The more often RANGE PLUS is used, the
more the extended range is reduced.
Therefore always check the range display
before every journey (Y page 188).144
High-voltage batteryDriving an
d parking
Page 147 of 338
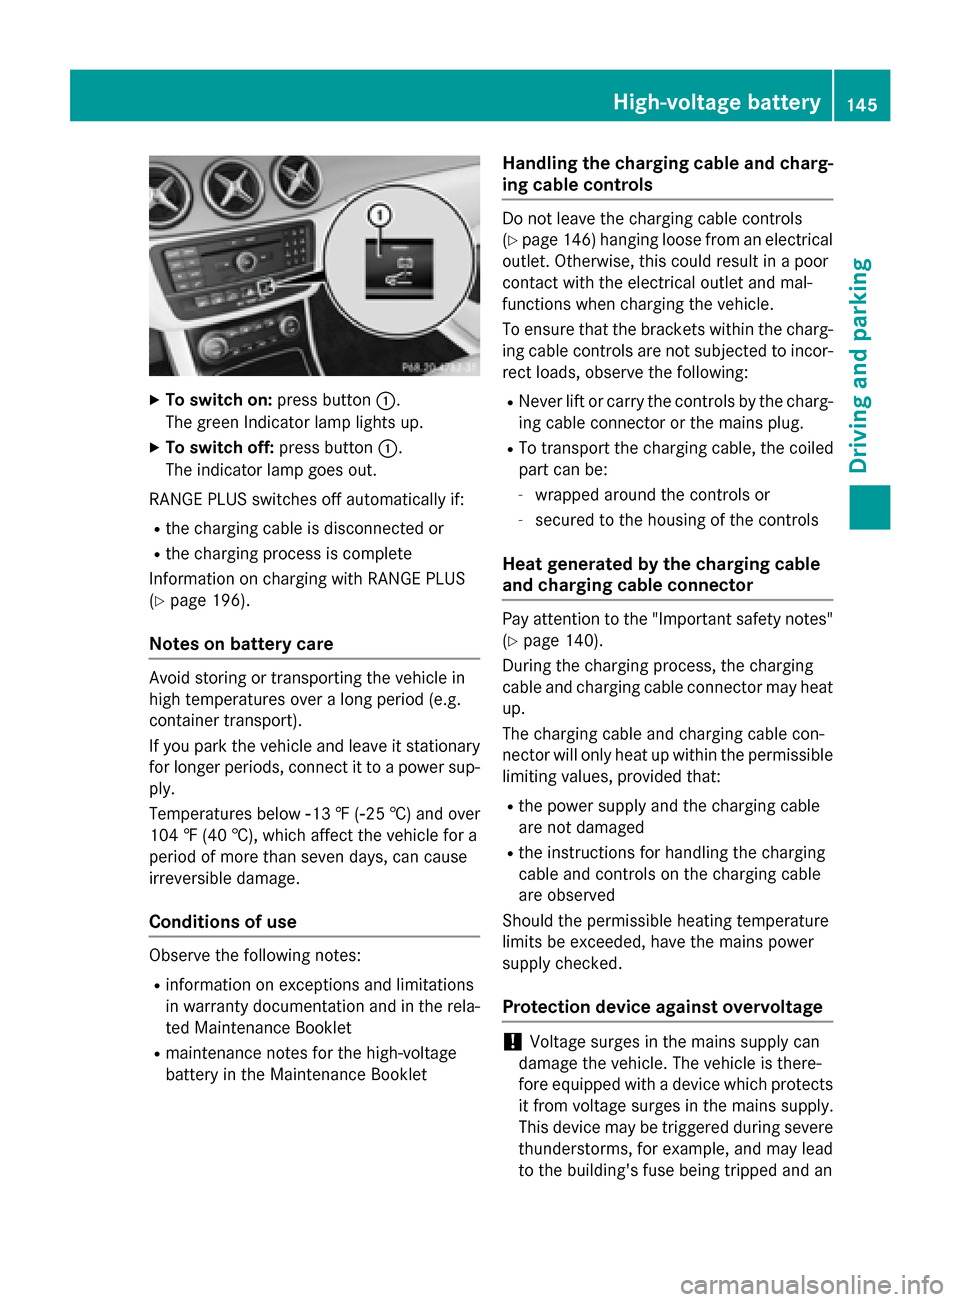
X
To switch on: press button:.
The green Indicator lamp lights up.
X To switch off: press button:.
The indicator lamp goes out.
RANGE PLUS switches off automatically if: R the charging cable is disconnected or
R the charging process is complete
Information on charging with RANGE PLUS
(Y page 196).
Notes on battery care Avoid storing or transporting the vehicle in
high temperatures over a long period (e.g.
container transport).
If you park the vehicle and leave it stationary
for longer periods, connect it to a power sup-
ply.
Temperatures below Ò13‡(Ò25 †) and over
104 ‡ (40 †), which affect the vehicle for a
period of more than seven days, can cause
irreversible damage.
Conditions of use Observe the following notes:
R information on exceptions and limitations
in warranty documentation and in the rela-
ted Maintenance Booklet
R maintenance notes for the high-voltage
battery in the Maintenance Booklet Handling the charging cable and charg-
ing cable controls Do not leave the charging cable controls
(Y page 146) hanging loose from an electrical
outlet. Otherwise, this could result in a poor
contact with the electrical outlet and mal-
functions when charging the vehicle.
To ensure that the brackets within the charg- ing cable controls are not subjected to incor-
rect loads, observe the following:
R Never lift or carry the controls by the charg-
ing cable connector or the mains plug.
R To transport the charging cable, the coiled
part can be:
- wrapped around the controls or
- secured to the housing of the controls
Heat generated by the charging cable
and charging cable connector Pay attention to the "Important safety notes"
(Y page 140).
During the charging process, the charging
cable and charging cable connector may heat
up.
The charging cable and charging cable con-
nector will only heat up within the permissible
limiting values, provided that:
R the power supply and the charging cable
are not damaged
R the instructions for handling the charging
cable and controls on the charging cable
are observed
Should the permissible heating temperature
limits be exceeded, have the mains power
supply checked.
Protection device against overvoltage !
Voltage surges in the mains supply can
damage the vehicle. The vehicle is there-
fore equipped with a device which protects
it from voltage surges in the mains supply.
This device may be triggered during severe
thunderstorms, for example, and may lead
to the building's fuse being tripped and an High-voltage battery
145Driving and parking Z
Page 148 of 338
interruption in the power supply. These
functions protect the vehicle. After the
building fuse is switched on again, the
charging process resumes automatically.
Following an interruption in the power sup- ply without tripping of the building's fuse, it
may take up to 15 minutes for charging to
resume automatically.
Switch on the building's fuse again after the
protection device against overvoltage has
been triggered. Otherwise, the charging proc-
ess cannot be continued. The high-voltage
battery will not be charged and you may not
be able to drive the vehicle.
If other devices are protected by the same
protective device, these are switched off as
well when the protective device is triggered.
Ensure that these other devices are still
operational after reactivating the protection
device. Charging the high-voltage battery via
the electrical outlet
Charging cable Important safety notes
! Only use the charging cable to charge the
high-voltage battery. Do not use the charg-
ing cable for other purposes. It may other-
wise be damaged.
The vehicle is supplied with a single-phase
12 A charging cable. Only use the charging
cable included with the vehicle, which has
been approved for vehicle use.
Pay attention to the "Important safety notes"
(Y page 140).
If you use the supplied 12 Acharging cable to
charge a high-voltage battery:
R the charge time increases considerably
R electrical consumption increases consider-
ably
Where possible, charge the high-voltage bat-
tery at a charging station (Y page 149). Onlythen can certified electrical energy consump-
tion levels be reached.
i The charging process can vary depending
on the charging station. Therefore, always
observe the local information.
Stowing the charging cable
The charging cable can be stowed in a bag in the trunk of the vehicle. To do so, the bag
must be secured to the cargo tie-down rings
using the retaining strap provided.
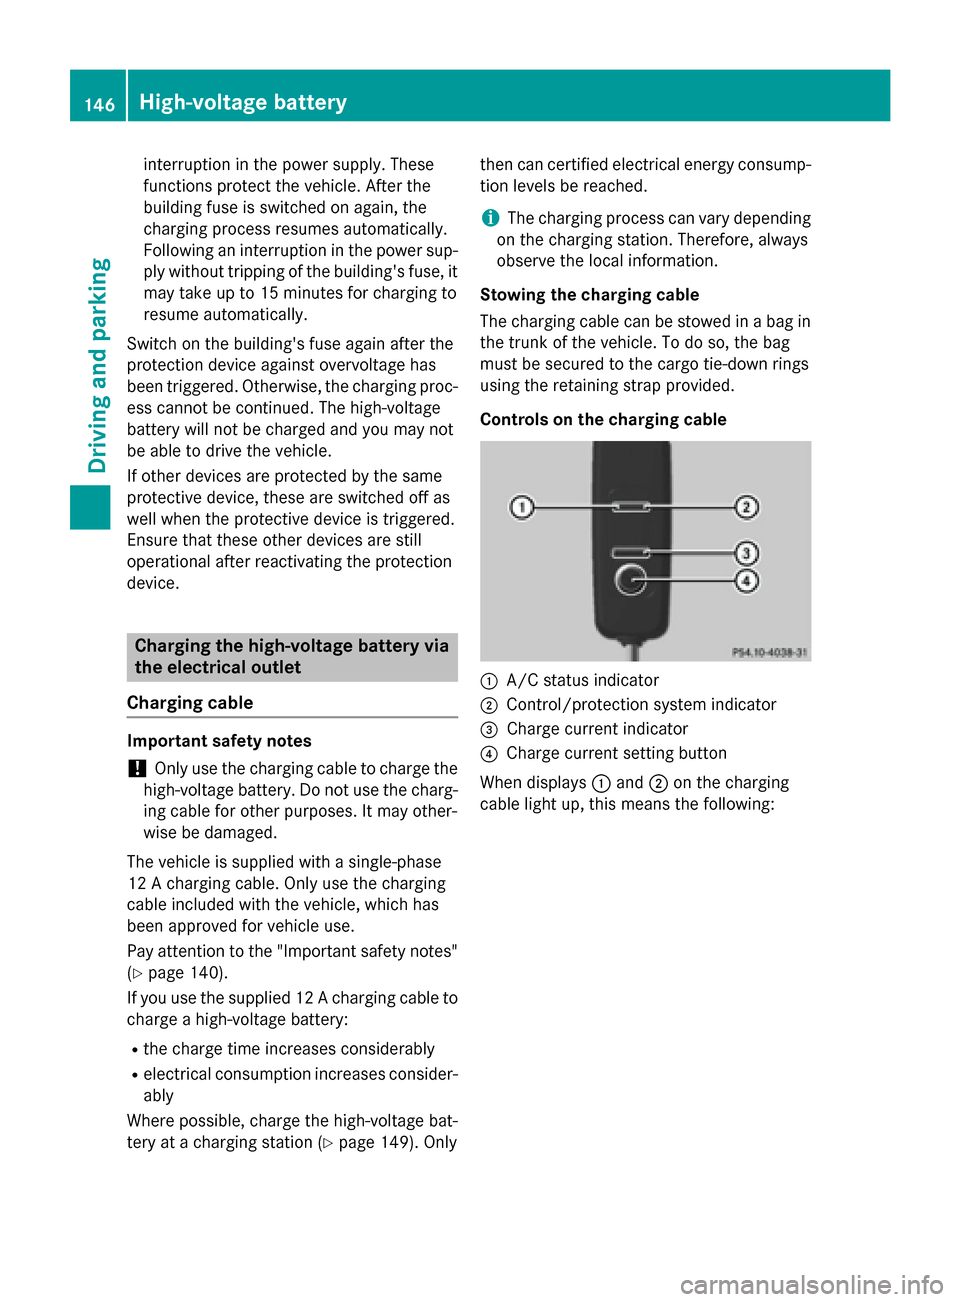
Controls on the charging cable :
A/C status indicator
; Control/protection system indicator
= Charge current indicator
? Charge current setting button
When displays :and ;on the charging
cable light up, this means the following: 146
High-voltage batteryDriving and parking
Page 149 of 338
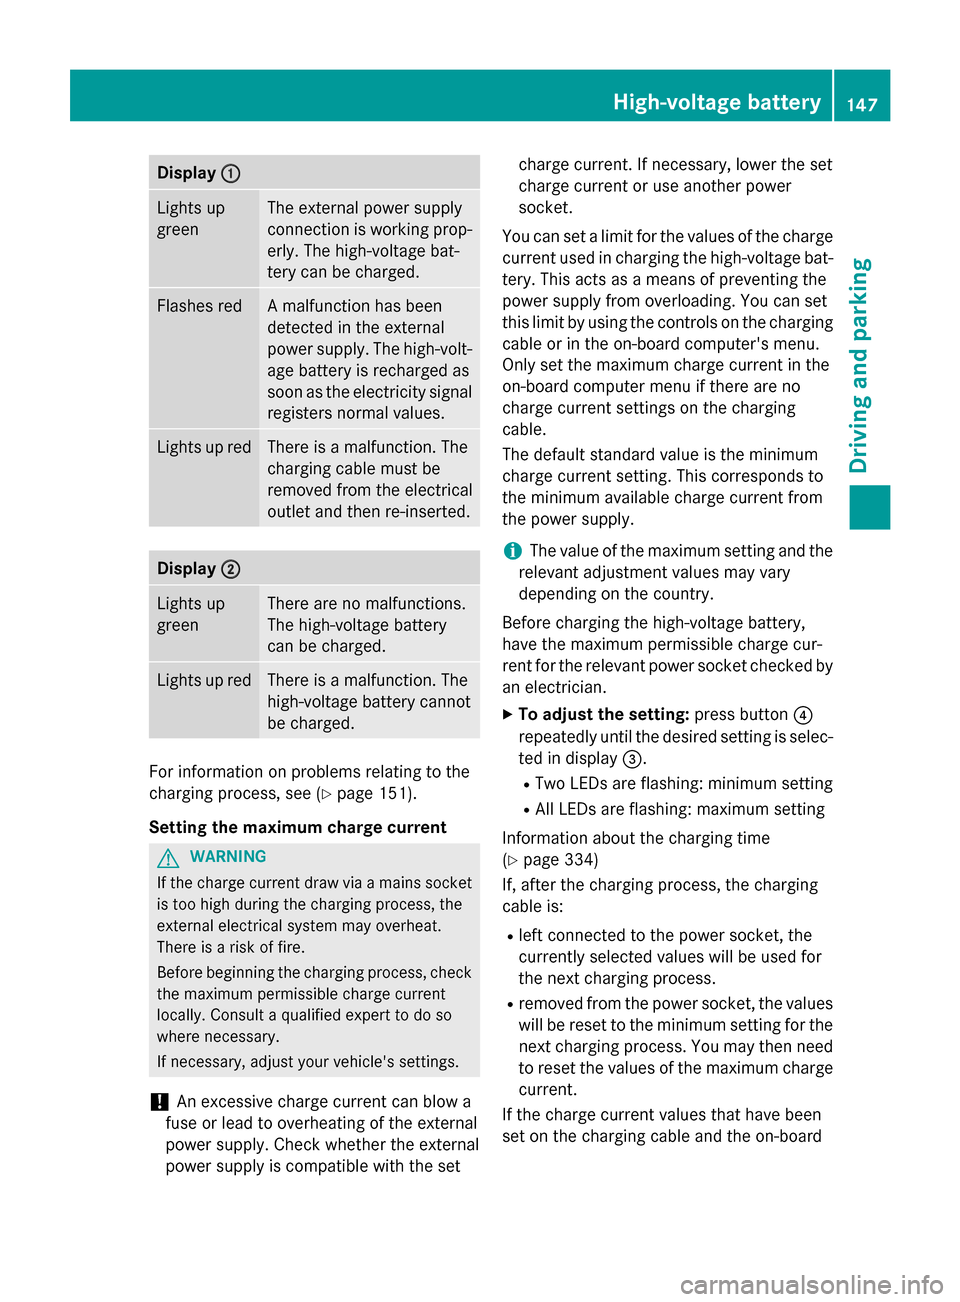
Display
:
: Lights up
green The external power supply
connection is working prop-
erly. The high-voltage bat-
tery can be charged. Flashes red A malfunction has been
detected in the external
power supply. The high-volt-
age battery is recharged as
soon as the electricity signal
registers normal values. Lights up red There is a malfunction. The
charging cable must be
removed from the electrical
outlet and then re-inserted.
Display
; ; Lights up
green There are no malfunctions.
The high-voltage battery
can be charged.
Lights up red There is a malfunction. The
high-voltage battery cannot
be charged. For information on problems relating to the
charging process, see (Y
page 151).
Setting the maximum charge current G
WARNING
If the charge current draw via a mains socket is too high during the charging process, the
external electrical system may overheat.
There is a risk of fire.
Before beginning the charging process, check the maximum permissible charge current
locally. Consult a qualified expert to do so
where necessary.
If necessary, adjust your vehicle's settings.
! An excessive charge current can blow a
fuse or lead to overheating of the external
power supply. Check whether the external
power supply is compatible with the set charge current. If necessary, lower the set
charge current or use another power
socket.
You can set a limit for the values of the charge current used in charging the high-voltage bat-
tery. This acts as a means of preventing the
power supply from overloading. You can set
this limit by using the controls on the charging
cable or in the on-board computer's menu.
Only set the maximum charge current in the
on-board computer menu if there are no
charge current settings on the charging
cable.
The default standard value is the minimum
charge current setting. This corresponds to
the minimum available charge current from
the power supply.
i The value of the maximum setting and the
relevant adjustment values may vary
depending on the country.
Before charging the high-voltage battery,
have the maximum permissible charge cur-
rent for the relevant power socket checked by
an electrician.
X To adjust the setting: press button?
repeatedly until the desired setting is selec- ted in display =.
R Two LEDs are flashing: minimum setting
R All LEDs are flashing: maximum setting
Information about the charging time
(Y page 334)
If, after the charging process, the charging
cable is:
R left connected to the power socket, the
currently selected values will be used for
the next charging process.
R removed from the power socket, the values
will be reset to the minimum setting for the next charging process. You may then need
to reset the values of the maximum charge current.
If the charge current values that have been
set on the charging cable and the on-board High-voltage batte
ry
147Driving an d parking Z
Page 150 of 338
computer are different, the high-voltage bat-
tery is charged using the lower value.
If the vehicle requires more time than usual to
charge the high-voltage battery, check:
R the settings of the maximum charge cur-
rent on the controls of the charging cable
R the settings of the maximum charge cur-
rent in the menu of the on-board computer
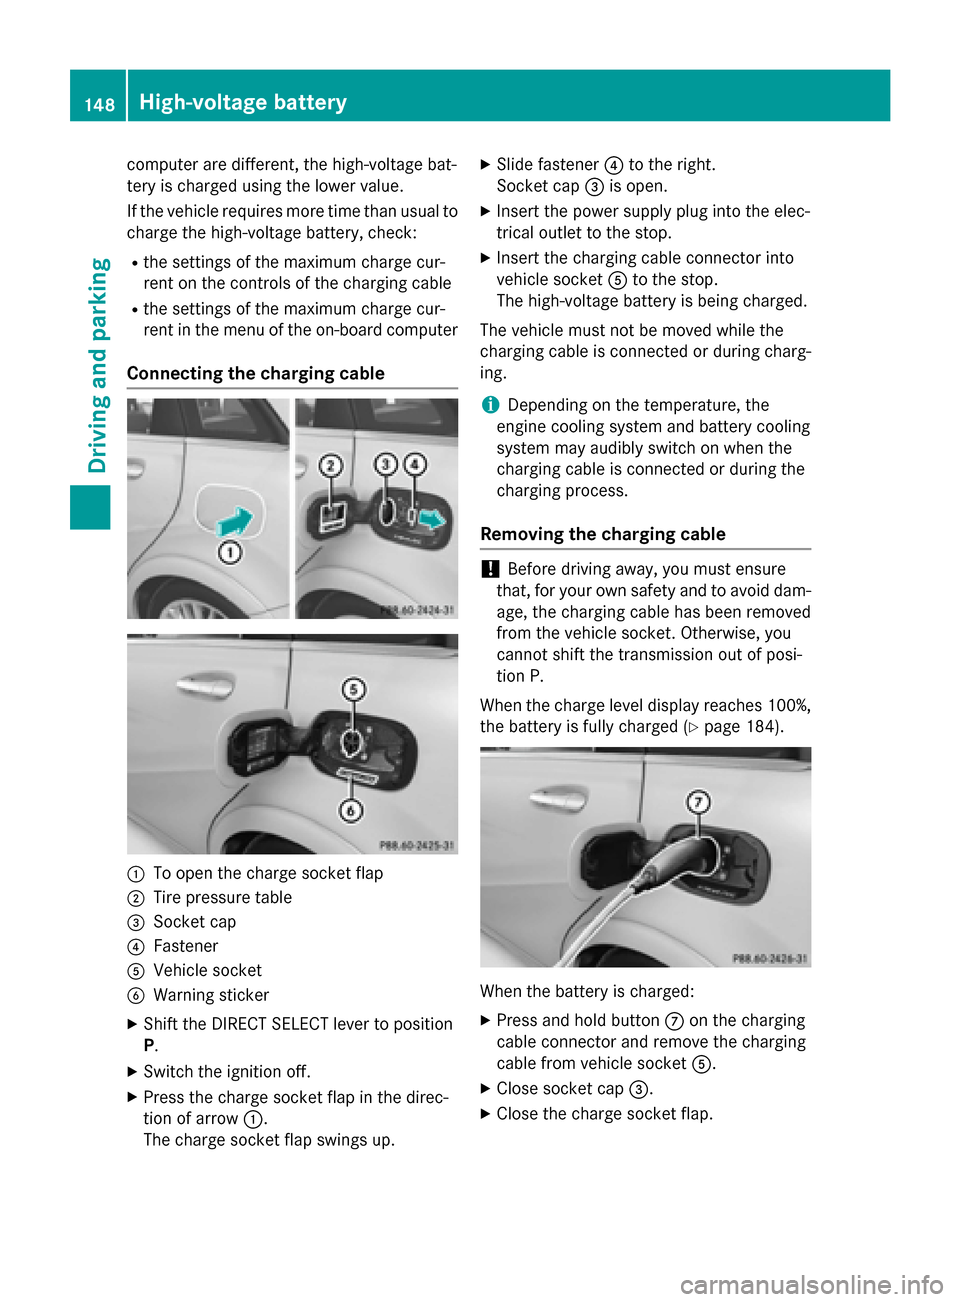
Connecting the charging cable :
To open the charge socket flap
; Tire pressure table
= Socket cap
? Fastener
A Vehicle socket
B Warning sticker
X Shift the DIRECT SELECT lever to position
P.
X Switch the ignition off.
X Press the charge socket flap in the direc-
tion of arrow :.
The charge socket flap swings up. X
Slide fastener ?to the right.
Socket cap =is open.
X Insert the power supply plug into the elec-
trical outlet to the stop.
X Insert the charging cable connector into
vehicle socket Ato the stop.
The high-voltage battery is being charged.
The vehicle must not be moved while the
charging cable is connected or during charg-
ing.
i Depending on the temperature, the
engine cooling system and battery cooling
system may audibly switch on when the
charging cable is connected or during the
charging process.
Removing the charging cable !
Before driving away, you must ensure
that, for your own safety and to avoid dam- age, the charging cable has been removed
from the vehicle socket. Otherwise, you
cannot shift the transmission out of posi-
tion P.
When the charge level display reaches 100%, the battery is fully charged (Y page 184). When the battery is charged:
X Press and hold button Con the charging
cable connector and remove the charging
cable from vehicle socket A.
X Close socket cap =.
X Close the charge socket flap. 148
High-voltage batteryDriving and parking
Page 151 of 338
X
Remove the charging cable from the elec-
trical outlet.
X Stow the charging cable safely in the vehi-
cle (Y page 146). Charging a high-voltage battery at a
charging station/wallbox
General notes Only use charging cables that have been tes-
ted and approved by the manufacturer for
charging the high-voltage battery in an elec-
tric vehicle.
Pay attention to the "Important safety notes"
(Y page 140).
Charging communication at a charging
station The charging station first has to be activated
before you can charge at a charging station.
You can activate the charging station by using
an RFID card or via telephone activation.
Observe the on-site operator instructions for
the charging station.
When the vehicle is connected to the charging station, information and details on technical
parameters are exchanged. It can thus take
up to 30 seconds for the charging process to
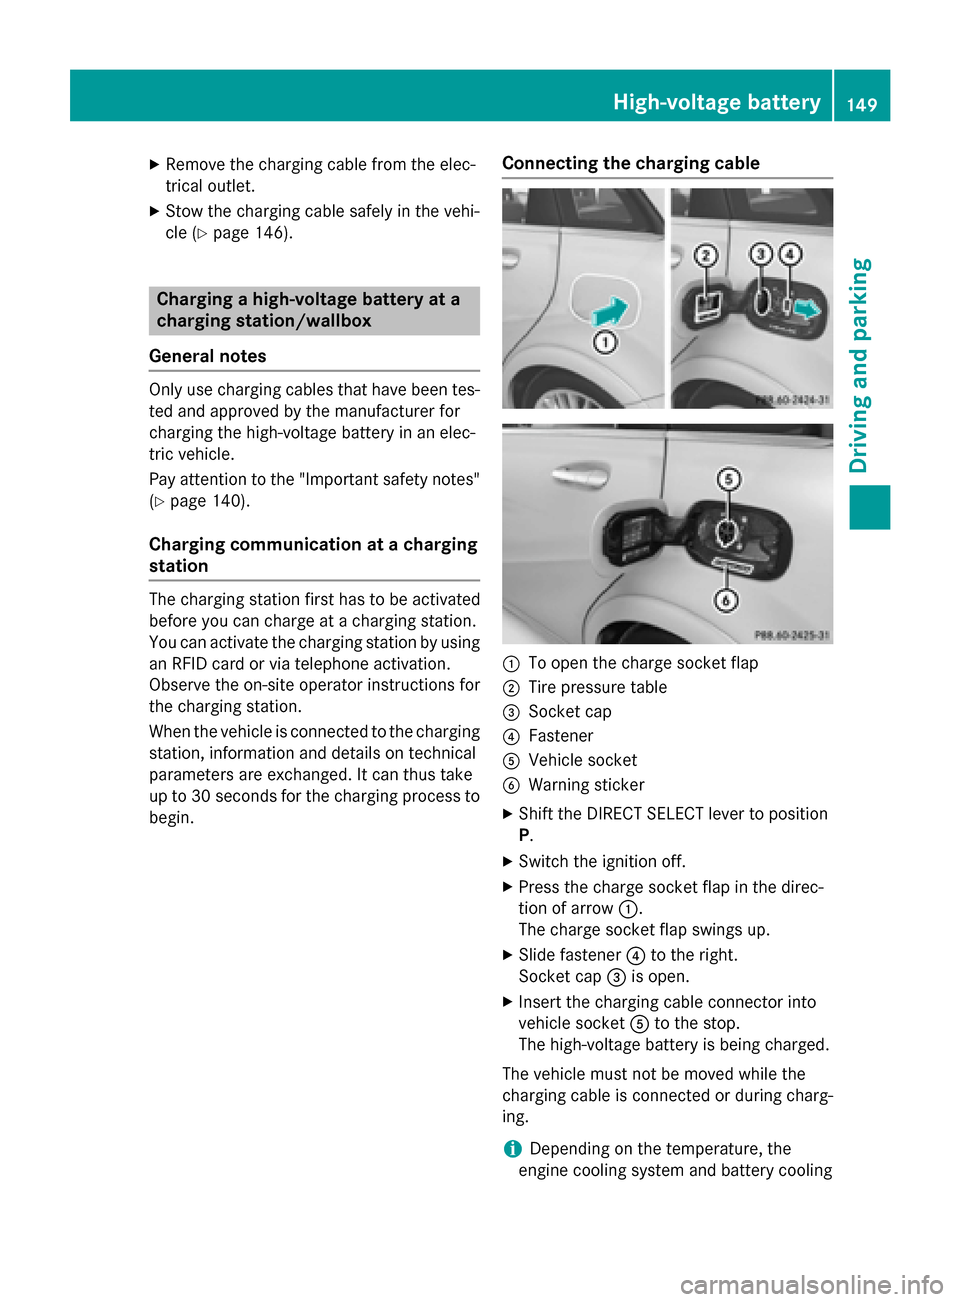
begin. Connecting the charging cable
:
To open the charge socket flap
; Tire pressure table
= Socket cap
? Fastener
A Vehicle socket
B Warning sticker
X Shift the DIRECT SELECT lever to position
P.
X Switch the ignition off.
X Press the charge socket flap in the direc-
tion of arrow :.
The charge socket flap swings up.
X Slide fastener ?to the right.
Socket cap =is open.
X Insert the charging cable connector into
vehicle socket Ato the stop.
The high-voltage battery is being charged.
The vehicle must not be moved while the
charging cable is connected or during charg-
ing.
i Depending on the temperature, the
engine cooling system and battery cooling High-voltage battery
149Driving and parking Z
Page 152 of 338
system may audibly switch on when the
charging cable is connected or during the
charging process.
Removing the charging cable !
Before driving away, you must ensure
that, for your own safety and to avoid dam- age, the charging cable has been removed
from the vehicle socket. Otherwise, you
cannot shift the transmission out of posi-
tion P.
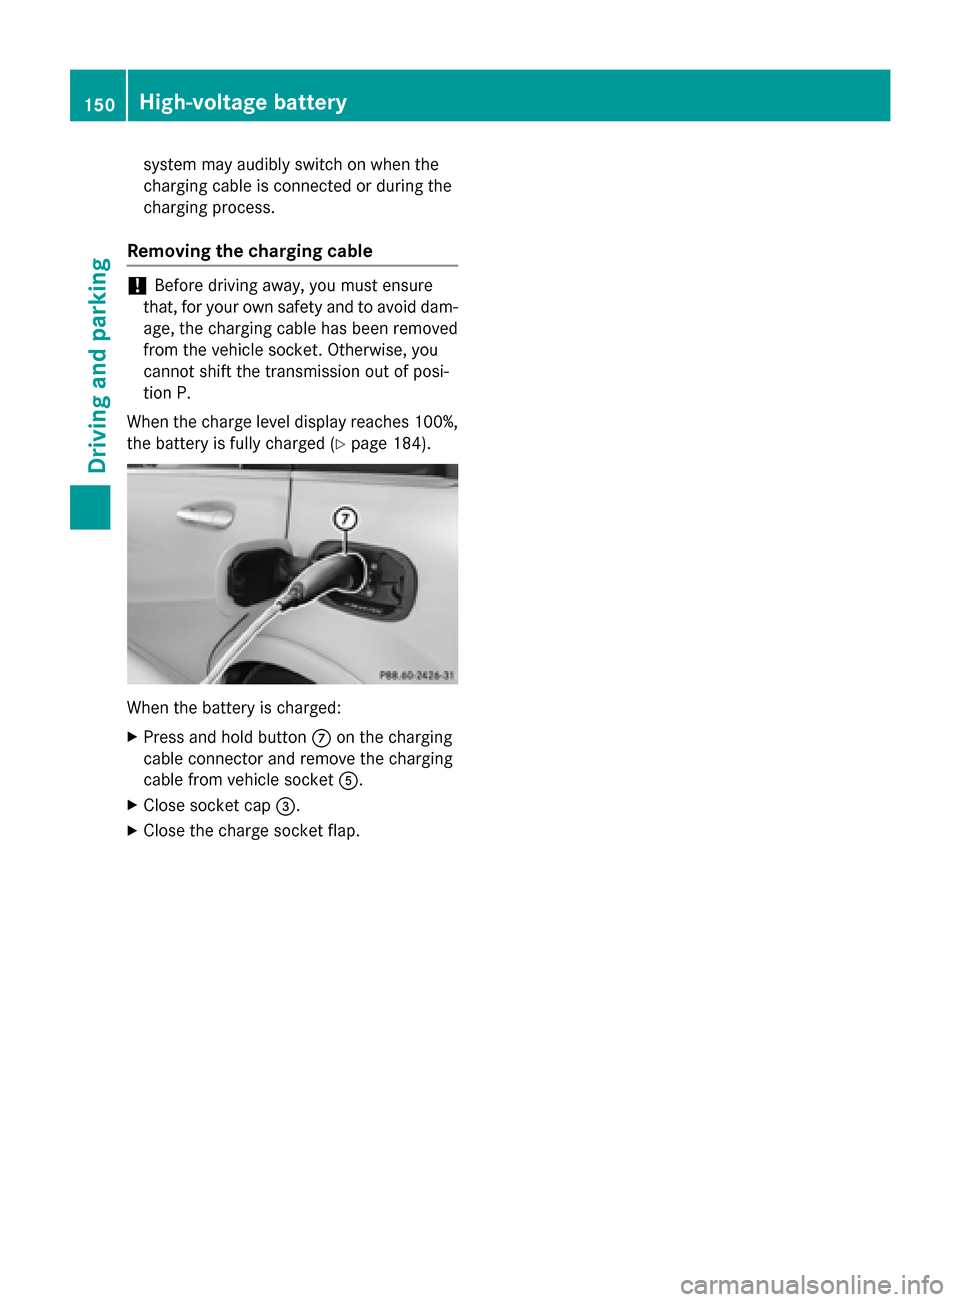
When the charge level display reaches 100%,
the battery is fully charged (Y page 184).When the battery is charged:
X Press and hold button Con the charging
cable connector and remove the charging
cable from vehicle socket A.
X Close socket cap =.
X Close the charge socket flap. 150
High-voltage batteryDriving and parking