Page 173 of 785

Features of your vehicle
80 4
Reprogramming a single HomeLink®
button
To program a device to HomeLink®
using a HomeLink®button previously
trained, follow these steps:
1.Press and hold the desired
HomeLink
®button. DO NOT
release the button.
2.The indicator light will begin to flash
after 20 seconds. Without releasing
the HomeLink
®button, proceed
with "Programming" step 2.
For questions or comments, contact
HomeLink
®at www.homelink.comor
1-800-355-3515.Erasing HomeLink
®buttons
Individual buttons cannot be erased.
However, to erase all three pro-
grammed buttons:
1. Press and hold the two outer
HomeLink
®buttons until the indi-
cator light begins to flash after 10
seconds.
2. Release both buttons. Do not hold
for longer than 20 seconds.
The Integrated HomeLink
®Wireless
Control System is now in the training
(learn) mode and can be pro-
grammed at any time following the
appropriate steps in the
Programming sections above.FCC ID: NZLTLMHL4
IC: 4112A-TLMHL4
This device complies with Industry
Canada Standard RSS-210.
Operation is subject to the following
two conditions:
1. This device may not cause harm-
ful interference, and
2. This device must accept any inter-
ference received, including inter-
ference that may cause undesired
operation.
CAUTION
The transceiver has been tested
and complies with FCC and
Industry Canada rules. Changes
or modifications not expressly
approved by the party responsi-
ble for compliance could void
the user's authority to operate
the device.
Page 178 of 785
485
Features of your vehicle
Instrument Cluster Control
Adjusting Instrument Cluster
Illumination
The brightness of the instrument
panel illumination is changed by
moving the illumination control knob
right or left when the ignition switch
or Engine Start/Stop button is ON, or
the tale lights are turned on.• The brightness has 20 levels : 1
(MIN) ~ 20 (MAX)
• If you hold the illumination control
knob on the right end (+) or left end
(-), the brightness will be changed
continuously.
• If the brightness reaches to the
maximum or minimum level, an
alarm will sound.
LCD Display Control
The LCD display modes can be
changed by using the control buttons
on the steering wheel.
(1) : MODE button for changing
modes
(2) : MOVE button for changing
items
(3) : SELECT/RESET button for
setting or resetting the
selected item
❈For the LCD modes, refer to “LCD
Display” in this chapter.
ODM042224
ODM042056ODMEDI2001/ODMEDI2029 ■Type A
■Type B
Page 232 of 785
4139
Features of your vehicle
MANUAL CLIMATE CONTROL SYSTEM (IF EQUIPPED)
ODM042273
1. MAX A/C (Max air conditioning)
button
2. A/C (Air conditioning) button
3. Mode selection buttons
4. Fan speed control knob
5. Rear window defroster button
6. Front windshield defrost button
7. Temperature control switch
8. Air intake control button
Page 243 of 785

Features of your vehicle
150 4
✽NOTICE
Never place anything over the sen-
sor located on the instrument panel
to ensure better control of the heat-
ing and cooling system.
Manual heating and air condi-
tioning
The heating and cooling system can
be controlled manually by pressing
buttons or turning knob(s) other than
the AUTO button. In this case, the
system works sequentially according
to the order of buttons or knob(s)
selected.
1. Start the engine.
2. Set the mode to the desired posi-
tion.
For improving the effectiveness of
heating and cooling;
- Heating:
- Cooling:
3. Set the temperature control to the
desired position.
4. Set the air intake control to the
outside (fresh) air position.
5. Set the fan speed control to the
desired speed.
6. If air conditioning is desired, turn
the air conditioning system on.
Press the AUTO button in order to
convert to full automatic control of
the system.
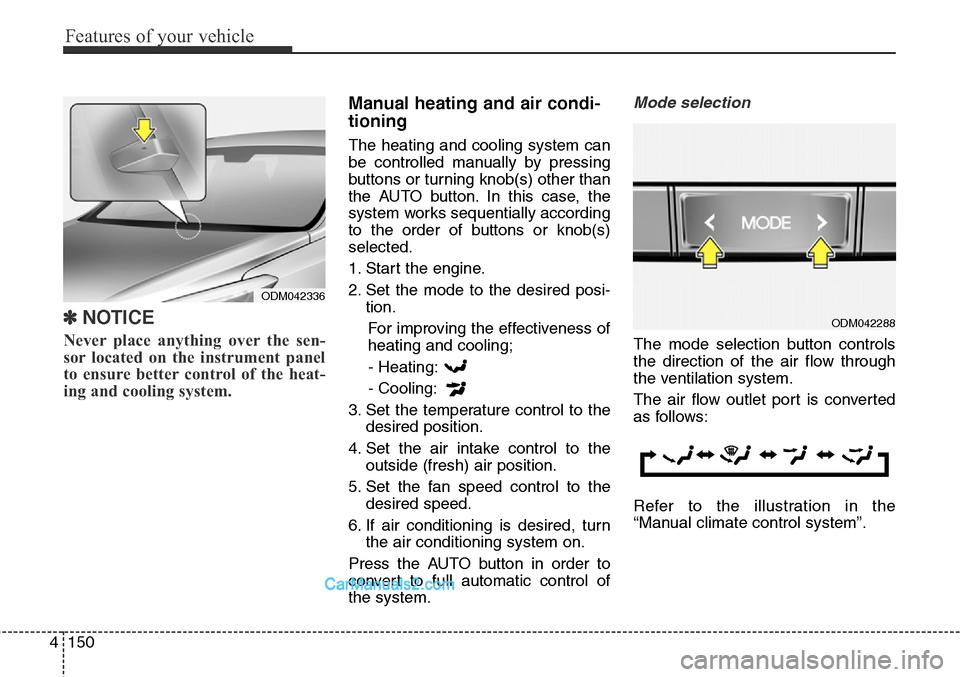
Mode selection
The mode selection button controls
the direction of the air flow through
the ventilation system.
The air flow outlet port is converted
as follows:
Refer to the illustration in the
“Manual climate control system”.
ODM042336
ODM042288
Page 248 of 785
4155
Features of your vehicle
OFF mode
Push the OFF button to turn off the
air climate control system. However,
you can still operate the mode and
air intake buttons as long as the igni-
tion switch is in the ON position.
Climate information screen selec-
tion (if equipped)
Press the climate information screen
selection button to display climate
information on the screen.
ODM042295ODM042297
Page 266 of 785

4173
Features of your vehicle
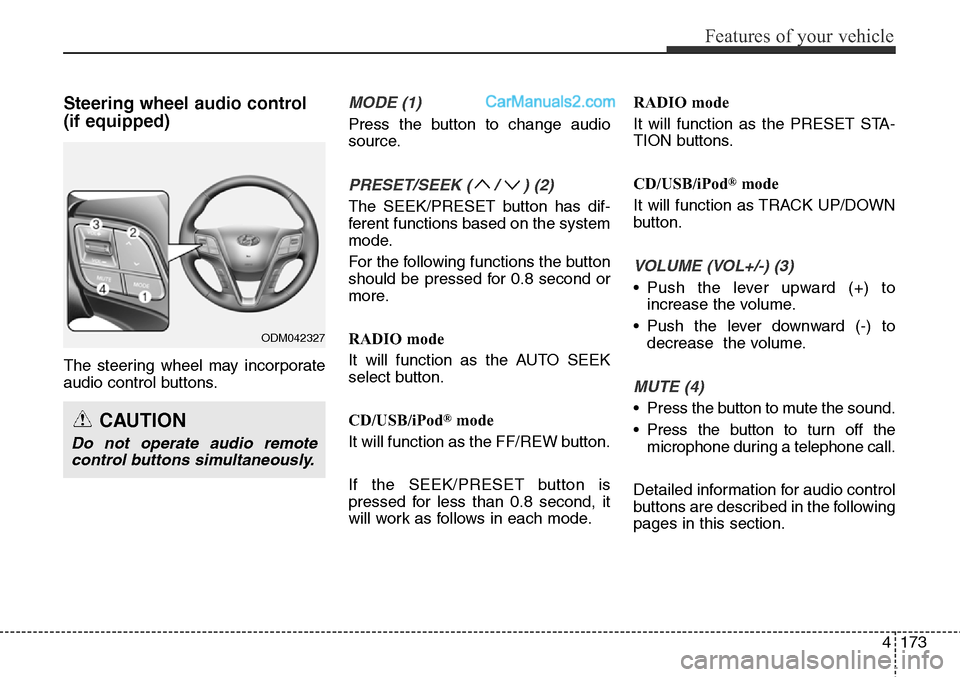
Steering wheel audio control
(if equipped)
The steering wheel may incorporate
audio control buttons.
MODE (1)
Press the button to change audio
source.
PRESET/SEEK ( / ) (2)
The SEEK/PRESET button has dif-
ferent functions based on the system
mode.
For the following functions the button
should be pressed for 0.8 second or
more.
RADIO mode
It will function as the AUTO SEEK
select button.
CD/USB/iPod
®mode
It will function as the FF/REW button.
If the SEEK/PRESET button is
pressed for less than 0.8 second, it
will work as follows in each mode.RADIO mode
It will function as the PRESET STA-
TION buttons.
CD/USB/iPod
®mode
It will function as TRACK UP/DOWN
button.
VOLUME (VOL+/-) (3)
• Push the lever upward (+) to
increase the volume.
• Push the lever downward (-) to
decrease the volume.
MUTE (4)
• Press the button to mute the sound.
• Press the button to turn off the
microphone during a telephone call.
Detailed information for audio control
buttons are described in the following
pages in this section.CAUTION
Do not operate audio remote
control buttons simultaneously.
ODM042327
Page 353 of 785
Features of your vehicle
260 4
RADIO MODE
Basic Mode Screen
1. Mode Display
Displays currently operating mode.
2. Frequency
Displays the current frequency.
3. Preset
Displays current preset number [1] ~
[6].
4. Preset Display
Displays preset buttons.
5. Info
Displays broadcast information.
6. HD
Changes HD Radio channels.
7. A.store
Automatically saves frequencies with
superior reception to Preset buttons.
Page 354 of 785
4261
Features of your vehicle
HD RADIO MODE
(for HD RADIOTMequipped model)
Basic Mode Screen
1. Mode Display
Displays currently operating mode.
2. HD Channel
Displays information for the currently
playing HD Radio broadcast.
3. Song Information
Displays the album, artist, and title
information.
4. Frequency
Displays the current frequency.
5. HD Radio Broadcast Station
Displays the HD Radio broadcast
station name.
6. Preset
Displays currently playing preset
number [1] ~ [6].
7. Preset Display
Displays saved presets.8. Info
Displays broadcast information.
9. HD
Changes HD Radio channels.
10. A.Store
Automatically saves frequencies with
superior reception to Preset buttons.