2015 FORD E SERIES automatic
[x] Cancel search: automaticPage 103 of 360
RUNNING OUT OF FUEL
Avoid running out of fuel because this situation may have an adverse
effect on powertrain components.
If you have run out of fuel:
•You may need to cycle the ignition from off to on several times after
refueling to allow the fuel system to pump the fuel from the tank to
the engine. On restarting, crank time will be a few seconds longer
than normal. With keyless ignition, just start the engine. Crank time
will be longer than usual.
•Normally, adding 1 gallon (3.8 liters) of fuel is enough to restart the
engine. If the vehicle is out of fuel and on a steep grade, more than
1 gallon (3.8 liters) may be required.
•The service engine soon indicator may come on. For more information
on the service engine soon indicator, seeWarning Lamps and
Indicatorsin theInstrument Clusterchapter.
REFUELING
WARNING:Fuel vapor burns violently and a fuel fire can cause
severe injuries. To help avoid injuries to you and others:
•Read and follow all the instructions on the pump island.
•Turn off your engine when you are refueling.
•Do not smoke if you are near fuel or refueling your vehicle.
•Keep sparks, flames and smoking materials away from fuel.
•Stay outside your vehicle and do not leave the fuel pump unattended
when refueling your vehicle - this is against the law in some places.
•Keep children away from the fuel pump; never let children pump
fuel.
•Do not use personal electronic devices while refueling.
WARNING:Stop refueling after the fuel pump nozzle
automatically shuts off for the second time. Failure to follow this
will fill the expansion space in the fuel tank and could lead to fuel
overflowing.
Note:Wait at least 10 seconds before removing the fuel pump nozzle to
allow any residual fuel to drain into the fuel tank.
102Fuel and Refueling
2015 Econoline(eco)
Owners Guide gf, 1st Printing, June 2014
USA(fus)
Page 105 of 360

FUEL CONSUMPTION
Filling the Tank
The advertised capacity is the indicated capacity and the empty reserve
combined. Indicated capacity is the difference in the amount of fuel in a
full tank and a tank when the fuel gauge indicates empty. Empty reserve
is the amount of fuel in the tank after the fuel gauge indicates empty.
Note:The amount of usable fuel in the empty reserve varies and should
not be relied upon to increase driving range. When refueling your vehicle
after the fuel gauge indicates empty, you might not be able to refuel the
full amount of the advertised capacity of the fuel tank due to the empty
reserve still present in the tank.
For consistent results when filling the fuel tank:
•Turn the ignition off before fueling; an inaccurate reading results if the
engine is left running.
•Use the same fill rate (low–medium–high) each time the tank is filled.
•Allow no more than two automatic click–offs when filling.
Results are most accurate when the filling method is consistent.
Calculating Fuel Economy
Do not measure fuel economy during the first 1000 miles
(1600 kilometers) of driving (this is your engine’s break-in period); a
more accurate measurement is obtained after 2000 miles–3000 miles
(3200 kilometers–4800 kilometers). Also, fuel expense, frequency of
fill-ups or fuel gauge readings are not accurate ways to measure fuel
economy.
1. Fill the fuel tank completely and record the initial odometer reading.
2. Each time you fill the tank, record the amount of fuel added.
3. After at least three to five tank fill-ups, fill the fuel tank and record
the current odometer reading.
4. Subtract your initial odometer reading from the current odometer
reading.
5. Calculate fuel economy as follows:
Standard: Divide miles traveled by gallons used.
Metric: Multiply liters used by 100, then divide by kilometers traveled.
Keep a record for at least one month and record the type of driving (city
or highway). This provides an accurate estimate of the vehicle’s fuel
104Fuel and Refueling
2015 Econoline(eco)
Owners Guide gf, 1st Printing, June 2014
USA(fus)
Page 109 of 360

AUTOMATIC TRANSMISSION OPERATION
Understanding the Shift Positions of the 5–Speed Automatic
Transmission
WARNING:Always set the parking brake fully and make sure
the gearshift is latched in P (Park). Turn the ignition to the lock
position and remove the key whenever you leave your vehicle.
WARNING:Do not use the tow/haul feature when driving in icy
or slippery conditions as the increased engine braking can cause
the rear wheels to slide and the vehicle to swing around with the
possible loss of vehicle control.
Your vehicle has been designed to improve fuel economy by reducing
fuel usage during coasting or deceleration. When you take your foot off
the accelerator pedal and the vehicle begins to slow down the torque
converter clutch locks up and aggressively shuts off fuel flow to the
engine while decelerating. This fuel economy benefit may be perceived
as a light to medium braking sensation when removing your foot from
the accelerator pedal.
P (Park)
This position locks the transmission and prevents the rear wheels from
turning.
To put your vehicle in gear:
1. Start the engine
2. Press the brake pedal
3. Move the gearshift lever into the desired gear
To put your vehicle in P (Park):
1. Come to a complete stop.
2. Move the gearshift lever and securely latch it in P (Park).
R (Reverse)
With the gearshift lever in R (Reverse), your vehicle will move backward.
Always come to a complete stop before shifting into and out of R
(Reverse).
108Transmission
2015 Econoline(eco)
Owners Guide gf, 1st Printing, June 2014
USA(fus)
Page 110 of 360
N (Neutral)
With the gearshift lever in N (Neutral), your vehicle can be started and
is free to roll. Hold the brake pedal down while in this position.
D (Drive with Overdrive) with Tow/Haul off
D (Overdrive) with tow/haul off is the normal driving position for the
best fuel economy. The overdrive function allows automatic upshifts and
downshifts through gears one through five.
D (Drive with Overdrive) with Tow/Haul on
The tow/haul feature improves transmission operation when towing a
trailer or a heavy load. All transmission gear ranges are available when
using tow/haul.
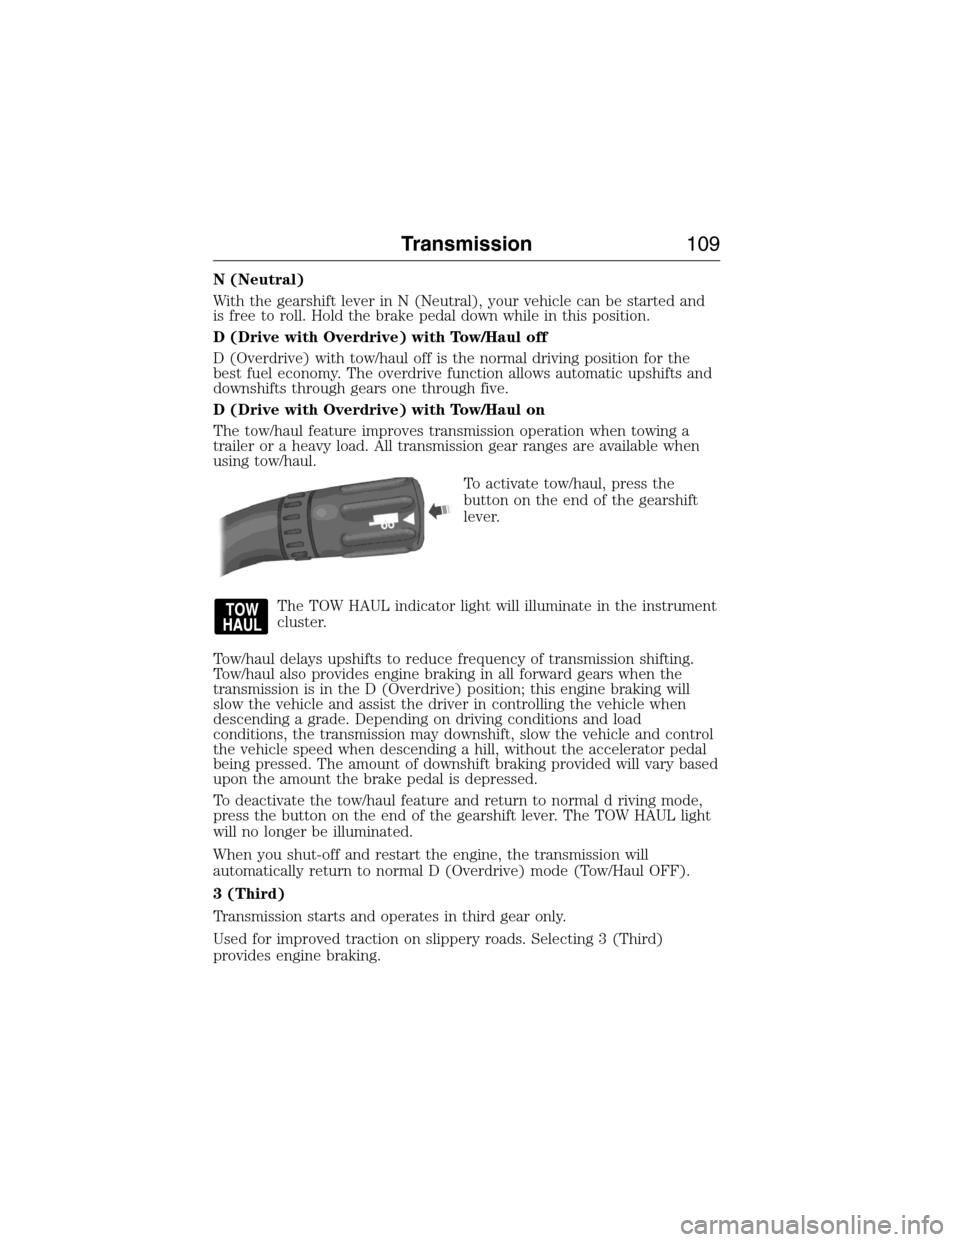
To activate tow/haul, press the
button on the end of the gearshift
lever.
The TOW HAUL indicator light will illuminate in the instrument
cluster.
Tow/haul delays upshifts to reduce frequency of transmission shifting.
Tow/haul also provides engine braking in all forward gears when the
transmission is in the D (Overdrive) position; this engine braking will
slow the vehicle and assist the driver in controlling the vehicle when
descending a grade. Depending on driving conditions and load
conditions, the transmission may downshift, slow the vehicle and control
the vehicle speed when descending a hill, without the accelerator pedal
being pressed. The amount of downshift braking provided will vary based
upon the amount the brake pedal is depressed.
To deactivate the tow/haul feature and return to normal d riving mode,
press the button on the end of the gearshift lever. The TOW HAUL light
will no longer be illuminated.
When you shut-off and restart the engine, the transmission will
automatically return to normal D (Overdrive) mode (Tow/Haul OFF).
3 (Third)
Transmission starts and operates in third gear only.
Used for improved traction on slippery roads. Selecting 3 (Third)
provides engine braking.
Transmission109
2015 Econoline(eco)
Owners Guide gf, 1st Printing, June 2014
USA(fus)
Page 113 of 360

Automatic Transmission Adaptive Learning
This feature is designed to increase durability and provide consistent
shift feel over the life of the vehicle. A new vehicle or transmission may
have firm shifts, soft shifts or both. This operation is considered normal
and will not affect function or durability of the transmission. Over time,
the adaptive learning process will fully update transmission operation.
Additionally, whenever the battery is disconnected or a new battery
installed, the strategy must be relearned.
AXLE INFORMATION
Traction-Lok axle (if equipped)
This axle provides added traction on slippery surfaces, particularly when
one wheel is on a poor traction surface. Under normal conditions, the
traction-lok axle functions like a standard rear axle. The axle may exhibit
a slight noise or vibration in tight turns with low vehicle speed. This is
normal behavior and indicates the axle is working.
11 2Transmission
2015 Econoline(eco)
Owners Guide gf, 1st Printing, June 2014
USA(fus)
Page 131 of 360

When hooking-up a trailer using a weight-distributing hitch, always use
the following procedure:
1. Park the loaded vehicle, without the trailer, on a level surface.
2. Measure the height to the top of your vehicle’s front wheel opening
on the fender. This is H1.
3. Securely attach the loaded trailer to your vehicle without the
weight-distributing bars connected.
4. Measure the height to the top of your vehicle’s front wheel opening
on the fender a second time. This is H2.
5. Install and adjust the tension in the weight-distributing bars so that
the height of your vehicle’s front wheel opening on the fender is
approximately halfway between H1 and H2.
6. Check that the trailer is level or slightly nose down toward your
vehicle. If not, adjust the ball height accordingly and repeat
Steps 2–6.
Once the trailer is level or slightly nose down toward the vehicle:
•Lock the bar tension adjuster in place.
•Check that the trailer tongue securely attaches and locks onto the
hitch.
•Install safety chains, lighting, and trailer brake controls as required by
law or the trailer manufacturer.
Safety Chains
Note:Do not attach safety chains to the bumper.
Always connect the trailer’s safety chains to the frame or hook retainers
of your vehicle hitch.
To connect the trailer’s safety chains, cross the chains under the trailer
tongue and allow enough slack for turning tight corners. Do not allow the
chains to drag on the ground.
Trailer Brakes
WARNING:Do not connect a trailer’s hydraulic brake system
directly to your vehicle’s brake system. Your vehicle may not have
enough braking power and your chances of having a collision greatly
increase.
Electric brakes and manual, automatic or surge-type trailer brakes are
safe if you install them properly and adjust them to the manufacturer’s
specifications. The trailer brakes must meet local and federal regulations.
The rating for the tow vehicle’s braking system operation is at
the gross vehicle weight rating, not the gross combined weight
rating.
130Towing
2015 Econoline(eco)
Owners Guide gf, 1st Printing, June 2014
USA(fus)
Page 136 of 360

Trailer Lamps
WARNING:Never connect any trailer lamp wiring to the
vehicle’s tail lamp wiring; this may damage the electrical system
resulting in a fire. Contact an authorized dealer as soon as possible for
assistance in proper trailer tow wiring installation. Additional electrical
equipment may be required.
Trailer lamps are required on most towed vehicles. Make sure all running
lights, brake lights, turn signals and hazard lights are working.
Before Towing a Trailer
Practice turning, stopping and backing up to get the feel of your
vehicle-trailer combination before starting on a trip. When turning, make
wider turns so the trailer wheels clear curbs and other obstacles.
When Towing a Trailer
•Do not drive faster than 70 mph (113 km/h) during the first 500 miles
(800 kilometers).
•Do not make full-throttle starts.
•Check your hitch, electrical connections and trailer wheel lug nuts
thoroughly after you have traveled 50 miles (80 kilometers).
•When stopped in congested or heavy traffic during hot weather, place
the gearshift in positionPto aid engine and transmission cooling and
to help air conditioning performance.
•Turn off the speed control with heavy loads or in hilly terrain. The
speed control may turn off automatically when you are towing on
long, steep grades.
•Shift to a lower gear when driving down a long or steep hill. Do not
apply the brakes continuously, as they may overheat and become less
effective.
•If your transmission is equipped with a Grade Assist or Tow/Haul
feature, use this feature when towing. This provides engine braking
and helps eliminate excessive transmission shifting for optimum fuel
economy and transmission cooling.
•If your vehicle is equipped with AdvanceTrac™ with RSC, this system
may turn on during typical cornering maneuvers with a heavily loaded
trailer. This is normal. Turning the corner at a slower speed while
towing may reduce this tendency.
•If you are towing a trailer frequently in hot weather, hilly conditions,
at the gross combined weight rating (or any combination of these
factors), consider refilling your rear axle with synthetic gear lubricant
Towing135
2015 Econoline(eco)
Owners Guide gf, 1st Printing, June 2014
USA(fus)
Page 137 of 360

(if the axle is not already filled with it). See theCapacities and
Specificationschapter for the lubricant specification.
•Allow more distance for stopping with a trailer attached. Anticipate
stops and brake gradually.
•Avoid parking on a grade. However, if you must park on a grade:
1. Turn the steering wheel to point your vehicle tires away from
traffic flow.
2. Set your vehicle parking brake.
3. Place the automatic transmission in positionP.
4. Place wheel chocks in front and back of the trailer wheels.
(Chocks not included with vehicle.)
Your vehicle may be equipped with a temporary or conventional spare
tire. A “temporary” spare tire is different in size (diameter or width),
tread-type (All-Season or All-Terrain) or is from a different manufacturer
than the road tires on your vehicle. Consult information on the tire label
or Safety Compliance label for limitations when using.
Launching or Retrieving a Boat or Personal Watercraft (PWC)
Note:Disconnect the wiring to the trailerbeforebacking the trailer into
the water.
Note:Reconnect the wiring to the trailerafterremoving the trailer from
the water.
When backing down a ramp during boat launching or retrieval:
•Do not allow the static water level to rise above the bottom edge of
the rear bumper.
•Do not allow waves to break higher than 6 inches (15 centimeters)
above the bottom edge of the rear bumper.
Exceeding these limits may allow water to enter vehicle components:
•Causing internal damage to the components.
•Affecting driveability, emissions, and reliability.
Replace the rear axle lubricant anytime the rear axle submerges in
water. Water may have contaminated the rear axle lubricant, which does
not normally require checking or changing unless it is leaking or other
axle repair is required.
136Towing
2015 Econoline(eco)
Owners Guide gf, 1st Printing, June 2014
USA(fus)