Page 117 of 438
Deactivation
Pull the multifunction lever toward the steering wheel
and hold it for more than two seconds.
Front Fog Lights — If Equipped
The fog light switch is located on the center
stack of the instrument panel, just below the
radio. Press the switch once to turn the front
fog lights on. Press the switch a second time to turn the
front fog lights off.
Interior Lights
The interior light switches are located in the overhead
console. The interior lights can be set to three different
positions (Off/Left Position, Center Position, On/Right
Position).
Using the switch on the bottom of the overhead console,
press the switch to the on/right position from its center
position and the lights are always on.
On/Right Position
3
UNDERSTANDING THE FEATURES OF YOUR VEHICLE 115
Page 118 of 438
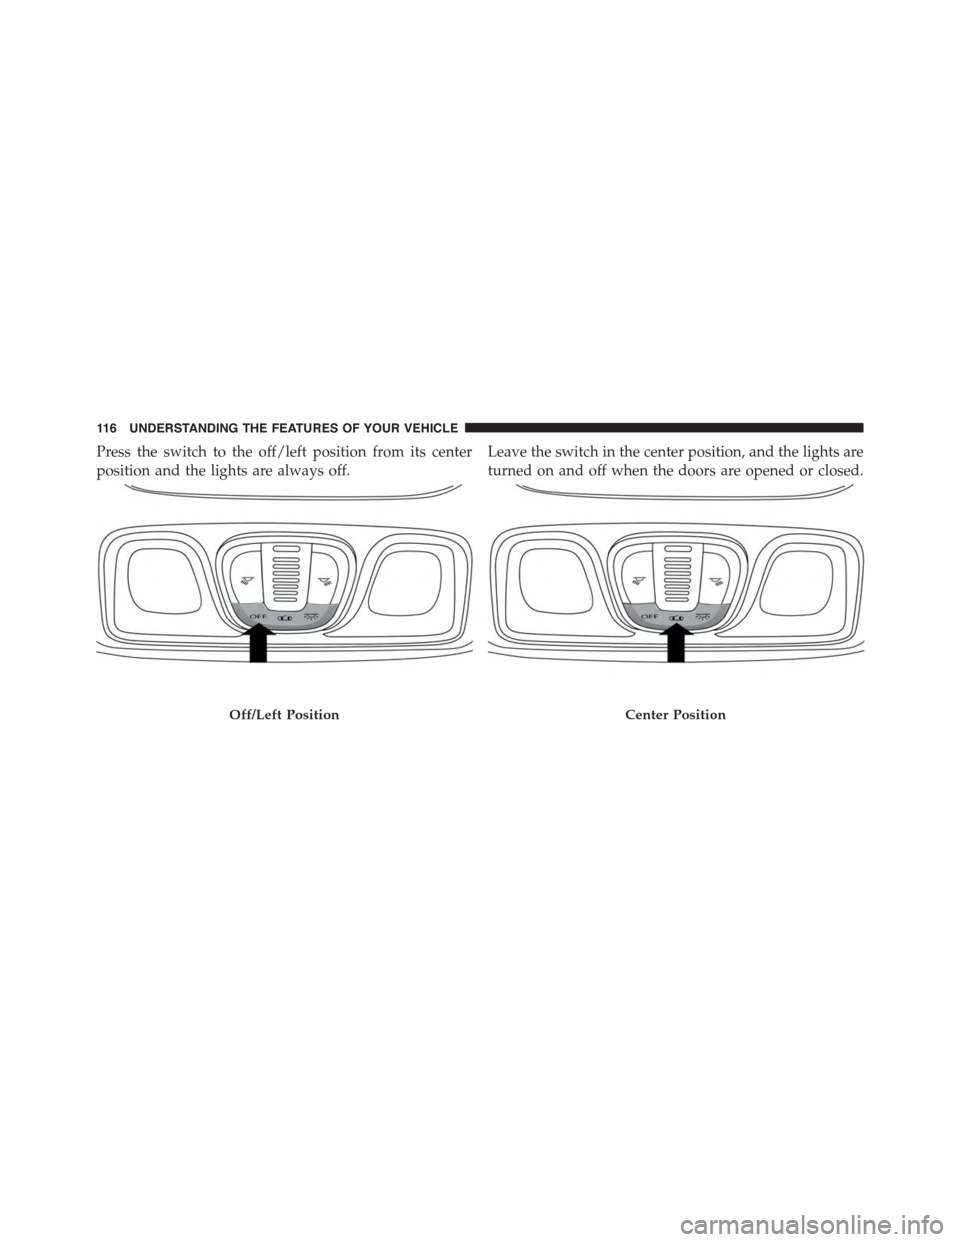
Press the switch to the off/left position from its center
position and the lights are always off.
Leave the switch in the center position, and the lights are
turned on and off when the doors are opened or closed.
Off/Left PositionCenter Position
11 6 U N D E R S TA N D I N G T H E F E AT U R E S O F Y O U R V E H I C L E
Page 119 of 438
The switches on the left and right sides of the overhead
console controls the map or reading function of the lights.
Press the switch to the right to turn on the right light and
press the switch to the left to turn on the left light.
CAUTION!
Before getting out of the vehicle be sure that the
switch is in the center position or that the lights are
off to avoid draining the battery.
Interior Light Timing (Center Position)
There are four different modes of operation that can be
activated in this position:
•When one door is opened a three minute timer is
activated.
•When the key is removed from the ignition (within
two minutes of the ignition being turned off), a 10
second timer is activated.
•When the doors are unlocked with the Key Fob a 10
second timer is activated.
•When the doors are locked with the Key Fob the lights
will turn off.
Map/Reading Light Switches
3
UNDERSTANDING THE FEATURES OF YOUR VEHICLE 117
Page 120 of 438
Interior Light Timing (On/Right Position)
•When all doors are closed a 15 minute timer is
activated.
NOTE:The timer is deactivated when the key is moved
into the ON/RUN position.
WINDSHIELD WIPERS AND WASHERS
The windshield wiper/washer lever is located on the
right side of the steering column.
NOTE:The windshield wipers/washers will only oper-
ate with the ignition in the ON/RUN position.
Front Windshield Wiper Operation
There are five different modes of operation for the front
windshield wipers. The windshield wiper lever can be
raised or lowered to access these modes.
Windshield Wiper Lever
11 8 U N D E R S TA N D I N G T H E F E AT U R E S O F Y O U R V E H I C L E
Page 127 of 438

To Activate
Push the ON/OFF button. The Cruise Indicator Light in
the instrument cluster will illuminate. To turn the system
off, push the ON/OFF button a second time. The Cruise
Indicator Light will turn off. The system should be
turned off when not in use.
WARNING!
Leaving the Electronic Speed Control system on
when not in use is dangerous. You could accidentally
set the system or cause it to go faster than you want.
You could lose control and have an accident. Always
leave the system OFF when you are not using it.
To Set A Desired Speed
Turn the Electronic Speed Control ON. When the vehicle
has reached the desired speed, press the SET (-) button
and release. Release the accelerator and the vehicle will
operate at the selected speed.
NOTE:The vehicle should be traveling at a steady speed
and on level ground before pressing the SET (-) button.
To Deactivate
A soft tap on the brake pedal, pushing the CANC button,
or normal brake pressure while slowing the vehicle will
deactivate Electronic Speed Control without erasing the
set speed memory. Pressing the ON/OFF button or
turning the ignition switch OFF erases the set speed in
memory.
3
UNDERSTANDING THE FEATURES OF YOUR VEHICLE 125
Page 129 of 438
To Decrease Speed
When the Electronic Speed Control is set, you can de-
crease speed by pushing the SET (-) button.
The drivers preferred units can be selected through the
instrument panel settings if equipped. Refer to “ Under-
standing Your Instrument Panel” for more information.
The speed decrement shown is dependant on the selected
speed unit of U.S. (mph) or Metric (km/h):
U.S. Speed (mph)
•Pressing the SET (-) button once will result ina1mph
decrease in set speed. Each subsequent tap of the
button results in a decrease of 1 mph.
•If the button is continually pressed, the set speed will
continue to decrease until the button is released, then
the new set speed will be established.
Metric Speed (km/h)
•Pressing the SET (-) button once will result in a 1 km/h
decrease in set speed. Each subsequent tap of the
button results in a decrease of 1 km/h.
•If the button is continually pressed, the set speed will
continue to decrease until the button is released, then
the new set speed will be established.
To Accelerate For Passing
Press the accelerator as you would normally. When the
pedal is released, the vehicle will return to the set speed.
Using Electronic Speed Control On Hills
The transmission may downshift on hills to maintain the
vehicle set speed.
NOTE:The Electronic Speed Control system maintains
speed up and down hills. A slight speed change on
moderate hills is normal.
3
UNDERSTANDING THE FEATURES OF YOUR VEHICLE 127
Page 138 of 438
WARNING!
Drivers must be careful when backing up even when
using the ParkView® Rear Back Up Camera. Always
check carefully behind your vehicle, and be sure to
check for pedestrians, animals, other vehicles, ob-
structions, or blind spots before backing up. You are
responsible for the safety of your surroundings and
must continue to pay attention while backing up.
Failure to do so can result in serious injury or death.
CAUTION!
•To avoid vehicle damage, ParkView® should only
be used as a parking aid. The ParkView® camera is
unable to view every obstacle or object in your
drive path.
(Continued)
CAUTION!(Continued)
•To avoid vehicle damage, the vehicle must be
driven slowly when using ParkView® to be able to
stop in time when an obstacle is seen. It is recom-
mended that the driver look frequently over his/her
shoulder when using ParkView®.
NOTE:If snow, ice, mud, or any foreign substance builds
up on the camera lens, clean the lens, rinse with water,
and dry with a soft cloth. Do not cover the lens.
GARAGE DOOR OPENER — IF EQUIPPED
HomeLink® replaces up to three remote controls (hand-
held transmitters) that operate devices such as garage
door openers, motorized gates, lighting or home security
systems. The HomeLink® unit operates off your vehicles
battery.
136 UNDERSTANDING THE FEATURES OF YOUR VEHICLE
Page 141 of 438
2.Place the hand-held transmitter 1 to 3 inches (3 to 8 cm)
away from the HomeLink® button you wish to program
while keeping the HomeLink® indicator light in view.
3. Push and hold the HomeLink® button you want to
program while you push and hold the hand-held
transmitter button.
4. Continue to hold both buttons and observe the indi-
cator light. The HomeLink® indicator will flash slowly
and then rapidly after HomeLink® has received the
frequency signal from the hand-held transmitter. Re-
lease both buttons after the indicator light changes
from slow to rapid.
5. At the garage door opener motor (in the garage),
locate the “LEARN” or “TRAINING” button. This can
usually be found where the hanging antenna wire is
attached to the garage door opener/device motor.
Firmly push and release the “LEARN” or “TRAIN-
ING” button. On some garage door openers/devices
there may be a light that blinks when the garage door
opener/device is in the LEARN/TRAIN mode.
NOTE:You have 30 seconds in which to initiate the next
step after the LEARN button has been pushed.
6. Return to the vehicle and push the programmed
HomeLink® button twice (holding the button for two
seconds each time). If the garage door opener/device
activates, programming is complete.
NOTE:If the garage door opener/device does not acti-
vate, push the button a third time (for two seconds) to
complete the training.
To program the remaining two HomeLink® buttons,
repeat each step for each remaining button. DO NOT
erase the channels.
3
UNDERSTANDING THE FEATURES OF YOUR VEHICLE 139