Page 328 of 703
The EVIC Menu items consists of the following:
•Fuel Economy
•Vehicle Speed
•Trip Info
•Tire PSI
•Vehicle Info
•Messages
•Units
•System Setup (Personal Settings)
•Turn Menu Off
The system allows the driver to select information by
pushing the following buttons mounted on the steering
wheel:
•UP Button
Push and release the UP button to scroll up-
ward through the main menu items (Fuel
Economy, Vehicle Info, Tire PSI, Cruise, Mes-
sages, Units, System Setup).
EVIC Steering Wheel Buttons
326 UNDERSTANDING YOUR INSTRUMENT PANEL
Page 347 of 703

check-mark appears next to the feature showing the
system has been activated or the check-mark is removed
showing the system has been deactivated.
Remote Start Comfort Sys.
When this feature is selected and the remote start is
activated, the heated steering wheel and driver heated
seat features will automatically turn on in cold weather.
These features will stay on through the duration of
remote start or until the key is cycled to ON/RUN
position. To make your selection, push and release the
RIGHT arrow button until a check-mark appears next to
the feature showing the system has been activated or the
check-mark is removed showing the system has been
deactivated.
Horn With Remote Lock
When this feature is selected, a short horn sound will
occur when the RKE transmitter LOCK button is pushed.
To make your selection, push and release the RIGHT
arrow button until a check-mark appears next to the
feature showing the system has been activated or the
check-mark is removed showing the system has been
deactivated.
Flash Lamps With Lock
When selected, the front and rear turn signals will flash
when the doors are locked with the RKE transmitter. To
make your selection, push and release the RIGHT arrow
button until a check-mark appears next to the feature
showing the system has been activated or the check-mark
is removed showing the system has been deactivated.
Automatic High Beams — If Equipped
When this feature is selected, the high beam headlights
will deactivate automatically under certain conditions. To
make your selection, push and release the SELECT
button until a check-mark appears next to the feature
showing the system has been activated or the check-mark
4
UNDERSTANDING YOUR INSTRUMENT PANEL 345
Page 432 of 703

STEERING WHEEL AUDIO CONTROLS — IF
EQUIPPED
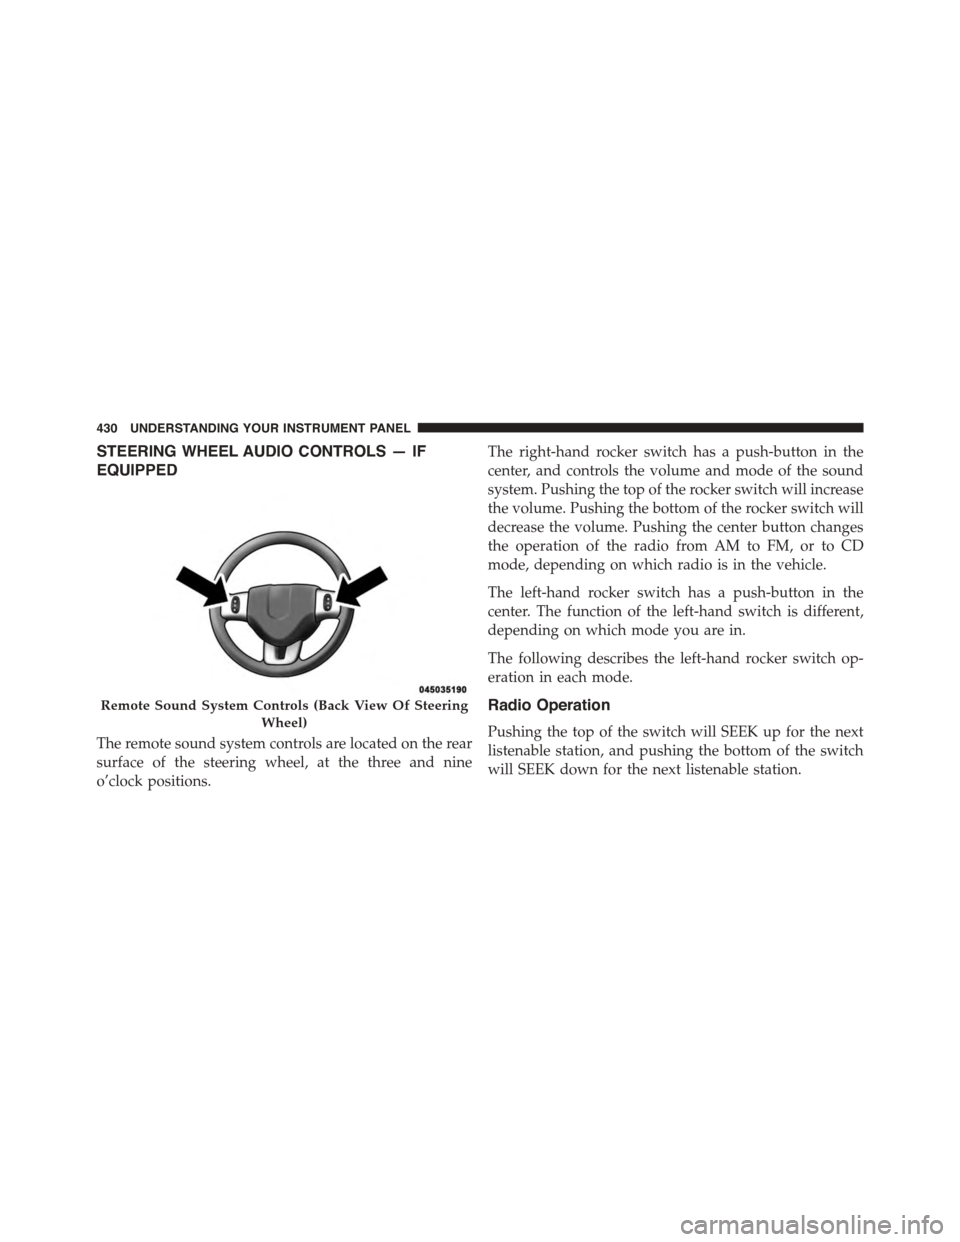
The remote sound system controls are located on the rear
surface of the steering wheel, at the three and nine
o’clock positions.
The right-hand rocker switch has a push-button in the
center, and controls the volume and mode of the sound
system. Pushing the top of the rocker switch will increase
the volume. Pushing the bottom of the rocker switch will
decrease the volume. Pushing the center button changes
the operation of the radio from AM to FM, or to CD
mode, depending on which radio is in the vehicle.
The left-hand rocker switch has a push-button in the
center. The function of the left-hand switch is different,
depending on which mode you are in.
The following describes the left-hand rocker switch op-
eration in each mode.
Radio Operation
Pushing the top of the switch will SEEK up for the next
listenable station, and pushing the bottom of the switch
will SEEK down for the next listenable station.
Remote Sound System Controls (Back View Of Steering
Wheel)
430 UNDERSTANDING YOUR INSTRUMENT PANEL
Page 480 of 703

CAUTION!(Continued)
•Driving through standing water may cause damage
to your vehicle’s drivetrain components. Always
inspect your vehicle’s fluids (i.e., engine oil, trans-
mission, axle, etc.) for signs of contamination (i.e.,
fluid that is milky or foamy in appearance) after
driving through standing water. Do not continue to
operate the vehicle if any fluid appears contami-
nated, as this may result in further damage. Such
damage is not covered by the New Vehicle Limited
Warranty.
•Getting water inside your vehicle’s engine can
cause it to lock up and stall out, and cause serious
internal damage to the engine. Such damage is not
covered by the New Vehicle Limited Warranty.
POWER STEERING
The standard power steering system will give you good
vehicle response and increased ease of maneuverability
in tight spaces. The system will provide mechanical
steering capability if power assist is lost.
If for some reason the power assist is interrupted, it will
still be possible to steer your vehicle. Under these condi-
tions, you will observe a substantial increase in steering
effort, especially at very low vehicle speeds and during
parking maneuvers.
NOTE:
•Increased noise levels at the end of the steering wheel
travel are considered normal and do not indicate that
there is a problem with the power steering system.
•Upon initial start-up in cold weather, the power steer-
ing pump may make noise for a short amount of time.
This is due to the cold, thick fluid in the steering
478 STARTING AND OPERATING
Page 481 of 703

system. This noise should be considered normal, and it
does not in any way damage the steering system.
CAUTION!
Prolonged operation of the steering system at the end
of the steering wheel travel will increase the steering
fluid temperature and it should be avoided when
possible. Damage to the power steering pump may
occur.
Power Steering Fluid Check
Checking the power steering fluid level at a defined
service interval is not required. The fluid should only be
checked if a leak is suspected, abnormal noises are
apparent, and/or the system is not functioning as antici-
pated. Coordinate inspection efforts through an autho-
rized dealer.
CAUTION!
Do not use chemical flushes in your power steering
system as the chemicals can damage your power
steering components. Such damage is not covered by
the New Vehicle Limited Warranty.
WARNING!
Fluid level should be checked on a level surface and
with the engine off to prevent injury from moving
parts and to ensure accurate fluid level reading. Do
not overfill. Use only manufacturer’s recommended
power steering fluid.
If necessary, add fluid to restore to the proper indicated
level. With a clean cloth, wipe any spilled fluid from all
surfaces. Refer to “Fluids, Lubricants, and Genuine Parts”
in “Maintaining Your Vehicle” for further information.
5
STARTING AND OPERATING 479
Page 486 of 703

WARNING!
•The Anti-Lock Brake System contains sophisti-
cated electronic equipment that may be susceptible
to interference caused by improperly installed, or
high output radio transmitting equipment. This
interference can cause possible loss of anti-lock
braking capability. Installation of such equipment
should be performed by qualified professionals.
•Pumping of the Anti-Lock Brakes will diminish
their effectiveness and may lead to a collision.
Pumping makes the stopping distance longer. Just
press firmly on your brake pedal when you need to
slow down or stop.
•The Anti-Lock Brake System cannot prevent colli-
sions, including those resulting from excessive
speed in turns, following another vehicle too
closely, or hydroplaning.
(Continued)
WARNING!(Continued)
•The capabilities of an ABS-equipped vehicle must
never be exploited in a reckless or dangerous
manner, which could jeopardize the user ’s safety or
the safety of others.
•The ABS cannot prevent the natural laws of phys-
ics from acting on the vehicle, nor can it increase
braking or steering efficiency beyond that afforded
by the condition of the vehicle brakes and tires or
the traction afforded.
All vehicle wheels and tires must be the same size and
type, and tires must be properly inflated to produce
accurate signals for the computer.
484 STARTING AND OPERATING
Page 490 of 703

Electronic Stability Control (ESC)
The Electronic Stability Control (ESC) enhances direc-
tional control and stability of the vehicle under various
driving conditions. ESC corrects for over/under steering
of the vehicle by applying the brake of the appropriate
wheel to assist in counteracting the over/under steer
condition. Engine power may also be reduced to help the
vehicle maintain the desired path.
ESC uses sensors in the vehicle to determine the vehicle
path intended by the driver and compares it to the actual
path of the vehicle. When the actual path does not match
the intended path, ESC applies the brake of the appro-
priate wheel to assist in counteracting the oversteer or
understeer condition.
•Oversteer - when the vehicle is turning more than
appropriate for the steering wheel position.
•Understeer - when the vehicle is turning less than
appropriate for the steering wheel position.
WARNING!
The Electronic Stability Control System (ESC) cannot
prevent the natural laws of physics from acting on
the vehicle, nor can it increase the traction afforded
by prevailing road conditions. ESC cannot prevent
all accidents, including those resulting from exces-
sive speed in turns, driving on very slippery surfaces,
or hydroplaning. ESC also cannot prevent accidents
resulting from loss of vehicle control due to inappro-
priate driver input for the conditions. Only a safe,
attentive, and skillful driver can prevent accidents.
The capabilities of an ESC equipped vehicle must
never be exploited in a reckless or dangerous manner
which could jeopardize the user ’s safety or the safety
of others.
488 STARTING AND OPERATING
Page 495 of 703

•Gear selection matches vehicle uphill direction (i.e.,
vehicle facing uphill is in forward gear; vehicle back-
ing uphill is in REVERSE gear).
HSA will work in REVERSE and all forward gears when
the activation criteria have been met. The system will not
activate if the vehicle is placed in NEUTRAL or PARK.
WARNING!
There may be situations on minor hills with a loaded
vehicle, or while pulling a trailer, when the system
will not activate and slight rolling may occur. This
could cause a collision with another vehicle or object.
Always remember the driver is responsible for brak-
ing the vehicle.
Disabling/Enabling HSA
If you wish to turn on or off the HSA system, it can be
done using the Customer Programmable Features in the
Electronic Vehicle Information Center (EVIC). Refer to
“Electronic Vehicle Information Center (EVIC)” in “Un-
derstanding Your Instrument Panel” for further informa-
tion.
For vehicles not equipped with the EVIC, perform the
following steps:
NOTE:You must complete Steps 1 through 8 within 90
seconds.
1. Center the steering wheel (front wheels pointing
straight forward).
2. Shift the transmission into NEUTRAL.
3. Apply the parking brake.
4. Start the engine.
5. Release the clutch pedal (if equipped).
6. Rotate the steering wheel one-half turn to the left.
5
STARTING AND OPERATING 493