Page 25 of 271

23
C1_en_Chap01_controle-de-marche_ed01-2015
Passenger's
front airbagfixed, in the seat belt
and front passenger's
airbag warning lamps
display. The control switch, located in the
glove box, is set to the OFF
position.The passenger's front airbag is deactivated.
You can install a "rear ward facing" child seat on the
front seat unless there is a fault with the airbags
(Airbag warning lamp on).
Traction control
(TRC) fixed.
A brief press has been made on the
button.
The traction control (TRC) system is
deactivated. Press the button to activate the system.
The TRC system is activated automatically when the
vehicle is started.
If deactivated, the system is reactivated automatically
from around 30 mph (50 km/h).
For more information, refer to the corresponding
section.
Dynamic
stability control
(DSC) fixed.
Vehicle stationary, the button
has been pressed for more than
3
seconds.
The traction control (TRC) and
dynamic stability control (DSC)
systems are deactivated. Press this button to activate the systems.
The DSC system is activated automatically when the
vehicle is started.
For more information, refer to the corresponding
section.
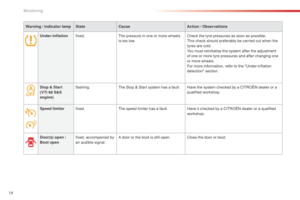
Warning
/ indicator lamp
State Cause Action
/ Observations
Deactivation indicator lamps
If one of the following indicator lamps comes on, this confirms that the corresponding system has been switched off intentionally.
This is may be accompanied by an audible signal.
1
Monitoring
Page 26 of 271
24
Warning / indicator lamp State Cause Action / Observations
Stop & Star t
( VTi 68 S&S
engine) fixed.
The Stop & Start
system has been
deactivated. Reactivate the system by pressing the button again.
For more information, refer to the corresponding
section.
Active City
Brake fixed.
The Active City Brake system has
been deactivated. Reactivate the system by pressing the button again.
For more information, refer to the corresponding
section.
Monitoring
Page 27 of 271
25
C1_en_Chap01_controle-de-marche_ed01-2015
Indicators
Total/trip distance recorder
Press one of the buttons 1 to alternate the
distance display:
-
t
otal with "ODO" (odometer) displayed,
-
t
rip with "TRIP" displayed.
To reset the trip recorder to zero, when
it is displayed, press and hold one of the
two
buttons 1 .
When the ignition is switched on, the distance
recorder selected when the engine was
switched off is displayed.
This indicates the quantity of fuel available:
-
1/ 1 and six bars, the fuel tank is full.
-
R
and one bar flashing, the fuel tank is on
the reserve.
Low fuel level
When the low level in the fuel tank is reached,
the last bar flashes accompanied by an audible
signal.
You have approximately 5 litres remaining.
When the frequency of the flashing increases,
you have approximately 3 litres remaining .
Fuel gauge
At least 5 litres must be added after
running out of fuel.
1
Monitoring
Page 28 of 271

26
Trip computer
System that gives you information on the journey in progress (range, fuel consumption…).
Information display
F Press one of theses buttons to display the various trip computer tabs in turn:
-
T
he total distance.
-
T
he trip "A" .
-
T
he trip "B" .
-
T
he Stop & Start partial time counter*.
-
T
he Stop & Start global time counter*.
-
T
he ambient temperature*.
-
T
he current fuel consumption.
-
T
he average fuel consumption.
-
T
he remaining range.
-
T
he average speed.
-
T
he lighting dimmer.
Trip reset
F When the trip required is displayed, press one of the two buttons for more than
two
seconds.
Tr i p s "A" and "B" are independent but their
use is identical.
For example, trip "A" can be used for daily
figures, and trip "B" for monthly figures.
* Depending on version.
Lighting dimmer
When driving at night, this function allows
certain displays in the instrument panel to be
switched off to reduce visual fatigue for the
driver.
It operates only when the sidelamps are on.
F
W
hen the "Lighting dimmer" menu is
displayed, press and hold one of the
buttons for access to the adjustment.
F
T
hen make repeated presses on one of
the two buttons to increase or reduce the
brightness.
T
he display flashes to show you the
brightness chosen.
Monitoring
Page 29 of 271

27
C1_en_Chap01_controle-de-marche_ed01-2015
With the touch screen tablet
From the Menu page in the touch screen tablet:
F Sel ect the " Vehicle information " tab.
The " Trip information " window is displayed
with the following information:
-
"Average speed ",
-
"Elapsed time ",
-
"Range ",
-
t
he current fuel consumption, presented in
graphical form.
The " Erase " button resets the fuel consumption
data in the touch screen tablet and the
instrument panel. If your vehicle has a touch screen tablet, you
can view information on the current journey.
Trip computer, a few definitions
Range
(miles or km)
The distance which can still be travelled with
the fuel remaining in the tank (related to the
average fuel consumption over the last few
miles (kilometres) travelled).
This value may vary following a change
in the style of driving or the relief,
resulting in a significant change in the
current fuel consumption.
When the fuel level is low, the message "Lo
FUEL" is displayed.
If only a small amount of fuel is added, the
range may not be recalculated.
Current fuel consumption
(mpg or l/100 km or km/l)
Calculated over the last few seconds.
Stop & Start time counter
(minutes / seconds or hours / minutes)
I f your vehicle is fitted with Stop & Start, a time
counter calculates the time spent in STOP
mode during a journey.
It resets to zero every time the ignition is
switched on.
Average fuel consumption
(mpg or l/100 km or km/l)
Calculated since the last trip computer reset.
Average speed
(mph or km/h)
Calculated since the last trip computer reset.
1
Monitoring
Page 30 of 271
28
Audio system
The time is adjusted using the "MENU" knob:
- p ress the knob for access to menus and to
confirm a selection,
-
t
urn the knob to select a function, an item
in a list.
You can go back to the previous step at any
time by using the " Back" button. F
P ress the knob for access to the menus.
F
T
urn the knob to select "CLOCK".
F
P
ress the knob to confirm.
T
he hours figure flashes.
F
T
urn the knob to adjust the hours.
F
P
ress the knob to confirm.
T
he minutes figure flashes.
F
T
urn the knob to adjust the minutes.
F
P
ress the knob to confirm and quit
the
menu.
Setting the time
Monitoring
Page 31 of 271
29
C1_en_Chap01_controle-de-marche_ed01-2015
Touch screen tablet
Adjust the hours and minutes using the virtual
arrows in the screen.
Press on "
Configuration ".
Choose the time format.
Press on " General".
Select " Clock". Press on "
OK" to confirm and quit the menu.
1
Monitoring
Page 32 of 271
30
C1_en_Chap02_ouvertures_ed01-2015
The keys allow you to switch on the ignition and operate the locks on the front doors, the boot, the steering lock and the passenger's front airbag
d eactivation switch.
Keys
Locking Unlocking
- Insert the key in one of the front door lock
barrels and turn it towards the rear of the
vehicle to lock the door in question.
-
I
nsert the key in the boot lock barrel and
turn it to the right to lock the boot. -
I nsert the key in one of the front door lock
barrels and turn it towards the front of the
vehicle to unlock the door in question.
-
I
nsert the key in the boot lock barrel and
turn it to the left to unlock the boot.
Access