2015 CADILLAC ATS light
[x] Cancel search: lightPage 53 of 138
Black plate (53,1)Cadillac CUE Infotainment System (GMNA-Localizing-U.S./Canada-
7639728) - 2015 - CRC - 9/3/14
Infotainment System 53
8.o(Previous/Reverse/Decrease)
.Radio and CD: Press to go
to the previous station or
track.
.Press to go to the
previous menu.
.Press to decrease the
brightness of the RSE
screen.
9.
w(Up Arrow)
.Press to scroll up a list.
10.
r/ENTER
.Press to select the
highlighted choice in
any menu.
.Press and hold for
quick play.
11.
p(Next/Forward/Increase)
.Radio and CD: Press to
go to the next station or
track.
.Press to go to the
next menu.
.Press to increase the
brightness of the RSE
screen.
12. RADIO
.Press to scroll through the
radio sources including
AM, FM, or XM (if
equipped).
13. MENU
.Press to go to the menu of
the now playing screen.
14.
4(Back)
.Press to go back to the
previous menu.
.Press and hold to go back
to the now playing screen.
15.
x(Down Arrow)
.Press to go down a list. To use the remote control, aim it at
the transmitter window at either
seatback console or at the second
row overhead screen and press the
buttons firmly. Direct sunlight or very
bright light could affect the ability of
the RSE transmitter to receive
signals from the remote control.
Check the batteries if the remote
control does not seem to be
working. See
“Battery Replacement”
later in this section. Objects
blocking the line of sight could also
affect the function of the remote
control.
{Caution
Storing the remote control in a hot
area or in direct sunlight can
damage it, and the repairs will not
be covered by the warranty.
Storage in extreme cold can
weaken the batteries. Keep the
remote control stored in a cool,
dry place.
Page 54 of 138
Black plate (54,1)Cadillac CUE Infotainment System (GMNA-Localizing-U.S./Canada-
7639728) - 2015 - CRC - 9/3/14
54 Infotainment System
Battery Replacement
To change the remote control
batteries:
1. Insert a coin or key to pull up therear cover on the remote control.
2. Replace the two AAA batteries in the compartment.
3. Replace the battery cover.
Remove the batteries from the
remote control if it will not be used
for an extended period of time.
RSE Troubleshooting
No power: The ignition might not
be in ON/RUN or ACC/
ACCESSORY.
The picture does not fill the
screen. There are black borders
on the top and bottom or on both
sides or it looks stretched out:
Press the MENU button on the
remote control to change the display
mode setting. In auxiliary mode, the picture
moves or scrolls:
Check the
auxiliary input connections at both
devices.
The remote control does not
work: Check to make sure the
remote control is programmed to the
correct screen. Make sure there is
no obstruction between the remote
control and the transmitter window
and check the batteries to make
sure they are not dead or installed
incorrectly.
There is no sound from the
headphones with the indicator
light on: If the batteries are good,
make sure the headphones are
programmed to the correct screen
and on the correct channel for the
screen being viewed.
The auxiliary source is running
but there is no picture or sound:
Check that the RSE video screen is
in the auxiliary source mode by
pressing the MEDIA button on the
remote control. Check the auxiliary
input connections at both devices. Sometimes the wireless
headphone audio cuts out or
buzzes:
Check for obstructions,
low batteries, reception range, and
interference from cell phone towers
or from cellular telephone use in the
vehicle. Check that the headphones
are on correctly using the L (Left)
and R (Right) on the headphones.
Check that the headphones are
positioned properly with the
headband across the top of
the head.
I lost the remote and/or the
headphones: See your dealer for
assistance.
The Blu-ray/DVD is playing, but
there is no picture or sound:
Check that the RSE video screen is
sourced to the Blu-ray/DVD player
by pressing the MEDIA button on
the remote control.
Page 62 of 138
Black plate (62,1)Cadillac CUE Infotainment System (GMNA-Localizing-U.S./Canada-
7639728) - 2015 - CRC - 9/3/14
62 Infotainment System
many frequencies selected on the
Sound Around portion of the
system’s remote control. See
“Remote Control” later in this
section.
Only one audio source can be heard
through the vehicle’ s speakers at a
time. The audio source being used
is specified by the A/V (audio/video)
source selected on the driver side
head restraint video display screen.
To turn the RSE system audio
output to the vehicle’s speakers,
press Sound Around ON, on the
system’ s remote control. The audio
from the RSE system can be heard
through the wireless/wired
headphones and the vehicle’s
speakers at the same time. The
volume on the radio can vary when
switching between the radio, CD,
DVD, MP3, or an auxiliary device.
Wired Headphones
VOL0(Volume): Use to adjust
the volume on the headphones. 100 Channel FM-Modulation
Control
For Monitor
“A”Only:
To activate the FM modulation
feature, press the “Sound Around
On/Off ”button on the remote until
the text “FM CH XX.XMH2” is
dislpayed on the monitor.
On the remote, press the “Sound
Around Select” button to cycle
through a pre-established list of
6 channels (88.3MHz, 88.7MHz,
89.1MHz, 89.5MHz, 89.9MHz,
90.3MHz.)
If none of these stations are suitable
for FM Modulation, use the “Fine
Tune” Option. To “Fine Tune” the
modulator to a specific target station
while the display is active, press the
“Up” or“Down” keys on the remote
to change the channel by 0.2MHz.
Hold down the “Up or“Down” keys
to cycle quickly through the stations.
When the end (107.9MHz) or
beginning (87.5MHz) of the FM
band is reached, the channels will continue from the beginning
(87.5MHz) or end (107.9MHz),
respectively.
To deactivate the FM modulation
feature, press the
“Sound Around
On/Off ”button on the remote until
the text “FM OFF” is displayed on
the monitor.
{Caution
Do not store the headphones in
heat or direct sunlight. This could
damage the headphones and
repairs will not be covered by the
warranty. Storage in extreme cold
can weaken the batteries. Keep
the headphones stored in a cool,
dry place.
Remote Control
To use the remote control, aim at
the remote sensor on top center of
the video display screen and press
the desired button.
Page 63 of 138
Black plate (63,1)Cadillac CUE Infotainment System (GMNA-Localizing-U.S./Canada-
7639728) - 2015 - CRC - 9/3/14
Infotainment System 63
Objects blocking the line of sight
can affect the function of the remote
control. Direct or very bright light
can affect the ability of the
transmitter to receive signals from
the remote control. If the remote
control does not seem to be
working, the batteries might need to
be replaced. See“Battery
Replacement” following this section.
The remote control provided with
the Headrest DVD RSE system is
not a universal remote control and
will not control other equipment.
{Caution
Storing the remote control in a hot
area or in direct sunlight can
damage it, and the repairs will not
be covered by the warranty.
Storage in extreme cold can
weaken the batteries. Keep the
remote control stored in a cool,
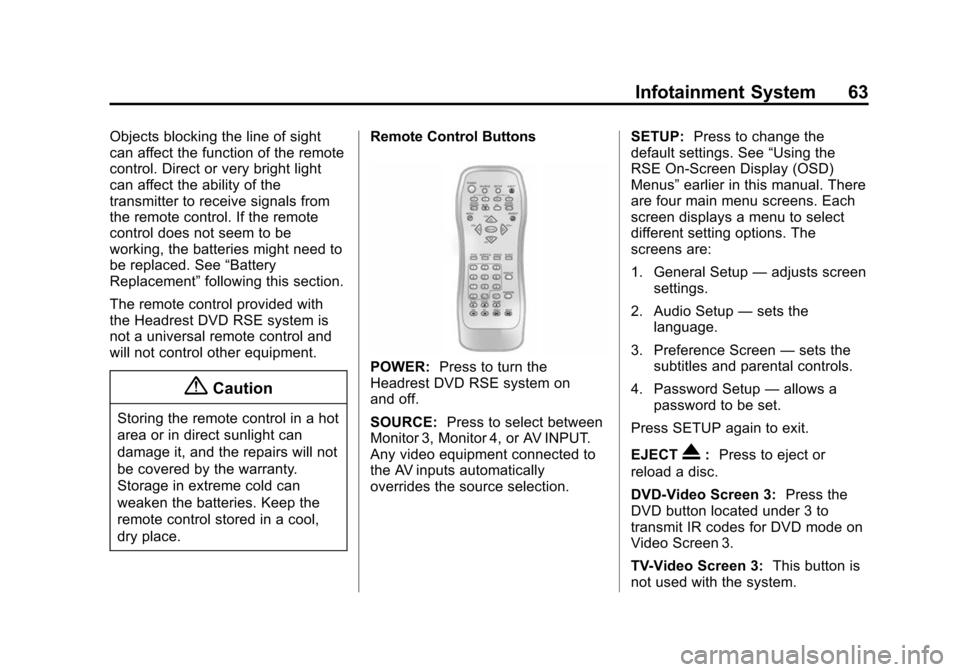
dry place. Remote Control Buttons
POWER:
Press to turn the
Headrest DVD RSE system on
and off.
SOURCE: Press to select between
Monitor 3, Monitor 4, or AV INPUT.
Any video equipment connected to
the AV inputs automatically
overrides the source selection. SETUP:
Press to change the
default settings. See “Using the
RSE On-Screen Display (OSD)
Menus” earlier in this manual. There
are four main menu screens. Each
screen displays a menu to select
different setting options. The
screens are:
1. General Setup —adjusts screen
settings.
2. Audio Setup —sets the
language.
3. Preference Screen —sets the
subtitles and parental controls.
4. Password Setup —allows a
password to be set.
Press SETUP again to exit.
EJECT
X: Press to eject or
reload a disc.
DVD-Video Screen 3: Press the
DVD button located under 3 to
transmit IR codes for DVD mode on
Video Screen 3.
TV-Video Screen 3: This button is
not used with the system.
Page 66 of 138
Black plate (66,1)Cadillac CUE Infotainment System (GMNA-Localizing-U.S./Canada-
7639728) - 2015 - CRC - 9/3/14
66 Infotainment System
DISPLAY:Press to choose from
the following display options:
1. Press DISPLAY once and Single
Elapsed appears along with the
current track playing and the
length of time for that track.
2. Press DISPLAY twice and Single Remain appears along with the
current track playing and the
amount of time left on the track.
3. Press DISPLAY three times and Total Elapsed appears along
with the current track playing
and the total time that has
played on the CD.
4. Press DISPLAY four times and Total Remain appears along with
the current track playing and the
amount of time left on the CD.
REPEAT: Press to toggle between
Track and All. The default for repeat
is OFF.
.Track repeats the track that is
playing.
.All repeats the disc that is
playing.
Playing MP3 CD
MP3 is the format for storing digital
audio. An audio CD quality song
can be compressed into the MP3
format with very little loss of quality,
while taking up much less space.
CD-R/RW discs that have been
encoded in MP3 format can be
played on the DVD player.
Selecting Folders and Songs
When an MP3 disc is inserted in the
player, the navigation screen
appears. The folders and songs can
be changed by navigating through
the file system. The DVD player
plays the songs in the order they
were burned to the disc.
1. Press STOP if a disc is playing. Press the up or down navigation
arrows on the remote control to
go through the folder list on the
left side of the screen.
2. Press ENTER when the desired folder is highlighted. 3. Press the up or down navigation
arrows to go through the song
list and highlight the desired
song. Press ENTER to begin the
playback of the selected song.
Skipping a Song
NEXT: Press to go to the
next song.
PREV (Previous): Press to return
to the beginning of the song that is
currently playing. Press PREV twice
to go to the previous song.
Selecting a Play Mode
The order the songs are played can
be temporarily chosen on a disc.
The FOLDER play mode is the
default. Press the REPEAT button to
access the play mode options.
The play mode options are:
.Single —Play a selected song.
.Folder —Play the folder in the
order the songs were recorded.
Page 67 of 138
Black plate (67,1)Cadillac CUE Infotainment System (GMNA-Localizing-U.S./Canada-
7639728) - 2015 - CRC - 9/3/14
Infotainment System 67
.Shuffle—Play the songs in
random order, from within the
selected folder.
Using the REPEAT Feature
REPEAT: Press to change between
Repeat One and Repeat Folder.
.Repeat One —Repeats the
song that is playing.
.Repeat Folder —Repeats the
folder that is playing.
Tips and Troubleshooting
IR Sensor Inoperative: Check that
the batteries are good in the remote
control. Check that the remote
Control IR Sensor is not blocked.
Aim the remote control toward the
IR Sensor being controlled. Select
the correct screen, 3 or 4.
No picture: Check that the correct
video input mode is selected. Check
that the video cable is plugged into
the jack securely. No Sound:
Check that the correct
audio input mode is selected. Check
that the audio cable is securely
plugged into the jack.
Cleaning the Video Screens
The video display screens are made
of a specially coated glass and can
be scratched or damaged by
abrasive products, solvents,
or ammonia-based window
cleaners. Clean with a soft, lint-free,
cotton cloth that has been slightly
dampened with warm water. Dry the
screens by wiping with a clean dry
cotton cloth.
Cleaning the Components
Use care when touching or cleaning
the components such as the DVD
player or the discs.
Do not use DVD lens cleaners for
DVD players because the lens of
the DVD optics can become
contaminated by lubricants. Handle CDs and DVDs carefully.
Store them in their original cases or
other protective cases and away
from direct sunlight and dust. The
DVD player scans the bottom
surface of the disc. If the surface of
a CD or DVD is damaged, such as
cracked, broken, or scratched, the
CD or DVD may not play properly or
not at all. If the surface of a CD or
DVD is soiled, take a soft, lint free
cloth or dampen a clean, soft cloth
in a mild, neutral detergent solution
mixed with water, and clean it. Make
sure the wiping process starts from
the center to the edge.
Do not touch the bottom side of a
CD or DVD while handling it; this
could damage the surface. Pick up
CDs or DVDs by grasping the outer
edges or the edge of the hole and
the outer edge.
Page 71 of 138
Black plate (71,1)Cadillac CUE Infotainment System (GMNA-Localizing-U.S./Canada-
7639728) - 2015 - CRC - 9/3/14
Infotainment System 71
Audio Information On/Off
Press to turn the audio information
view on or off from the main map
view. When ON, the audio
information becomes an audio
status pane. This allows for two
lines of audio information in the
status pane and enables the use of
some Interaction Selector controls.
The audio status screen contains
the following elements:
.Station Frequency
.Artist Information
.Song Information
.r/jort/uStation and
Channel Controls
Press the
t/uStation controls to
go to the next or previous strong
signal station or digital channel.
When the audio status pane
displays Artist and Song
Information, press the
t/u
controls to go to the next or
previous track based on the current
media mode.
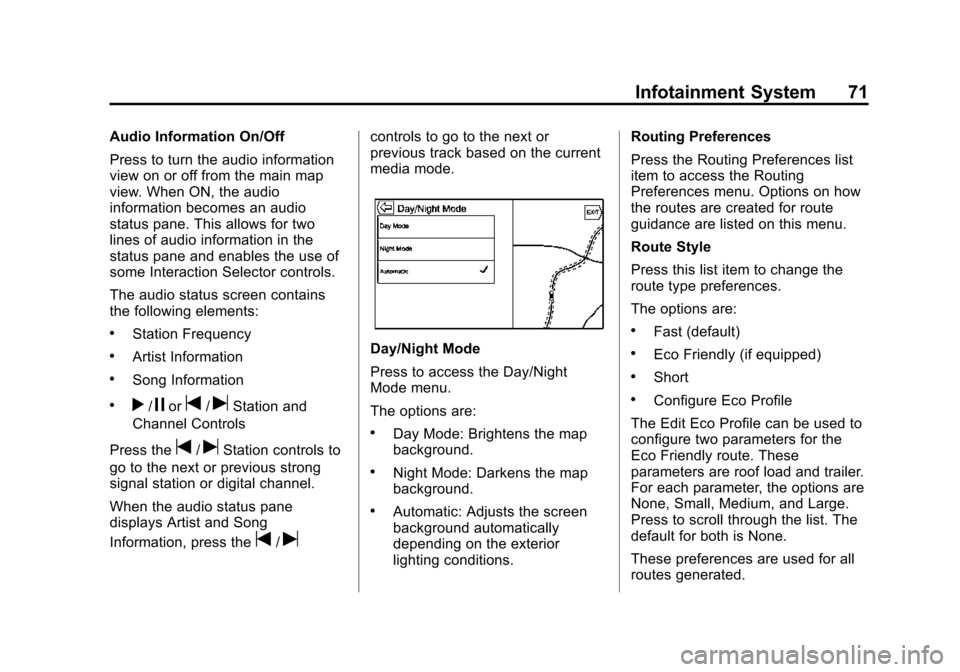
Day/Night Mode
Press to access the Day/Night
Mode menu.
The options are:
.Day Mode: Brightens the map
background.
.Night Mode: Darkens the map
background.
.Automatic: Adjusts the screen
background automatically
depending on the exterior
lighting conditions. Routing Preferences
Press the Routing Preferences list
item to access the Routing
Preferences menu. Options on how
the routes are created for route
guidance are listed on this menu.
Route Style
Press this list item to change the
route type preferences.
The options are:
.Fast (default)
.Eco Friendly (if equipped)
.Short
.Configure Eco Profile
The Edit Eco Profile can be used to
configure two parameters for the
Eco Friendly route. These
parameters are roof load and trailer.
For each parameter, the options are
None, Small, Medium, and Large.
Press to scroll through the list. The
default for both is None.
These preferences are used for all
routes generated.
Page 78 of 138
Black plate (78,1)Cadillac CUE Infotainment System (GMNA-Localizing-U.S./Canada-
7639728) - 2015 - CRC - 9/3/14
78 Infotainment System
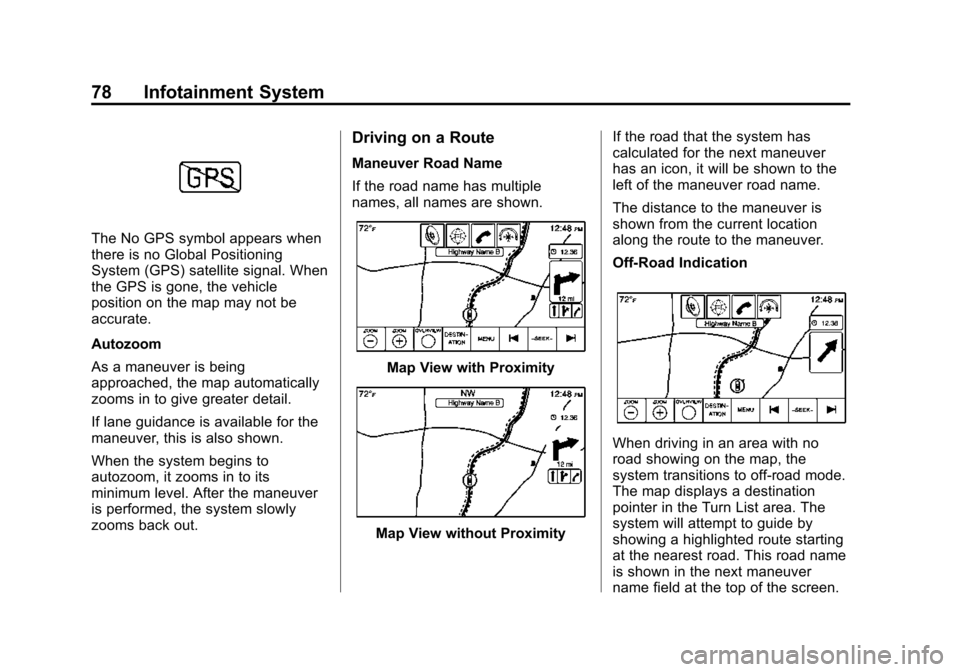
The No GPS symbol appears when
there is no Global Positioning
System (GPS) satellite signal. When
the GPS is gone, the vehicle
position on the map may not be
accurate.
Autozoom
As a maneuver is being
approached, the map automatically
zooms in to give greater detail.
If lane guidance is available for the
maneuver, this is also shown.
When the system begins to
autozoom, it zooms in to its
minimum level. After the maneuver
is performed, the system slowly
zooms back out.
Driving on a Route
Maneuver Road Name
If the road name has multiple
names, all names are shown.
Map View with Proximity
Map View without ProximityIf the road that the system has
calculated for the next maneuver
has an icon, it will be shown to the
left of the maneuver road name.
The distance to the maneuver is
shown from the current location
along the route to the maneuver.
Off-Road Indication
When driving in an area with no
road showing on the map, the
system transitions to off-road mode.
The map displays a destination
pointer in the Turn List area. The
system will attempt to guide by
showing a highlighted route starting
at the nearest road. This road name
is shown in the next maneuver
name field at the top of the screen.