2015 BMW Z4 SDRIVE35IS I car 03
[x] Cancel search: I car 03Page 180 of 289

Storing from a CD/DVD1.Insert a CD or DVD into the CD/DVD
player.2."CD/Multimedia"3."CD/DVD"4. Select the symbol for the CD/DVD
player.5."Store in vehicle"
The music collection is displayed and the first
track of the CD/DVD is played back. During the
storage process, the tracks are played in se‐
quence.
Observe the following during the storage proc‐
ess:
Do not switch to the CD/DVD player and do not
remove the CD/DVD from the CD/DVD player
as this will interrupt the storage process. You
can switch to the other audio sources without
interrupting the storage process. Tracks from
the current CD/DVD that have already been
stored can be called up.
Interrupting storage
1."CD/Multimedia"2."CD/DVD"3."Storing..."4."Cancel storing"
The storage process is interrupted and can be
continued at any time.
Continuing the storage process
1."CD/Multimedia"2."CD/DVD"3. Select the symbol for the CD/DVD
player.4."Continue storing"
Storage of the CD/DVD continues at the begin‐
ning of the track at which storage was inter‐
rupted.
Album information
During storage, information such as the name
of the artist is stored with the track, if this infor‐
mation is available in the vehicle database or
on the CD.
To update the database, contact your service
center.
Storing from a USB device
To store music, a suitable device must be con‐
nected to the USB interface in the glove com‐
partment.
▷Suitable devices: USB mass storage devi‐
ces, such as USB flash drives or MP3 play‐
ers with a USB interface.▷Unsuitable devices: USB hard drives, USB
hubs, USB memory card readers with mul‐
tiple inserts, Apple iPod/iPhone. Music
from the Apple iPod/iPhone can be playedSeite 178EntertainmentCD/multimedia178
Online Edition for Part no. 01 40 2 954 104 - II/15
Page 198 of 289
ceived calls are displayed on the Control Dis‐
play.
Audio source
A mobile phone can be used as an audio
source.
Pairing and connecting a mobile
phone
Pairing the mobile phone
To avoid becoming distracted and pos‐
ing an unnecessary hazard both to your own
vehicle's occupants and to other road users,
only pair the mobile phone while the vehicle is
stationary.◀1."Telephone"2."Bluetooth® (phone)"3."Add new phone"
The Bluetooth name of the vehicle is dis‐
played.4.To perform additional steps on the mobile
phone, refer to the mobile phone operating
instructions: for instance, search for or
connect the Bluetooth device or a new de‐
vice.
The Bluetooth name of the vehicle appears
on the mobile phone display.5.Select the Bluetooth name of the vehicle
on the mobile phone display.6.You are prompted by the iDrive or mobile
phone to enter the same Bluetooth pass‐
key. Enter the passkey and confirm.
or
Compare the control number on the vehi‐
cle display with the control number on the
mobile phone display. Confirm the control
number on the mobile phone and in the ve‐
hicle.
"OK"7.Select the functions for which the mobile
phone is to be used.8."OK"If the pairing was successful, the mobile phone
appears at the top of the list of mobile phones.
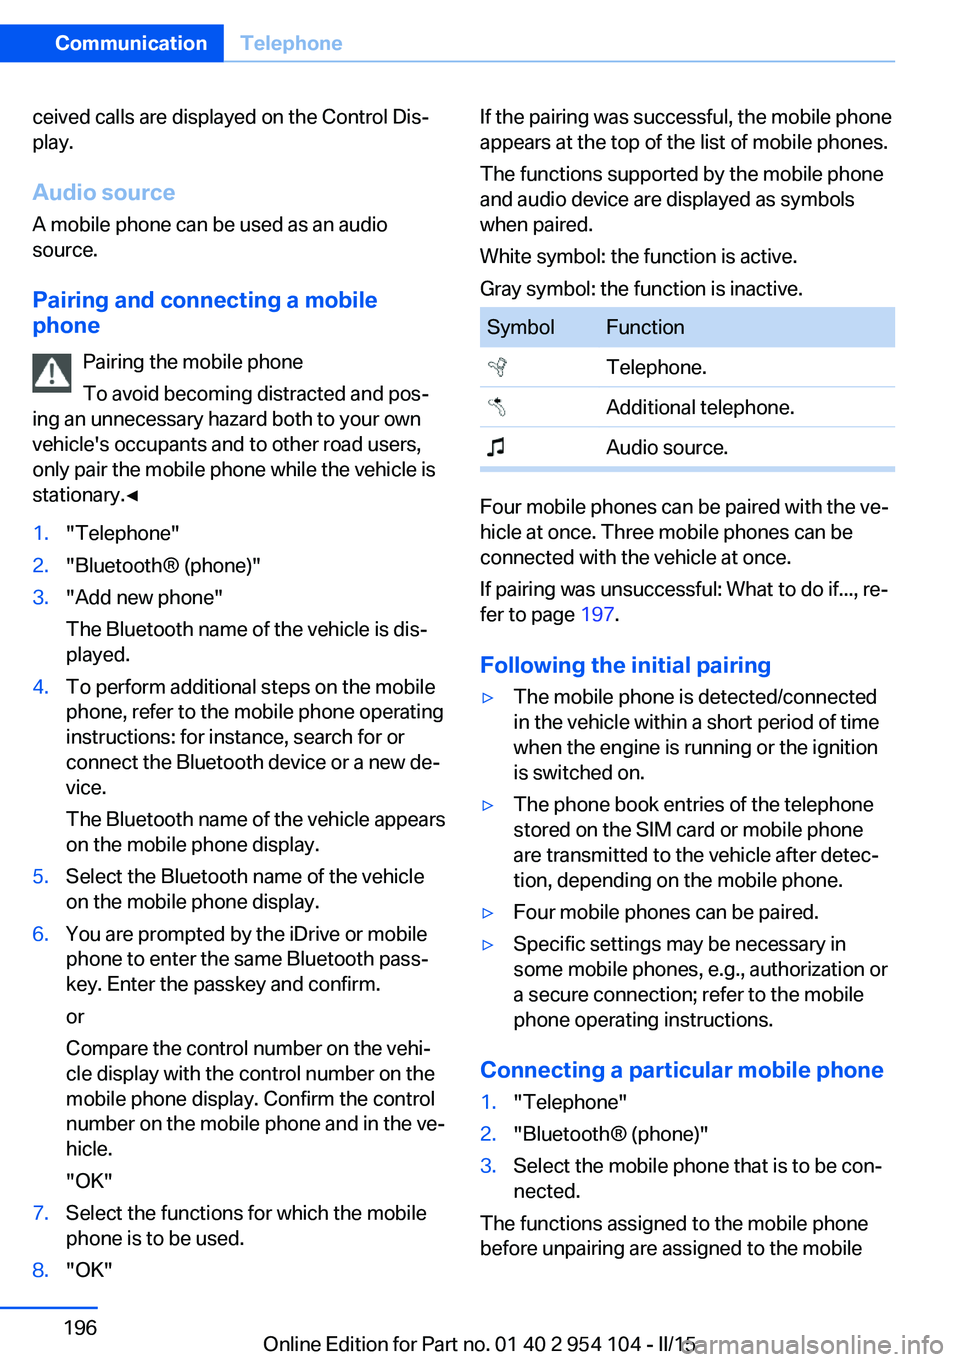
The functions supported by the mobile phone
and audio device are displayed as symbols
when paired.
White symbol: the function is active.
Gray symbol: the function is inactive.SymbolFunction Telephone. Additional telephone. Audio source.
Four mobile phones can be paired with the ve‐
hicle at once. Three mobile phones can be
connected with the vehicle at once.
If pairing was unsuccessful: What to do if..., re‐
fer to page 197.
Following the initial pairing
▷The mobile phone is detected/connected
in the vehicle within a short period of time
when the engine is running or the ignition
is switched on.▷The phone book entries of the telephone
stored on the SIM card or mobile phone
are transmitted to the vehicle after detec‐
tion, depending on the mobile phone.▷Four mobile phones can be paired.▷Specific settings may be necessary in
some mobile phones, e.g., authorization or
a secure connection; refer to the mobile
phone operating instructions.
Connecting a particular mobile phone
1."Telephone"2."Bluetooth® (phone)"3.Select the mobile phone that is to be con‐
nected.
The functions assigned to the mobile phone
before unpairing are assigned to the mobile
Seite 196CommunicationTelephone196
Online Edition for Part no. 01 40 2 954 104 - II/15
Page 200 of 289
▷Switch the mobile phone off and on again.▷Is the ambient temperature too high or
low? Do not expose the mobile phone to
extreme environmental conditions.
The telephone functions are not available.
▷Is the mobile phone paired as an additional
telephone and is the additional telephone
function deactivated? Activate the func‐
tion.▷Is an outgoing call not possible? Connect
the mobile phone as a telephone.
No phone book entries or only some phone
book entries are displayed, or they are incom‐
plete.
▷Transmission of the phone book entries is
not yet complete.▷It is possible that only the phone book en‐
tries of the mobile phone or the SIM card
are transmitted.▷It may not be possible to display phone
book entries with special characters.▷The number of phone book entries to be
stored is too high.▷Is the data volume of the contact too large,
e. g., due to stored information such as
notes? Reduce the data volume of the con‐
tact.▷Is the mobile phone connected as an audio
source or additional telephone? The mo‐
bile phone must be connected as a tele‐
phone.
The phone connection quality is poor.
▷The strength of the Bluetooth signal on the
mobile phone can be adjusted, depending
on the mobile phone.▷Insert the mobile phone into the snap-in
adapter or place it in the area of the center
console.▷Adjust the volume of the microphone and
loudspeakers separately.If all points in this list have been checked and
the required function is still not available, con‐
tact Customer Relations or the service center.
Controls
Adjusting the volume
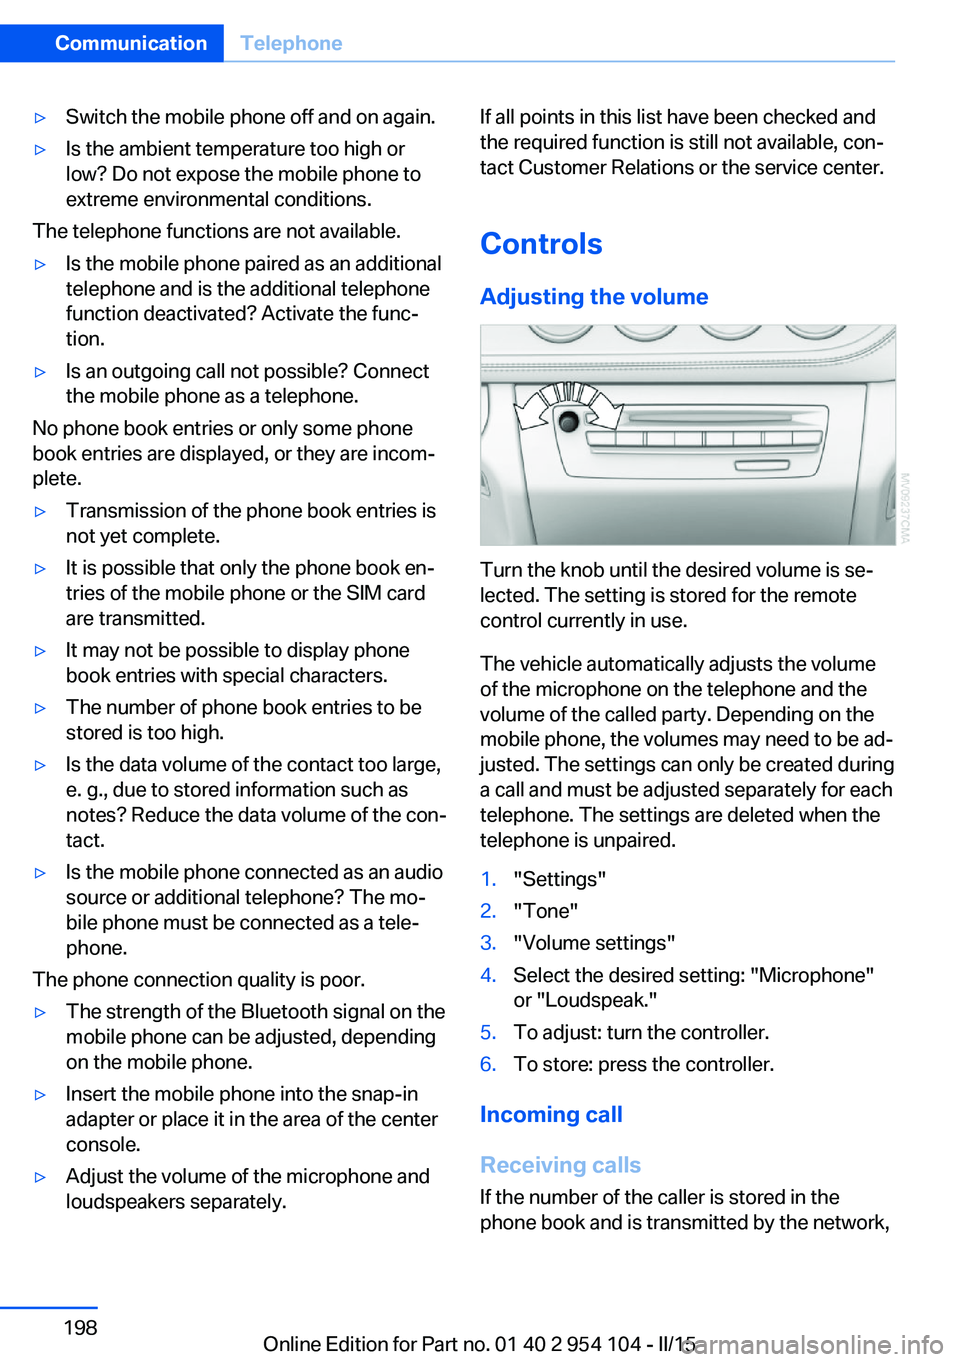
Turn the knob until the desired volume is se‐
lected. The setting is stored for the remote
control currently in use.
The vehicle automatically adjusts the volume
of the microphone on the telephone and the
volume of the called party. Depending on the
mobile phone, the volumes may need to be ad‐
justed. The settings can only be created during
a call and must be adjusted separately for each
telephone. The settings are deleted when the
telephone is unpaired.
1."Settings"2."Tone"3."Volume settings"4.Select the desired setting: "Microphone"
or "Loudspeak."5.To adjust: turn the controller.6.To store: press the controller.
Incoming call
Receiving calls If the number of the caller is stored in the
phone book and is transmitted by the network,
Seite 198CommunicationTelephone198
Online Edition for Part no. 01 40 2 954 104 - II/15
Page 226 of 289
RefuelingVehicle equipment
This chapter describes all series equipment as
well as country-specific and special equipment
offered for this model series. Therefore, it also
describes equipment that may not be found in
your vehicle, for instance due to the selected
special equipment or the country version. This
also applies to safety-related functions and
systems.
When using the features and systems descri‐
bed here, adhere to local regulations.
General information Refuel promptly
At the latest, refuel at a range of
30 miles/50 km; otherwise, the engine function
is not ensured and damage may occur.◀
Notes Switch off the engine before refueling
Always switch off the engine before refu‐
eling; otherwise, fuel cannot be added to the tank and a message will be displayed.◀
Observe when handling fuel▷Take all precautionary measures and
observe all applicable regulations
when handling fuel.▷Do not carry any spare fuel containers in
your vehicle. They can develop a leak and
cause an explosion or cause a fire in the
event of an accident.◀Fuel filler flap
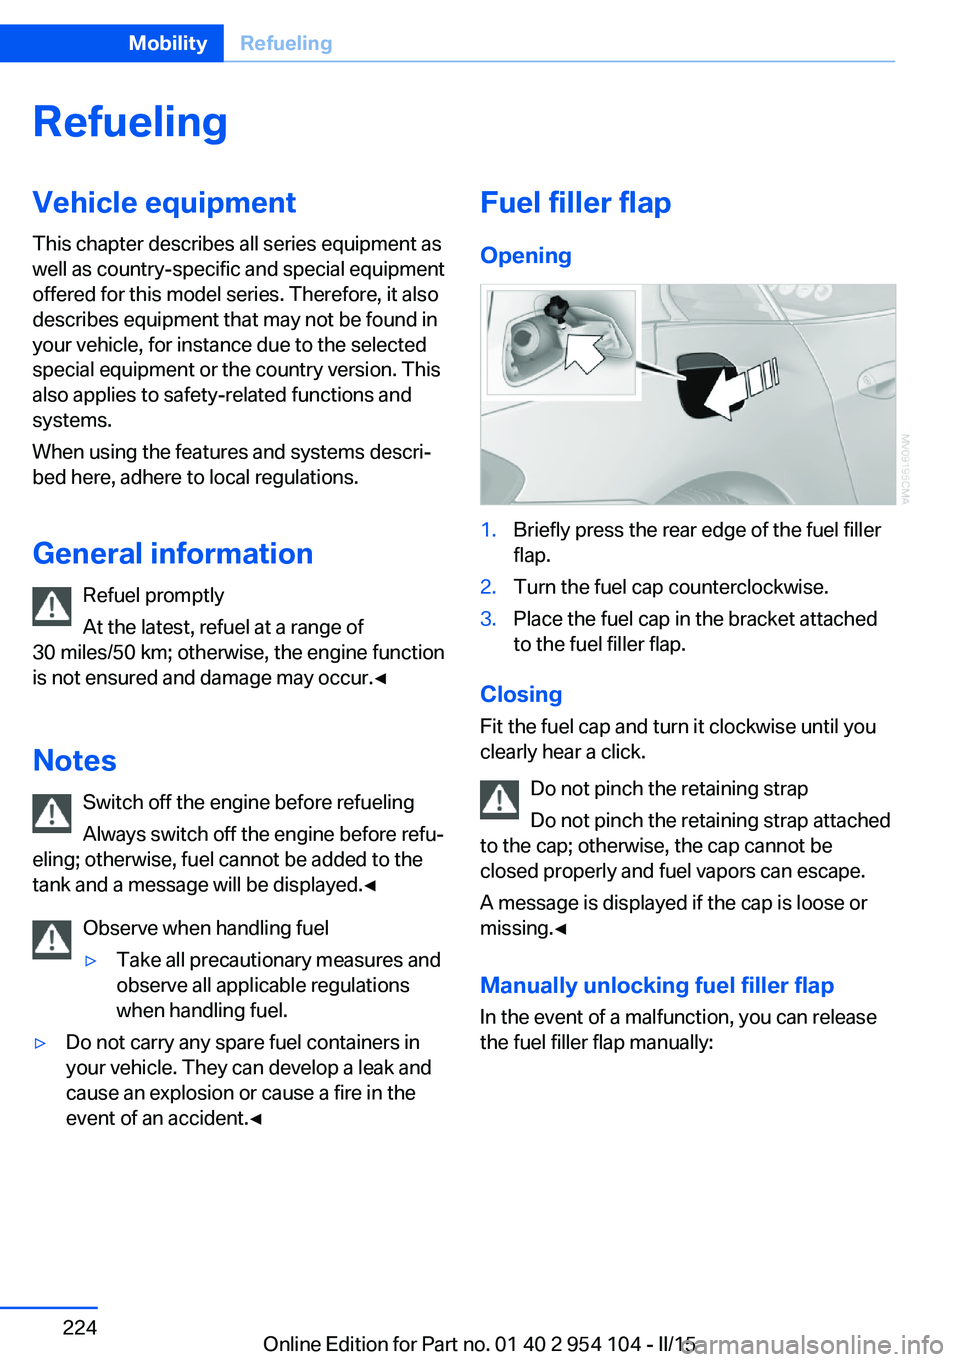
Opening1.Briefly press the rear edge of the fuel filler
flap.2.Turn the fuel cap counterclockwise.3.Place the fuel cap in the bracket attached
to the fuel filler flap.
Closing
Fit the fuel cap and turn it clockwise until you
clearly hear a click.
Do not pinch the retaining strap
Do not pinch the retaining strap attached
to the cap; otherwise, the cap cannot be
closed properly and fuel vapors can escape.
A message is displayed if the cap is loose or
missing.◀
Manually unlocking fuel filler flap In the event of a malfunction, you can release
the fuel filler flap manually:
Seite 224MobilityRefueling224
Online Edition for Part no. 01 40 2 954 104 - II/15
Page 227 of 289
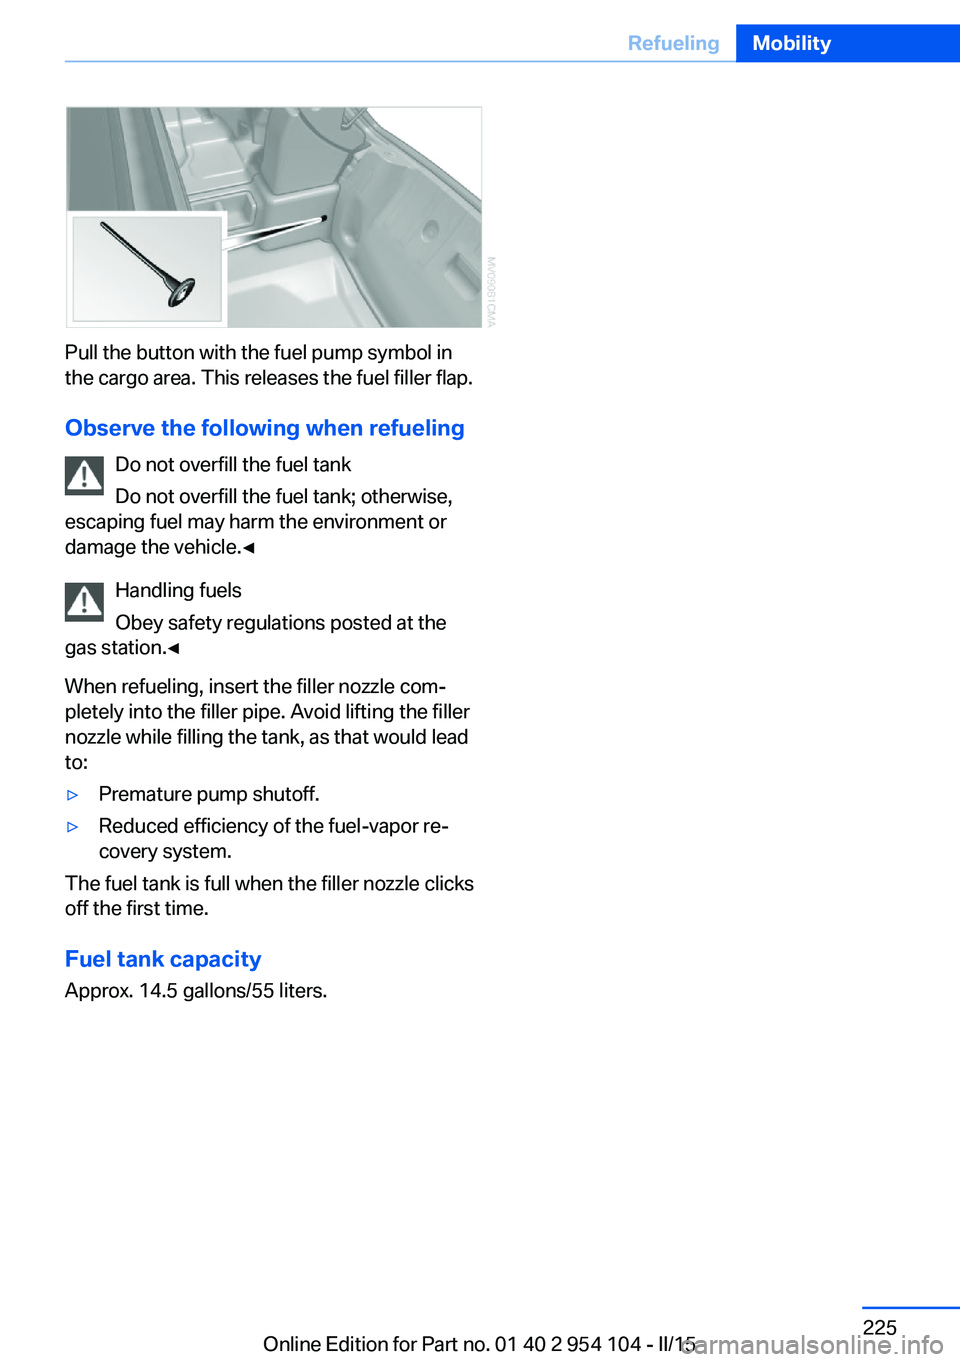
Pull the button with the fuel pump symbol in
the cargo area. This releases the fuel filler flap.
Observe the following when refueling Do not overfill the fuel tank
Do not overfill the fuel tank; otherwise,
escaping fuel may harm the environment or
damage the vehicle.◀
Handling fuels
Obey safety regulations posted at the
gas station.◀
When refueling, insert the filler nozzle com‐ pletely into the filler pipe. Avoid lifting the filler
nozzle while filling the tank, as that would lead
to:
▷Premature pump shutoff.▷Reduced efficiency of the fuel-vapor re‐
covery system.
The fuel tank is full when the filler nozzle clicks
off the first time.
Fuel tank capacity Approx. 14.5 gallons/55 liters.
Seite 225RefuelingMobility225
Online Edition for Part no. 01 40 2 954 104 - II/15
Page 234 of 289
R: radial tire code
17: rim diameter in inches
91: load rating, not for ZR tires
V: speed rating, before the R on ZR tires
Speed letter
Q = up to 100 mph/160 km/h
T = up to 118 mph/190 km/h
H = up to 131 mph/210 km/h
V = up to 150 mph/240 km/h
W = up to 167 mph/270 km/h
Y = up to 186 mph/300 km/h
Tire Identification Number Tires with DOT codes meet the guidelines of
the U.S. Department of Transportation.
DOT code:
DOT xxxx xxx 0313
xxxx: manufacturer code for the tire brand
xxx: tire size and tire design
0313: tire age
Tire age The tire manufacturing date is contained in the
tire identification mark: DOT ... 0313 means
that the tire was manufactured in the week 3 of
2,013.
BMW recommends that you replace all tires af‐
ter 6 years at most, even if some tires may last
for 10 years.
Uniform Tire Quality Grading Quality grades can be found where applicable
on the tire sidewall between tread shoulder
and maximum section width. For example:
Treadwear 200 Traction AA
Temperature A
DOT Quality Grades
TreadwearTraction AA A B C
Temperature A B C
All passenger car tires must conform to
Federal Safety Requirements in addition
to these grades.◀
Treadwear The treadwear grade is a comparative rating
based on the wear rate of the tire when tested
under controlled conditions on a specified gov‐
ernment test course. For example, a tire graded 150 would wear one and one-half
(11/2) times as well on the government course
as a tire graded 100. The relative performance of tires depends upon the actual conditions of
their use, however, and may depart signifi‐
cantly from the norm due to variations in driv‐
ing habits, service practices and differences in
road characteristics and climate.
Traction
The traction grades, from highest to lowest,
are AA, A, B, and C.
Those grades represent the tire's ability to
stop on wet pavement as measured under
controlled conditions on specified government
test surfaces of asphalt and concrete. A tire
marked C may have poor traction performance.
The traction grade assigned to this tire is
based on straight-ahead braking traction tests,
and does not include acceleration, cornering,
hydroplaning, or peak traction characteristics.
Temperature
The temperature grades are A, the highest, B,
and C, representing the tire's resistance to the
generation of heat and its ability to dissipate
heat when tested under controlled conditions
on a specified indoor laboratory test wheel.
Sustained high temperature can cause the ma‐
terial of the tire to degenerate and reduce tire
life, and excessive temperature can lead to
sudden tire failure. The grade C corresponds
to a level of performance which all passengerSeite 232MobilityWheels and tires232
Online Edition for Part no. 01 40 2 954 104 - II/15
Page 235 of 289
car tires must meet under the Federal Motor
Vehicle Safety Standard No. 109. Grades B
and A represent higher levels of performance
on the laboratory test wheel than the minimum
required by law.
Temperature grade for this tire
The temperature grade for this tire is es‐
tablished for a tire that is properly inflated and
not overloaded. Excessive speed, underinfla‐
tion, or excessive loading, either separately or
in combination, can cause heat buildup and
possible tire failure.◀
RSC – Run-flat tires The symbol identifying run-flat tires is a circle
with the letters RSC on the sidewall, refer to
page 234.
M+S
Winter and all-season tires.
These have better winter properties than
summer tires.
XL
Designation for specially reinforced tires.
Tire tread
Summer tires
Do not drive with a tire tread depth of less than
0.12 in/3 mm.
There is an increased danger of hydroplaning if
the tread depth is less than 0.12 in/3 mm.
Winter tires
Do not drive with a tire tread depth of less than
0.16 in/4 mm.
Below a tread depth of 0.16 in/4 mm, tires are
less suitable for winter operation.Minimum tread depth
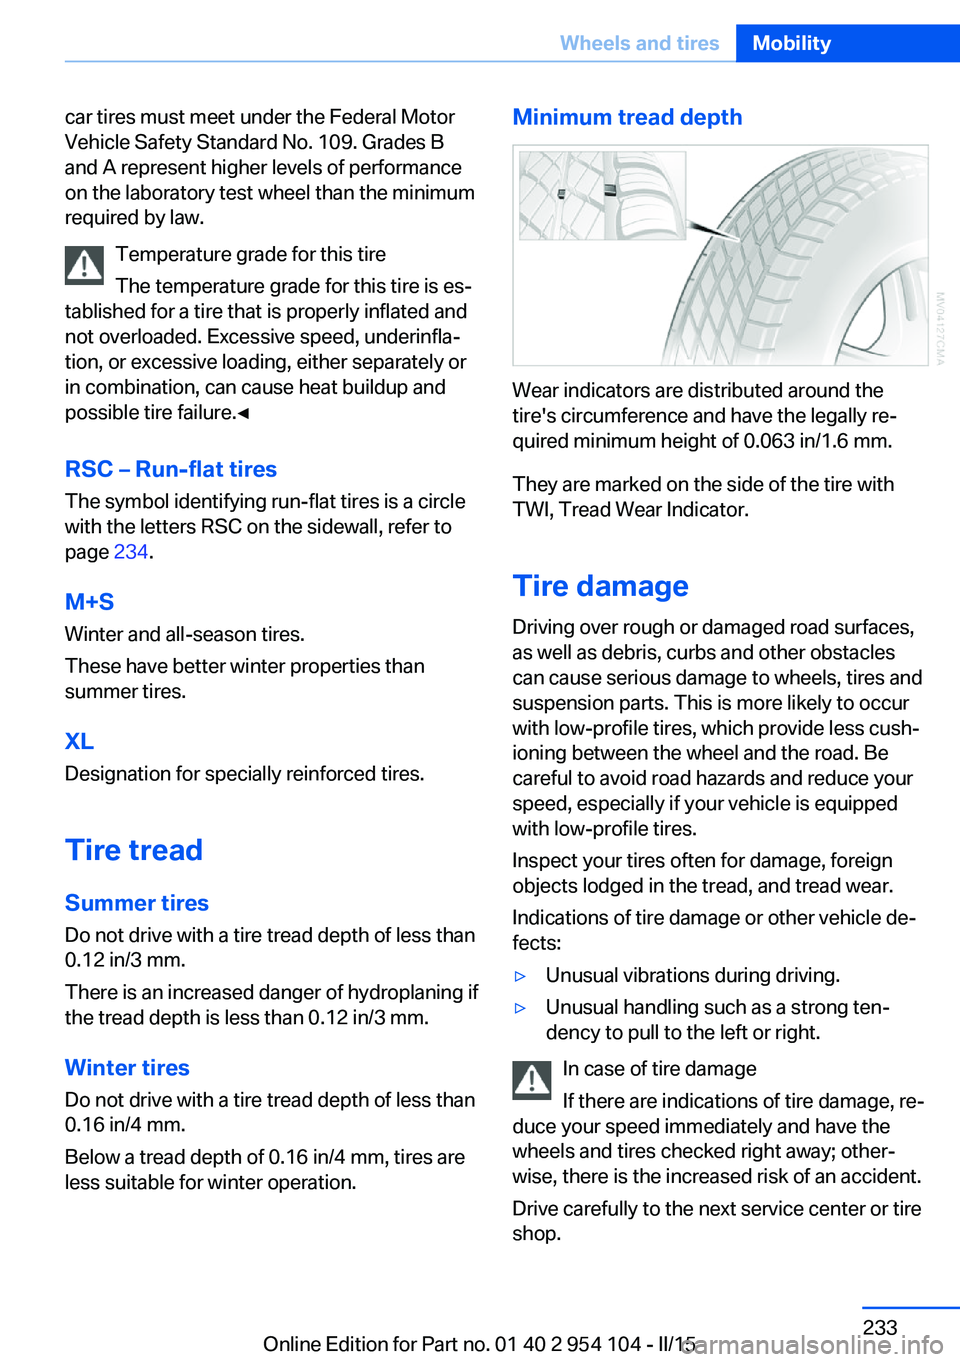
Wear indicators are distributed around the
tire's circumference and have the legally re‐
quired minimum height of 0.063 in/1.6 mm.
They are marked on the side of the tire with
TWI, Tread Wear Indicator.
Tire damage
Driving over rough or damaged road surfaces,
as well as debris, curbs and other obstacles can cause serious damage to wheels, tires and
suspension parts. This is more likely to occur
with low-profile tires, which provide less cush‐
ioning between the wheel and the road. Be
careful to avoid road hazards and reduce your
speed, especially if your vehicle is equipped
with low-profile tires.
Inspect your tires often for damage, foreign
objects lodged in the tread, and tread wear.
Indications of tire damage or other vehicle de‐
fects:
▷Unusual vibrations during driving.▷Unusual handling such as a strong ten‐
dency to pull to the left or right.
In case of tire damage
If there are indications of tire damage, re‐
duce your speed immediately and have the
wheels and tires checked right away; other‐
wise, there is the increased risk of an accident.
Drive carefully to the next service center or tire
shop.
Seite 233Wheels and tiresMobility233
Online Edition for Part no. 01 40 2 954 104 - II/15
Page 236 of 289
If necessary, have the vehicle towed.◀Repair of tire damage
For safety reasons, the manufacturer of
your vehicle recommends that you do not have
damaged tires repaired; they should be re‐
placed. Otherwise, damage can occur as a re‐
sult.◀
Run-flat tires
Label
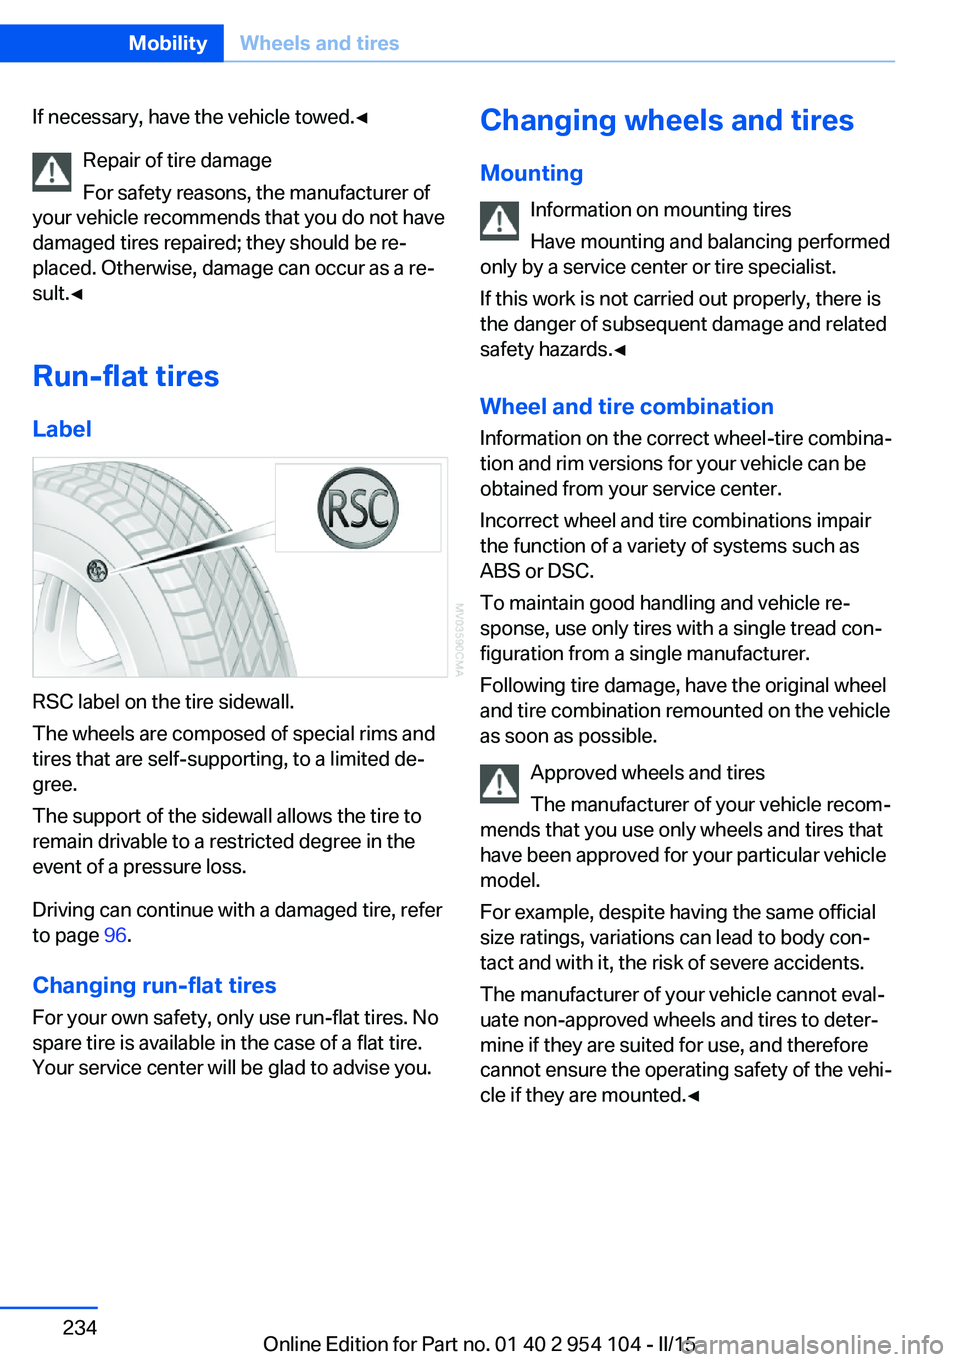
RSC label on the tire sidewall.
The wheels are composed of special rims and
tires that are self-supporting, to a limited de‐
gree.
The support of the sidewall allows the tire to
remain drivable to a restricted degree in the
event of a pressure loss.
Driving can continue with a damaged tire, refer
to page 96.
Changing run-flat tires
For your own safety, only use run-flat tires. No
spare tire is available in the case of a flat tire.
Your service center will be glad to advise you.
Changing wheels and tires
Mounting Information on mounting tires
Have mounting and balancing performed
only by a service center or tire specialist.
If this work is not carried out properly, there is
the danger of subsequent damage and related
safety hazards.◀
Wheel and tire combination
Information on the correct wheel-tire combina‐
tion and rim versions for your vehicle can be
obtained from your service center.
Incorrect wheel and tire combinations impair
the function of a variety of systems such as
ABS or DSC.
To maintain good handling and vehicle re‐
sponse, use only tires with a single tread con‐ figuration from a single manufacturer.
Following tire damage, have the original wheel
and tire combination remounted on the vehicle
as soon as possible.
Approved wheels and tires
The manufacturer of your vehicle recom‐
mends that you use only wheels and tires that have been approved for your particular vehicle
model.
For example, despite having the same official
size ratings, variations can lead to body con‐
tact and with it, the risk of severe accidents.
The manufacturer of your vehicle cannot eval‐
uate non-approved wheels and tires to deter‐
mine if they are suited for use, and therefore
cannot ensure the operating safety of the vehi‐
cle if they are mounted.◀Seite 234MobilityWheels and tires234
Online Edition for Part no. 01 40 2 954 104 - II/15