2015 BMW I8 glass
[x] Cancel search: glassPage 70 of 224

Front head restraintsDistance
The spacing is adjusted to the back of the
head using the incline of the seat backrest.
Adjust the distance so that the head restraint
is as close as possible to the back of the head.
Removing The head restraints cannot be removed.
Mirrors Exterior mirrors
General information
The mirror on the passenger side is more
curved than the driver's side mirror.
Depending on the vehicle equipment, the mir‐
ror setting is stored for the profile currently in
use. When the vehicle is unlocked via the re‐
mote control, the position is automatically re‐
trieved if this function is active.
Note Estimating distances correctly
Objects reflected in the mirror are closer
than they appear. Do not estimate the distance
to the traffic behind you based on what you
see in the mirror, as this will increase your risk
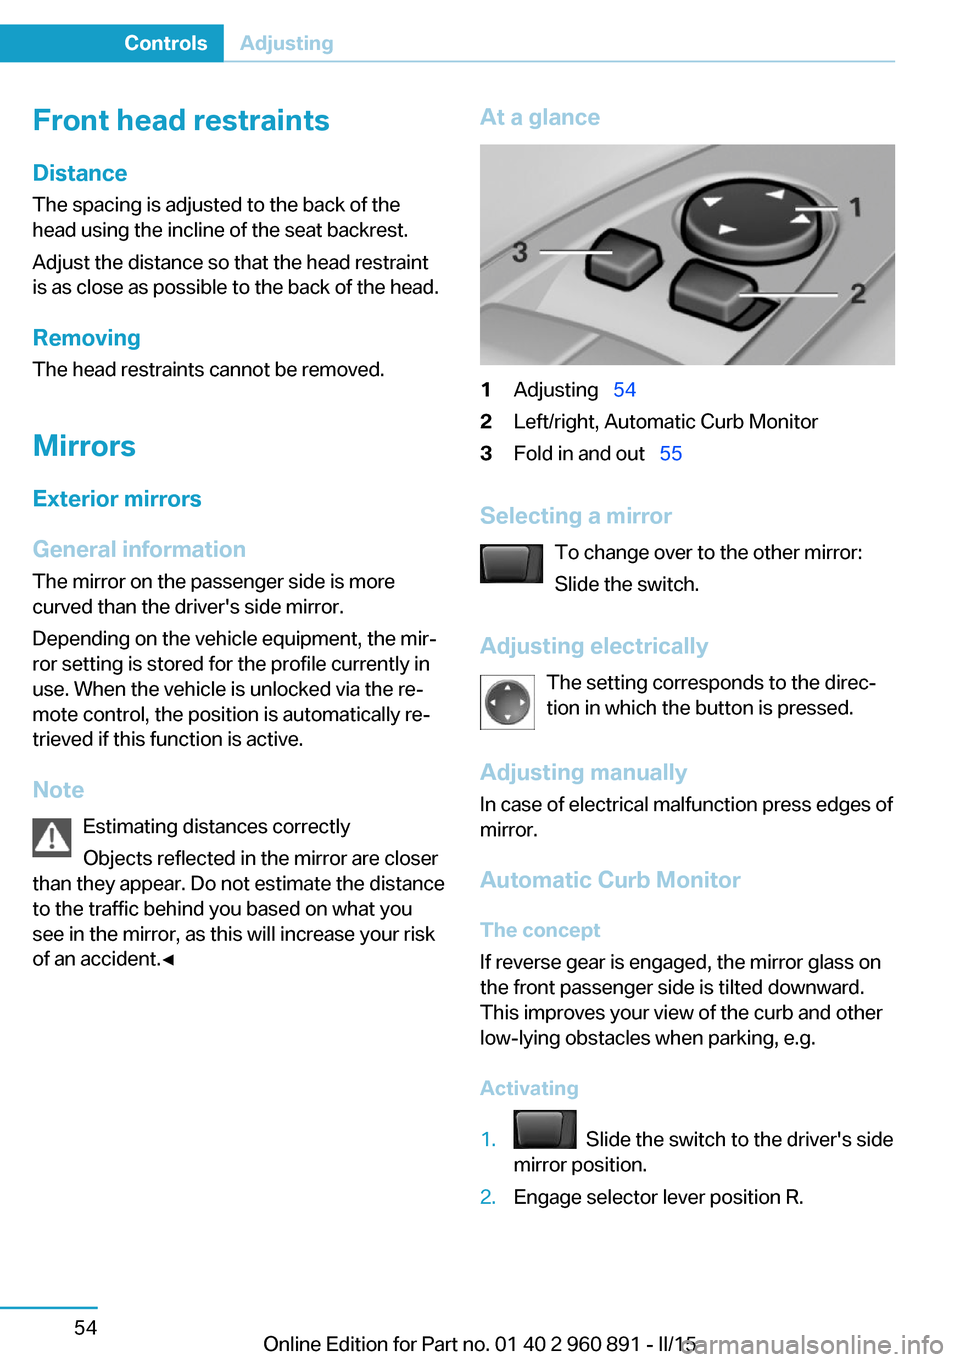
of an accident.◀At a glance1Adjusting 542Left/right, Automatic Curb Monitor3Fold in and out 55
Selecting a mirror
To change over to the other mirror:
Slide the switch.
Adjusting electrically The setting corresponds to the direc‐
tion in which the button is pressed.
Adjusting manually
In case of electrical malfunction press edges of
mirror.
Automatic Curb MonitorThe concept
If reverse gear is engaged, the mirror glass on
the front passenger side is tilted downward.
This improves your view of the curb and other
low-lying obstacles when parking, e.g.
Activating
1. Slide the switch to the driver's side
mirror position.2.Engage selector lever position R.Seite 54ControlsAdjusting54
Online Edition for Part no. 01 40 2 960 891 - II/15
Page 71 of 224

Deactivating
Slide the switch to the passenger side mirror
position.
Fold in and out Press button.
Possible at speeds up to approx.
15 mph/20 km/h.
E. g. this is advantageous▷In car washes.▷In narrow streets.▷For folding mirrors back out that were
folded away manually.
Mirrors that were folded in are folded out auto‐
matically at a speed of approx.
25 mph/40 km/h.
Fold in the mirror in a car wash
Before washing the car in an automatic
car wash, fold in the exterior mirrors by hand or
with the button; otherwise, the mirrors could
be damaged, depending on the width of the
vehicle.◀
Automatic heating
Both exterior mirrors are automatically heated
whenever drive readiness is switched on.
Automatic dimming featureBoth exterior mirrors are automatically dim‐
med. Photocells are used to control the Interior
rearview mirror, refer to page 55.
Interior rearview mirror, manually
dimmable
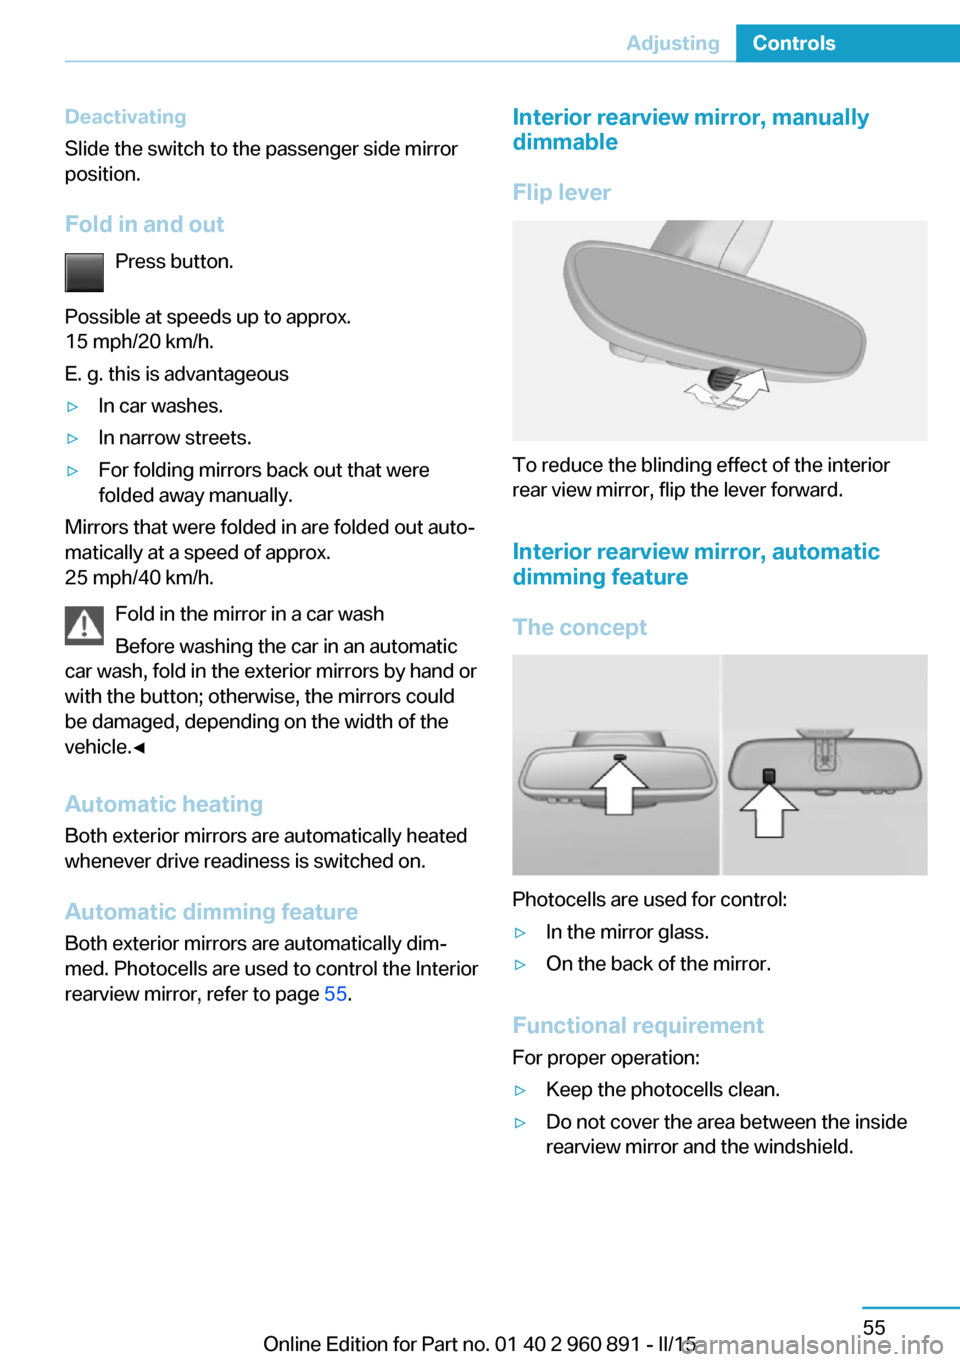
Flip lever
To reduce the blinding effect of the interior
rear view mirror, flip the lever forward.
Interior rearview mirror, automatic dimming feature
The concept
Photocells are used for control:
▷In the mirror glass.▷On the back of the mirror.
Functional requirement For proper operation:
▷Keep the photocells clean.▷Do not cover the area between the inside
rearview mirror and the windshield.Seite 55AdjustingControls55
Online Edition for Part no. 01 40 2 960 891 - II/15
Page 106 of 224

Language
Setting the language
To set the language on the Control Display:1."Settings"2."Language/Units"3."Language:"4.Select the desired language.
Settings are stored for the profile currently in
use.
Setting the voice dialog
Voice dialog for the voice activation system,
refer to page 27.
Units of measure
Setting the units of measure
To set the units for fuel consumption, route/
distance and temperature:
1."Settings"2."Language/Units"3.Select the desired menu item.4.Select the desired unit.
Settings are stored for the profile currently in
use.
Brightness
Setting the brightness
To set the brightness of the Control Display:
1."Settings"2."Control display"3."Brightness"4.Turn the controller until the desired bright‐
ness is set.5.Press the controller.
Settings are stored for the profile currently in
use.
Depending on the light conditions, the bright‐
ness settings may not be clearly visible.
Activating/deactivating display of the
current vehicle position
If GPS geolocation has been activated, the cur‐
rent vehicle position can be displayed in the
BMW i Remote App or in the ConnectedDrive
customer portal.1."Settings"2."GPS tracking"3."GPS tracking"
Head-up Display
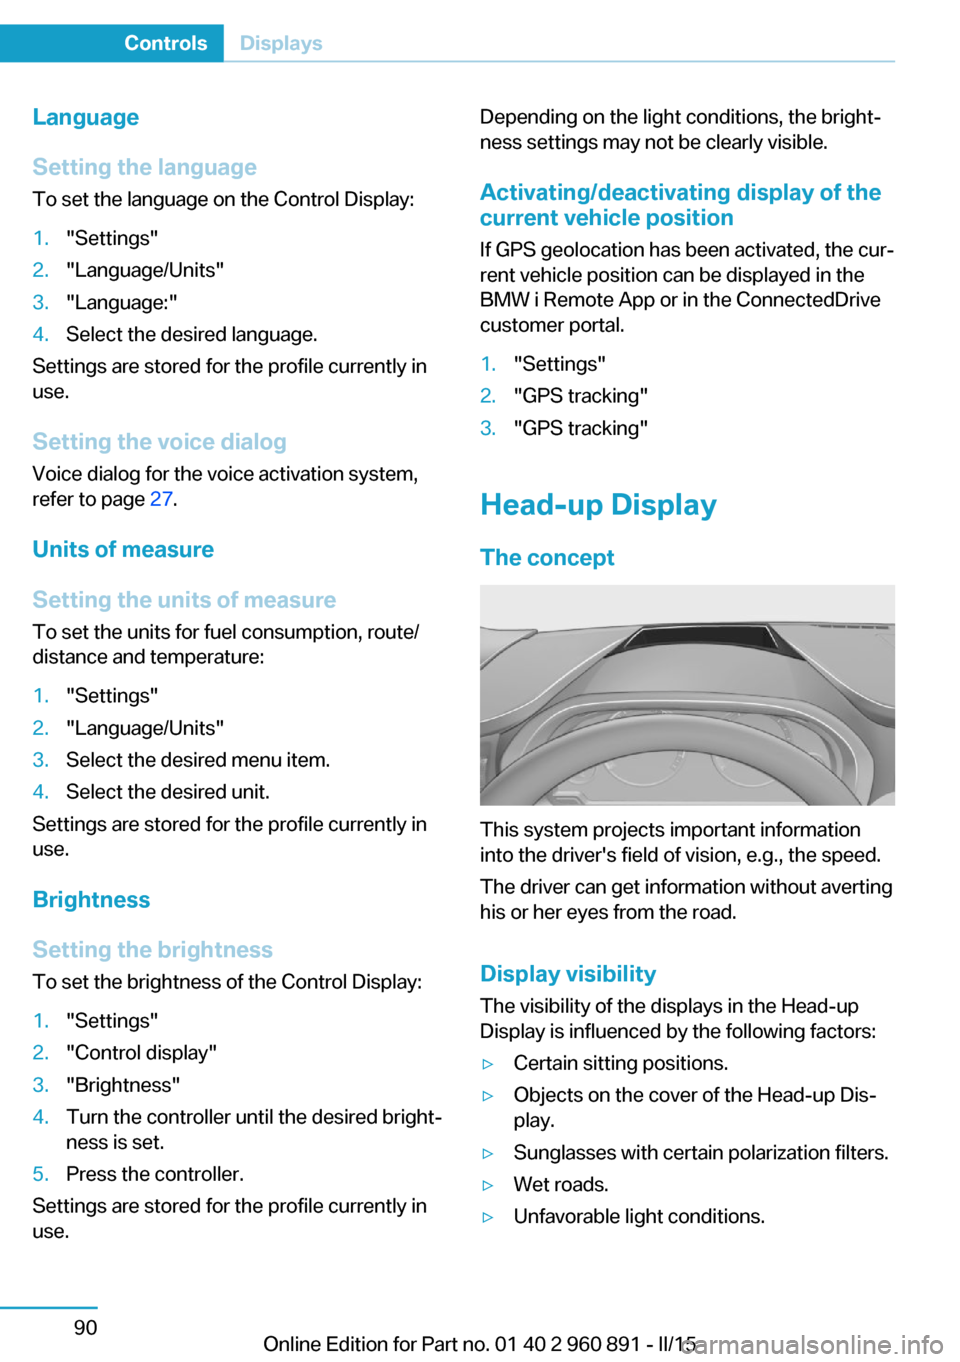
The concept
This system projects important information
into the driver's field of vision, e.g., the speed.
The driver can get information without averting
his or her eyes from the road.
Display visibility The visibility of the displays in the Head-up
Display is influenced by the following factors:
▷Certain sitting positions.▷Objects on the cover of the Head-up Dis‐
play.▷Sunglasses with certain polarization filters.▷Wet roads.▷Unfavorable light conditions.Seite 90ControlsDisplays90
Online Edition for Part no. 01 40 2 960 891 - II/15
Page 196 of 224

Replacing componentsVehicle features and optionsThis chapter describes all standard, country-
specific and optional features offered with the
series. It also describes features that are not
necessarily available in your car, e. g., due to
the selected options or country versions. This
also applies to safety-related functions and
systems. The respectively applicable country
provisions must be observed when using the
respective features and systems.
Wiper blade replacement Hints Do not fold down the wipers without
wiper blades
Do not fold down the wipers if wiper blades
have not been installed; this may damage the
windshield.◀
Replacing the wiper blades1.To change the wiper blades, fold up, refer
to page 70, the wiper arms.2.Fold up the wipers.3.Position the wiper blade in a horizontal po‐
sition.4.Remove the wiper blade toward one side.5.Insert the new wiper blade in reverse order
of removal until it locks in place.6.Fold down the wipers.
Lamp and bulb replacement
General information
All headlights and lights are made using LED
or laser technology. Contact your service cen‐
ter in the event of a malfunction.
Headlight glass
Condensation can form on the inside of the ex‐
ternal lights in cool or humid weather. When
driving with the light switched on, the conden‐
sation evaporates after a short time. The head‐
light glass does not need to be changed.
If the headlights do not dim despite driving
with the light switched on, increasing humidity
forms, e. g. water droplets in the light, have the
service center check this.
Light-emitting diodes (LEDs)
Some items of equipment use light-emitting
diodes installed behind a cover as a light
source.
These light-emitting diodes, which are related
to conventional lasers, are officially designated
as Class 1 light-emitting diodes.
Seite 180MobilityReplacing components180
Online Edition for Part no. 01 40 2 960 891 - II/15
Page 206 of 224

Do not place additional floor mats over existing
mats or other objects.
Only use floor mats that have been approved
for the vehicle and can be properly attached to
floor.
Ensure that the floor mats are securely fas‐
tened again after they were removed for clean‐
ing, e.g.◀
Floor mats can be removed from the car's inte‐
rior for cleaning.
If the floor carpets are very dirty, clean with a
microfiber cloth and water or a textile cleaner.
To prevent matting of the carpet, rub back and
forth in the direction of travel only.
Sensor/camera lenses To clean sensors and camera lenses, use a
cloth moistened with a small amount of glass
detergent.
Displays/monitors Cleaning displays and screens
Do not use any chemical or household
cleaning agents; otherwise, surfaces can be af‐
fected.◀
Keeping out moisture
Keep all fluids and moisture away from
the unit; otherwise, electrical components can
be damaged.◀
Avoid pressure
Avoid pressing too hard when cleaning
and do not use abrasive materials; otherwise,
damage can result.◀
Clean with a clean, antistatic microfiber cloth.
Long idle times and long-term vehicle
storage
Do not allow the vehicle to sit idle for ex‐
tended periods with a low charging state
Before storing the vehicle for an extended pe‐
riod, check the battery charge indicator to en‐sure that the high-voltage battery is fully
charged. For longer idle times, park the vehicle
with a charging plug plugged into a suitable
power source. Regularly check charging state.
Otherwise, the high-voltage battery can be
damaged when there is excessive discharge.◀
For idle phases that last several weeks, park
the vehicle with a fully charged battery if possi‐
ble.
Do not park the vehicle for longer than 14 days
if the electric range is less than 6 mls, approx.
10 km.
With storage times of up to three months, if
possible plug the vehicle into a suitable power
source or park it in a nearly fully charged state.
Note The service center can advise you on what to
consider when storing the vehicle for longer
than three months.Seite 190MobilityCare190
Online Edition for Part no. 01 40 2 960 891 - II/15
Page 217 of 224

External temperature warn‐ing 83
F Failure message, see Check Control 79
False alarm, refer to Uninten‐ tional alarm 48
Fan, refer to Air flow 126
Filler neck for engine oil 175
First aid kit 184
Fitting for towing, see Tow fit‐ ting 185
Flat tire, changing wheels 181
Flat tire, Tire Pressure Moni‐ tor TPM 99
Flat tire, warning lamp 100
Flooding 140
Floor carpet, care 189
Floor mats, care 189
Fold-out position, wiper 70
Foot brake 140
Front airbags 96
Front armrest 134
Front beverage holder, front cup holder 135
Front bottle holder, refer to Front cup holder 135
Front can holder, refer to Front cup holder 135
Front cup holder 135
Front-end collision warning with City Braking func‐
tion 103
Front holder for bever‐ ages 135
front-seat passenger airbags, automatic deactivation 98
Front-seat passenger airbags, indicator lamp 98
Fuel 161
Fuel consumption, current 87 Fuel consumption, refer to
Average fuel consump‐
tion 87
Fuel filler flap 158
Fuel gauge 82
Fuel lid 158
Fuel quality 161
Fuel recommendation 161
Fuel, tank capacity 195
Fuse 182
G
Garage door opener, refer to Universal Integrated Remote
Control 129
Gasoline 161
Gear change, Steptronic Sport transmission 71
Gear shift indicator 85
Gearshift, see Steptronic Sport transmission 70
General driving notes 139
Glare shield 131
Glove compartment 134
GPS location, vehicle posi‐ tion 90
Gross vehicle weight, ap‐ proved 195
H
Handbrake, refer to parking brake 66
Hand-held transmitter, alter‐ nating code 130
Hazard warning flashers 183
Head airbags 96
Headlight control, auto‐ matic 93
Headlight courtesy delay fea‐ ture 92
Headlight courtesy delay fea‐ ture, remote control 47
Headlight courtesy delay fea‐ ture via remote control 42 Headlight flasher 68
Headlight glass 180
Headlights, care 188
Head restraints 51
Head restraints, front 54
Head-up Display 90
Head-up Display, care 190
Heavy cargo, stowing 143
Height, vehicle 194
High-beam Assistant 94
High beams 68
High beams/low beams, refer to High-beam Assistant 94
High-voltage battery, charg‐ ing state indicator 77
High-voltage battery, dis‐ charge 139
High-voltage system, auto‐ matic deactivation 34
High-voltage system, contact with water 34
High-voltage system, safety 34
Hills 141
Hill start assistant, refer to Drive-off assistant 112
Hints 6
Homepage 6
Hood 44
Horn 14
Hot exhaust system 140
HUD Head-up Display 90
Hybrid system, adapting to the course of the road 79
Hybrid system, displays 77
Hydroplaning 140
I Ice warning, see External temperature warning 83
Icy roads, see External tem‐ perature warning 83
Identification marks, tires 164 Seite 201Everything from A to ZReference201
Online Edition for Part no. 01 40 2 960 891 - II/15