2015 AUDI TT ROADSTER ESP
[x] Cancel search: ESPPage 36 of 244
34 Opening and closing
Power locking system
General description
The power locking system locks or unlocks all
doors simultaneously.
The power lock ing system in your ve hicle in
corporates the fo llow ing funct ions:
- Central locking function
- Remote con tro l feature q page 33 .
- Anti -Theft Alarm Sys tem q page 38.
A ll the doors and the rear lid are locked by the
centra l locking system when you lock the vehi
cle.
The unlocking a nd lock ing mode * can be
changed in t he d river i nfo rmation system
qpage24.
Unlocking the vehicle
You can un lock the vehicle from outs ide e ither
by using the remote control
or by insert ing
a nd turning the key in t he driver's door lock.
When you
unlock your veh icle:
- The anti-theft alarm system is deactivated br iefly.
- The veh icle inter ior lights ill uminate for ap
proximate ly 30 seconds.
- All turn signa l lights will f lash twice w hen
the car is unlocked.
- After unlock ing the vehicle, yo u have 30 sec
onds to open a door or the rear lid. After 30
seconds, the vehicle automatically locks and
the ant i-theft a larm system activates again.
The rear lid can be locked or un locked either
by using the remote control
or by insert ing
a nd turning the key in the driver's door lock.
Unlock ing the ve hicle w ith the remote co ntrol
c::::5 will only unlock the rear lid, to open it, the
lid handle needs to be p ressed .
Locking the vehicle
You can lock the vehicle from o utside e ither by
using the remote control
or by insert ing and
turning the key in the drivers's door lock.
When you
lo ck the vehicle:
- All doors and the rear lid are locked. -
All turn signal lights wi ll flash once when
the car is loc ked .
- The ant i-theft a larm system is ac tiva ted.
The ho rn of the anti -theft alarm system wi ll
sound and t he anti-theft a la rm system read
iness light, located in the center of the in
strument panel be low the w indshield on the
r ight side of the air vent, will start to blink.
- The vehicle interior lights turn off.
Automat ic lock ing*
T he au tom atic locking fea ture locks a ll the ve
hicle doors an d the rear lid when you drive
faster than 9 m ph (15 km/h).
You can unlock t he vehi cle from the i nside by:
- remov ing the key from the igni tion swi tc h
(the vehi cle w ill automatically u nlock itself)
or
- pressi ng the un loc k pa rt of the power lock
sw itch
ll:D or
pull ing the door ha ndle (to open the doo r).
If you wish, yo u can have an a utho rized Aud i
dealer convert your power doo r lock system to
automat ic locking.
Unintentionally locking yourself out
T he veh icle does not lock with t he centra l
l ocking switch
¢ page 3 6 if the driver's door
is open .
D o no t lock your ve hicle w ith the
remote mas
ter key
un til a ll doo rs and t he rea r lid are
cl osed. In this way yo u avoid locking yourse lf
o ut accidentally .
_& WARNING
- When you loc k yo ur vehicle from o utside,
nobody- espec ia lly children -shou ld re
main inside the vehicle. Remember,
when yo u lock the vehicle from the out
side th e wi ndows cannot be o pened from
the inside.
- Wh en you leav e th e ve hicle, always re
move the ign ition key and take it w ith
you. This will preven t passe ngers (chil
d ren, f or example) from acci denta lly be
i n g loc ke d in the vehicle s hould they
Page 39 of 244
,&_ WARNING
-If you use the power locking switch with
the doors closed , remember that all the
vehicle doors will lock.
- Locked doors make it more difficult for
emergency workers to get into the vehi
cle, which puts lives at risk. Do not leave
anyone behind in the vehicle, especially
children.
Emergency locking
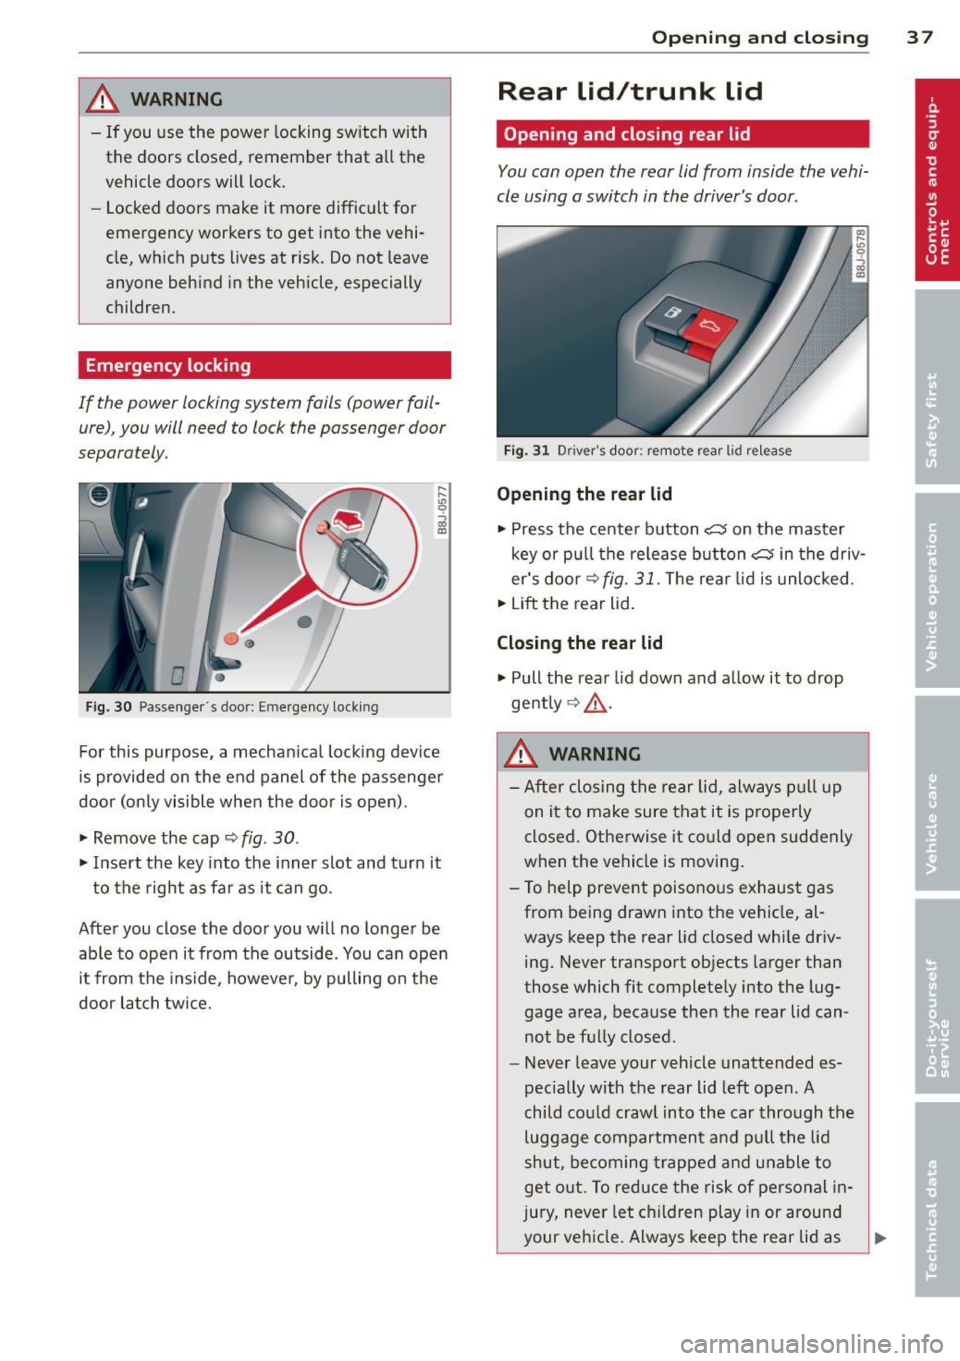
If the power locking system fails (pow er fail
ure), you will need to lock the passenger door
separately.
Fig. 30 Passenge r's door: E merge ncy lock ing
For this purpose, a mechan ica l locking device
i s provided on the end panel of the passenger
door (only visible when the door is open) .
• Remove the cap
~ fig . 30 .
• Insert the key into the inner slot and turn it
to the right as far as it can go.
After you close the door you w ill no longer be
able to open it from the outside . You can open
it from the inside, however, by pulling on the
door latch twice.
Opening and closing 3 7
Rear lid/trunk lid
Opening and closing rear lid
You can open the rear lid from inside the vehi
cle using a switch in the driver's door .
Fig. 31 Driver 's doo r: remote rear lid re lease
Opening the rear lid
• Press the center button Cc5 on the master
key or pu ll the release button
c:s in the driv
er's doo r
~fig. 31. The rea r lid is unlocked.
• Lift the rear lid.
Closing the rear lid
• Pull the rear lid down and a llow it to drop
gent ly ~ .&, .
A WARNING
-After closing the rear lid, always pull up
on it to make sure that it is p roperly
closed. Otherwise it could open suddenly
when the vehicle is moving .
- To help prevent poisonous exhaust gas
from being drawn into the vehicle, al
ways keep the rear lid closed whi le driv
ing. Never transport objects larger than
those which fit complete ly into the lug
gage area, because then the rear lid can not be fully closed.
- Never leave your vehicle unattended es
pecially with the rear lid left open . A
child could craw l into the car through the
luggage compartment and pull the lid
shut, becoming trapped and unable to
get out. To reduce the risk of personal in
jury, never let chil dren play in or around
your vehicle. Always keep the rear lid as
II-
Page 41 of 244

When will the anti theft ala rm system be
triggered?
When the vehicle is locked , the alarm system
monitors and protects the following parts of
the vehicle:
- engine compartment
- luggage compartment
- doo rs
- ignition
When the system is activated, the alarm will
be triggered if one of the doors, the engine
hood or the rear lid are opened, or if the ign i
tion is turned on.
The anti-theft alarm system will also go off
when the battery is disconnected.
You can a lso trigger the alarm by pressing the
PANIC button on your remote-control key.
This will alert other people in case of emer
gency. Press the
PANIC button again to turn
off the alarm .
How is the anti-theft alarm switched off
when triggered?
The alarm system is switched off when you
unlock the vehicle using the remote-control key or when the ignition is sw itched on . The
a larm will also switch itse lf off when it comes
to the end of its cycle.
Emergency flasher
The emergency flasher will blink briefly when
the doors, engine hood and rear lid are prop
erly closed.
If the emergency flashers do not blink, check
the doors, engine hood and rear lid to make
sure they are properly closed. If you close a
door, the hood or the rear lid with the ant i
theft alarm switched on, the emergency flash
ers will blink only after you have closed the
door or lid.
(1) Tips
For the anti-theft alarm system to func
tion properly, make sure all vehicle doors
and windows are closed before leaving the
vehicle.
Opening and closing 39
Power windows
Controls
The driver can operate all windows .
Fig. 35 Driver's door: power w indow switches
If the respective switch is pushed or pulled
the window w il l open or clos e. The power win
dow switches have a two-position function :
Opening the windows
.,. Press the switch and hold it down until the
w indow has reached the desired position .
.,. Press the switch
briefly to open the window
automatically. By briefly pressing the switch
again, the downward travel of the window
can be stopped in any position<=-> .&_.
Closing the windows
.,. Pull the sw itch and hold it unti l the window
has reached the desired position .
.,. Pull the switch
briefly to close the window
automatically. By briefly press ing the switch
aga in, the upward travel of the window can
be stopped in any position
~ .&_ .
Switch @<=->fig .
35 operates the window in
the driver's door.
Switch @ operates the window in the front
passenger 's door.
&_ WARNING
- Do not leave children unattended in the
vehicle, especially with access to vehicle
keys . Unsupervised use of the keys can
result in start ing of the engine and use
of vehicle systems such as power win
dows, etc. wh ich could result in serious
injury.
Page 42 of 244
40 Opening and closing
-Remember -you can still open or close
the power windows for about ten mi
nutes after the ignition is switched off.
Only when either of the front doors are
opened are the power windows sw itched
off.
- Be careful when closing the windows.
Check to see that no one is in the way, or
serious injury could result!
- Always remove the ignition key whenever
you leave your vehicle .
- If you lock your vehicle from the outside,
no one, especially children, should re
ma in in the vehicle.
- Do not stick anything on the w indows or
the windsh ield that may interfere with
the driver's field of vision.
(D Tips
-When the doors are opened, the w in
dows are automat ically lowered 10 mm .
- The windows can still be opened and
closed for about ten m inutes after the
ignition has been turned off. The power
windows are not shut off until one of the
fron t doors is opened.
Convenience close/open feature
You can close or open the windows from out
side when you lock or unlock your car with the
key.
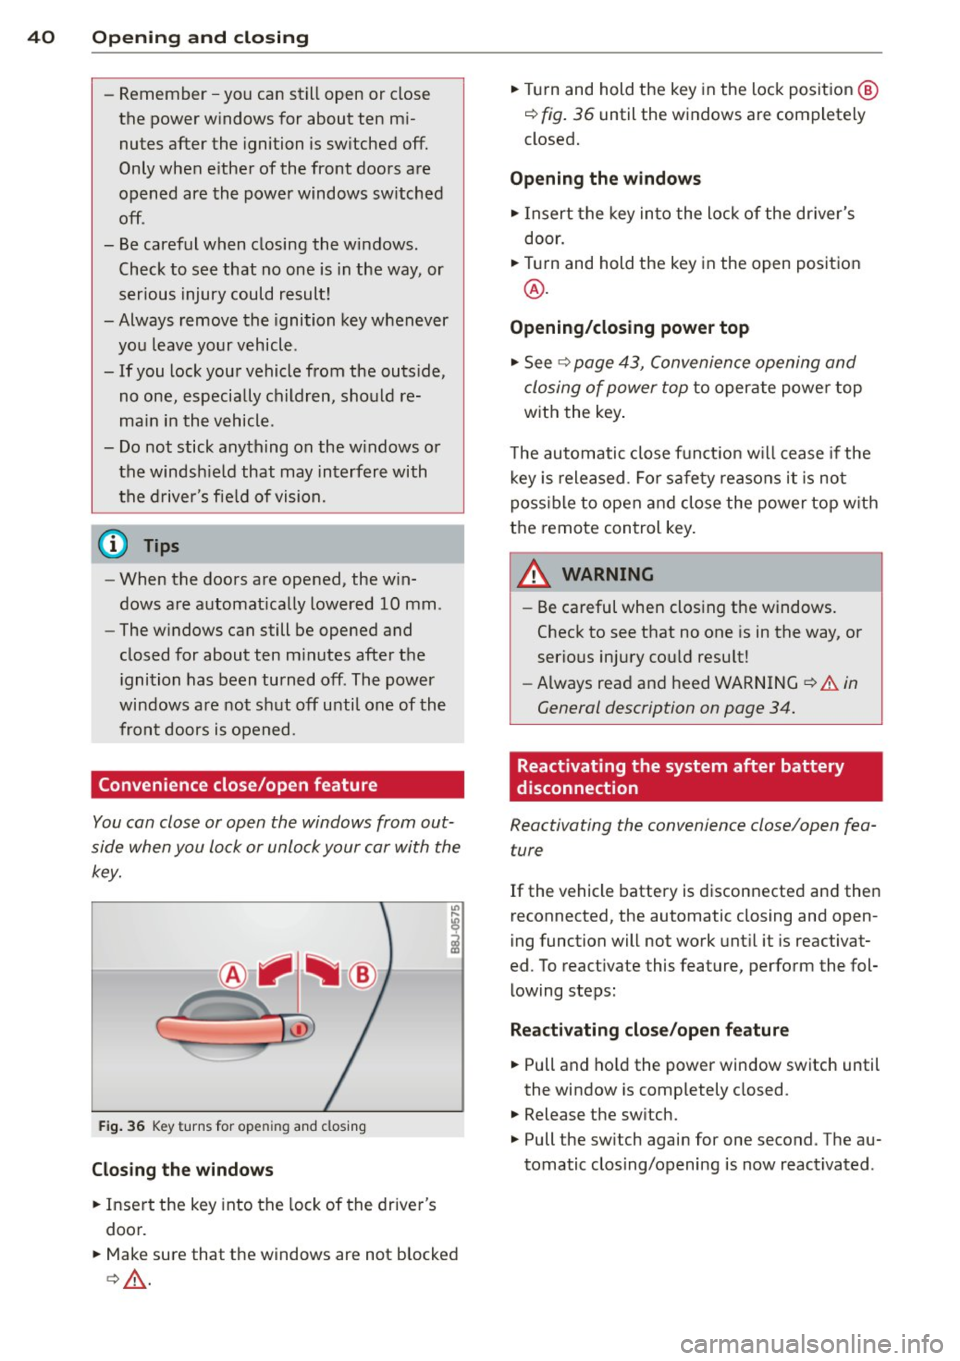
F ig. 36 Key turns for open ing and closing
Closing the windows
• Insert the key into the lock of the driver's
door.
• Make sure that the windows are not blocked
c> & .
• Tu rn and hold the key in the lock position @
¢ fig. 36 until the windows are completely
closed.
Opening the windows
• Insert the key into the lock of the driver's
door.
• Turn and hold the key in the open position
@.
Opening/closing power top
• See c> page 43, Convenience opening and
closing of power top
to operate power top
with the key.
T he automatic close funct io n w ill cease if the
key is released. Fo r sa fety reasons it is not
poss ible to open and close the power top w ith
the remote control key.
A WARNING
-
- Be careful when clos ing the windows.
Check to see that no one is in the way, or
serious injury cou ld resu lt!
- Always read and heed WARNING
~.&. in
General description on page
34.
Reactivating the system after battery
disconnection
Reactivating the convenience close/open fea
ture
If the vehicle battery is disconnected and then
reconnected, the automatic closing and open
ing function will not work until it is reactivat
ed. To react ivate this feature, perform the fol
lowing steps:
Reactivating close/open feature
• Pull and hold the power window switch until
the window is completely closed.
• Release the sw itch.
• Pull the sw itch again for one second . The au
tomatic clos ing/opening is now reactivated .
Page 43 of 244
Convertible top
Convertible top
General information
The comprehensively engin eered design of the
f abric convertib le top a llows it to be operated
qu ickly and simply. When open, the convert i
b le top is stowed completely in a tonneau pro
vided spec ifically for this purpose.
I n normal operating conditions, the converti
b le top is wind -and waterp roof. Under certa in
circumstances, a small quantity o f droplets
might form, but on ly in extremely inclement
weather, e.g . torrentia l or contin uous heavy
rain. This is normal and not a cause for con
cern.
F ollow the care instructions
Q page 154 to
maintain the convertible top's attractive ap
pearance and to keep it wind- and waterproof.
Please follow these instructions as well:
- Stow and open the convertib le top only
when it is clean. When the top is folded
away, sharp-edged contaminants can build
up as silt and cause wear spots o n the rear
window, which may damage the convertible
top over time. Of course, ice and snow should also be removed before open ing the
convertible top.
- Under no c ircumstances should you use
sharp-edged or abrasive objects to remove
ice and snow . Use a commerc ial ice scraper
to remove ice from o f the rear window.
- T he convert ible top should be opened only if
it is complete ly d ry. If the convertib le top is
opened and then stored wet, unattractive
indentations may develop . In addition, over
time, mold and mildew stains can develop.
- Do no t leave the convertible top open for
several weeks at a time; instead, open and
close it from time to time so that the fabric
does not disco lor where it folds, and to pre
vent creases from forming. This is espec ially
important if it happens to be stowed wh ile
still damp on occasion.
- Because the fabric becomes less flexible
when temperatures drops below zero, we
Convertible top 41
recommend not operating the convertible
top below O°C.
A WARNING -
- When operat ing the convertible top,
make sure that any external factors (e.g.
the wind) do not impair its funct ion or
e ndanger other drivers.
- Never drive wh ile the convertib le top is
not properly secured. Otherwise , it may
be pulled open by the wind. This can
cause injur ies and damage to the vehicle
- danger of an accident!
- When opening and closing the converti-
ble top make sure to keep yourself and
o thers clear of a ll movi ng pa rts. Risk of
in jur y!
d) Note
-Always make su re that there is enough
clearance above the veh icle so that the
c onvertib le top is not damaged when
opening and clos ing.
- Do not place any objects in the tonneau
t o avoid damage when open ing the con
ver tible top.
(D Tips
- Th e convert ible top should be operated
only wi th the ign ition sw itched on.
- When pa rking the ca r with the convert i
ble top open, bear in mind t hat the vehi
cle's in terior is not p rotec ted fro m dam
age due to unexpec ted weather condi
tions, o r unauthorized access . It is there
fore advisab le to close the convertib le
top before leaving the veh icle. If objects
are left inside the vehicle, they should be
locked in the luggage compartment.
Page 51 of 244

light sensor checked as soon as possible at a
dealership.
Adaptive light *
The benefit of adaptive l ight is that the curve
and the edge of the road are better i llum inat
ed . The adaptive light is contro lled automati
cally, depending on vehicle speed and steering
wheel angle.
When driving a round bends, the head lights
are contro lled according to steering wheel an
g le . So that there is no black area ahead of the
ve hic le, the two main beams pivot at different
angles. The system works above a speed of
about 6 mph (10 km/h).
Com ing home /le avi ng home function *
The function is swit ched on when the switch is
in the AUTO* position and the function is
shown as active in the driver information sys
tem.
The
coming hom e function illuminates the
area around the vehicle when the ign ition is
switched off and the driver's door is ope ned.
The length of time the lights remain on can be
set in the menu display
( Illumination > Exte
rior lights > coming home ).
The leavi ng home function i lluminates the
area around the vehicle when unlocking it.
A WARNING
- Never use dayt ime running l ights to see
where you are going. They are not bright
enough and w ill not let you see far
enough ahead for safety, especially at
dusk or when it is dar k. Always switch on
the low beams at dusk or when i t is dar k.
- Automatic headlights a re only intended
to assist the dr iver. They do not re lieve
t he driver of his responsibi lity to check
t he headlights and to turn them on man
ually according to the current light and
visibility conditions. For example, fog
and rain cannot be detected by the light
sensors. So a lways switch on the head
lights under these weather cond itions
and when driving in the dark
jO .
Clear vis ion 49
- Crashes can happen when you cannot see
the road ahead and when you cannot be
seen by other motorists.
- Always turn on the headlights so that
youcanseeahe adandsothatothe ~
can see your car from the back .
- Please observe legal regulat ions w hen
using the ligh ting systems des cribed.
(D Tips
- T he light sensor for head light control is
located in the rear view mirror mount.
Do not apply any stickers to t he wind
shield in th is area to preven t malfunc
tions or fa ilures.
- Some exter io r l ighting funct ions can be
adjusted in t he driver i nformat ion sys
t em
~page 24.
- I f you remove the igni tion from t he igni
t ion lock while the headligh ts are s till
on, a buzzer wi ll sound as long as the
driver's door is o pen to remind yo u to
t u rn off the lights.
- Always observe the specific local regula
tions for your area as to when to use your
lights.
- With automatic headlights, the high
beam f unction is also available, but w ith
one restrict ion: If you have not sw itched
the high beams back to low beams dur
ing automatic headlight operation (for
example, after d riving throug h a tunnel),
only the low beams come on the next
t ime au tomati c headlights a re swi tched
on. To use the high beams , you firs t have
t o pull the hig h beam lever back and
then push the lever fo rward again .
- In coo l or damp weather, the inside of
the headlights, turn signals an d tail
lights can fog over due to the tempera
t u re difference between the inside and
outside. They w ill clear shortly after
switching them on. This does not affect
the se rv ice life of the lighting.
Page 54 of 244
52 Clear vis ion
Instrument panel illumination
F ig. 58 Instrument panel ill umination
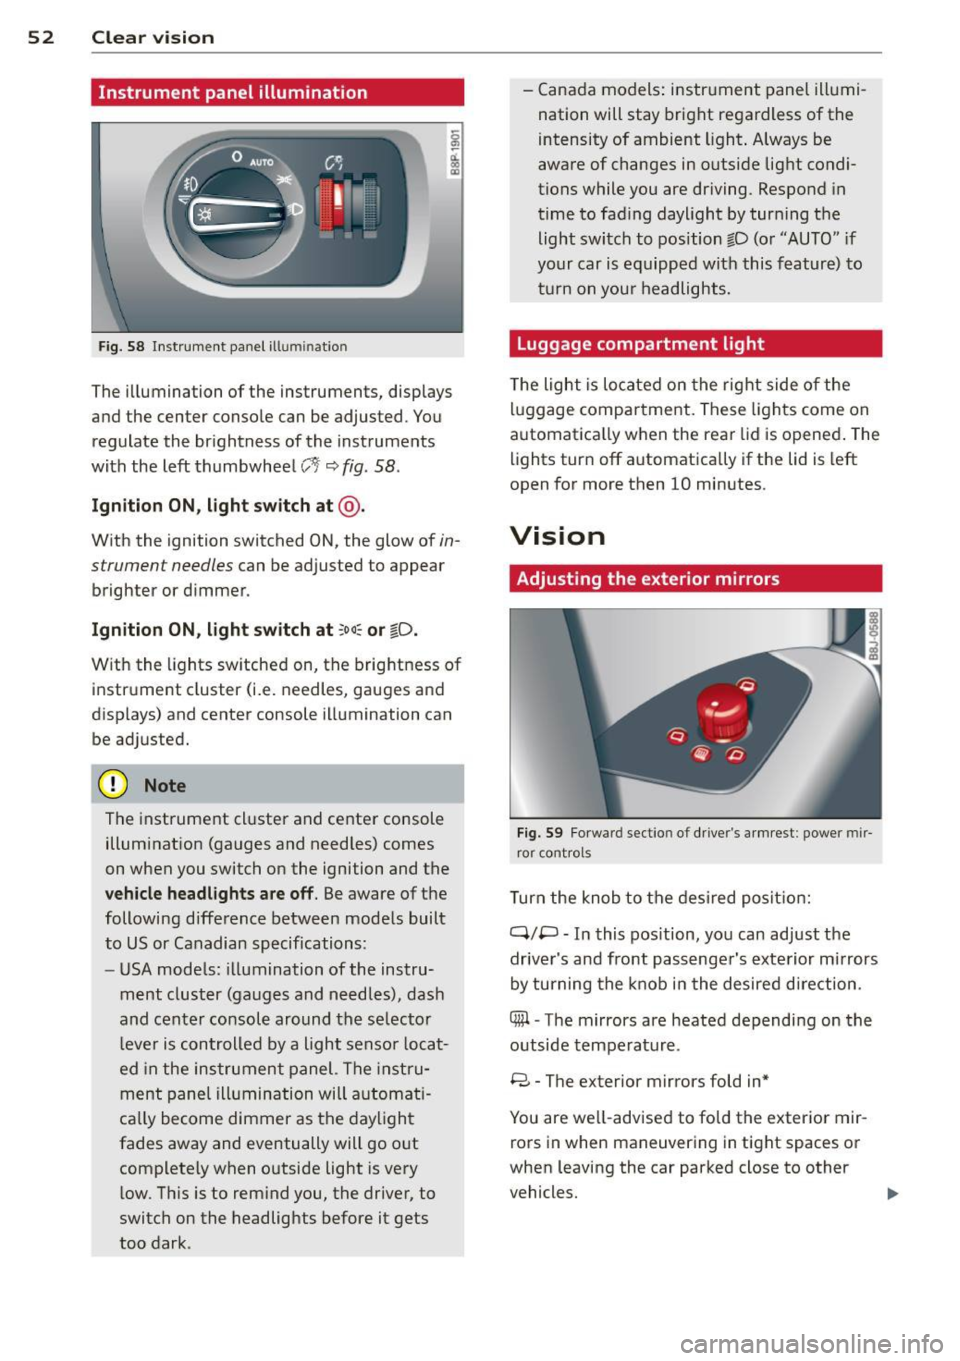
The illumination of the instruments, displays
and the center console can be adjusted. You
regulate the brightness of the instruments
with the left thumbwheel
CJ:J ~ fig. 58.
Ignition ON, light switch at @ .
With the ignition switched ON, the glow of in
strument needles can be adjusted to appear
brighter or dimmer.
Ignition ON , light switch at ;oo~ or io .
With the l ights sw itched on, the brightness of
instrument cluster (i.e. needles, gauges and
displays) and center console illumination can
be adjusted.
@ Note
The instrument cl uster and cente r console
illumination (gauges and needles) comes
on when you switch on the ignition and the
vehicle headligh ts ar e off . Be aware of the
following difference between mode ls built
to US or Canadian specifications:
- USA mode ls: illumination of the instru
ment cluster (gauges and needles), dash
and center consol e around the se lector
l ever is controlled by a light senso r locat
ed in the instrument panel. The instru
ment pane l illumination will a utomat i
cally become dimmer as the daylight
fades away and eventually will go out
complete ly when outside light is very
l ow . Th is is to rem ind you, the driver, to
switch on the headlights before it gets
too dark . -
Canada models: instrument panel illumi
nation will stay bright regardless of the
intensity of ambient light . Always be
aware of changes in outside light condi
tions while you are driving. Respond in
time to fading daylight by tur ning the
light switch to position fD (o r "AUTO" if
your car is equipped with this feature) to
t ur n on you r headlights.
Luggage compartment light
The light is located on the right side of the
lu ggage compartme nt. These lights come on
automat ica lly when the rear lid is opened . The
lights turn off automatica lly if the lid is left
open for more then 10 minutes.
Vision
Adjusting the exterior mirrors
Fig. 59 Fo rwa rd section of driver's a rmrest: power mir
ror controls
Turn the knob to the desired posit ion:
Q/ P -In this pos ition, you can adjust the
driver's and front passenger's exte rior m irrors
by turning the knob in the desired d irection.
4iil -The mirrors are heated depending on the
outside temperature .
8 -The exterior mirrors fold in*
You are we ll-advised to fold the exterior mir
rors in when maneuvering in tight spaces or
when leaving the car parked close to other
vehicles. ..,,.
Page 55 of 244
_& WARNING
- Curved (i. e. convex) mirror surfaces in
crease your field of view. Remember that
vehicles or other objects will appear
smaller and farther away than when seen
in a flat mirror.
If you use this mirror to
estimate distances of following vehicles
when changing lanes, you could estimate
incorrectly and cause an accident.
CD Note
- If the mirror housing is moved uninten
tionally (for example, while parking your
vehicle), then you must first fold the mir ror electrically. Do not readjust the mir
ror housing manually. You could damage
the motor which controls the mirror .
- If you wash the vehicle in an automatic
car wash, you must fold the exterior mir
rors in to reduce the risk of damage to
the mirrors . Never fold power folding ex
terior mirrors* by hand. Only fold them in and out using the power controls .
@ Tips
If there should be a malfunction in the
electrical system, you can still adjust the
exterior mirrors by pressing the edge of
the mirror .
Dimming the mirrors
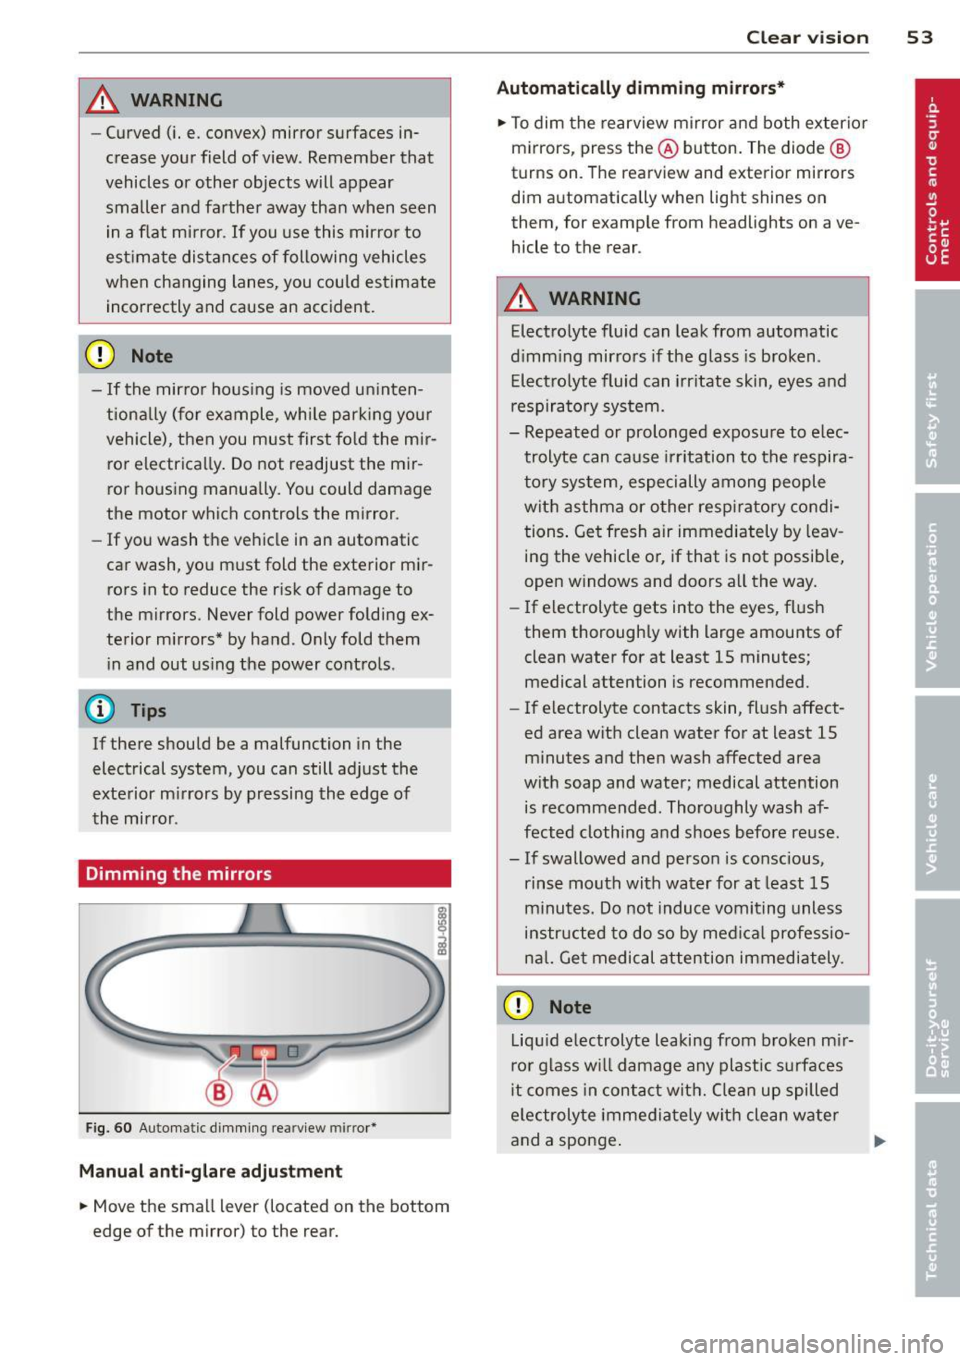
Fig. 60 Automa tic dimming re arview mirror•
Manual anti-glare adjustment
• Move the small l ever (located on the bottom
edge of the mirror) to the rear.
Clear vision 53
Automatically dimming mirrors*
• To dim the rearview mirror and both exterior
mirrors, press the @button. The diode @
turns on . The rearview and exterior mirrors
dim automatically when light shines on
them, fo r ex ample from headlights on ave
hicle to the rear .
_& WARNING
Electrolyte fluid can leak from automatic
dimming mirrors if the glass is broken .
Electrolyte fluid can irritate skin, eyes and
respiratory system.
- Repeated or prolonged exposure to elec
trolyte can cause irritation to the respira
tory system, especially among people
with asthma or other respiratory condi
tions. Get fresh air immediately by leav
ing the vehicle or, if that is not possible,
open windows and doors all the way.
- If electrolyte gets into the eyes, flush
them thoroughly with large amounts of
clean water for at least 15 minutes·
. '
medical attention is recommended.
- If electrolyte contacts skin, flush affect
ed area with clean water for at least 15 minutes and then wash affected area
with soap and water; medical attention is recommended. Thoroughly wash af
fected clothing and shoes before reuse .
- If swallowed and person is conscious, rinse mouth with water for at least 15
minutes. Do not induce vomiting unless
instructed to do so by medical professio
nal. Get medical attention immediately .
CD Note
Liquid electrolyte leaking from broken mir
ror glass will damage any plastic surfaces
it comes in contact with. Clean up spilled
electrolyte immediately with clean water
and a sponge. .,..