2015 AUDI S7 lights
[x] Cancel search: lightsPage 81 of 316
M N <( I.J "". rl I.O
"' rl
"' rl
.. Press the !S TAR T ENGINE STOP I button. The
engine will start.
.. Drive to your author ized Audi dealer imme
diately to have the malfunction corrected .
@ Tips
You can view the message again by press ing the
! START ENGINE STOPI button.
Electromechanical
parking brake
Operation
The electromechanical parking brake replaces
the hand brake.
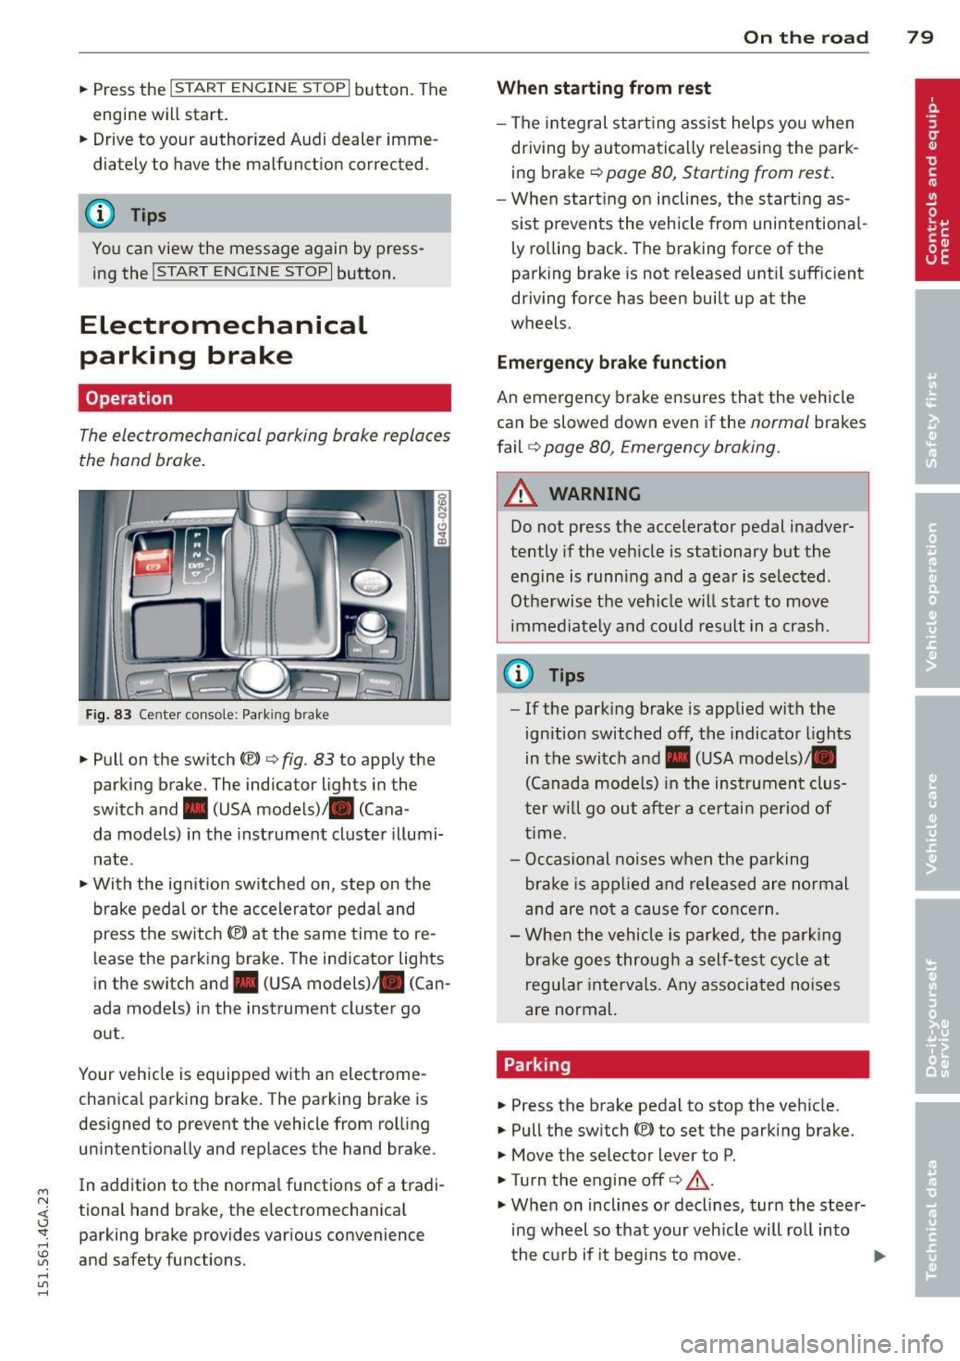
Fig. 83 Center console: Park ing brake
.. Pull on the switch<®> c> fig. 83 to apply the
parking brake. The indicator lights in the
switch and. (USA models)/ . (Cana -
da models) in the instrument cluster illumi
nate .
.. With the ignit ion sw itched on, step on the
brake pedal or the accelerator pedal and
press the sw itch<®> at the same time to re
lease the parking brake. The indicator lights
in the switch and. (USA models) . (Can
ada models) in the instrument cluster go
out .
Your vehicle is equipped with an electrome
chanica l parking brake. The parking brake is
designed to prevent the vehicle from rolling unintentionally and replaces the hand brake .
In addition to the norma l functions of a tradi
tional hand brake, the electromechanical parking brake provides various convenience
and safety functions.
On the road 79
When starting from rest
- The integral start ing assist helps you when
driving by automatically re leasing the park
ing brake c>
page 80, Starting from rest.
-When start ing on inclines, the starting as
sist p revents the vehicle from unintentiona l
ly rolling back. The braking force of the
parking brake is not re leased until sufficient
driving force has been built up at the
wheels.
Emergency brake function
An emergency brake ensures that the vehicle
can be slowed down even if the
normal brakes
fail
c:;, page 80, Emergency braking.
A WARNING
Do not press the accelerator pedal inadver
tently if the veh icle is stationary but the
engine is running and a gear is selected .
Otherwise th e vehicle w ill start to move
immediately and could result in a crash.
@ Tips
- If the parking brake is applied with the
ignition switched
off, the indicator lights
in the switch and. (USA models)/ •
(Canada models) in the instrument clus
t er w ill go out after a certain period of
time.
- Occasional noises when the parking
brake is applied and released are normal
and are not a cause for concern.
- When the vehicle is pa rked, the parking
brake goes through a self-test cycle at
regu lar intervals. Any associated noises
are normal.
Parking
.. Press the brake pedal to stop the vehicle.
.. Pull the switch(®) to set the parking brake.
.. Move the selector lever to P .
.. Tu rn the engine offc>
.&.
.,. When on inclines or decl ines, turn the steer
ing wheel so that your veh icle wi ll roll into
the curb if it begins to move. ""
Page 84 of 316
82 On the road
lever position and take your foot off the brake
pedal.
If you select the R position during a Stop
phase, the eng ine will start aga in.
Shift from
D to P quickly to prevent the engine
from starting unintentionally when shifting
through
R.
You can determ ine for yourself if the eng ine
will stop or not by reduc ing or increasing the
amount of force you use to press the brake
pedal. For example , if you only lightly press
on the brake pedal in stop-and and-go traff ic
or when turning, the engine will not switch off
when the vehicle is stationary . As soon as you
press the brake down harder, the eng ine will
switch off.
General information
Applies to vehicles: with Start-Stop-System
The standard Start-Stop-mode can be cancel
led for different system-related reasons .
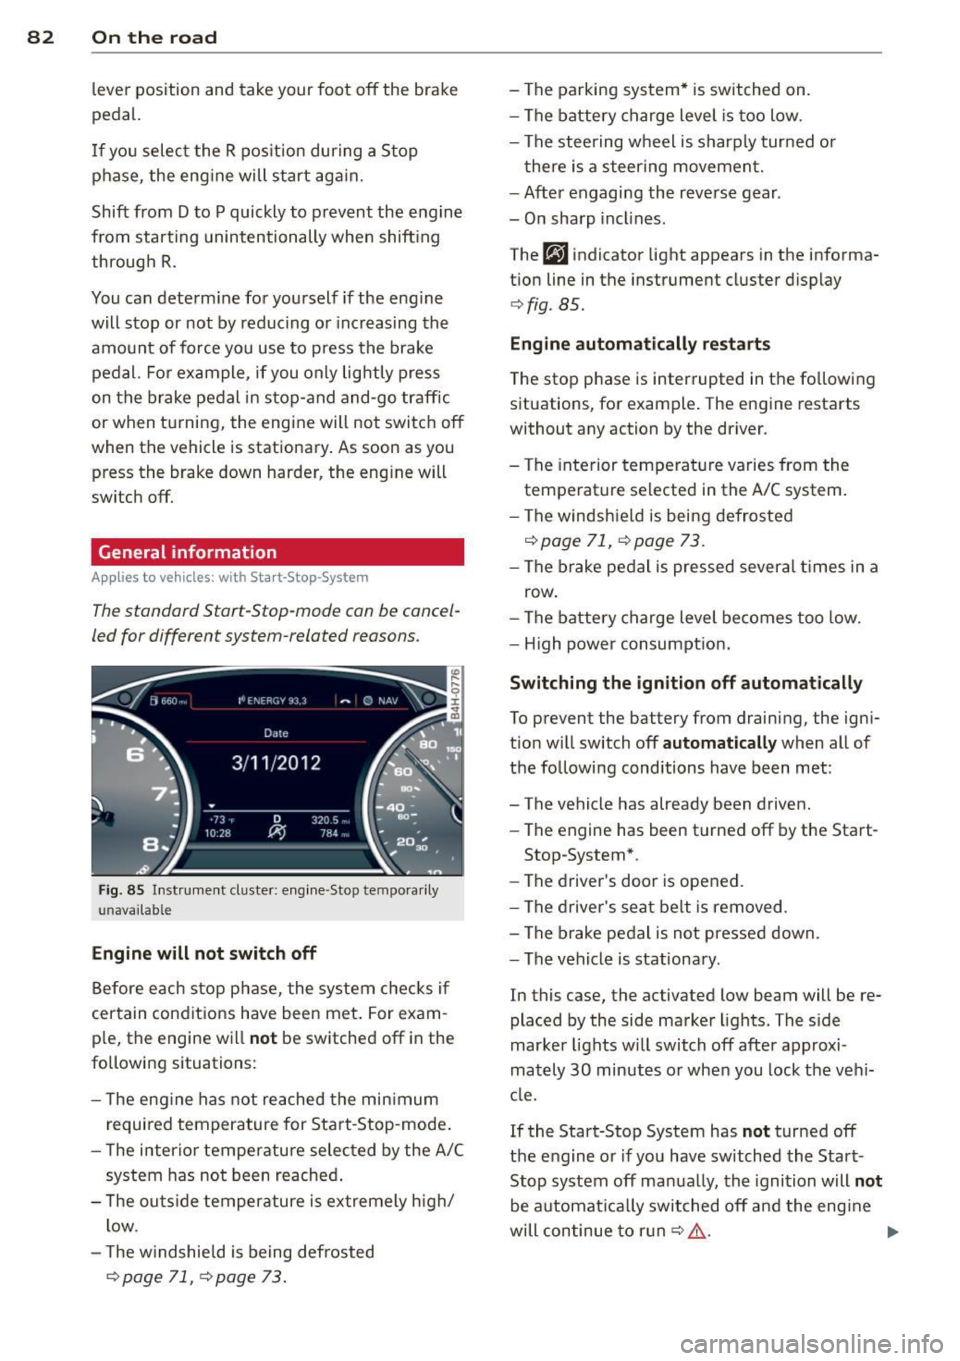
Fig. 85 Instrum ent cluster: engine -Stop tempo ra ril y
u navailab le
Engine will not switch off
Before each stop phase, the system checks i f
certain cond it ions have been met. For exam ·
p le, the engine will
not be switched off in the
following situations:
- T he eng ine has not reached the minimum
required temperature for Start-Stop-mode .
- The inter ior temperature selected by the A/C
system has not been reached .
- T he outside temperature is extremely high/
low .
- T he w indshield is being defrosted
¢page 71, ¢ page 73.
- The parking system* is switched on.
- The battery charge level is too low.
- The steering wheel is sharply turned or
there is a steering movement.
- After engaging the reverse gear .
- On sharp inclines.
The
fjJ indicator light appears in the informa
tion line in the instrument cluster display
¢fig . 85.
Engine automatically restarts
The stop phase is interrupted in the following
situations, for example. The engine restarts
without any action by the driver .
- The interior temperature varies from the
temperature selected in the A/C system .
- The windshie ld is being defrosted
<:!;>page 71, ¢page 73.
-The brake pedal is pressed several times in a
row .
- The battery charge level becomes too low.
- High power consumption.
Switching the ignition off automatically
To prevent the battery from drain ing, the igni
tion w ill switch off
automatically when all of
the following conditions have been met :
- The vehicle has already been driven.
- The engine has been turned off by the Start-
Stop -System*.
- The driver's door is opened.
- The driver's seat belt is removed .
- The brake pedal is not pressed down.
- The vehicle is stationary .
In this case, the activated low beam will be re
placed by the side marker lights. The side
marker lights will switch off afte r approxi
mately
30 minutes o r when you lock the veh i
cle.
If the Start-Stop System has
not turned off
the engine or if you have sw itched the Start
Stop system off manually, the ignition will
not
be automat ically switched off and the eng ine
will continue to ru n
c:!;> ,& . ...,
Page 86 of 316
84 On the road
You can set any threshold between 20 mph
(30 km/h) and 150 mph (240 km/h). Settings
can each be adjusted in increments of 6 mph
(10 km/h).
Cruise control
Switching on
Ap plies to vehicles: with c ruise con tro l
The cruise control system makes it possible to
drive at a constant speed starting at 20 mph
(30 km/h).
0
f
~
0
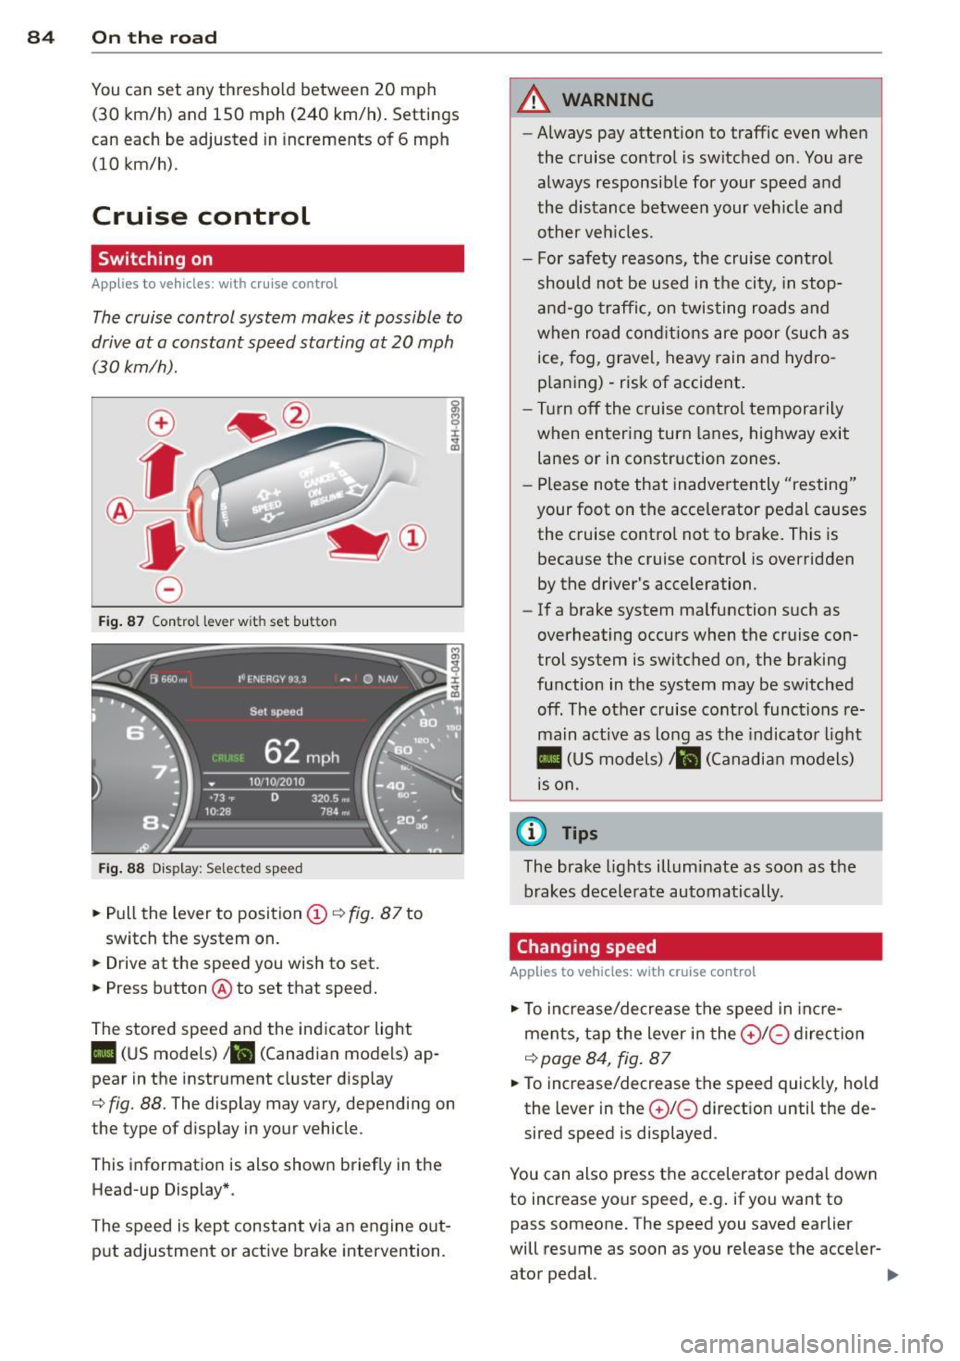
Fig. 87 Con tro l lever w it h set bu tton
Fig. 88 Display : Selected speed
• Pull the lever to position (D c:> fig. 87 to
switch the system on.
• Drive at the speed you wish to set.
• Press button @to set that speed.
The stored speed and the indicator light
II (US models) ;ii (Canadian models) ap
pear in the instrument cluster display
cc> fig. 88. The display may vary, depending on
the type of d isplay in your vehicle .
This information is also shown briefly in the
Head-up Display*.
The speed is kept constant v ia an engine out
put adjustment or active brake intervention .
A WARNING
--Always pay attent ion to traffic even when
the cruise control is switched on. You are always responsible for your speed and
the distance between your vehicle and
other vehicles.
- For safety reasons, the cruise contro l
should not be used in the city, in stop
and-go traffic, on twisting roads and
when road conditions are poor (such as
ice, fog, gravel, heavy rain and hydro
p lan ing) -risk of accident .
- Turn off the cruise control temporarily
when entering turn lanes, highway exit
lanes or in constr uction zones .
- Please note that inadve rtently "resting"
your foot on the accelerator pedal causes the cruise control not to brake. This is
because the cruise control is overridden
by the driver's acceleration.
- If a brake system malfunction such as
overheating occurs when the cruise con
trol system is switched on, the braking
function in the system may be sw itched
off. The other cruise control functions re
main active as long as the indicator light
II (US models)/ ... (Canadian models)
is on.
(D Tips
The brake lights illuminate as soon as the
brakes decelerate automatically .
Changing speed
Applies to vehicles: with cruise control
• To increase/decrease the speed in incre
ments, tap the lever in the
0 10 direction
c:> page 84, fig. 87
• To increase/decrease the speed quick ly, hold
the lever in the
010 d irect ion until the de
sired speed is displayed .
You can also press the accelerator pedal down
to increase your speed, e.g . if you want to
pass someone. The speed you saved earlier
will resume as soon as you release the acceler- ator pedal. ..,.
Page 91 of 316

Audi adaptive cruise control and braking guard 89
tachometer @and is also shown briefly in
the display @
c::> fig. 94.
.. You must also press the brake pedal when
the vehicle is stopped.
Switching adaptive cruise control off
.. Push the lever away from you into position
@ until it clicks into place. The message
ACC off appears.
@ Indicator lights
II-Adaptive cru ise contro l is switched on.
No vehicles are detec ted up ahead. The stored
speed is ma intained.
• -A moving vehicle is detected up ahead.
The adaptive cruise control system regulates
the speed and distance to the moving vehicle
ahead and acce lerates/brakes automatical ly.
fit -Adaptive cruise contro l is switched on. A
mov ing vehicle up ahead was detected. Your
vehicle remains stopped.
• -When automatic brak ing is not able to
keep enough distance to a previously detected
moving vehicle up ahead, you must take con
trol and brake
c::> page 91, Prompt for driver
intervention.
© Display
If adaptive cruise control is not shown in the
d isp lay, you can call it up with the multifunc
tion steering wheel buttons
c::> page 24.
Based on the symbols in the d isplay, you can
determine if the system is maintaining a dis
tance to the vehicle ahead and what that d is
tance is.
No vehicle -No veh icle ahead was detected .
White vehicle -A vehicle ahead was detected.
Red vehicle -Prompt for the driver to take ac
tion
c::> page 91.
Both arrow s on the scale© indicate the dis
tance to the vehicle ahead. No arrow appears
~ when the vehicle is on an open road and there <(
~ is no object ahead . If an object is detected
:;, ahead , the arrow moves on the scale .
"' ,....,
"' ,....,
The green zone on the scale shows the stored
distance. For information on changing the
stored distance, refer to
c::> page 90 . If the
distance selected is too close or may soon be
come too close, the arrows move into the red
zone on the sca le .
A WARNING
Improper use of the adaptive cruise con
trol can cause collisions, other accidents
and serious personal injur ies .
- Pressing the
!SET ! button when driv ing at
speeds below 20 mph (30 km/h), will au
tomatically accelerate the vehicle to 20
mph (30 km/h), which is the minimum
speed that can be set.
(D Tips
-If you switch the ignit ion or the adaptive
cruise control off, the set speed is erased
from the system memory.
- Th e elec tronic stab ilization control (ESC)
and the anti-slip-regulation (ASR) are au
tomatically turned on when the adaptive
cruise control is turned on. Both systems
cannot be turned off if the adaptive
cruise contro l is turned on.
Changing the speed
Applies to veh icles: with Audi adaptive cruise control
0
f
• 0
Fig . 95 Se lector lever: chang ing the speed
.. To increase or reduce the speed in incre
ments,
tap the lever up or down.
.. To increase or reduce the speed quickly,
hold
the lever up or down until the red LED @
reaches the desired speed
c::> page 88,
fig . 94.
~
Page 107 of 316
M N <( I.J "". rl I.O
"' rl
"' rl
Night vision assistant
Night vision assistant
with detected pedestrian marking
Description
App lies to vehicles: with night v isio n assistant
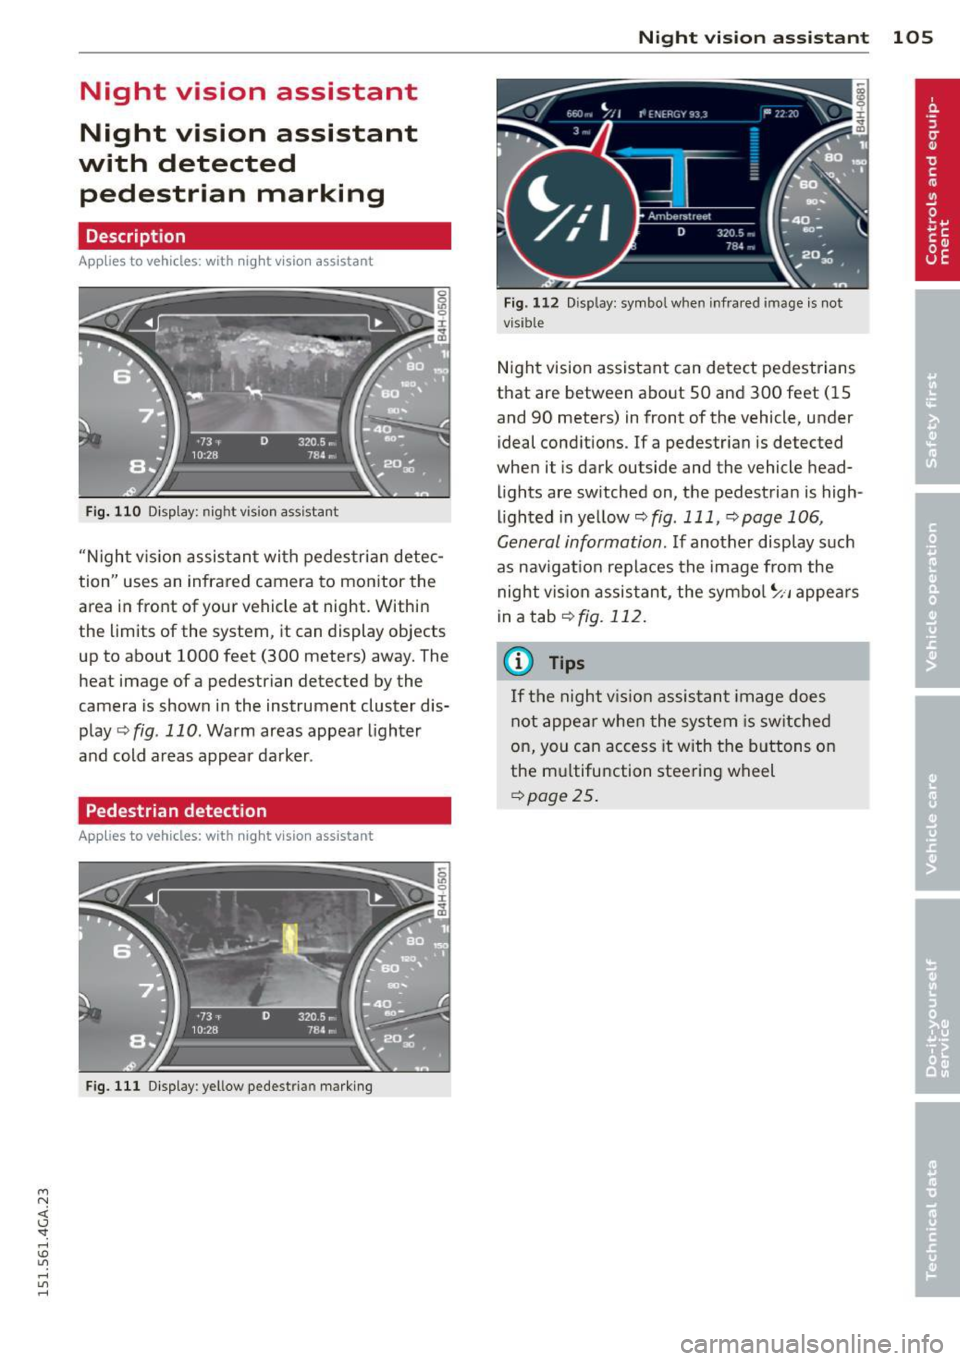
Fig . 110 Display: nig ht v is ion assistant
"N ight v is ion assistant with pedestrian detec
tion" uses an infrared camera to monitor the
area in front of your vehicle at night. Within
the limits of the system , it can display objects
up to about 1000 feet (300 meters) away. The
heat image of a pedestrian detected by the
camera is shown in the instrument cluster dis
play
r::;, fig . 110 . Warm areas appear lighter
and cold areas appear darker .
Pedestrian detection
Applies to vehicles: with n ig ht v ision ass istant
Fig. 111 Display : yellow pedestrian marking
Night vision assistant 105
Fig. 1 12 Disp lay: symbo l w hen infrare d image is not
visi ble
Night vision assistant can detect pedestrians
that are between about 50 and 300 feet (15
and 90 meters) in front of the vehicle, under
ideal conditions .
If a pedestrian is detected
when it is dark outside and the vehicle head
lights are switched on, the pedestrian is high
lighted in yellow
r::;, fig . 111, r::;, page 106,
General information.
If another display such
as navigation replaces the image from the
night vision assistant, the symbo l~,, appears
in a tab
r=;, fig. 112.
(D Tips
If the night vision assistant image does
not appear when the system is sw itched
on, you can access it with the buttons on
the multifunction steering wheel
r::;, page25.
Page 110 of 316

108 Night vision assistant
Night vision assistant: only available in dark
ness and with lights switched on
Night vision assistant only works when it is
dark outside and the headlights are on.
Night vision assistant: pedestrian detection
not available
The system has deactivated the pedestrian de
tection function.
Page 111 of 316
M N <( I.J "". rl I.O
"' rl
"' rl
Automatic Transmission
S tronic, tiptronic
Introduction
The automatic transmission is controlled elec
tronically. The transmission upsh ifts or down
shifts automatically depending on which drive
program is selected.
When a
moderate driving style is used, the
transmission selects the most econom ica l
driving mode. It will then change up early and
delay the downshifts to give better fuel econ
omy.
The transmission switches to a sporty mode
after a kick-down or when the driver uses a
sporty driving style characterized by quick ac
celerator pedal movements, heavy accelera
tion, frequent changes in speed and traveling
at the maximum speed.
If desired, the driver can also select the gears
manually (tiptronic mode) ¢ page 113.
Various automatic transmissions may be in
stalled, depending on the model :
S tronic transmission
The S tronic is a dual-clutch transmission.
Power is transferred using two clutches that
work independently from one another . They
replace the torque convert er used in conven
tional automatic transmissions and allow the
veh icle to accelerate without a noticeable in
terruption in traction.
tiptronic transmission
In the tiptronic transmission, power is trans
ferred by a torque converter .
Automatic Transmission 109
Selector lever positions
Fig. 118 D isp lay in the instrument clus te r: se le ctor
lever pos itio n
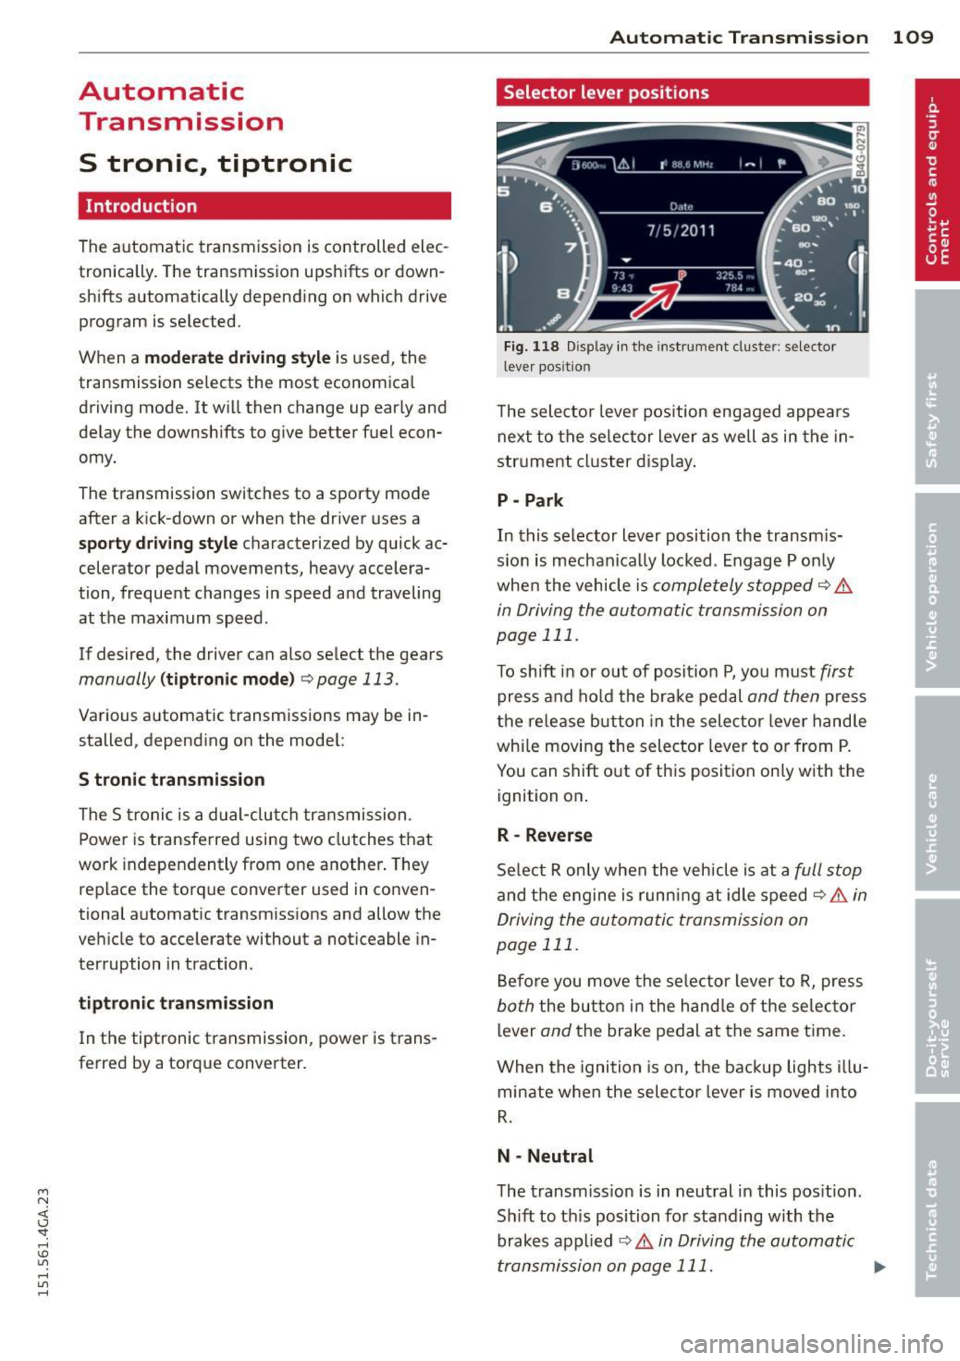
The selector lever position engaged appea rs
next to the selector lever as well as in the in
str ument cluster display.
P- Park
In this selector lever position the transm is
s ion is mechanica lly locked . Engage P only
when the vehicle is
completely stopped Q .&.
in Driving the automatic transmission on
page 111.
To shift in or out of posit ion P, you must first
press and hold the brake pedal and then press
the release button in the selector lever handle
whi le moving the selector lever to or from P.
You can shift out of this position on ly with the
ignit ion on .
R- Reverse
Select R only when the vehicle is at a full stop
and the engine is running at idle speed ¢.&. in
Driving the automatic transmission on
page 111.
Before you move the selector lever to R, press
both the button in the hand le of the selec tor
lever
and the brake pedal at the same t i me .
When the ignition is on, the backup lights illu
minate when the selector lever is moved into
R.
N -Neutral
The transmission is in neutral in this pos ition .
Sh ift to th is position for standing with the
brakes applied
¢.&. in Driving the automatic
transmission on page 111. ..,.
Page 130 of 316

128 Driving Safely
Driving Safely
General notes
Safe driving habits
Please remember -safety first!
This chapter contains important information,
tips, instructions and warnings that you need
to read and observe for your own safety, the
safety of your passengers and others . We have
summarized here what you need to know
about safety belts, airbags, child restraints as
well as child safety. Your safety is for us
priori
ty number 1.
Always observe the information
and warnings in this section - for your own
safety as well as that of your passengers.
The information in this section applies to all
model versions of your vehicle . Some of the
features described in this sections may be
standard equipment on some models, or may
be optional equipment on others. If you are
not sure, ask your authorized Audi dealer.
A WARNING
- Always make sure that you follow the in
structions and heed the WARNINGS in
this Manual. It is in your interest and in
the interest of your passengers.
- Always keep the complete Owner's Liter
ature in your Audi when you lend or sell
your vehicle so that this important infor
mation will always be available to the
driver and passengers.
- Always keep the Owner's literature handy
so that you can find it easily if you have
questions.
Safety equipment
The safety features are part of the occupant
restraint system and work together to help
reduce the risk of injury in a wide variety of
accident situations.
Your safety and the safety of your passengers
should not be left to chance. Advances in
technology have made a variety of features
available to help reduce the risk of injury in an accident.
The following is a list of just a few of
the safety features in your Audi:
- sophisticated safety belts for driver and all
passenger seating positions,
- safety belt pretensioners ,
- safety belt force limiters for the front seats,
- safety belt height adjustment systems for
the front seats,
- front airbags,
- knee airbags for the front seats*
- side airbags in the front seats and outer rear
seats*,
- side curtain airbags ,
- special LATCH anchorages for child re-
straints,
- head restraints for each seating position,
- adjustable steering column.
These individual safety features, can work to gether as a system to help protect you and
your passengers in a wide range of accidents .
These features cannot work as a system if
they are not always correctly adjusted and cor
rectly used.
Safety is everybody's responsibility!
Important things to do before driving
Safety is everybody 's job! Vehicle and occu
pant safety always depends on the informed and careful driver .
For your safety and the safety of your passen
gers,
before driving always:
.. Make sure that all lights and signals are op
erating correctly.
.. Make sure that the tire pressure is correct .
.. Make sure that all windows are clean and af
ford good visibility to the outside .
.. Secure all luggage and other items carefully
q page 64, q page 61 .
.. Make sure that nothing can interfere with
the pedals.
.. Adjust front seat, head restraint and mirrors
correctly for your height.
.. Instruct passengers to adjust the head re-
straints according to their height . .,..