2015 AUDI S3 SEDAN headlights
[x] Cancel search: headlightsPage 12 of 282

Instruments and indicato r Lights
Instruments and indicator Lights
Instruments
Instrument cluster overview
The instrument cluster is the central information center for the driver.
Fig. 3 Instrument cluster overview
(D Tachometer with indicator lights
@ Coolant temperature ind icator* or
Boost* (boost press ure indicato r)
® Turn signa l indicator lights
@ Display 12,29
- Indicator lights or . . . . . . . . . . . . 13
- Drive r information system . . . . . 27
- Date and time . . . . . . . . . . . . . . . 10
- Mileage . . . . . . . . . . . . . . . . . . . . 11
- Service interval display . . . . . . . 212
® Speedometer w ith indicator lights
® Fu el level .. ................ . .
0 Display for: Central indicator light
or system displays ..... ..... .. .
@ Trip odometer reset button 10.01
(D Tips
11
13
11
The needles in the instrument cluster are illu
minated when the ignition is switched on. The
gauges are also illuminated when the lights
are turned on . The instrument illum inat ion
dims automatically as the amount of light
outside decreases. This helps to remind the
driver to turn the headlights on as it becomes
darker outside.
10
Setting the time/date
Fig. 4 Instrument cluste r: time and date
The date, time of day, time and date format can
be set in the MMI. Refer to the MMI owner's
manua l for instructions .
(0 Tips
-When you switch the ignition off or open
the driver's door, the date and time are dis
played for approximately 30 seconds.
- You can also turn on the display with the
IO.O ! button when the ignition is switched
off
I:=;) page 10, fig. 3.
g .., 0 :> CX) m
Page 14 of 282

Instruments and indicator lights
reached the reserve mark, the bottom LED will
turn red and the
ljJ indicator light turns on
¢
page 23. The bottom LED blinks red when
the fuel level is very low.
The on-board computer shows the range based
on the fuel level¢
page 28, On-board comput
er display.
For the tank capacity in your vehicle, refer to the
Technical Data
¢ page 260.
(D Note
Never drive until the tank is completely emp
ty. The irregular supply of fuel that results
from that can cause engine misfires. Uncom
busted fuel will then enter the exhaust sys
tem. This can cause overheating and damage
to the catalytic converter.
Coolant temperature indicator
In vehicles without a coolant temperature indica
tor, an indicator light. will turn on when the
coolant temperature is too high ¢
page 19. Re
fer to ¢(1) .
The coolant temperature indicator @c:>
page 10,
fig . 3 only works when the ignition is switched
on . To prevent engine damage, please observe
the following notes about the temperature rang
es.
Cold range
If only the LEDs at the bottom of the gauge turn
on, the engine has not reached operating tem perature yet. Avoid high engine speeds, full accel
erating and heavy engine loads.
Normal range
The engine has reached its operating tempera
ture once the LEDs up to the center of the gauge
turn on under normal driving conditions . The
LEDs higher up may turn on if the engine is under
heavy load or the outside temperature is high.
This is no cause for concern as long as the. in
dicator light in the instrument cluster does not
turn on.
12
Hot range
If the LEDs in the upper area of the display and
the . indicator light in the instrument cluster
display turn on, the coolant temperature is too
high
c:> page 19 .
A WARNING
-Never open the hood if you can see or hear
steam or coolant escaping from the engine
compartment. This increases the risk of
burns. Wait until you no longer see or hear
steam or coolant escaping.
- The engine compartment in any vehicle can
be a dangerous area . Stop the engine and al
low it to cool before working in the engine
compartment. Always follow the informa
tion found in ¢
page 198, Working in the
engine compartment.
(D Note
- In vehicles with a boost pressure indicator* ,
this indicator replaces the temperature dis
play. To promote a long engine service life,
avoiding high engine speeds, full accelera
tion and heavy engine loads during approxi
mately the first 15 minutes when the en
gine is cold is recommended . The amount of
time until the engine is warm depends on
the outside temperature . Check the engine
oil temperature* if necessary .
c:> page 30
-Auxiliary headlights and other accessories in
front of the cooling-air intake impair the
cooling effect of the coolant. This increases
the risk of the engine overheating during
high outside temperatures and heavy engine
load.
- The front spoiler also helps to distribute
cooling air correctly while driving. If the
spoiler is damaged, the cooling effect will
be impaired and the risk of the engine over
heating will increase. See an authorized
Audi dealer or authorized Audi Service Fa
cility for assistance.
Page 26 of 282

Instruments and indicator lights
Drive to an authorized Aud i dea ler or authorized
Audi Service Faci lity immediately to have the
malfunct ion corrected .
(D Note
Applies to veh icles with diesel engines: If the
diese l fue l quality is poor , it may be necessary
to have the water drained from the water sep
arator
l) in the fuel filter more often than
specified in the ma intenance schedule. Th is
can help reduce engine malfunct ions.
@ For the sake of the environment
Fuel should never enter the sewer system or
come into contact w ith the ground.
More information on refueling is ava ilable on
page
c:> page 192.
~ Washer fluid level
~ Pl ease add w asher flu id
F ill the washer fluid with the ignition switched
off
c:> page 212.
~~ Windshield wipers
m Wind shield w iper: s yste m fault!
There is a malfunction with the windshield wip
ers.
Dr ive to an a utho rized Aud i dea le r or a uthorized
Audi Service Faci lity immediately to have the
malfunct ion corrected .
~ Defective light bulb warning
Applies to veh icles: w ith driver information system
If the S:i indicator light turns on, a bu lb has
fa iled. The message indicates the location of the
bu lb.
Replace the bu lb immediate ly.
Vehi cle l ight s: syste m fault!
l) Thi s fun ction is not av ailable in all c ountri es.
24
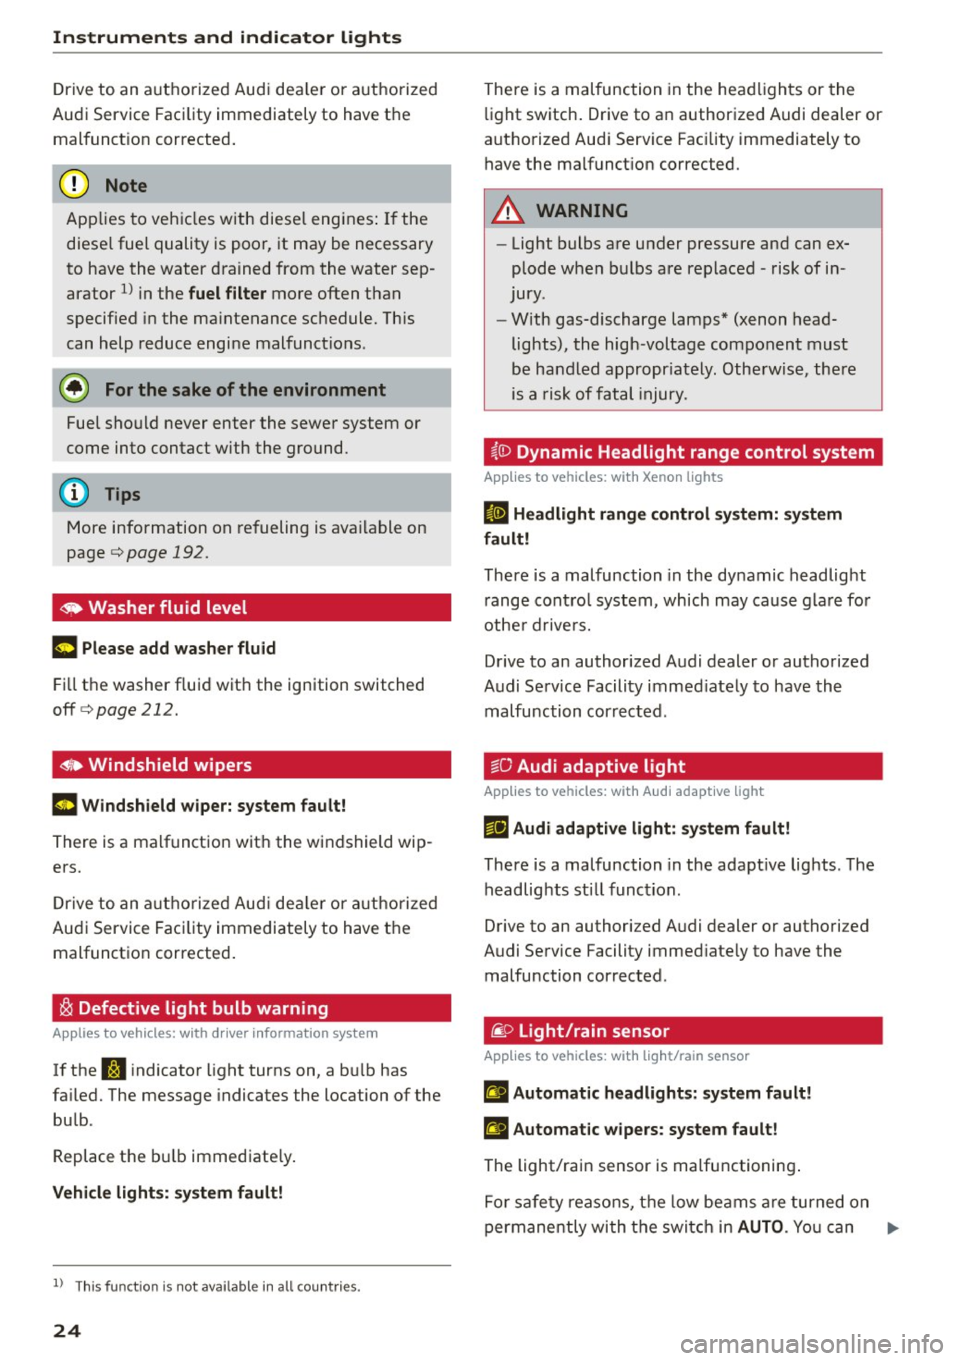
There is a malfunction in the headlights or the
li ght switch . Drive to an authorized Audi dealer or
authorized Aud i Service Fac ility immediately to
have the malfunct ion corrected.
A WARNING
--
- Light bulbs are under pressure and can ex
plode when bulbs are replaced -risk of in
jury .
- With gas-discharge lamps* (xenon head
lights), the high -voltage component must
be handled appropr iately. Otherwise, there
is a risk of fatal injury.
~(D Dynamic Headlight range control system
App lies to vehicles: wit h Xeno n lights
II He adlight r an ge control system: sy ste m
f a ult!
There is a malfunction in the dynamic headlight
r ange contro l system, which may cause glare for
othe r drive rs.
Drive to an authorized Audi dealer or authorized
Audi Service Facility immed iate ly to have the
malfunction corrected.
go Audi adaptive light
App lies to vehicles : wi th Audi adapt ive ligh t
l'!J Audi adaptiv e light : system fault!
There is a malfunction in the adapt ive lights . T he
headlights sti ll function.
Drive to an authori zed Audi dealer or authori zed
Audi Service Facility immed iate ly to have the
malfunction corrected.
@ Light/rain sensor
App lies to vehicles: wit h lig ht/rain sensor
II Automat ic headlight s: s ys tem fault!
El Automat ic wipe rs: s ystem fault !
The light/rain sensor is ma lfunctioning .
Fo r safety reasons, the low beams a re turned on
permanently wi th the switch in
AUTO . You can .,..
Page 45 of 282

....,
N
0 > co
rl I.O
"'
"'
"'
rl
Light and Vision
Exterior Lighting
Switching lights on and off
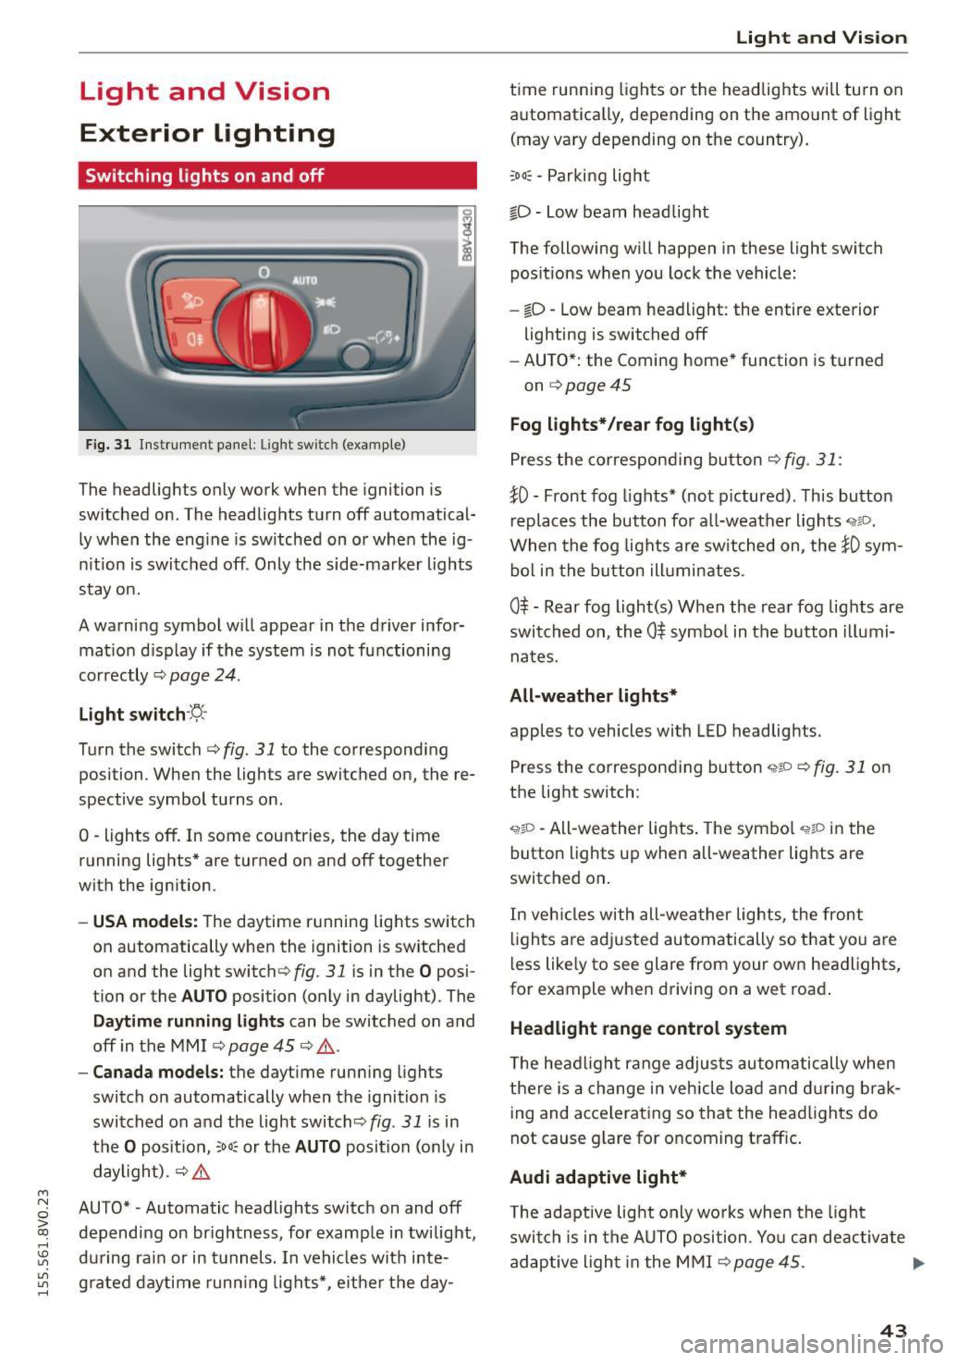
Fig. 31 Instrument panel: Ligh t swi tc h (examp le )
The headlights only work when the ignition is
switched on . The headlights turn off automatical
ly when the eng ine is switched on or when the ig
nition is switched off . Only the side-marker lights
stay on.
A warning symbol w ill appear in the driver infor
mat ion d isp lay if the system is not functioning
correctly ¢
page 24.
Light switch ·~-
Turn the switch c::> fig. 31 to the corresponding
position . When the lights are switched on, the re
spective symbol turns on .
0 -lights off. In some countries, the day time
running lights* are turned on and off together
with the ignition .
-USA models: The daytime running lights switch
on automatically when the ignition is switched
on and the light switch¢
fig. 31 is in the O posi
tion or the
AUTO position (only in daylight) . The
Daytime runn ing lights can be switched on and
off in the MMI
c::> page 45 c::> & .
-Canada models: the daytime running lights
switch on automatically when the ignition is
switched on and the light switch<::>
fig. 31 is in
the
O position, ;ooc or the AUTO position (on ly in
daylight) .
c::> &.
AUTO* -Automatic headlights switch on and off
depending on brightness, for example in twilight,
during rain or in tunnels. In vehicles with inte
grated daytime running lights*, e ither the day-
Light and Vision
time running lights or the headlights will turn on
automatica lly, depend ing on the amount of light
(may vary depending on the country).
;oo~ -Parking light
io -Low beam headlight
The following will happen in these light switch
pos itions when you lock the vehicle:
- iD -Low beam headlight: the entire exterior
lighting is switched off
- AUTO*: the Coming home* function is turned
on
c::> page 45
Fog lights* /rear fog light(s)
Press the correspond ing button c::> fig. 31 :
!0 -Front fog lights* (not pictured) . This button
replaces the button for all-weather lights
'i'liD.
When the fog lights are switched on, the !0 sym
bol in the button illuminates.
0$ -Rear fog light(s) When the rear fog lights are
switched on, the
0$ symbol in the button illumi
nates.
All-weather lights*
apples to vehicles with LED headlights.
Press the corresponding button
<,1gD <=> fig. 31 on
the light switch :
'i'!io -All-weather lights . The symbo l 'i'!io in the
button l ights up when all-weather lights are
switched on .
In veh icles with all-weather lights, the front
lights are adjusted automatically so that yo u are
less likely to see glare from your own headlights,
for example when driving on a wet road .
Headlight range control system
The headlight range adjusts automatically when
there is a change in vehicle load a nd during brak
ing and accelerating so that the headlights do
not cause glare for oncoming traff ic.
Audi adaptive light*
T he adaptive light only wo rks when the light
switch is in the AUTO position . You can deactiva te
adaptive light in the MMI ¢
page 45. ..,.
43
Page 46 of 282

Light and Vision
When switched on, adaptive light adjusts to
curves depending on the vehicle speed and steer·
ing wheel angle . This provides better lighting
through the curve. The system operates in a
speed range from approximately 6 mph (10 km/
h) to 68 mph (110 km/h).
Static cornering light* (vehicles with adaptive
light)· the cornering light switches on automati
cally when the steering wheel is turned at acer
tain ang le at speeds up to approximately 44 mph
(70 km/h) and whe n the turn signal is activated
at speeds up to approximately 25 mph (40 km/
h). The area to the side of the vehicle is illuminat
ed better when tu rning.
Speed depend ent light distribution* -The speed
dependent light distribution adapts the light in
towns and on highways or expressways. In tersec
tions can also be illum inated on veh icles with a
navigat ion system*.
Highway light function*
(Vehicles with adaptive light or LED headlights) -
This function adapts the light ing for highway
driving based on vehicle speed .
..&, WARNING
-Automatic headlights* are only int ended to
assist the driver. They do not relieve the
driver of his responsibility to check the
headlights and to turn them on manually
according to the current light and visibi lity
condit ions. For example, fog cannot be de·
tected by the light sensors . So always switch
on the low beam under these weather con
ditions and when driving in the dark
io.
- Accidents could occur if you can not see the
road ahead of you well and if others on the
road cannot see you . Always switch your
head lightsonsothatyoucanseetheroad
ahead of you and others can see your vehicle
from behind.
- Please observe legal regulations when using
the lighting systems described .
44
(D Note
The rear fog lights shou ld only be turned on in
accordance with traffic regulation, as the lights are bright for following traffic.
@ Tips
-The light sensor for the automatic head
lights * is in the rearview mirror mount.
Therefore, do not place any stickers in this
area on the windshield.
- Some functions of the exterior lighting can
be adjusted
c> page 45.
- If you turn off the ignition whi le the exterior
lights are on and open the door, you will
hear a warning tone.
- In some market-specific versions, the tail
lights do not turn on when switching on the
daytime running lights.
- In cool or damp weather, the inside of the headlights, turn signals and taillights can
fog over due to the temperature difference
between the inside and outside . They will
clear shortly after switching them on. This
does not affect the serv ice life of the light
ing .
- A message will appear in the instrument
cluster if there is a malfunction in the light
sensor
c> page 24.
Emergency flasher
Fig. 32 Ins trumen t panel : em ergenc y flasher bu tton
The emergency flashers makes other dr ivers
aware of your vehicle in dangerous s ituations .
.. Press the~ button to switch the emergency
flashers on or off.
Page 47 of 282

....,
N
0 > co
rl I.O
"'
"'
"'
rl
You can indicate a lane change or a turn when the
emergency flashers are switched on by using the
turn signal lever. The emergency flashers stop
temporari ly.
The emergency flashers also work when the igni
tion is turned off.
@ Tips
Yo u should switch the emergency flashers on
if:
- You are the last car in a traffic jam so that
all other vehicles approaching from behind
can see you, or if
- Your vehicle has broken down or you are
having an emergency, or if
- Your vehicle is being towed or if yo u are
towing another vehicle.
Turn signal and high beam lever
The Lever operates the turn signals, the high
beams and the headlight flasher.
Fig. 33 Turn signal a nd high beam leve r
Turn signals ¢i 9
The turn signals activate when you move the lev
er into a turn s ignal position when the ignition is
switched on.
CD -Turn signal
@ -Turn sig nal
The turn s ignal blinks three times if you tap the
l eve r (convenience tu rn signal) .
High beams and headlight flasher ~D
Move the lever to the correspond ing position :
@-high beams on
Light and Vision
@-high beams off or headlight flasher
Th e
El indicator light in the inst rument cl uste r
turns on.
_& WARNING
High beams can cause glare for other drivers,
which increases the risk of an accident . For
this reason, only use the high beams or the
headlight flasher when they will not create
glare for other drivers.
Adjusting the exterior lighting
The settings are adjusted in the MMI.
.. Select: the I MENU I button > Car> Systems*
cont rol button > Vehicle settings > Exterior
lighting.
Automatic headlights
You can adjust the following sett ings in the Auto
matic headlights
menu:
Activation sensitivity -You can adjust if the
headlights switch on
Early, Medium or Late ac
cording to the sens itiv ity of the light sensor .
Audi adaptive light * -you can switch adaptive
light
On and Off .
Coming home, Leaving home*
The coming home function illuminates the area
outside the vehicle when you turn the ignit ion off
and open the driver's door. To turn the function
on, select
Lights when leaving car > On .
The leaving home illuminates the area outside
the vehicle when you un lock the vehicle. To turn
the function on, select
Lights when unlocking
car > On .
The coming home and leaving home functions
on ly operate when it is dark and the light switch
is in the
AUTO position.
Daytime running lights*
USA models:
the daytime running lights can be
switched on or off using the MMI. Select
On or
Off. ...
45
Page 48 of 282

Light and Vision
Canada models: This function can not be switch
ed off . They activate automatically each time the
ignit ion is switched on . Th is menu item is shown
with a "gray background".
Travel mode*
T he headlig ht beam is asymme trical. This p ro
vides stronger illum ination on the s ide of the
road on w hich you are drivi ng . In vehicles with
Xenon headlights* wit h turning light* or LED
headl ights* ,
you must adjust the headlights
when yo u are driving in a cou ntry whe re the traf
f ic direction is opposite from your own country .
Othe rwise, o ncom ing traff ic wi ll be blinded by
t he glare from th e headlights . An adjustm ent is
not needed in veh icles with Xenon he adlig hts
wi thout turni ng lig hts.
To prevent glare:
- Travel mode must be activated in vehicles with
Xenon headlig hts* and turning light* or LED
headlights*. Select: the
I M ENU I button> Car >
Sy stems *
contro l button > V ehicle settings >
Exterior lighting > Light for driving on left ,
for
example.
After you have adjusted the headlights, the fol
low ing message will appear:
II Headlight converter active for driving on
left. Range reduced!
(D Tips
When trave l mode is activated , a display in
the driver information system in dicates this
e ach t ime you switch the ignition on.
46
Interior lighting
Front and rear inter ior lighting front
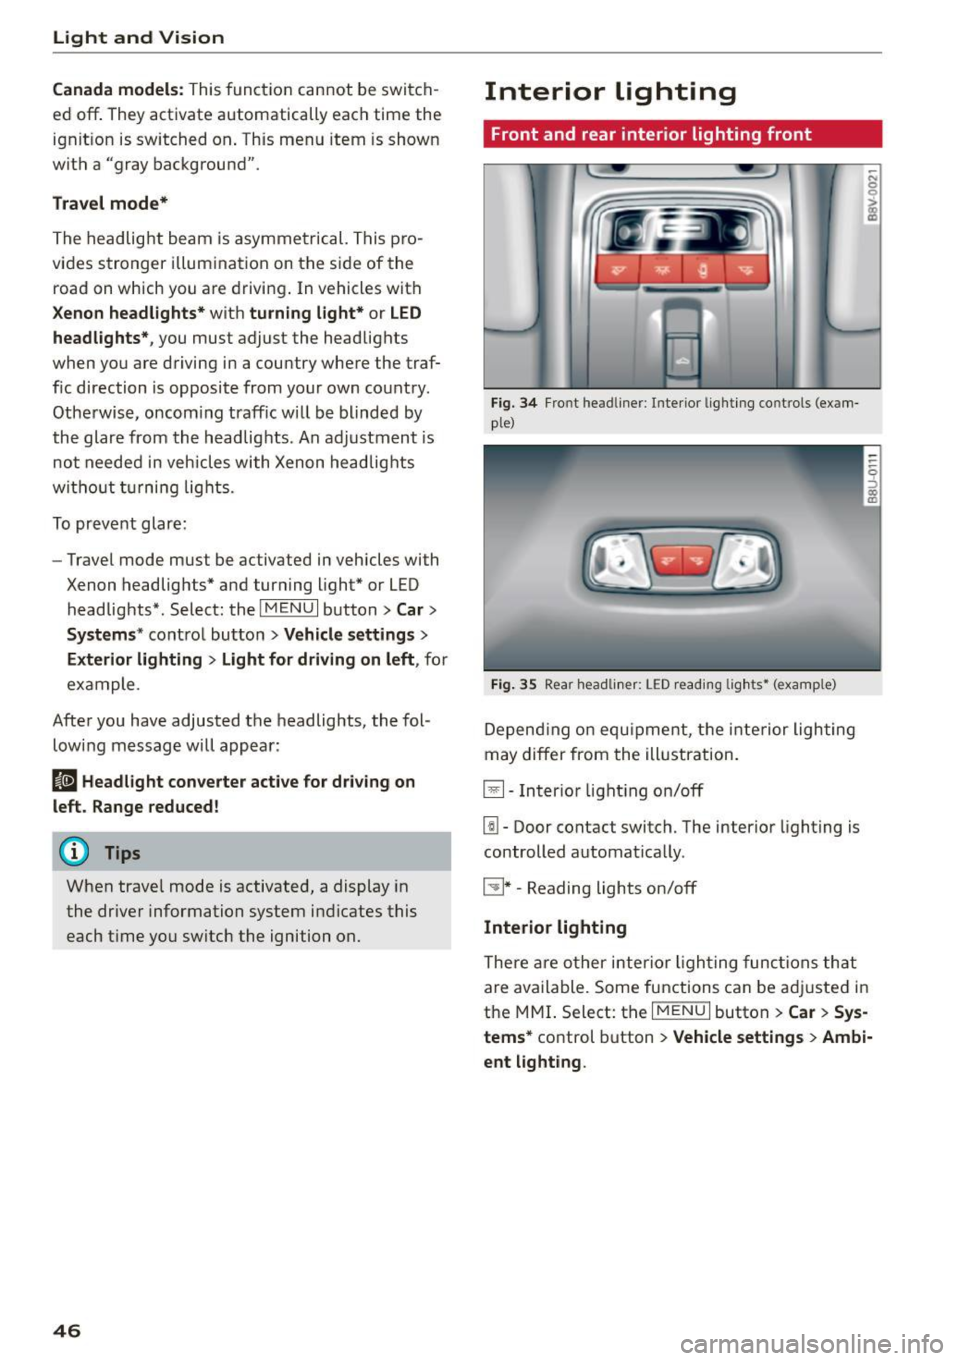
Fi g. 34 Fro nt head liner : In te rior lig htin g co ntrols (exam
p le)
Fig. 35 Rear headli ner: L ED read ing lig hts • (examp le)
De pend ing o n equ ipme nt, th e interior ligh ting
m ay differ from the ill ustration.
El-Inter io r li ght ing on/off
[!I -Door contact switch. The interio r lighting is
controlled automat ica lly.
~ * -Reading lights on/off
Interior lighting
The re a re o ther inter ior ligh ting func tions th at
a re available. Some functions can be adju sted in
the MMI. S elect: th e
I MENU I button > Car > Sys
tems*
co ntrol button > Vehicle settings > Ambi·
ent light ing .
Page 49 of 282

....,
N
0 > co
rl I.O
"'
"'
"'
rl
Instrument illumination
The brightness of the instrument cluster and the
center console can be adjusted .
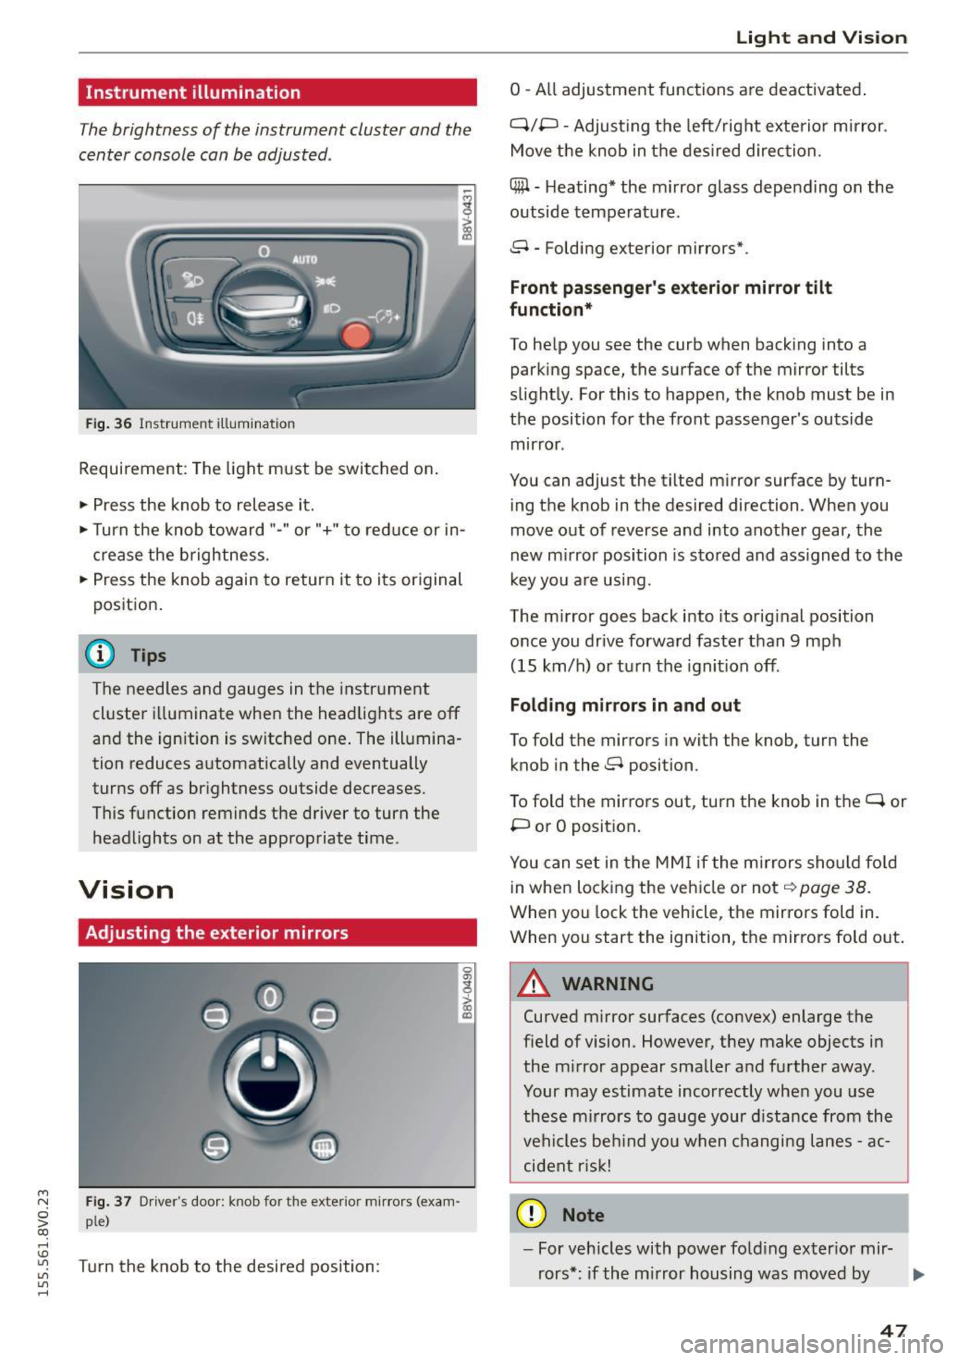
Fig. 36 Instrument illum ination
Requirement: The light must be switched on.
.. Press the knob to release it.
.. Turn the knob toward"-" or"+" to red uce or in
crease the brightness.
.. Press the knob again to return it to its original
posit ion .
@ Tips
The needles and gauges in the instrument
cluster illuminate when the headlights are off
and the ignition is switched one . The illumina·
tion reduces automatically and eventually
turns off as br ightness outside decreases.
This function reminds the driver to turn the
headlights on at the appropriate time .
Vision
Adjusting the exterior mirrors
Fig. 37 Driver's door: knob for the exterior mirrors (exam
ple)
Turn the knob to the desired position:
0
g
> a, (X)
Light and Visio n
0 -A ll adjustment functions are deactivated .
Q/P -Adjusting the left/rig ht exterior mirror.
Move the knob in the des ired direction.
C@ · Heating* the m irror glass depending on the
outside temperature.
8 • Folding exterior mirrors*.
Front pa ss e ng er's ex te rior mirror tilt
functio n*
To help you see the curb when backing into a
parking space, the surface of the mirror tilts
slight ly. For this to happen, the knob must be in
the position for the front passenger's outside
mirror .
You can adjust the tilted mirror surface by turn·
i ng the knob in the desired direction . When you
move out of reverse and into another gear, the
new m irror position is stored and ass igned to the
key yo u are us ing .
The mirror goes back into its orig inal position
once you drive forward faster than 9 mph
(15 km/h) o r turn the ignition off.
Folding m ir rors in and out
To fold the mirrors in with the knob, turn the
knob in the 8 position.
To fold the mirrors out, turn the knob in the
q or
P or O posit ion .
You can set in the MM I if the mirrors sho uld fo ld
in when locking the vehicle or not
q page 38.
When you lock the vehicle, the mirrors fold in.
When you start the ignition, the mirrors fold out.
A WARNING -,.
Curved m irror surfaces (convex) enlarge the
field of vision. However, they make objects in
the m irror appear smaller and further away.
Your may estimate incorrectly when you use
these m irrors to gauge your d istance from the
vehi cles be hind you when changi ng lanes -ac·
cident risk!
@ Note
- For vehicles with power fo ld ing exter ior mir·
rors*: if the mirror housing was moved by
IJI,-
47