2015.5 Peugeot 308 dashboard
[x] Cancel search: dashboardPage 9 of 396
7
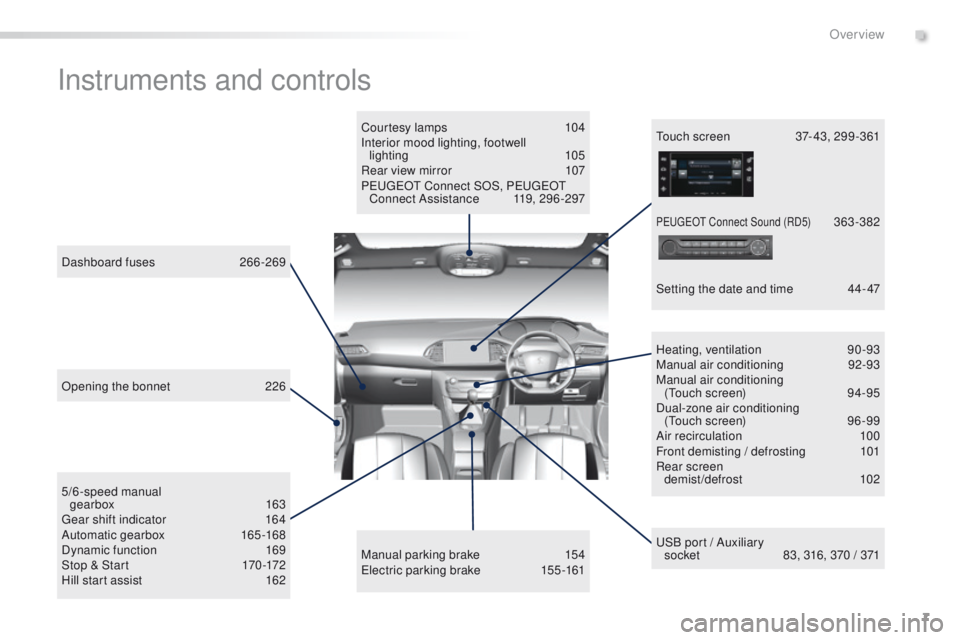
Instruments and controls
Courtesy lamps 104
Interior mood lighting, footwell lighting
105
Rear view mirror
1
07
Peuge
O
t Connect SOS, Peuge
O
t
Connect Assistance
1
19, 296 -297
uS
B port / Auxiliary
socket
8
3, 316, 370 / 371
5/6-speed manual
gearbox
163
ge
ar shift indicator
1
64
Automatic gearbox
16
5 -168
Dynamic function
1
69
Stop & Start
1
70 -172
Hill start assist
1
62
Dashboard fuses
2
66-269 Heating, ventilation
9
0-93
Manual air conditioning
9
2-93
Manual air conditioning (
to
uch screen)
9
4-95
Dual-zone air conditioning (
to
uch screen)
9
6 -99
Air recirculation
1
00
Front demisting / defrosting
1
01
Rear screen demist/defrost
1
02
Manual parking brake
1
54
el
ectric parking brake
1
55 -161to uch screen 3 7- 43, 299 -361
Setting the date and time
4
4- 47
Opening the bonnet
2
26
PeugeO t Connect Sound (RD5) 363-382
.
Over view
Page 18 of 396
16
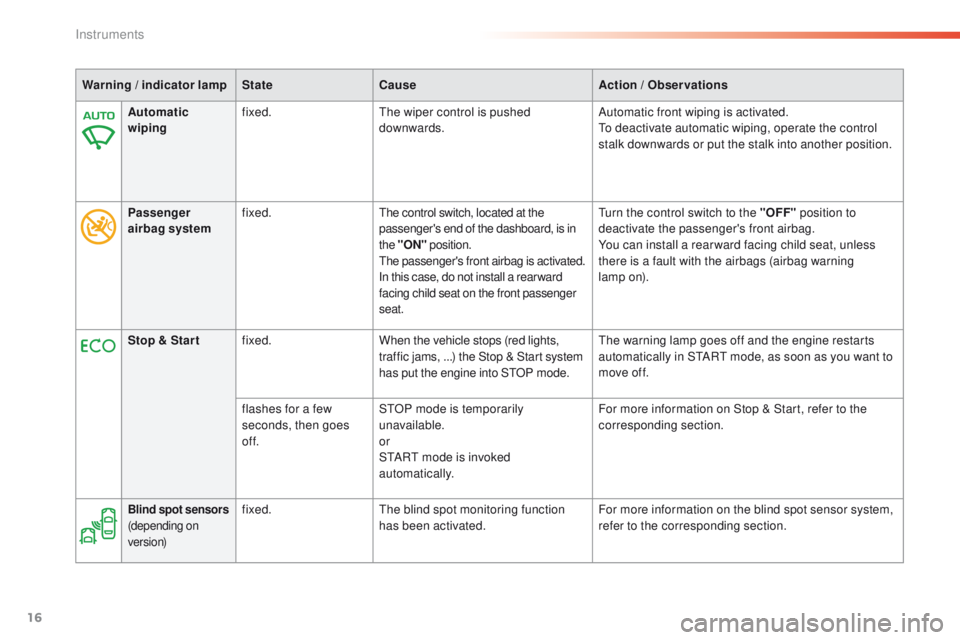
Warning / indicator lamp State Cause Action / Observations
Automatic
wiping fixed.
th
e wiper control is pushed
downwards. Automatic front wiping is activated.
to d
eactivate automatic wiping, operate the control
stalk downwards or put the stalk into another position.
Passenger
airbag system fixed.
the control switch, located at the
passenger's end of the dashboard, is in
the
"ON " position.
the
passenger's front airbag is activated.
In this case, do not install a rear ward
facing child seat on the front passenger
seat.turn the control switch to the " OFF" position to
deactivate the passenger's front airbag.
You can install a rear ward facing child seat, unless
there is a fault with the airbags (airbag warning
lamp
on).
Stop & Star t fixed. When the vehicle stops (red lights,
traffic jams,
...) the Stop & Start system
has put the engine into S
tO
P mode.
th
e warning lamp goes off and the engine restarts
automatically in S
tA
R
t
mode, as soon as you want to
move off.
flashes for a few
seconds, then goes
of f. S
tO
P mode is temporarily
unavailable.
or
S
tA
R
t
mode is invoked
automatically. For more information on Stop & Start, refer to the
corresponding section.
Blind spot sensors
(depending on
ve r s i o n)fixed.th
e blind spot monitoring function
has been activated. For more information on the blind spot sensor system,
refer to the corresponding section.
Instruments
Page 19 of 396
17
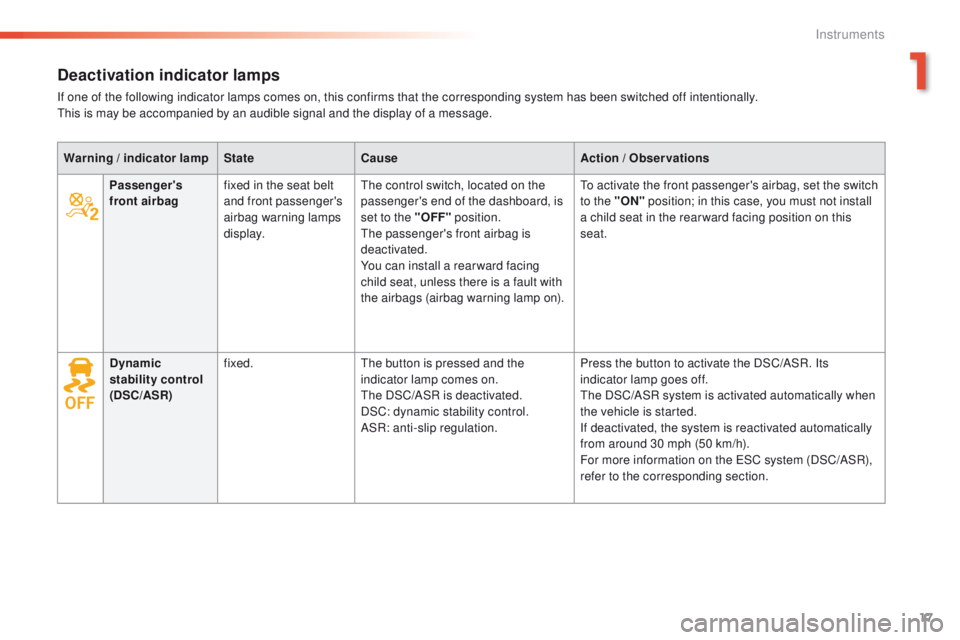
Deactivation indicator lamps
If one of the following indicator lamps comes on, this confirms that the corresponding system has been switched off intentionally.this is may be accompanied by an audible signal and the display of a message.
Warning
/ indicator lamp State Cause Action
/ Observations
Passenger's
front airbag fixed in the seat belt
and front passenger's
airbag warning lamps
display.
th
e control switch, located on the
passenger's end of the dashboard, is
set to the "OFF" position.
the
passenger's front airbag is
deactivated.
You can install a rear ward facing
child seat, unless there is a fault with
the airbags (airbag warning lamp on).
to a
ctivate the front passenger's airbag, set the switch
to the "ON" position; in this case, you must not install
a child seat in the rear ward facing position on this
seat.
Dynamic
stability control
(DSC/ASR) fixed.
th
e button is pressed and the
indicator lamp comes on.
the
DSC/ASR is deactivated.
DSC: dynamic stability control.
ASR: anti-slip regulation. Press the button to activate the DSC/ASR. Its
indicator lamp goes off.
th
e DSC/ASR system is activated automatically when
the vehicle is started.
If deactivated, the system is reactivated automatically
from around 30 mph (50 km/h).
For more information on the
e SC system (DSC/ASR),
refer to the corresponding section.
1
Instruments
Page 35 of 396
33
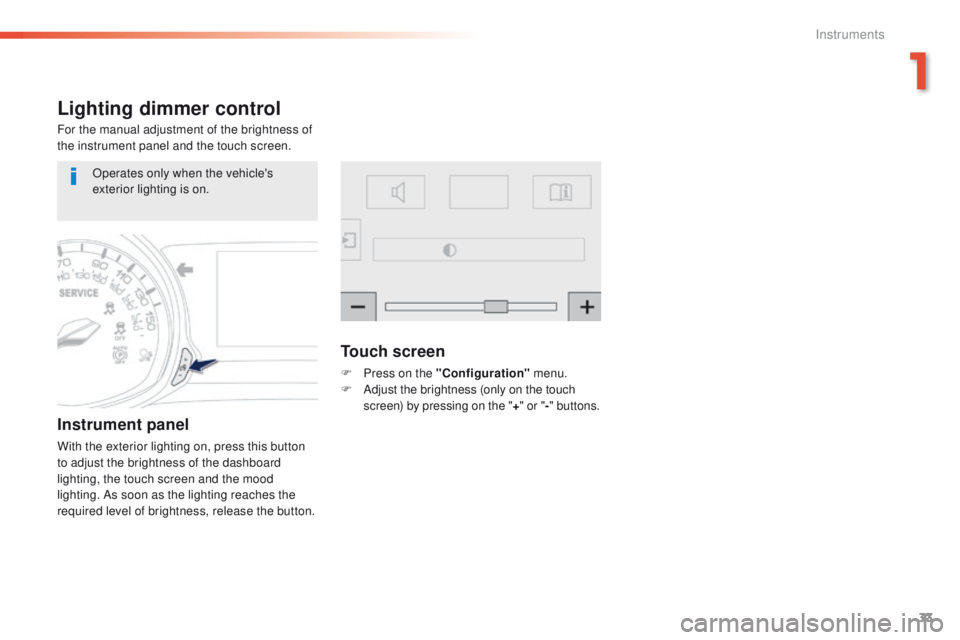
Lighting dimmer control
For the manual adjustment of the brightness of
the instrument panel and the touch screen.
Instrument panel
With the exterior lighting on, press this button
to adjust the brightness of the dashboard
lighting, the touch screen and the mood
lighting. As soon as the lighting reaches the
required level of brightness, release the button.
Touch screen
F Press on the "Configuration" menu.
F A djust the brightness (only on the touch
screen) by pressing on the " +" or " -" buttons.
Operates only when the vehicle's
exterior lighting is on.
1
Instruments
Page 93 of 396
91
In order for these systems to be fully effective, follow the operation and maintenance
guidelines below:
F t
o o
btain an even air distribution, take care not to obstruct the exterior air intake grilles
located at the base of the windscreen, the nozzles, the vents and the air outlets, as well
as the air extractor located in the boot.
F
D
o not cover the sunshine sensor, located on the dashboard; this is used for regulation
of the air conditioning system.
F
O
perate the air conditioning system for at least 5 to 10 minutes, once or twice a month
to keep it in per fect working order.
F
e
n
sure that the passenger compartment filter is in good condition and have the filter
elements replaced regularly.
W
e recommend the use of a combined passenger compartment filter. t
h
anks to its
special active additive, it contributes to the purification of the air breathed by the
occupants and the cleanliness of the passenger compartment (reduction of allergic
symptoms, bad odours and greasy deposits).
F
t
o e
nsure correct operation of the air conditioning system, you are also advised to have
it checked regularly as recommended in the warranty and maintenance record.
F
I
f the system does not produce cold air, switch it off and contact a P
e
uge
Ot
dealer or
a qualified workshop.
Recommendations for ventilation and air conditioning
If after an extended stop in sunshine,
the interior temperature is very high, first
ventilate the passenger compartment for
a few moments.
Put the air flow control at a setting high
enough to quickly change the air in the
passenger compartment.
th
e air conditioning system does not
contain chlorine and does not present
any danger to the ozone layer.
th
e condensation created by the air
conditioning results in a discharge
of water under the vehicle which is
perfectly normal.
When towing the maximum load on a steep gradient in high temperatures, switching off the
air conditioning increases the available engine power and so improves the towing ability.
Stop & Start
the heating and air conditioning
systems only work when the engine
is running. t
o m
aintain a comfortable
temperature in the passenger
compartment, you can temporarily
deactivate the Stop & Start system
(see the corresponding section).
3
ease of use and comfort
Page 128 of 396
126
Airbags
System designed to contribute towards
improving the safety of the occupants (with
the exception of the rear centre passenger)
in the event of violent collisions. t
h
e airbags
supplement the action of the force-limiting
seat belts (with the exception of the centre rear
passenger).
If a collision occurs, the electronic detectors
record and analyse the front and side impacts
sustained in the impact detection zones:
-
i
n the case of a serious impact, the airbags
are deployed instantly and contribute
towards better protection of the occupants
of the vehicle (with the exception of the
rear centre passenger); immediately after
the impact, the airbags deflate rapidly so
that they do not hinder visibility or the exit
of the occupants,
-
i
n the case of a minor or rear impact or in
certain roll-over conditions, the airbags
may not be deployed; the seat belt
alone contributes towards ensuring your
protection in these situations.
The airbags do not operate when the
ignition is switched off.
th
is equipment will only deploy once.
If a second impact occurs (during the
same or a subsequent accident), the
airbag will not be deployed again. Deployment of one or more of the
airbags is accompanied by a slight
emission of smoke and a noise, due
to the activation of the pyrotechnic
cartridge incorporated in the system.
th
is smoke is not harmful, but sensitive
individuals may experience slight
irritation.
th
e noise of detonation related to the
deployment of one or more airbags may
result in a slight loss of hearing for a
short time.
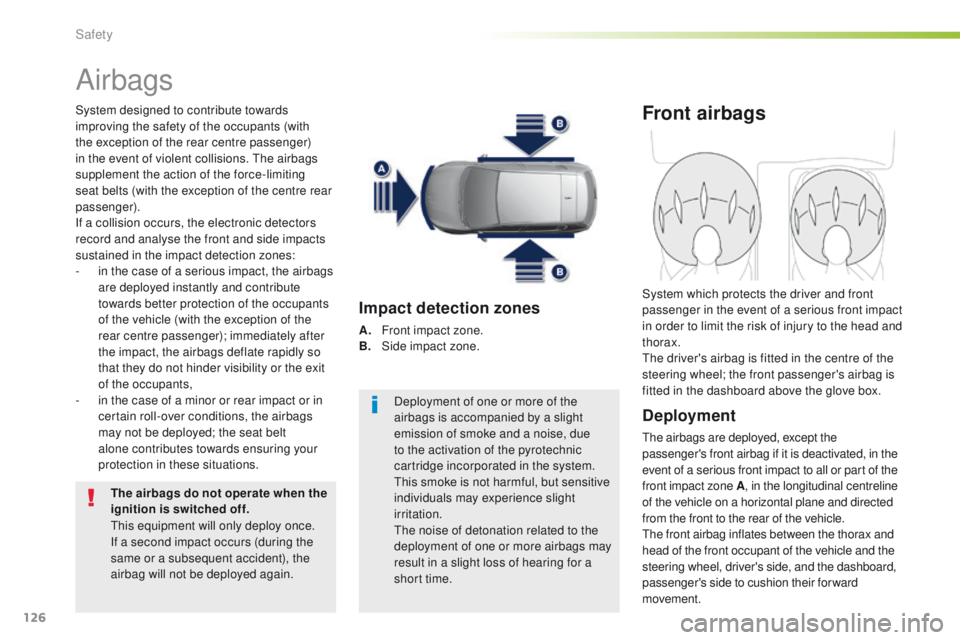
Impact detection zones
A. Front impact zone.
B. S ide impact zone.
Front airbags
Deployment
the airbags are deployed, except the
passenger's front airbag if it is deactivated, in the
event of a serious front impact to all or part of the
front impact zone A , in the longitudinal centreline
of the vehicle on a horizontal plane and directed
from the front to the rear of the vehicle.
th
e front airbag inflates between the thorax and
head of the front occupant of the vehicle and the
steering wheel, driver's side, and the dashboard,
passenger's side to cushion their forward
movement. System which protects the driver and front
passenger in the event of a serious front impact
in order to limit the risk of injury to the head and
thorax.
th
e driver's airbag is fitted in the centre of the
steering wheel; the front passenger's airbag is
fitted in the dashboard above the glove box.
Safety
Page 131 of 396
129
Sit in a normal upright position.
Wear a correctly adjusted seat belt.
Do not leave anything between the
occupants and the airbags (a child, pet,
object...), nor fix or attach anything close to
the inflation trajectory of the airbags; this
could cause injuries during their deployment.
Never modify the original definition of your
vehicle, particularly in the area directly
around the airbags.
After an accident or if the vehicle has been
stolen or broken into, have the airbag
systems checked.
All work on the airbag system must be
carried out by a P
e
uge
Ot
dealer or a
qualified workshop.
ev
en if all of the precautions mentioned
are observed, a risk of injury or of minor
burns to the head, chest or arms when an
airbag is deployed cannot be ruled out.
t
h
e
bag inflates almost instantly (within a few
milliseconds) then deflates within the same
time discharging the hot gas via openings
provided for this purpose.Lateral airbags
use only approved covers on the seats,
compatible with the deployment the lateral
airbags. For information on the range of seat
covers suitable for your vehicle, you can
contact a P
e
uge
Ot
dealer.
Refer to the "Accessories" section.
Do not fix or attach anything to the seat
backs (clothing...).
t
h
is could cause injury
to the chest or arms if the lateral airbag is
deployed.
Do not sit with the upper part of the body any
nearer to the door than necessary.
Front airbags
Do not drive holding the steering wheel by its
spokes or resting your hands on the centre
part of the wheel.
Passengers must not place their feet on the
dashboard.
Do not smoke as deployment of the airbags
can cause burns or the risk of injury from a
cigarette or pipe.
Never remove or pierce the steering wheel or
hit it violently.
Do not fit or attach anything to the steering
wheel or dashboard, this could cause
injuries with deployment of the airbags.
For the airbags to be fully effective, observe the following safety rules:
Curtain airbags
Do not fix or attach anything to the roof. this
could cause injury to the head if the curtain
airbag is deployed.
If fitted on your vehicle, do not remove the
grab handles installed on the roof, they play
a part in securing the curtain airbags.
5
Safety
Page 268 of 396
266
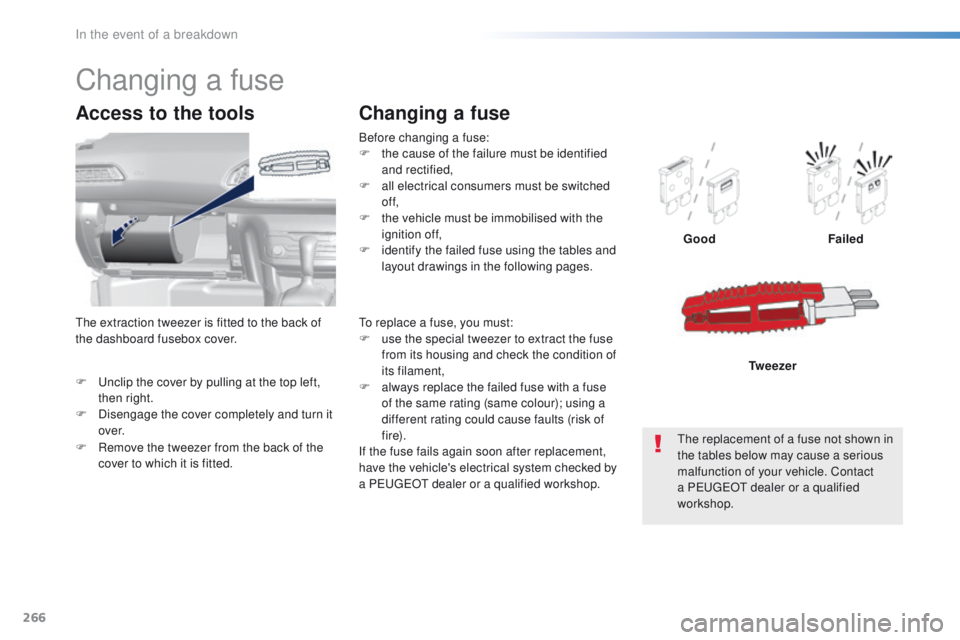
F unclip the cover by pulling at the top left, then right.
F
D
isengage the cover completely and turn it
ove r.
Access to the tools
Before changing a fuse:
F t he cause of the failure must be identified
and rectified,
F
a
ll electrical consumers must be switched
of f,
F
t
he vehicle must be immobilised with the
ignition off,
F
i
dentify the failed fuse using the tables and
layout drawings in the following pages.
Changing a fuse
Good Failed
th
e replacement of a fuse not shown in
the tables below may cause a serious
malfunction of your vehicle. Contact
a P
e
uge
Ot
dealer or a qualified
workshop. Tw e e z e r
Changing a fuse
to replace a fuse, you must:
F
u se the special tweezer to extract the fuse
from its housing and check the condition of
its filament,
F
a
lways replace the failed fuse with a fuse
of the same rating (same colour); using a
different rating could cause faults (risk of
f i r e).
If the fuse fails again soon after replacement,
have the vehicle's electrical system checked by
a P
e
uge
Ot
dealer or a qualified workshop.
F
R
emove the tweezer from the back of the
cover to which it is fitted.th
e extraction tweezer is fitted to the back of
the dashboard fusebox cover.
In the event of a breakdown