Page 239 of 396
237
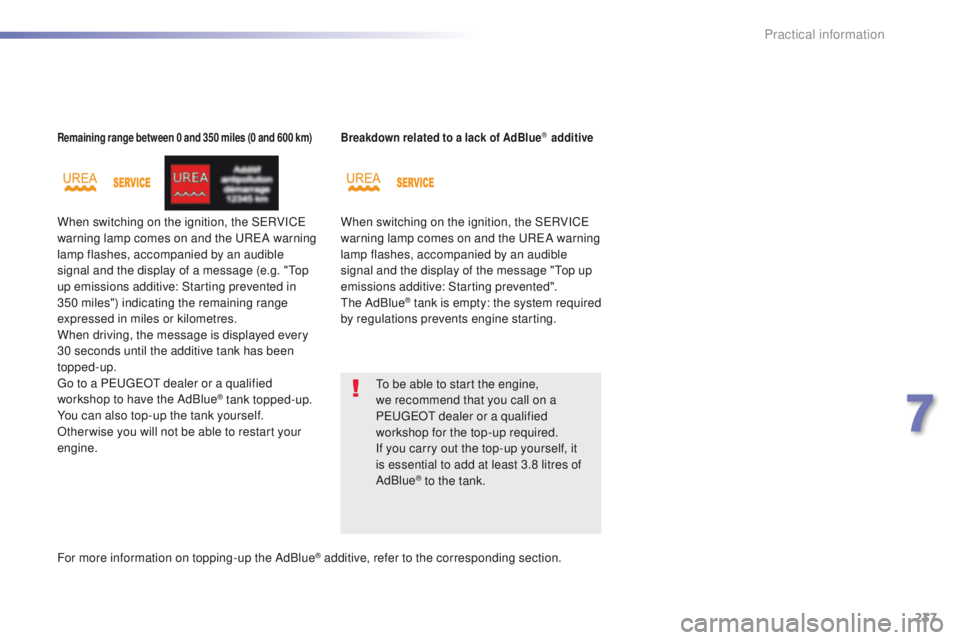
Remaining range between 0 and 350 miles (0 and 600 km)
When switching on the ignition, the SeRVICe
warning lamp comes on and the uReA w arning
lamp flashes, accompanied by an audible
signal and the display of a message (e.g. "
to
p
up emissions additive: Starting prevented in
350 miles") indicating the remaining range
expressed in miles or kilometres.
When driving, the message is displayed every
30 seconds until the additive tank has been
topped-up.
go t
o a P
e
uge
Ot
dealer or a qualified
workshop to have the AdBlue
® tank topped-up.
You can also top-up the tank yourself.
Other wise you will not be able to restart your
engine.
Breakdown related to a lack of AdBlue® additive
When switching on the ignition, the SeR VICe
warning lamp comes on and the uReA w arning
lamp flashes, accompanied by an audible
signal and the display of the message "
to
p up
emissions additive: Starting prevented".
th
e AdBlue
® tank is empty: the system required
by regulations prevents engine starting.
to b
e able to start the engine,
we recommend that you call on a
P
e
uge
Ot
dealer or a qualified
workshop for the top-up required.
If you carry out the top-up yourself, it
is essential to add at least 3.8 litres of
AdBlue
® to the tank.
For more information on topping-up the AdBlue
® additive, refer to the corresponding section.
7
Practical information
Page 246 of 396
244
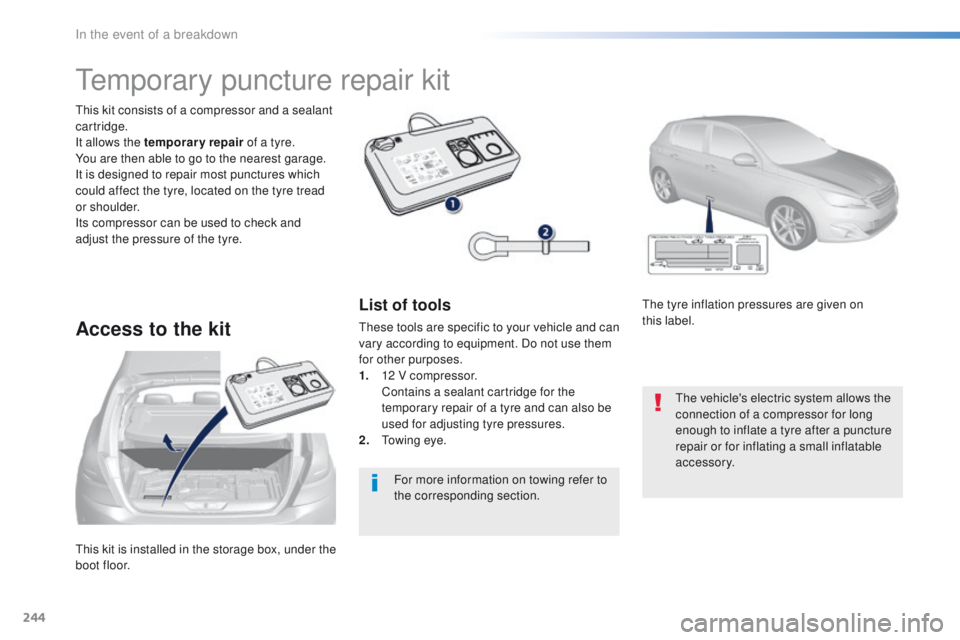
this kit is installed in the storage box, under the
boot floor.
th
is kit consists of a compressor and a sealant
cartridge.
It allows the temporary repair of a tyre.
You are then able to go to the nearest garage.
It is designed to repair most punctures which
could affect the tyre, located on the tyre tread
or shoulder.
Its compressor can be used to check and
adjust the pressure of the tyre.
temporary puncture repair kit
Access to the kit
List of tools
these tools are specific to your vehicle and can
vary according to equipment. Do not use them
for other purposes.
1.
1
2 V compressor.
C
ontains a sealant cartridge for the
temporary repair of a tyre and can also be
used for adjusting tyre pressures.
2.
t
o
wing eye.
th
e tyre inflation pressures are given on
this label.
th
e vehicle's electric system allows the
connection of a compressor for long
enough to inflate a tyre after a puncture
repair or for inflating a small inflatable
accessory.
For more information on towing refer to
the corresponding section.
In the event of a breakdown
Page 251 of 396
249
Checking tyre pressures /
inflating accessories
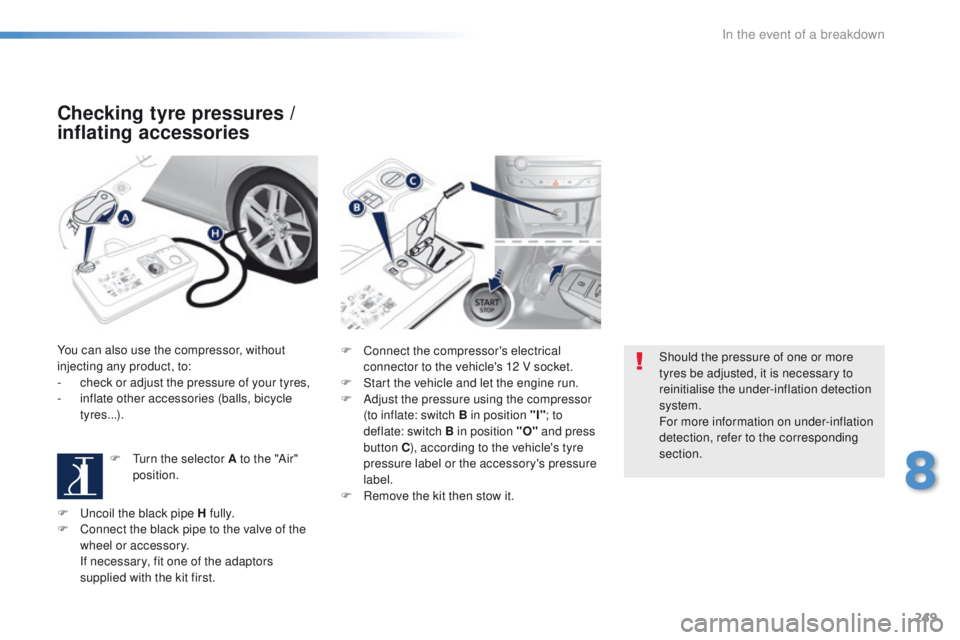
You can also use the compressor, without
injecting any product, to:
-
c
heck or adjust the pressure of your tyres,
-
i
nflate other accessories (balls, bicycle
tyres...).
F
t
u
rn the selector A to the "Air"
position. F
C onnect the compressor's electrical
connector to the vehicle's 12 V socket.
F
S
tart the vehicle and let the engine run.
F
A
djust the pressure using the compressor
(to inflate: switch B in position "I" ; to
deflate: switch B in position "O" and press
button C ), according to the vehicle's tyre
pressure label or the accessory's pressure
label.
F
R
emove the kit then stow it.Should the pressure of one or more
tyres be adjusted, it is necessary to
reinitialise the under-inflation detection
system.
For more information on under-inflation
detection, refer to the corresponding
section.
F
u
n
coil the black pipe H fully.
F
C
onnect the black pipe to the valve of the
wheel or accessory.
I
f necessary, fit one of the adaptors
supplied with the kit first.
8
In the event of a breakdown
Page 252 of 396
250
Changing a wheel
the tools are installed in the boot under the
f l o o r.
Access to the tooling
List of tools
these tools are specific to your vehicle and can
vary according to the level of equipment. Do
not use them for other purposes.
1.
Wheelbrace.
F
or removing the wheel trim and removing
the wheel bolts.
2.
J
ack with integral handle.
F
or raising the vehicle. 3.
"
Bolt cover" tool.
F
or removing the bolt protectors (covers)
on alloy wheels.
4.
S
ocket for the security bolts (located in the
glove box).
F
or adapting the wheelbrace to the special
"security" bolts.
5.
t
o
wing eye.
Procedure for changing a wheel with a damaged or punctured tyre for the spare wheel using the tools provided with the vehicle.
For more information on towing, refer to
the corresponding section.
Wheel with trim
When refitting the wheel, refit the trim
starting by placing its notch facing the
valve and press around its edge with
the palm of your hand.
In the event of a breakdown
Page 257 of 396
255
F tighten the security bolt using the wheelbrace 1 fitted with the security
socket
4 (according to equipment).
F
t
i
ghten the other bolts using the
wheelbrace 1 o n l y.
F
R
efit the bolt covers on each of the bolts
(according to equipment).
F
S
tore the tools in the box.
th
e tyre inflation pressures are given on
this
label.
After changing a wheel
to store the punctured wheel in the boot
correctly, first remove the central cover.
When using the "space-saver" type
spare wheel, do not exceed 50 mph
(80
km/h).
Have the tightening of the bolts and the
pressure of the spare wheel checked
by a P
e
uge
Ot
dealer or a qualified
workshop without delay.
Have the punctured wheel repaired
and refitted to the vehicle as soon as
possible.
If your vehicle has tyre under-inflation
detection, check the tyre pressures then
refer to the corresponding section.
8
In the event of a breakdown
Page 269 of 396
267
PeugeOt will not accept responsibility
for the cost incurred in repairing your
vehicle or for rectifying malfunctions
resulting from the installation of
accessories not supplied and not
recommended by P
e
uge
Ot
and
not installed in accordance with its
instructions, in particular when the
combined consumption of all of the
additional equipment connected
exceeds 10 milliamperes.Installing electrical
accessories
Your vehicle's electrical system is
designed to operate with standard or
optional equipment.
Before installing other electrical
equipment or accessories on your
vehicle, contact a P
e
uge
Ot
dealer or
a qualified workshop.
8
In the event of a breakdown
Page 275 of 396
273
Starting using another battery
First check that the slave battery has a
nominal voltage of 12 V and a capacity
at least equal to that of the discharged
battery.
Do not try to start the engine by
connecting a battery charger.
Do not disconnect the (+) terminal when
the engine is running.
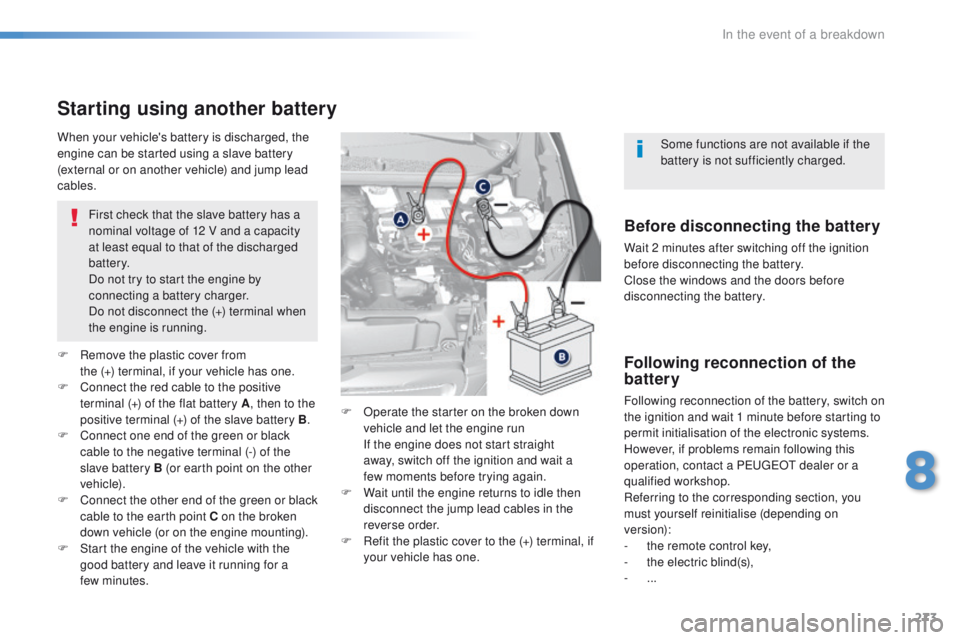
F
R
emove the plastic cover from
the
(+) terminal, if your vehicle has one.
F
C
onnect the red cable to the positive
terminal (+) of the flat battery A , then to the
positive terminal (+) of the slave battery B.
F
C
onnect one end of the green or black
cable to the negative terminal (-) of the
slave battery B (or earth point on the other
vehicle).
F
C
onnect the other end of the green or black
cable to the earth point C on the broken
down vehicle (or on the engine mounting).
F
S
tart the engine of the vehicle with the
good battery and leave it running for a
few
minutes. F
O
perate the starter on the broken down
vehicle and let the engine run
I
f the engine does not start straight
away, switch off the ignition and wait a
few
moments before trying again.
F
W
ait until the engine returns to idle then
disconnect the jump lead cables in the
reverse order.
F
R
efit the plastic cover to the (+) terminal, if
your vehicle has one.
When your vehicle's battery is discharged, the
engine can be started using a slave battery
(external or on another vehicle) and jump lead
cables.Before disconnecting the battery
Wait 2 minutes after switching off the ignition
before disconnecting the battery.
Close the windows and the doors before
disconnecting the battery.
Following reconnection of the
battery
Following reconnection of the battery, switch on
the ignition and wait 1 minute before starting to
permit initialisation of the electronic systems.
However, if problems remain following this
operation, contact a P
e
uge
Ot
dealer or a
qualified workshop.
Referring to the corresponding section, you
must yourself reinitialise (depending on
version):
-
t
he remote control key,
-
t
he electric blind(s),
-
...Some functions are not available if the
battery is not sufficiently charged.
8
In the event of a breakdown
Page 278 of 396
276
General recommendations
Observe the legislation in force in your country.ensure that the weight of the towing vehicle is higher than that of the towed vehicle.
th
e driver must remain at the wheel of the towed vehicle and must have a valid driving licence.
When towing a vehicle with all four wheels on the ground, always use an approved towing
arm; rope and straps are prohibited.
th
e towing vehicle must move off gently.
When towing a vehicle with the engine off, there is no longer any power assistance for
braking or steering.
In the following cases, you must always call on a professional recovery service:
-
v
ehicle broken down on a motor way or fast road,
-
f
our-wheel drive vehicle,
-
w
hen it is not possible to put the gearbox into neutral, unlock the steering, or release
the parking brake,
-
t
owing with only two wheels on the ground,
-
w
here there is no approved towing arm available...
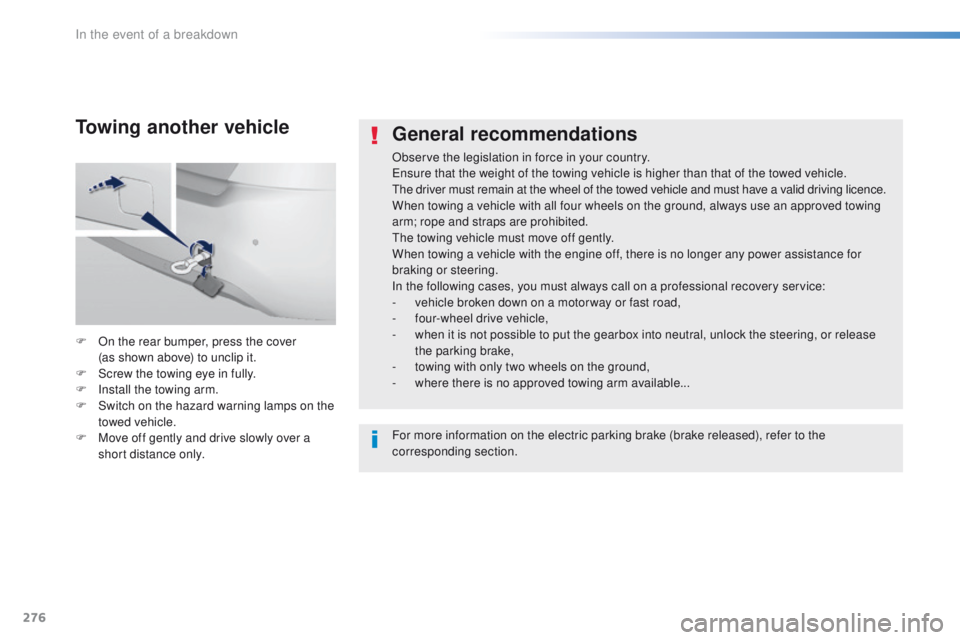
F
O
n the rear bumper, press the cover
(as
shown above) to unclip it.
F
S
crew the towing eye in fully.
F
I
nstall the towing arm.
F
S
witch on the hazard warning lamps on the
towed vehicle.
F
M
ove off gently and drive slowly over a
short distance only.
Towing another vehicle
For more information on the electric parking brake (brake released), refer to the
corresponding section.
In the event of a breakdown