2014 VAUXHALL MOKKA navigation system
[x] Cancel search: navigation systemPage 112 of 221
112Navigation
other family members or
destination addresses for your next journey or business trip in separate
submenus.
See "Organizing the POI data in
several subfolders" below.
Exporting and importing individual
POIs and address book entriesBrief description:
1. Connect a USB drive to the USB port of your vehicle's Infotainmentsystem.
2. Store (export) your favourite destination addresses on the USBdrive.
3. Connect the USB drive to the USB
port of a vehicle equipped with a
Navi 600 or Navi 900 system.
4. Download (import) the address data to the vehicle's Infotainment
system.
After the import, the addresses can
be selected as destinations for route
guidance.
Detailed descriptions see below.Exporting POI data to a USB drive
Connect a USB drive to the USB port of the Infotainment system, see
chapter "USB port" 3 100.
Press the CONFIG button, select
Navigation settings and then select
Export POIs .
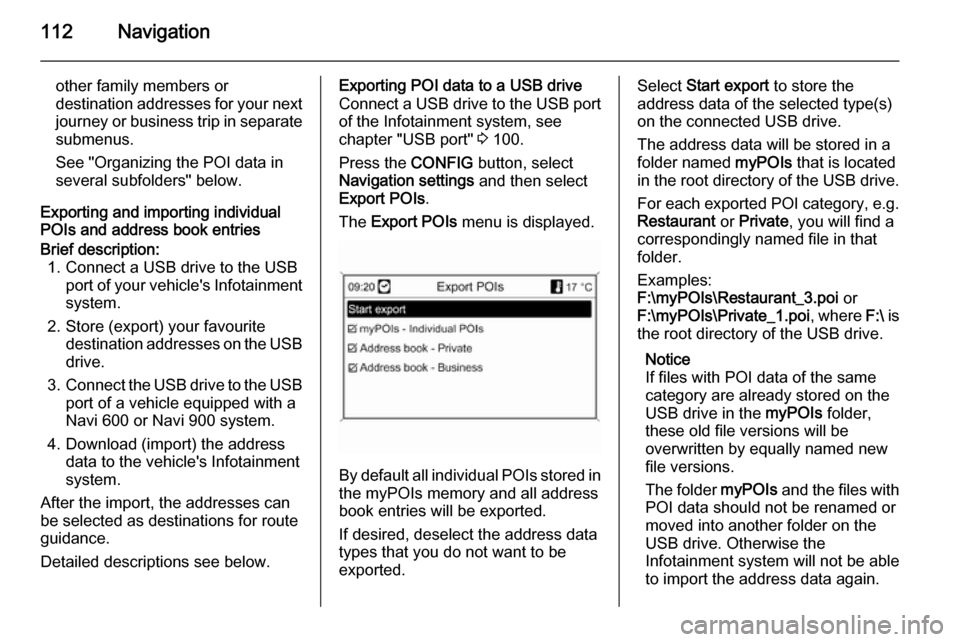
The Export POIs menu is displayed.
By default all individual POIs stored in
the myPOIs memory and all address
book entries will be exported.
If desired, deselect the address data
types that you do not want to be
exported.
Select Start export to store the
address data of the selected type(s)
on the connected USB drive.
The address data will be stored in a
folder named myPOIs that is located
in the root directory of the USB drive.
For each exported POI category, e.g.
Restaurant or Private , you will find a
correspondingly named file in that
folder.
Examples:
F:\myPOIs\Restaurant_3.poi or
F:\myPOIs\Private_1.poi , where F:\ is
the root directory of the USB drive.
Notice
If files with POI data of the same
category are already stored on the
USB drive in the myPOIs folder,
these old file versions will be
overwritten by equally named new
file versions.
The folder myPOIs and the files with
POI data should not be renamed or
moved into another folder on the
USB drive. Otherwise the
Infotainment system will not be able
to import the address data again.
Page 113 of 221

Navigation113
Importing POI data from a USB drive
Connect a USB drive with POI data
stored on it (details see above) to the
USB port of the Infotainment system,
see chapter "USB port" 3 100.
To start the import: press the
CONFIG button, select Navigation
settings , select Import individual
POIs and then select Continue.
All POI data stored on the USB drive
is imported to the myPOIs memory of the Infotainment system.
After the import is finished, the
imported POIs are selectable as
destinations via the Enter
destination menu, see chapter
"Destination input" 3 115.
Creating and importing user defined
POIs
User defined points of interest need
to be defined via GPS coordinates
that can be taken, e.g., from a
topographical map.
The GPS coordinates and further
address data need to be entered into
text files, each file representing a POI category.Brief description: 1. Create the text files for the POI data.
2. Enter the desired address data into the text files.
3. Store the text files with your POI data on a USB drive.
4. Connect the USB drive to the USB
port of your vehicle's Infotainment system.
5. Download (import) the text files with your POI data to the
Infotainment system.
After the import, the addresses can
be selected as destinations for route
guidance.
Detailed descriptions see below.Creating the text files for POI data
You can assign your favourite
destination addresses to 20 different
POI categories, with each POI
category assigned a number, see
"POI categories and assigned
numbers" below.
For each POI category you need to create a separate text file.The text files can be created, e.g., by
using a simple text editor software.
Notice
The text editor must support the
UTF-8 character encoding for
Unicode.
Each text file name need to consist of the category name, a single
underscore, the category's number
and the file extension .poi.
Example file names: ■ Business_2.poi
■ Home & Living_8.poi
■ Culture_15.poi
Notice
The length of the text file names is
limited to 32 characters.
POI categories and assigned
numbers:
(1) Private , (2) Business , (3)
Restaurant , (4) Hotel , (5) Automotive ,
(6) Travel , (7) Cinema , (8) Home &
Living , (9) Shopping , (10) Craft, (11)
Sport , (12) Sight, (13) Health care ,
(14) Leisure , (15) Culture , (16)
Page 114 of 221
114Navigation
Nightlife, (17) Communication , (18)
News & broking , (19) Government
office , (20) General .Entering POI data into the text files
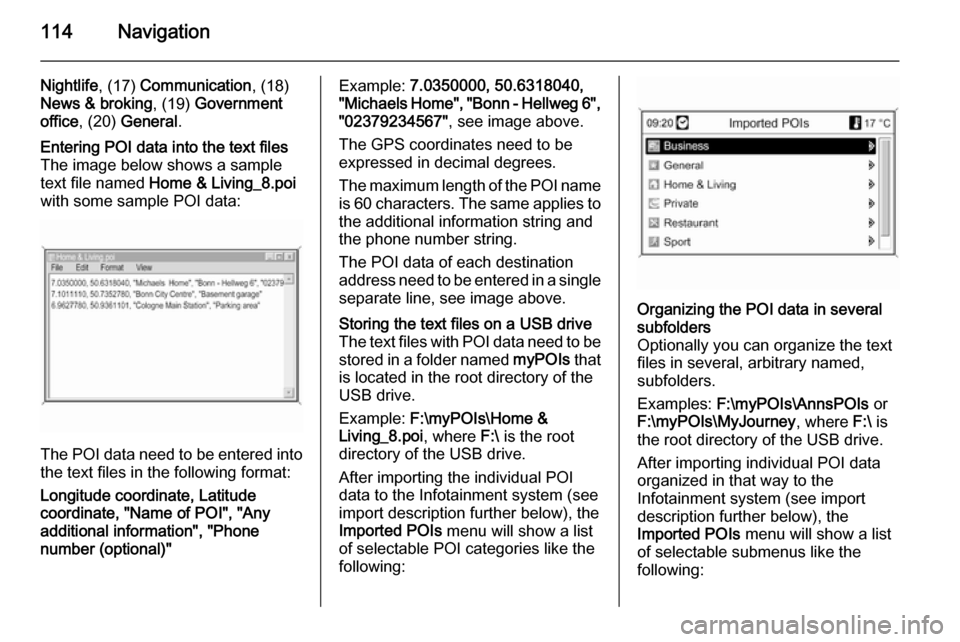
The image below shows a sample
text file named Home & Living_8.poi
with some sample POI data:
The POI data need to be entered into the text files in the following format:
Longitude coordinate, Latitude
coordinate, "Name of POI", "Any additional information", "Phone
number (optional)"
Example: 7.0350000, 50.6318040,
"Michaels Home", "Bonn - Hellweg 6", "02379234567" , see image above.
The GPS coordinates need to be
expressed in decimal degrees.
The maximum length of the POI name
is 60 characters. The same applies to the additional information string and
the phone number string.
The POI data of each destination
address need to be entered in a single
separate line, see image above.Storing the text files on a USB drive
The text files with POI data need to be
stored in a folder named myPOIs that
is located in the root directory of the
USB drive.
Example: F:\myPOIs\Home &
Living_8.poi , where F:\ is the root
directory of the USB drive.
After importing the individual POI
data to the Infotainment system (see
import description further below), the
Imported POIs menu will show a list
of selectable POI categories like the
following:Organizing the POI data in several
subfolders
Optionally you can organize the text
files in several, arbitrary named,
subfolders.
Examples: F:\myPOIs\AnnsPOIs or
F:\myPOIs\MyJourney , where F:\ is
the root directory of the USB drive.
After importing individual POI data
organized in that way to the
Infotainment system (see import
description further below), the
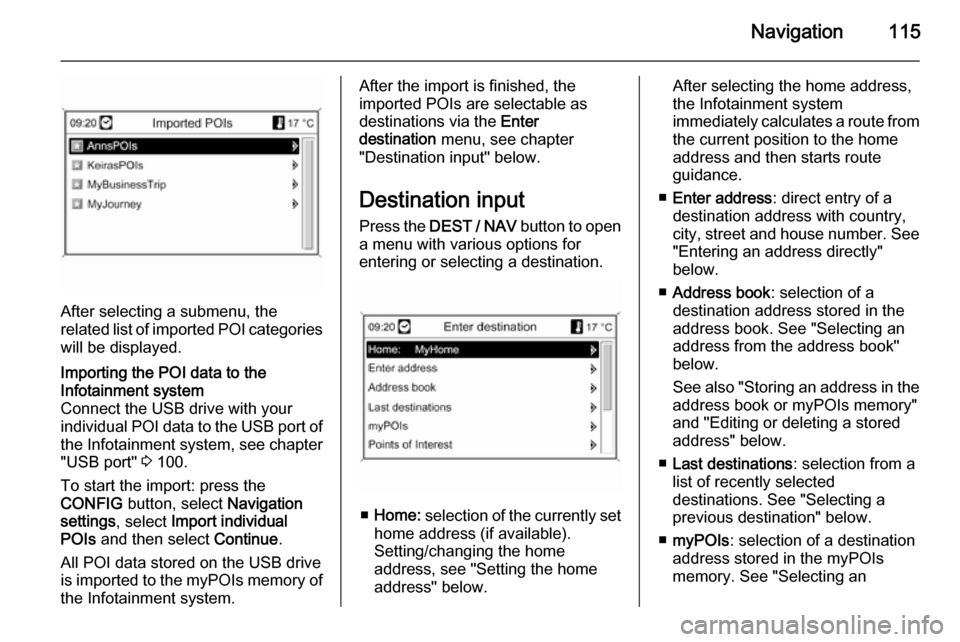
Imported POIs menu will show a list
of selectable submenus like the
following:
Page 115 of 221
Navigation115
After selecting a submenu, the
related list of imported POI categories
will be displayed.
Importing the POI data to the
Infotainment system
Connect the USB drive with your
individual POI data to the USB port of the Infotainment system, see chapter
"USB port" 3 100.
To start the import: press the
CONFIG button, select Navigation
settings , select Import individual
POIs and then select Continue.
All POI data stored on the USB drive
is imported to the myPOIs memory of the Infotainment system.After the import is finished, the
imported POIs are selectable as
destinations via the Enter
destination menu, see chapter
"Destination input" below.
Destination input Press the DEST / NAV button to open
a menu with various options for entering or selecting a destination.
■ Home: selection of the currently set
home address (if available).
Setting/changing the home
address, see "Setting the home
address" below.
After selecting the home address,
the Infotainment system
immediately calculates a route from
the current position to the home
address and then starts route
guidance.
■ Enter address : direct entry of a
destination address with country,
city, street and house number. See "Entering an address directly"
below.
■ Address book : selection of a
destination address stored in the
address book. See "Selecting an address from the address book"below.
See also "Storing an address in the
address book or myPOIs memory"
and "Editing or deleting a stored address" below.
■ Last destinations : selection from a
list of recently selected
destinations. See "Selecting a
previous destination" below.
■ myPOIs : selection of a destination
address stored in the myPOIs
memory. See "Selecting an
Page 116 of 221
116Navigation
address stored in the myPOIs
memory" below.
See also "Storing an address in the address book or myPOIs memory"
and "Editing or deleting a stored
address" below.
■ Points of Interest : selection of POIs
(addresses of, e.g., restaurants, petrol stations, hospitals etc.)
stored on the map SD card of the
Infotainment system. See
"Selecting a point of interest"
below.
■ Select from map : selection of a
destination from the map display
using the eight-way switch 3 78.
See "Selecting a destination from
the map" below.
■ Latitude / Longitude : selection of a
destination using geographic
coordinates. See "Selecting a
destination via geographic
coordinates" below.Selecting a petrol station as
destination after a
Fuel level low alert When the fuel level in the vehicle'stank is low, an alert message is
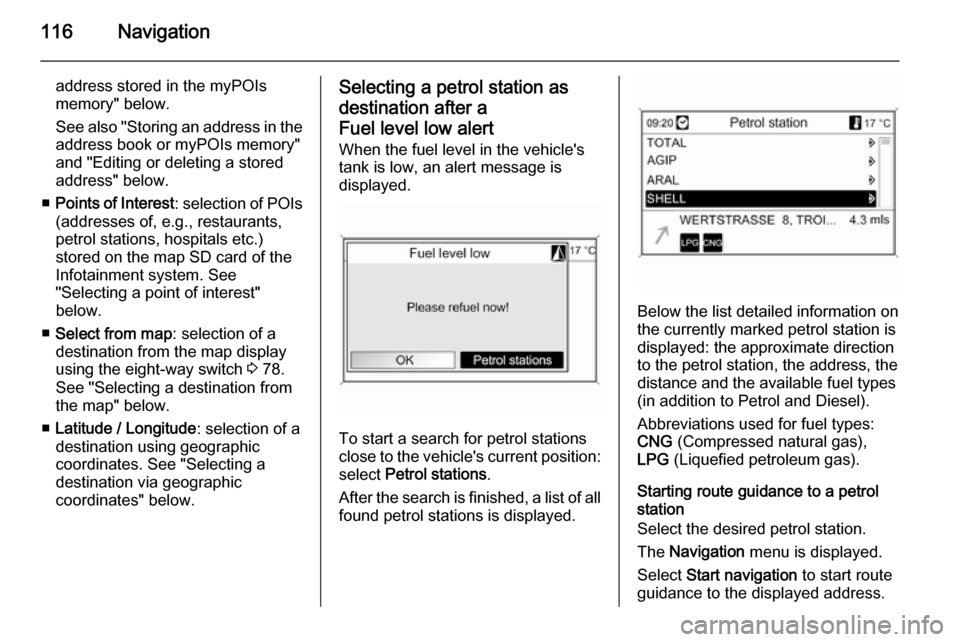
displayed.
To start a search for petrol stations
close to the vehicle's current position:
select Petrol stations .
After the search is finished, a list of all found petrol stations is displayed.
Below the list detailed information onthe currently marked petrol station is
displayed: the approximate direction
to the petrol station, the address, the
distance and the available fuel types
(in addition to Petrol and Diesel).
Abbreviations used for fuel types:
CNG (Compressed natural gas),
LPG (Liquefied petroleum gas).
Starting route guidance to a petrol
station
Select the desired petrol station.
The Navigation menu is displayed.
Select Start navigation to start route
guidance to the displayed address.
Page 117 of 221

Navigation117
Description on route guidance, see
chapter "Guidance" 3 129.
Entering an address directly Press the DEST / NAV button and
then select Enter address to open the
menu shown below.
To change/select the country: mark
the country input field (see image
above) and then press the
multifunction knob to open the
Countries menu.
Select the desired country.
Entering an address using the speller
function
Mark the City: input field and then
press the multifunction knob to
activate the speller function.Using the multifunction knob,
successively mark and accept the
letters for the desired city. During this process the system will automatically block letters that cannot occur next inthe city name.
The following symbols can be
selected in the bottom line:
⇧ : Lists with special letters are
displayed in the bottom line.
◀▶ : Previous/next letter is marked.
k : Delete last letter.
Aa : Upper, lower case.
Page 125 of 221
Navigation125
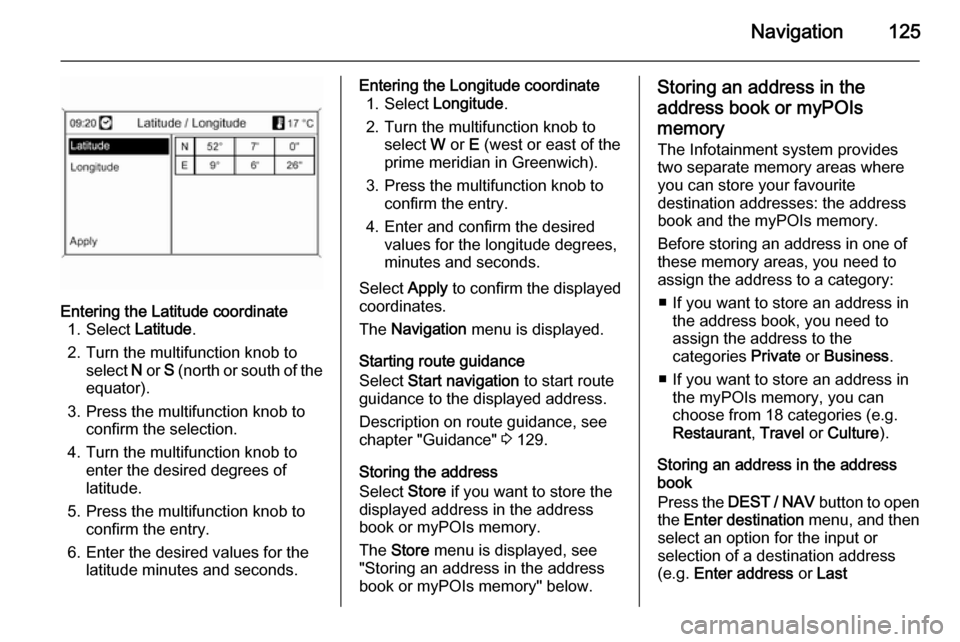
Entering the Latitude coordinate1. Select Latitude.
2. Turn the multifunction knob to select N or S (north or south of the
equator).
3. Press the multifunction knob to confirm the selection.
4. Turn the multifunction knob to enter the desired degrees of
latitude.
5. Press the multifunction knob to confirm the entry.
6. Enter the desired values for the latitude minutes and seconds.Entering the Longitude coordinate1. Select Longitude .
2. Turn the multifunction knob to select W or E (west or east of the
prime meridian in Greenwich).
3. Press the multifunction knob to confirm the entry.
4. Enter and confirm the desired values for the longitude degrees,
minutes and seconds.
Select Apply to confirm the displayed
coordinates.
The Navigation menu is displayed.
Starting route guidance
Select Start navigation to start route
guidance to the displayed address.
Description on route guidance, see
chapter "Guidance" 3 129.
Storing the address
Select Store if you want to store the
displayed address in the address
book or myPOIs memory.
The Store menu is displayed, see
"Storing an address in the address
book or myPOIs memory" below.Storing an address in the
address book or myPOIs
memory
The Infotainment system provides two separate memory areas where you can store your favourite
destination addresses: the address
book and the myPOIs memory.
Before storing an address in one of
these memory areas, you need to
assign the address to a category:
■ If you want to store an address in the address book, you need to
assign the address to the
categories Private or Business .
■ If you want to store an address in the myPOIs memory, you can
choose from 18 categories (e.g.
Restaurant , Travel or Culture ).
Storing an address in the address
book
Press the DEST / NAV button to open
the Enter destination menu, and then
select an option for the input or
selection of a destination address
(e.g. Enter address or Last
Page 128 of 221

128Navigation
Notes on Imported POIs
Imported points of interest (POIs
downloaded from a USB drive)
cannot be edited directly.
If you want to edit the address data of an imported POI:
■ You first need to store the address in the address book or as an
individual point of interest. Then
you can edit the address data of the regarding address book entry ormyPOIs entry (selectable via
Individual POIs ).
■ Or you can import updated address
data from a USB drive, see
"Exporting and importing POI data"
in chapter "Usage" above.
It is also not possible to directly
remove the address data of individual
imported points of interest from the
myPOIs memory.
If you want to remove individual
imported POIs:
Import updated POI data to the
Infotainment system that do not
contain the address data of the POIs
which you want to be removed.To remove all imported POIs of a
certain category: import an empty POI
data file of the regarding category.
Descriptions on importing POI data,
see "Exporting and importing POI
data" in chapter "Usage" above.
Deleting all imported POIs at once:
Press the CONFIG button, select
Navigation settings and then select
Delete all imported POIs .
Setting the home address Before you can set an address as
home address, you need to store this
address in the address book or
myPOIs memory, see corresponding
descriptions above.
Setting an address book entry as
home address
Press the DEST / NAV button, select
Address book , select the desired
address entry, select Edit and then
select Set as Home .
The displayed address is set as new
home address and displayed as first
option in the Enter destination menu.Setting a myPOIs entry as home
address
Press the DEST / NAV button and
then select myPOIs to open the menu
shown below.Setting an individual POI as home
address
Select Individual POIs , select the
desired sorting option (e.g. Vicinity
current position ), select the desired
category (e.g. Restaurant), select the
desired address, select Edit and then
select Set as Home .
The displayed address is set as new
home address and displayed as first
option in the Enter destination menu.