2014 TOYOTA DYNA 100/150 ABS
[x] Cancel search: ABSPage 27 of 232

KEYS AND DOORS21
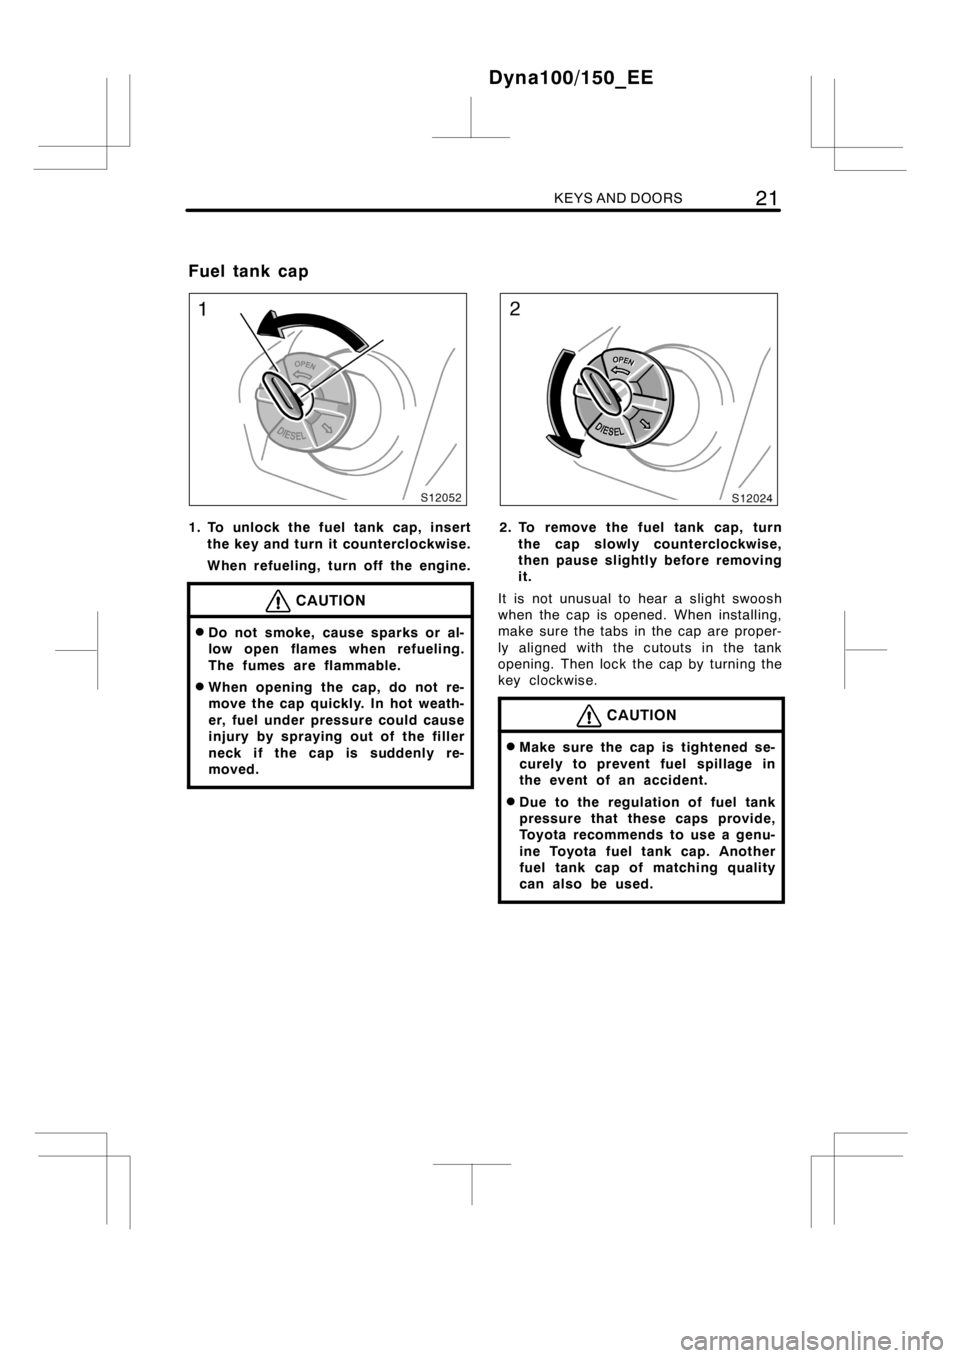
1. To unlock the fuel tank cap, insert
the key and turn it counterclockwise.
When refueling, turn off the engine.
CAUTION
DDo not smoke, cause sparks or al-
low open flames when refueling.
The fumes are flammable.
DWhen opening the cap, do not re-
move the cap quickly. In hot weath-
er, fuel under pressure could cause
injury by spraying out of the filler
neck if the cap is suddenly re-
moved.
2. To remove the fuel tank cap, turn
the cap slowly counterclockwise,
then pause slightly before removing
it.
It is not unusual to hear a slight swoosh
when the cap is opened.When installing,
make sure the tabs in the cap are proper-
ly aligned with the cutouts in the tank
opening. Then lock the cap by turning the
key clockwise.
CAUTION
DMake sure the cap is tightened se-
curely to prevent fuel spillage in
the event of an accident.
DDue to the regulation of fuel tank
pressure that these caps provide,
Toyota recommends to use a genu-
ine Toyota fuel tank cap. Another
fuel tank cap of matching quality
can also be used.
Dyna100/150_EE
Fuel tank cap
Page 83 of 232

GAUGES, METERS AND SERVICE REMINDER INDICATORS77
(g) “ABS” Warning Light
The light comes on when the engine
switch is turned to the “ON” position. If
the anti−lock brake system works properly,
the light turns off after a few seconds.
Thereafter, if the system malfunctions, the
light comes on again.
When the “ABS” warning light is on (and
the brake system warning light is off), the
anti−lock brake systemdoes not operate,
but the brake system stilloperates con-
ventionally.
When the “ABS” warning light is on (and
the brake system warning light is off), the
anti−lock brake systemdoes not operate
so that the wheels could lock up during
a sudden braking or braking on slippery
road surfaces.
If either of the following conditions oc-
curs, this indicates a malfunction some-
where in the components monitored by
the warning light system. Contact any
authorized Toyota dealer or repairer, or
another duly qualified and equipped
professional, as soon as possible to
service the vehicle.
DThe light does not come on when the
engine switch is turned to the “ON”
position, or the light remains on.
DThe light comes on while you are driv-
ing.
A warning light turning on briefly during
operation does not indicate a problem.
(h) SRS Warning Light
This light will come on when the engine
switch is turned to the “ON” position.
After about 6 seconds, the light will go
off. This means the systems of the air-
bag and driver ’s seat belt pretensioner
are operating properly.
This warning light system monitors the
airbag sensor assembly, airbag sensor,
driver ’s seat belt pretensioner assembly,
inflator, interconnecting wiring and power
sources.If either of the following conditions occurs,
this indicates a malfunction somewhere in
the parts monitored by the warning light
system. Contact any authorized Toyota
dealer or repairer, or another duly quali-
fied and equipped professional, as soon
as possible to service the vehicle.
DThe light does not come on when the
engine switch is turned to the “ON”
position or remains on for more than
6 seconds or flashes.
DThe light comes on or starts flashing
while driving.
(i) DPF (Diesel Particulate Filter) Sys-
tem Indicator Light
If the deposit builds up in the filter, the
indicator light on the instrument cluster
will come on when the engine switch is
turned on. The deposit built up in the filter
needs to be regenerated. For details, see
“DPF system” onpage 110 in Section 2.
If you do not perform regeneration and
continue to drive for a while with the indi-
cator light on, the light will begin to flash.
CAUTION
Continuing to drive with the light
flashing will cause the malfunction in-
dicator light to come on. In this
event, damage may be caused to the
vehicle or an accident may occur. If
the malfunction indicator light comes
on, have your vehicle checked by any
authorized Toyota dealer or repairer,
or another duly qualified and
equipped professional immediately.
Dyna100/150_EE
Page 84 of 232

78GAUGES, METERS AND SERVICE REMINDER INDICATORS
(j) Timing Belt Replacement Warning
Light
This light will come on every time when
the trip amount gets between 140000 km
and 150000 km in kilometer reading or
90000 miles in mile reading to indicate
that the timing belt should be replaced.
When it comes on, have the belt replaced
and the warning light reset by any autho-
rized Toyota dealer or repairer, or another
duly qualified and equipped professional.
NOTICE
Continued driving without having the
belt replaced will result in a broken
belt and engine damage.
(k) Fuel Filter Warning Light
The light warns you that the amount of
accumulated water in the fuel filter has
reached the specified level.
If it comes on, drain the water immediate-
ly. (See page 192 in Section 7−2for
instructions for how to drain the water.)
NOTICE
Never drive the vehicle with the warn-
ing light on. Continued driving with
water accumulated in the fuel filter
will damage the fuel injection pump.
(l) Engine Oil Change Reminder Light
This light comes on to remind you to
change the engine oil and oil filter.
If the light comes on, change the engine
oil and oil filter at your earliest conve-
nience. For detailed information, see “Oil
maintenance managementsystem” on
page 70 in this Section.(m) Light Reminder Buzzer
This buzzer will sound if the driver ’s door
is opened while the engine switch is
turned to the “LOCK” position with the
headlight switch on. Removing the key will
not stop the buzzer as long as the head-
light switch is on.
CHECKING SERVICE REMINDER
INDICATORS (except the low fuel level
warning light)
1. Apply the parking brake.
2. Turn the engine switch to the “ACC”
position.
The SRS warning light should come on.
It goes off after about 6 seconds.
3. Turn the engine switch to the “ON”
position, but do not start the engine.
All the service reminder indicators ex-
cept the SRS warning light should
come on. The “ABS” warning light goes
off after a few seconds. The engine oil
change reminder light goes off after
about 5 seconds.
If any service reminder indicator or warn-
ing buzzer does not function as described
above, have it checked by any authorized
Toyota dealer or repairer, or another duly
qualified and equipped professional, as
soon as possible.
Dyna100/150_EE
Page 122 of 232

11 6INFORMATION BEFORE DRIVING YOUR TOYOTA
The tandem master cylinder brakesystem
is a hydraulic system with two separate
sub−systems. If either sub−system should
fail, the other will still work. However, the
pedal will be harder to press, and your
stopping distance will increase. Also, the
brake system warning light may come on.
CAUTION
Do not drive your vehicle with only a
single brake system. Have your
brakes fixed immediately.
BRAKE BOOSTER
The brake booster uses engine vacuum to
power−assist the brakes. If the engine
should quit while you are driving, you can
bringthevehicletoastopwithnormal
pedal pressure. There is enough reserved
vacuum for one or two stops—but no
more!
CAUTION
DDo not pump the brake pedal if the
engine stalls. Each push on the
pedal uses up your reserved vacu-
um.
DEven if the power assist is com-
pletely lost, the brakes will still
work. But you will have to push the
pedal hard, much harder than nor-
mal. And your braking distance will
increase.
ANTI−LOCK BRAKE SYSTEM
(with “ABS” warning light)
The anti−lock brake system is designed
to help prevent lock−up of the wheels
during a sudden braking or braking on
slippery road surfaces. This assists in
providing directional stability and steer-
ing performance of the vehicle under
these circumstances.
Effective way to press the ABS brake
pedal:
When the anti−lock brake system func-
tion is in action, you may feel the brake
pedal pulsating and hear a noise. In this
situation, to let the anti−lock brake sys-
tem work for you, just hold the brake
pedal down more firmly. Do not pump
the brake in a panic stop. This will re-
sult in reduced braking performance.
The anti−lock brake system becomes op-
erative after the vehicle has accelerated
to a speed in excess of approximately 10
km/h (6 mph). It stops operating when the
vehicle decelerates to a speed below
approximately 5 km/h (3 mph).
Depressing the brake pedal on slippery
road surfaces such as on a manhole cov-
er, a steel plate at a construction site,
joints in a bridge, etc. on a rainy day
tends to activate the anti−lock brake sys-
tem.
You may hear a click or motor sound from
the area around the front axle for a few
seconds when the engine is started or just
after the vehicle begins to move. This
means that the anti−lock brake system is
in the self−check mode, and does not indi-
cate a malfunction.
Dyna100/150_EE
Brake system
Page 124 of 232

11 8INFORMATION BEFORE DRIVING YOUR TOYOTA
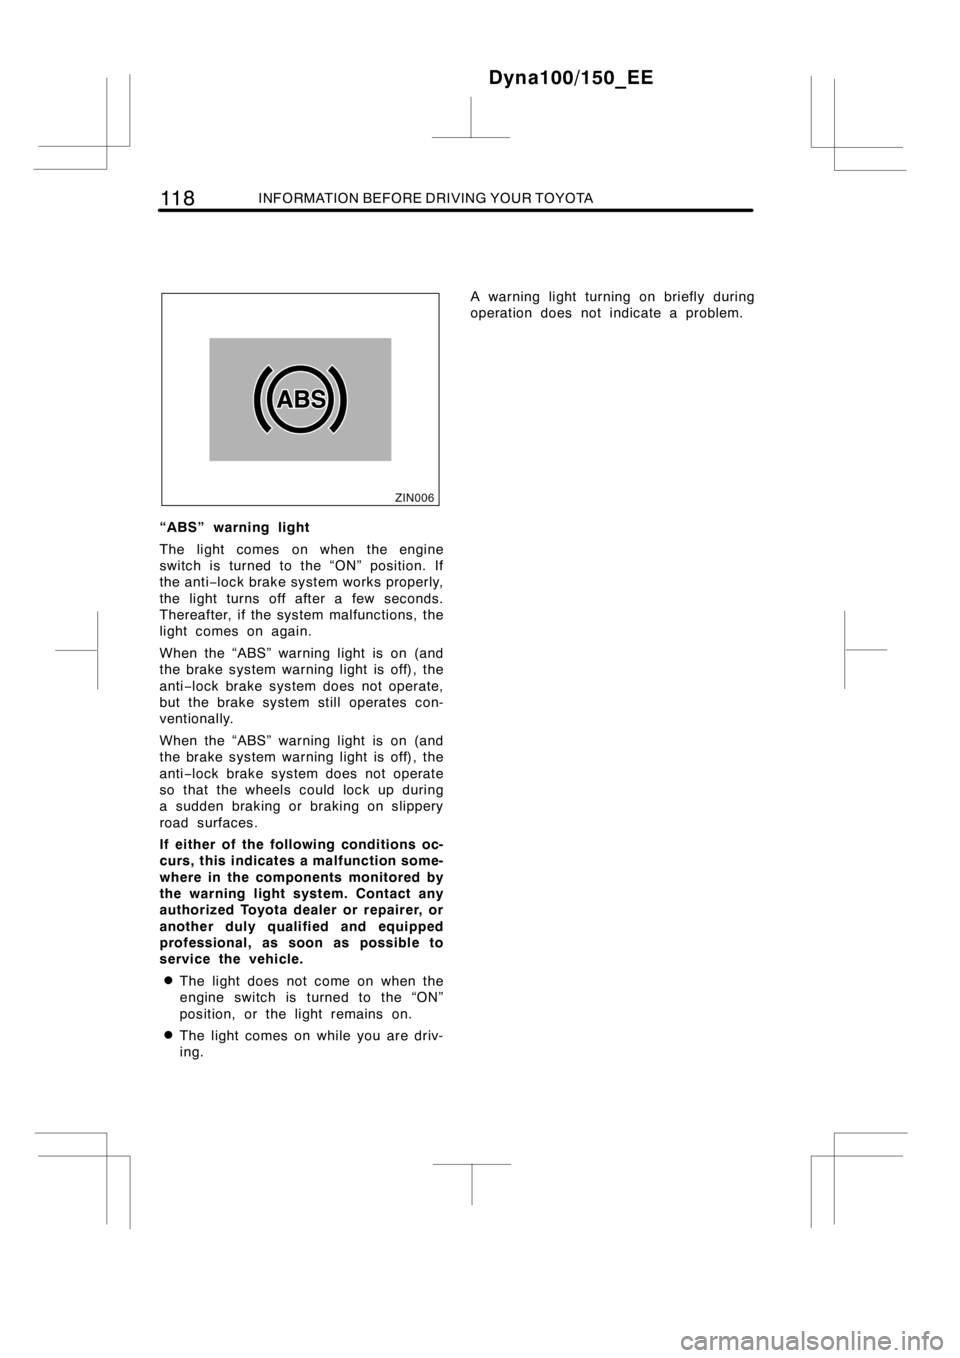
“ABS” warning light
The light comes on when the engine
switch is turned to the “ON” position. If
the anti−lock brake system works properly,
the light turns off after a few seconds.
Thereafter, if the system malfunctions, the
light comes on again.
When the “ABS” warning light is on (and
the brake system warning light is off), the
anti−lock brake systemdoes not operate,
but the brake system stilloperates con-
ventionally.
When the “ABS” warning light is on (and
the brake system warning light is off), the
anti−lock brake systemdoes not operate
so that the wheels could lock up during
a sudden braking or braking on slippery
road surfaces.
If either of the following conditions oc-
curs, this indicates a malfunction some-
where in the components monitored by
the warning light system. Contact any
authorized Toyota dealer or repairer, or
another duly qualified and equipped
professional, as soon as possible to
service the vehicle.
DThe light does not come on when the
engine switch is turned to the “ON”
position, or the light remains on.
DThe light comes on while you are driv-
ing.A warning light turning on briefly during
operation does not indicate a problem.
Dyna100/150_EE
Page 143 of 232

STARTING AND DRIVING137
DBacking with a trailer is difficult and
requires practice. Grip the bottom of
the steering wheel and move your hand
to the left to move the trailer to the
left. Move your hand to the right to
move the trailer to the right. (This pro-
cedure is generally opposite to that
when backing without a trailer.) Also,
just turn the steering wheel a little at
a time, avoiding sharp or prolonged
turning. Have someone guide you when
backing to reduce the risk of an acci-
dent.
DRemember that when making a turn,
the trailer wheels will be closer than
the vehicle wheels to the inside of the
turn. Therefore, compensate for this by
making a larger than normal turning
radius with your vehicle.
DCrosswinds and rough roads will ad-
versely affect handling of your vehicle
and trailer, causing sway. Pay attention
to the rear from time to time to pre-
pare yourself for being passed by large
trucks or buses, which may cause your
vehicle and trailer to sway. If swaying
happens, firmly grip the steering wheel
and reduce speed immediately but
gradually. Never increase speed. If it is
necessary to reduce speed, brake
slowly. Steer straight ahead. If you
make no extreme correction with the
steering or brakes, the vehicle and
trailer will stabilize.
DBe careful when passing other ve-
hicles. Passing requires considerable
distance. After passing a vehicle, do
not forget the length of your trailer and
be sure you have plenty of room be-
fore changing lanes.
DTo maintain engine braking efficiency,
when using engine braking, do not use
fifth gear.
DBecause of the added load of the trail-
er, your vehicle’s engine may overheat
on hot days (at temperatures over
30_C[85_F]) when going up a long or
steep grade with a trailer. If the engine
coolant temperature gauge indicates
overheating, pull off the road and stop
in a safe spot. Refer to “If your vehicle
overheats” on page 148 in Section 4.
DAlways place wheel blocks under both
the vehicle and trailer wheels when
parking. Apply the parking brake firmly.
Put the transmission in first or reverse.
Avoid parking on a slope with a trailer,
but if it cannot be avoided, do so only
after performing the following:
1. Apply the brakes and hold.
2. Have someone place wheel blocks un-
der both the vehicle and trailer wheels.
3. When the wheel blocks are in place,
release your brakes slowly until the
blocks absorb the load.
4. Apply the parking brake firmly.
5. Shift into first or reverse and turn off
the engine.
When restarting out after parking on a
slope:
1. With the clutch pedal depressed, start
the engine.
2. Shift into gear.
3. Release the parking brake and slowly
pull or back away from the wheel
blocks. Stop andapply your brakes.
4. Have someone retrieve the blocks.
Dyna100/150_EE
Page 213 of 232

DO−IT−YOURSELF MAINTENANCE: Electrical components207
3. Release the bulb retaining spring
and remove the bulb. Install a new
bulb and the bulb retaining spring.
To install a bulb, align the tabs of the
bulb with the cutouts of the mounting
hole.4. Install the rubber cover with the
“TOP” mark upward, and fit it se-
curely on the boss. Plug in the con-
nector.
Make sure the rubber cover fits securely
on the bulb base and the mounting body.
Aiming is not necessary after replacing
the bulb. When aiming adjustment is nec-
essary, contact any authorized Toyota
dealer or repairer, or another duly quali-
fied and equipped professional.
Dyna100/150_EE
Page 226 of 232

220SPECIFICATIONS
33. A/F 15A:A/F
34. ECD 25 A:Engine control system
35. E−FA N 3 0 A :Electric cooling fan
36. EDU 20A:EDU
Fuse (type B)
37. POWER 30 A:Power window, power
door locksystem
38. PTC1 50 A:PTC heater
39. PTC2 50 A:PTC heater
40.AM130A:Engine switch, “CIG”, “AIR
BAG” and “GAUGE” fuses
41. HEAD 40 A:Headlights
42. MAIN1 30 A:“HAZ”, “HORN”, “STOP”
and “ECU−B” fuses
43. ABS 50 A:Anti−lock brake system
44. HTR 40 A:Air conditioningsystem
45. P−MAIN 30A:Electric cooling fan
46. P−COOL RR HTR 40A:Air conditioning
system
47.ABS230A:Anti−lock brake system
Fuse (type C)
48.MAIN350A:“TRN”, “ECU−IG”, “IG1”,
“A/C”, “WIP” and “DOOR” fuses
49.MAIN250A:“OBD”, “TAIL”, “DOME”,
“RR−FOG” and “POWER” fuses
50. ALT 140 A:Charging system
51. GLOW 80 A:Engine glow system
52. ST 60 A:Starting system
Dyna100/150_EE