2014 TOYOTA AVALON screen off
[x] Cancel search: screen offPage 245 of 346

245
1. VOICE COMMAND SYSTEM OPERATION
6
VOICE COMMAND SYSTEM
1Press the talk switch.
2Say “Go home” .
A confirmation screen will be displayed
showing the recognition results.
3Say “Yes” or touch “Yes” .
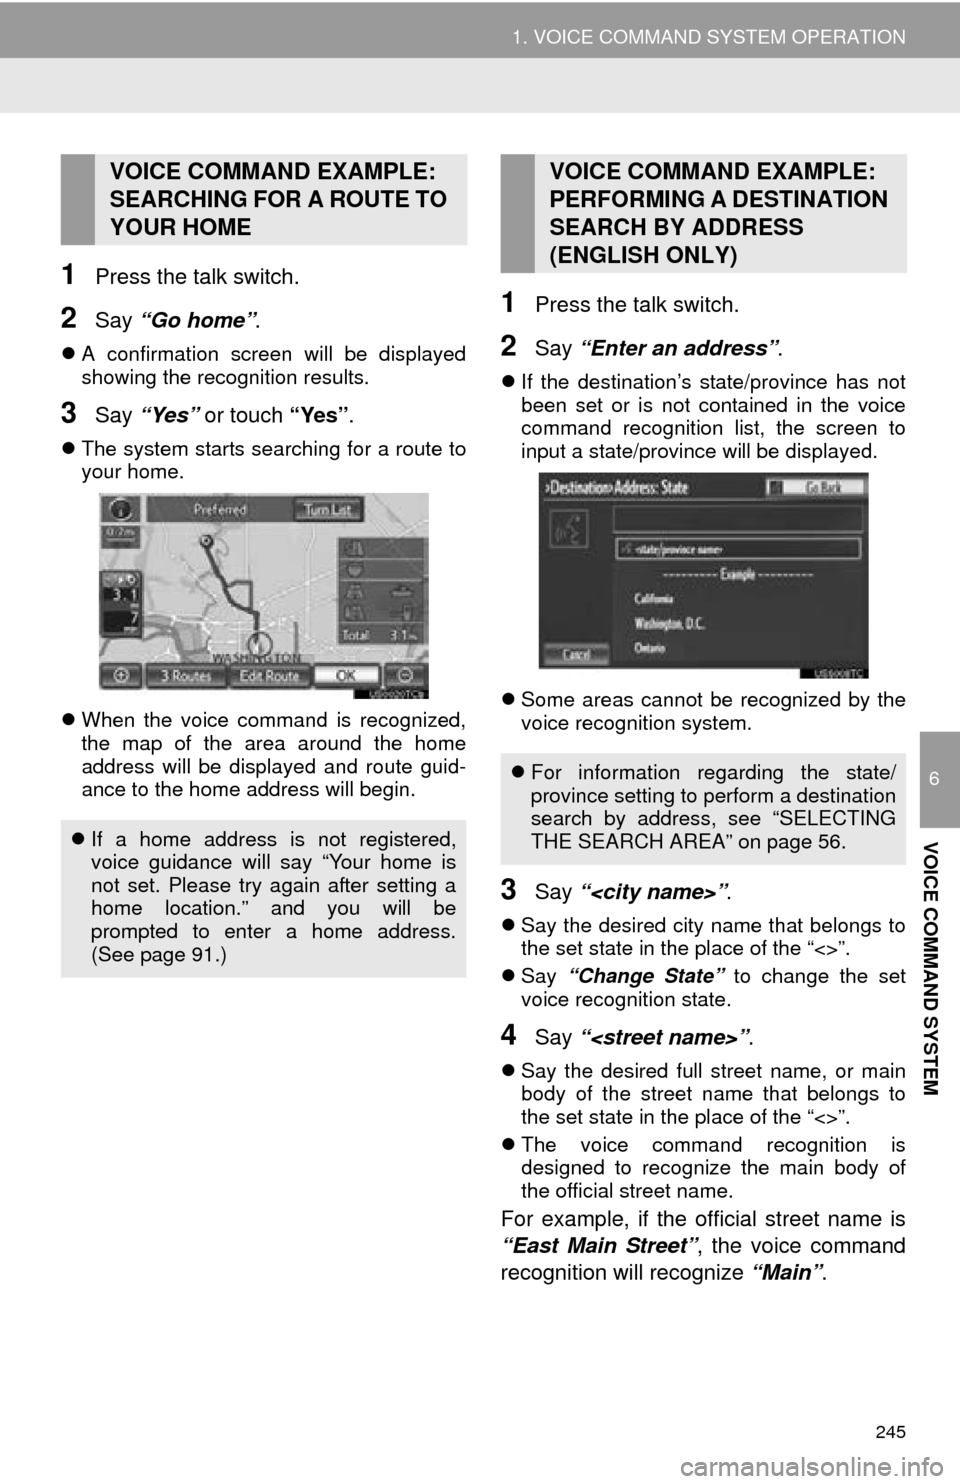
The system starts searching for a route to
your home.
When the voice command is recognized,
the map of the area around the home
address will be displayed and route guid-
ance to the home address will begin.
1Press the talk switch.
2Say “Enter an address” .
If the destination’s state/province has not
been set or is not contained in the voice
command recognition list, the screen to
input a state/province will be displayed.
Some areas cannot be recognized by the
voice recognition system.
3Say “
Say the desired city name that belongs to
the set state in the place of the “<>”.
Say “Change State” to change the set
voice recognition state.
4Say “
Say the desired full street name, or main
body of the street name that belongs to
the set state in the place of the “<>”.
The voice command recognition is
designed to recognize the main body of
the official street name.
For example, if the o fficial street name is
“East Main Street” , the voice command
recognition will recognize “Main”.
VOICE COMMAND EXAMPLE:
SEARCHING FOR A ROUTE TO
YOUR HOME
If a home address is not registered,
voice guidance will say “Your home is
not set. Please try again after setting a
home location.” and you will be
prompted to enter a home address.
(See page 91.)
VOICE COMMAND EXAMPLE:
PERFORMING A DESTINATION
SEARCH BY ADDRESS
(ENGLISH ONLY)
For information regarding the state/
province setting to perform a destination
search by address, see “SELECTING
THE SEARCH AREA” on page 56.
Page 252 of 346

252
1. VOICE COMMAND SYSTEM OPERATION
Select audio mode
When Expanded Voice Commands are turned “On”. (See page 249.)
*: Bluetooth is a registered trademark of Bluetooth SIG, Inc.
CommandActionShortcut Menu
“Radio”Sets the audio mode to radio.O
“AM”Selects the AM band.O
“FM”Selects the FM band.O
“Satellite radio”Selects the satellite radio mode.O
“Disc”Selects the disc audio mode.O
“Auxiliary”Selects the auxiliary audio mode.O
“Bluetooth* audio”Selects the Bluetooth® audio mode.O
“iPod”Selects the iPod audio mode.O
“USB audio”Selects the USB audio mode.O
“Audio on”Turns the audio system on.O
“Audio off”Turns the audio system off.O
INFORMATION
● Commands that have a “O” in the Shortcut Menu column can be recognized from the
“Shortcut Menu” screen.
● Commands that have a “
” in the Shortcut Menu column can only be recognized from
the screen that they are displayed in.
Page 271 of 346

271
3. XM FUNCTION OPERATION
7
INFORMATION
5. XM NavTraffic®
The following operations can be per-
formed:
Show XM NavTraffic® Information: Traffic
information is displayed on the map
screen. (See page 272.)
Auto Avoid Traffic: If any heavy conges-
tion or moderate traffic has been detected
on the guidance route, it may be possible
for you to select another route offered by
the system. (See page 107.)
Traffic Incident Warning: Traffic conges-
tion information is provided using voice
guidance. (See page 52.)
Show Free Flowing Traffic: Freely flowing
traffic is shown by the arrow on the map.
(See page 107.)
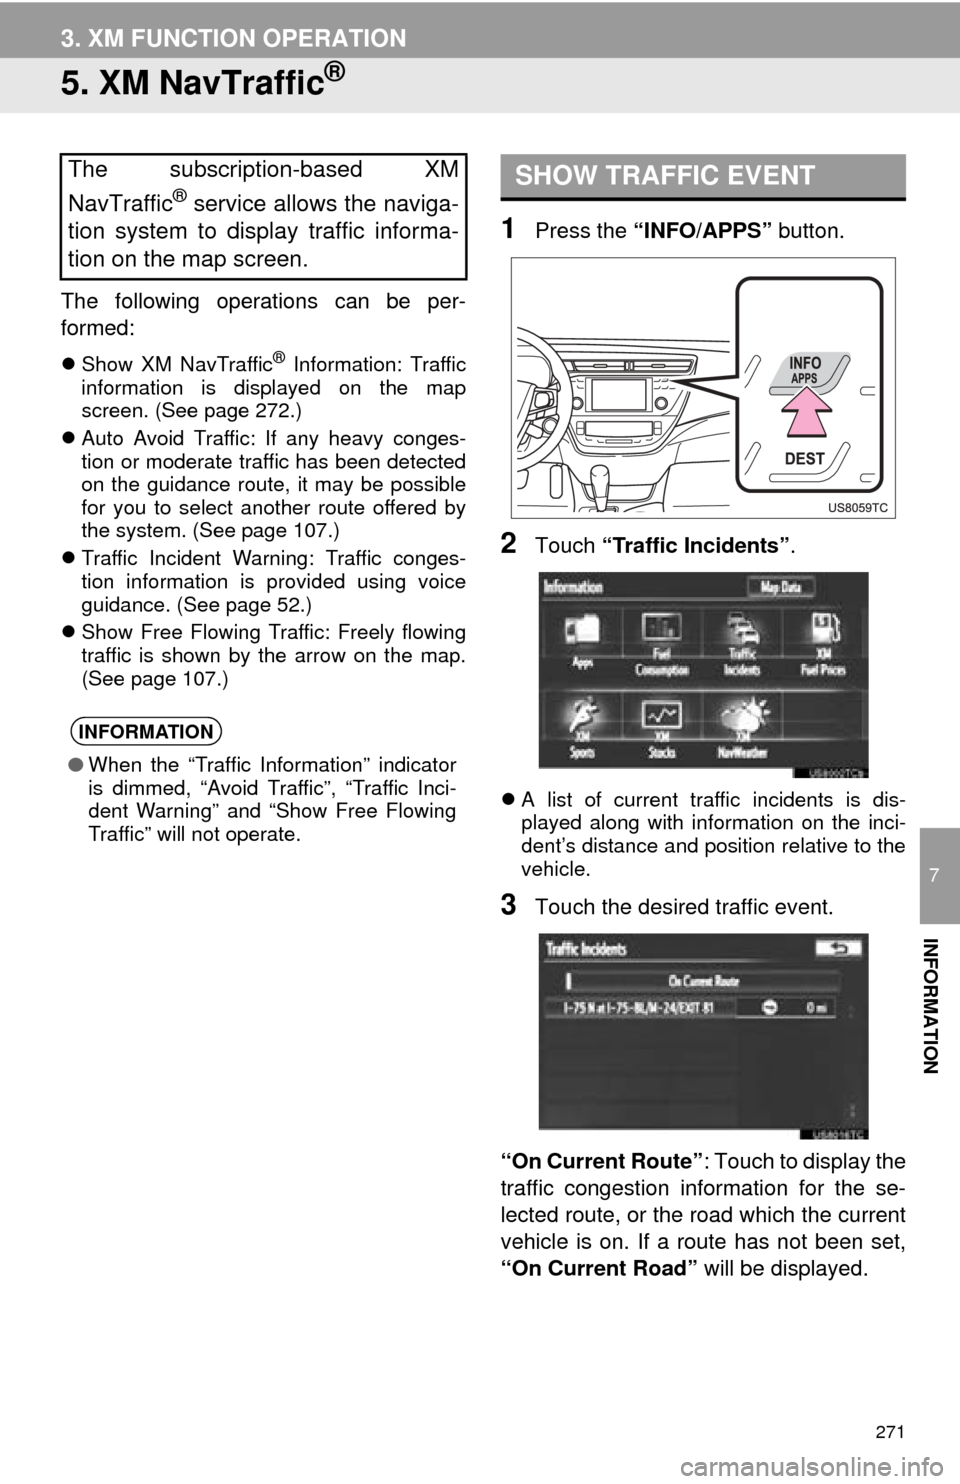
1Press the “INFO/APPS” button.
2Touch “Traffic Incidents” .
A list of current traffic incidents is dis-
played along with information on the inci-
dent’s distance and position relative to the
vehicle.
3Touch the desired traffic event.
“On Current Route” : Touch to display the
traffic congestion information for the se-
lected route, or the road which the current
vehicle is on. If a route has not been set,
“On Current Road” will be displayed.
The subscription-based XM
NavTraffic
® service allows the naviga-
tion system to display traffic informa-
tion on the map screen.
INFORMATION
● When the “Traffic Information” indicator
is dimmed, “Avoid Traffic”, “Traffic Inci-
dent Warning” and “Show Free Flowing
Traffic” will not operate.
SHOW TRAFFIC EVENT
Page 273 of 346

273
3. XM FUNCTION OPERATION
7
INFORMATION
XM NavTraffic® icon
When any traffic information is received,
the XM NavTraffic
® icon will appear on the
map screen. Touching the XM NavTraffic®
icon on the screen will start voice guid-
ance for the traffic information. (See page
37.)
When the XM NavTraffic
® icon is selected,
voice guidance for the traffic information
will start even if “Off” for “Traffic Incident
Warning” is selected.
XM NavTraffic
® information arrow
When any XM NavTraffic
® information is
received, the XM NavTraffic® information
arrow will appear on the map screen. The
color of the arrow changes depending on
the traffic information received.
XM NavTraffic
® indicator
When any XM NavTraffic
® information is
received, the XM NavTraffic® indicator will
appear on the screen. The color of the
indicator changes depending on the traffic
information received.
*: Touching the XM NavTraffic® indicator
will start voice guidance.
ColorFunction
RedHeavy congestion
Ye l l o wModerate traffic
GreenFreely flowing traffic
ColorFunction
WhiteTraffic information has been
received.
Ye l l o w
Traffic restriction informa-
tion on the guidance route
has been received (screen
button*).
Red
Congestion information on
the guidance route has
been received (screen but-
ton*).
Page 290 of 346

290
1. TOYOTA PARKING ASSIST MONITOR
The parking assist monitor displays the last-used parking mode first.
Perpendicular parking Parallel parking
When the shift lever is shifted to the “R” position and any mode button (such as
“DEST” ) is pressed
The parking assist monitor is canceled, and the screen is switched to the mode of
the button that was pressed
SCREEN DISPLAY
The parking assist monitor screen will be displayed if the shift lever is shifted to the
“R” position while the power
No.DisplayFunction
Display mode switch screen but-
tonSwitches the display mode.
Parking mode switch screen but-
tonSwitches the parking mode (between perpendic-
ular parking and parallel parking assist screens)
Narrow mode screen on-off but-
tonSwitch the narrow mode on and off. ( P.293)
CANCELING TOYOTA PARKING ASSIST MONITOR
The parking assist monitor is canceled when the shift lever is shifted into any posi-
tion other than the “R” position.
Page 293 of 346

293
1. TOYOTA PARKING ASSIST MONITOR
9
PERIPHERAL MONITORING SYSTEM
1Touch the narrow mode screen on-off
button on the parallel parking assist.
With each touch, the mode switches as
follows:
1Touch the parking mode switch screen
button.
With each touch, the perpendicular park-
ing and parallel parking assist screen
switches as follows:
SWITCHING TO NARROW
MODE
“Caution” screen
Normal mode
Narrow mode
“I agree”
SWITCHING THE PARKING
MODE SCREEN
Perpendicular parking
• Estimated course line display mode
• Parking assist guide line display mode
• Distance guide line display mode Parallel parking
Page 303 of 346

303
1. TOYOTA PARKING ASSIST MONITOR
9
PERIPHERAL MONITORING SYSTEM
10When the vehicle is parallel with the
road or the shoulder, straighten the
steering wheel.
Check your surroundings visually and
with the mirrors, then back up using the
distance guide lines as a reference,
and stop.
When the vehicle is approximately in the
desired parking location, the parallel park-
ing assist is complete.
1Touch .
The steering wheel has been turned too
far, and the system cannot function.
Return the steering wheel to its original
position.
If the message is displayed before the out-
line is positioned over the desired parking
space, it is likely that the vehicle is too far
away from the shoulder. Check that there
is a gap of approximately 3 ft. (1 m)
between your vehicle and the parked vehi-
cle.
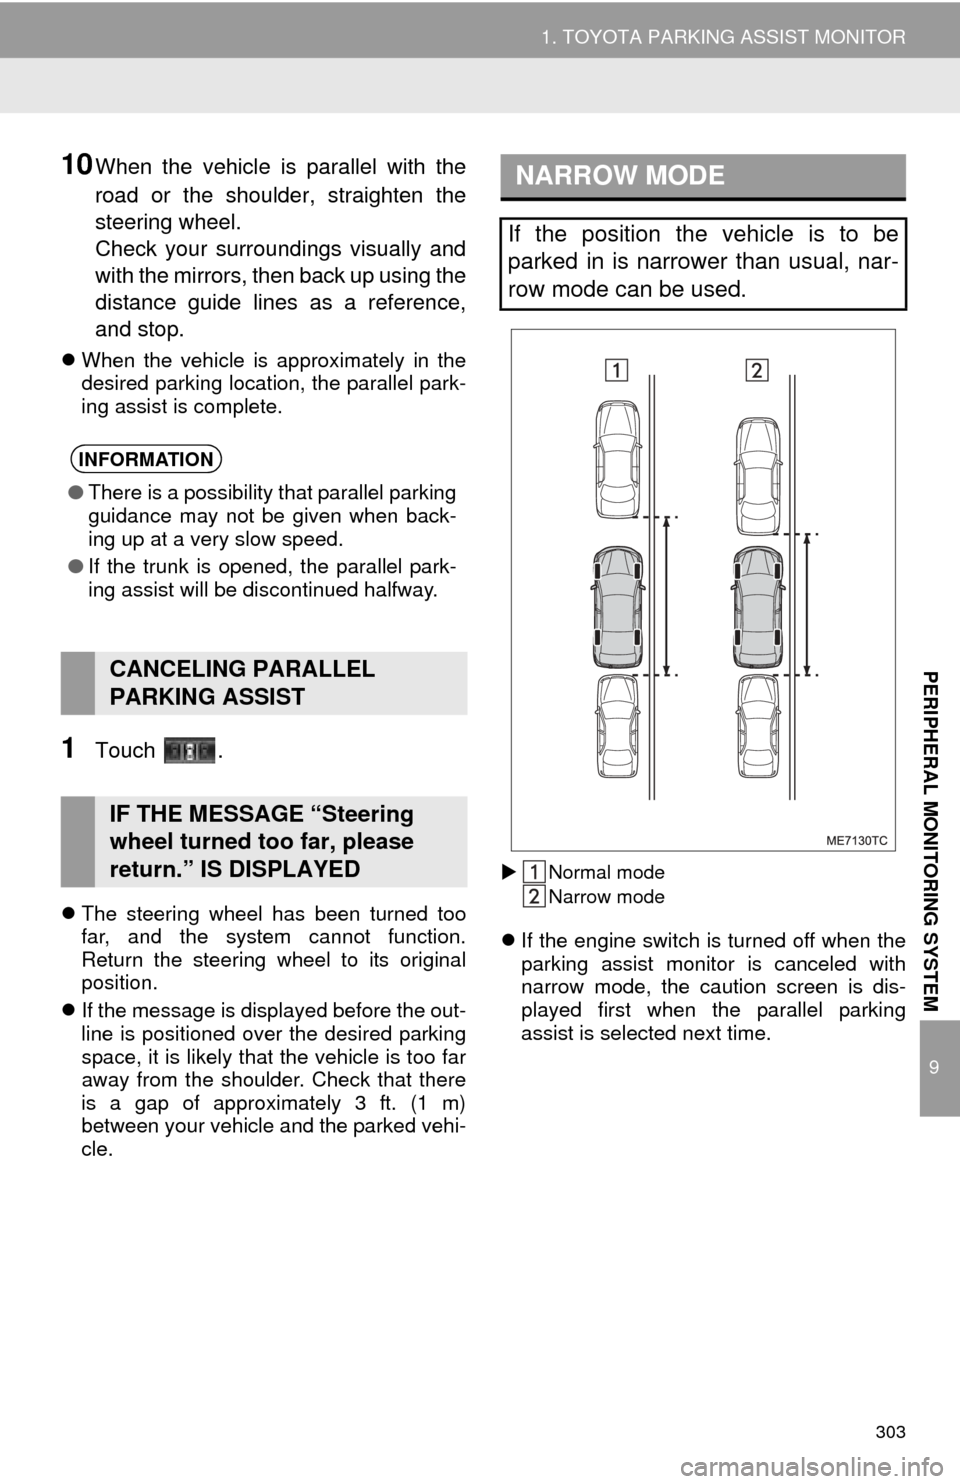
Normal mode
Narrow mode
If the engine switch is turned off when the
parking assist monitor is canceled with
narrow mode, the caution screen is dis-
played first when the parallel parking
assist is selected next time.
INFORMATION
● There is a possibility that parallel parking
guidance may not be given when back-
ing up at a very slow speed.
● If the trunk is opened, the parallel park-
ing assist will be discontinued halfway.
CANCELING PARALLEL
PARKING ASSIST
IF THE MESSAGE “Steering
wheel turned too far, please
return.” IS DISPLAYED
NARROW MODE
If the position the vehicle is to be
parked in is narrower than usual, nar-
row mode can be used.
Page 317 of 346

317
R
Radio ..................................................... 181Listening to the radio .......................... 181
Presetting a station ............................ 181
Radio broadcast data system............. 182
Selecting a station .............................. 182
Traffic announcement ........................ 183
Radio broadcast data system ................. 182
RADIO button ......................................... 174
Receive on the Bluetooth
® phone ......... 137
Register a Bluetooth® phone ................. 127
Connecting a Bluetooth® phone......... 128
Reconnecting the Bluetooth®
phone.............................................. 130
Registering home..................................... 12
Registering preset destinations ............... 14
Reordering destinations ........................... 81
Resuming guidance ................................. 86
Route guidance......................................... 71
Route guidance screen ............................ 74
Route overview ........................................ 84
Route preference ..................................... 85
Route trace .............................................. 90
S
Satellite radio (SAT) ................................ 177
Screen adjustment ................................... 32
Screen Off ................................................. 32
Screen scroll operation ............................ 34
Screen settings adjustment...................... 32
Screens for navigation settings ................ 91
SEEK/TRACK button .............................. 174
Setting home as the destination............... 17
Setting up the “Address Book” ................. 96
Setting up the “Areas to Avoid” .............. 100
Setting up the “Home” .............................. 91
Setting up the “Preset Destinations” ........ 93
SETUP button ................................... 10, 174
“Setup” screen ......................................... 22
Show on map ........................................... 87
SMS/MMS message ....................... 136, 141
Speed dial ............................................... 133
Standard map icons ................................. 41
Starting route guidance ............................ 71
Steering switches .................... 124, 229, 242
Surround ................................................. 178
Switching the screens .............................. 38