2014 SUBARU TRIBECA stop start
[x] Cancel search: stop startPage 10 of 426
Safety precautions when
driving
&Seatbelt and SRS airbag
WARNING
.All persons in the vehicle shouldfasten their seatbelts BEFOREthe vehicle starts to move. Other-wise, the possibility of seriousinjury becomes greater in theevent of a sudden stop or acci-dent.
.To obtain maximum protection inthe event of an accident, thedriver and all passengers in thevehicle shouldalways wear seat-belts when the vehicle is moving.The SRS (Supplemental RestraintSystem) airbag does not do awaywith the need to fasten seatbelts.In combination with the seat-belts, it offers the best combinedprotection in case of a seriousaccident.
Not wearing a seatbelt increasesthe chance of severe injury ordeath in a crash even when thevehicle has the SRS airbag.
.The SRS airbags deploy withconsiderable speed and force.Occupants who are out of properposition when the SRS airbagdeploys could suffer very seriousinjuries. Because the SRS airbagneeds enough space for deploy-ment, the driver should alwayssit upright and well back in theseat as far from the steeringwheel as practical while stillmaintaining full vehicle controland the front passenger shouldmove the seat as far back aspossible and sit upright and wellback in the seat.
For instructions and precautions, carefullyread the following sections.
.For the seatbelt system, refer to“Seat-belts”F1-17.
.For the SRS airbag system, refer to“*SRS airbag (Supplemental RestraintSystem airbag)”F1-45.
&Child safety
WARNING
.Never hold a child on your lap orin your arms while the vehicle ismoving. The passenger cannotprotect the child from injury in acollision, because the child willbe caught between the passen-ger and objects inside the vehi-cle.
.While riding in the vehicle, in-fants and small children shouldalways be placed in one of therear seating positions recom-mended in this Owner’s Manualin an infant or child restraintsystem which is appropriate forthe child’sage,heightandweight. If a child is too big for achild restraint system, the childshould sit in a REAR seat and berestrained using the seatbelts.According to accident statistics,children are safer when properlyrestrained in the rear seatingpositions than in the front seat-ing positions. Never allow a childto stand up or kneel on the seat.
.Put childrenaged 12 and under ina REAR seat properly restrained
5
–CONTINUED–
Page 48 of 426
Seatbelts
&Seatbelt safety tips
WARNING
.All persons in the vehicle shouldfasten their seatbelts BEFOREthe vehicle starts to move. Other-wise, the possibility of seriousinjury becomes greater in theevent of a sudden stop or acci-dent.
.All belts should fit snugly in orderto provide full restraint. Loosefitting belts are not as effective inpreventing or reducing injury.
.Each seatbelt is designed tosupport only one person. Neveruse a single belt for two or morepersons–even children.Other-wise, in an accident, seriousinjury or death could result.
.Replace all seatbelt assembliesincluding retractors and attach-ing hardware worn by occupantsof a vehicle that has been in aserious accident. The entire as-sembly should be replaced evenif damage is not obvious.
.Put children aged 12 and under in
a rear seat properly restrained atall times. The SRS airbag de-ploys with considerable speedand force and can injure or evenkill children, especially if they are12 years of age and under andare not restrained or improperlyrestrained. Because children arelighter and weaker than adults,their risk of being injured fromdeployment is greater. Conse-quently, we strongly recommendthat ALL children (includingthose in child seats and thosethat have outgrown child re-straint devices) sit in a REARseat properly restrained at alltimes in a child restraint deviceor in a seatbelt, whichever isappropriate for the child’s heightand weight.
Always secure ALL types of childrestraint devices (including for-ward facing child seats) in one ofthe rear seating positions recom-mended in this Owner’s Manual.
NEVERINSTALL A REARWARDFA C I N G C H I L D S E AT I N T H EFRONT SEAT. DOING SO RISKSSERIOUS INJURY OR DEATH TOTHE CHILD BY PLACING THECHILD’S HEAD TOO CLOSE TO
THE SRS AIRBAG.
According to accident statistics,children are safer when properlyrestrained in the rear seatingpositions than in the front seat-ing positions. For instructionsand precautions concerning thechild restraint system, refer to“Child restraint systems”F1-29.
Your vehicle is equipped with a crashsensing and diagnostic module, which willrecord the use of the seatbelt(s) by thedriver and front passenger when any ofthe SRS frontal, side and curtain airbagsdeploy.
!Infants or small children
Use a child restraint system that issuitable for your vehicle. Refer to“Childrestraint systems”F1-29.
!Children
If a child is too big for a child restraintsystem, the child should sit in the rear seatand be restrained using the seatbelts.According to accident statistics, childrenare safer when properly restrained in therear seating positions than in the frontseating positions.Never allow a child tostand up or kneel on the seat.
If the shoulder portion of the belt crosses
Seat, seatbelt and SRS airbags1-17
–CONTINUED–
Page 108 of 426
Immobilizer
CAUTION
FCC WARNING
Changes or modifications not ex-pressly approved by the party re-sponsible for compliance could voidthe user’s authority to operate theequipment.
The immobilizer system is designed toprevent an unauthorized person fromstarting the engine. Only keys registeredwith your vehicle’s immobilizer system canbe used to operate your vehicle. Even ifan unregistered key fits into the ignitionswitchand can be turned to the“START”position, the engine will automatically stopafter several seconds.
Each immobilizer key contains a trans-ponder in which the key’s ID code isstored. When a key is inserted into theignition switch and turned to the“ON”position, the transponder transmits thekey’s ID code to the immobilizer system’sreceiver. If the transmitted ID codematches the ID code registered in theimmobilizer system, the system allows theengine to be started. Since the ID code istransmitted and acted upon almost in-
stantly, the immobilizer system does notimpede normal starting of the engine.
If the engine does not start, pull out thekey once before trying again. Refer to“Ignition switch”F3-3.
This device complies with Part 15 ofthe FCC Rules and RSS-Gen of ICRules. Operation is subject to thefollowing two conditions: (1) this de-vice may not cause harmful interfer-ence, and (2) this device must acceptany interference received, includinginterference that may cause undesiredoperation.
CAUTION
.Do not place the key under directsunlight or anywhere it maybecomehot.
.Do not get the key wet. If the keygets wet, wipe it dry with a clothimmediately.
NOTE
To p r o t e c t y o u r v e h i c l e f r o m t h e f t ,please pay close attention to the fol-lowing security precautions.
.Never leaveyour vehicle unattendedwith its keys inside..Before leaving your vehicle, close all
windows and lock the doors and reargate..Do not leave spare keys or anyrecord of your key number in thevehicle.
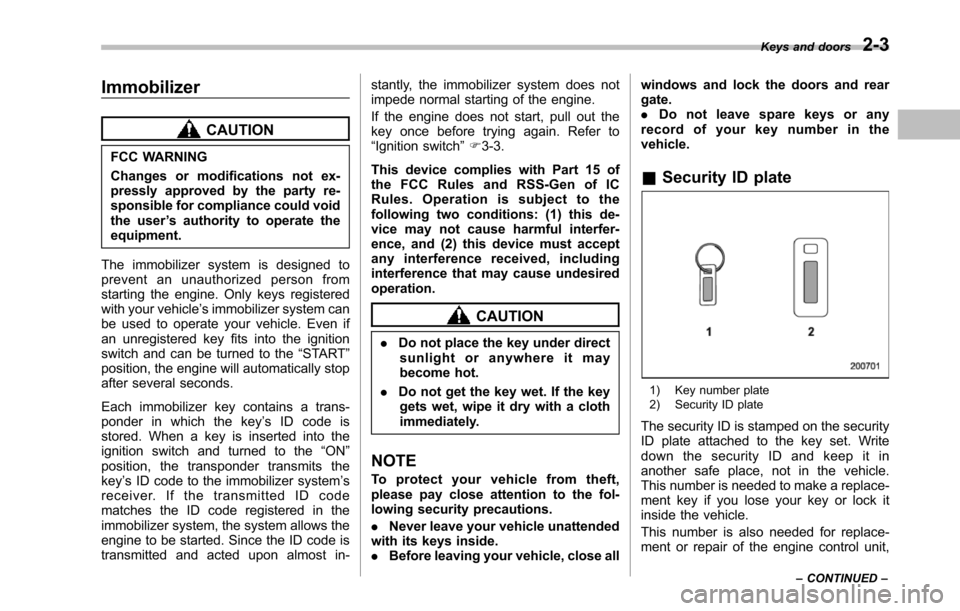
&Security ID plate
1) Key number plate2) Security ID plate
The security ID is stamped on the securityID plate attached to the key set. Writedown the security ID and keep it inanother safe place, not in the vehicle.This number is needed to make a replace-ment key if you lose your key or lock itinside the vehicle.
This number is also needed for replace-ment or repair of the engine control unit,
Keys and doors2-3
–CONTINUED–
Page 119 of 426

2-14Keys and doors
form the whole procedure again begin-ning with part 1.
4. Open and close the door once within15 seconds.
NOTE
.When part 4 of the procedure iscompleted, an electronic tone willsound for 30 seconds..If you do not perform the operationsin part 4 within 15 seconds, an errorwill occur and the electronic tone willnot sound. In this event, perform theregistration steps again beginning withpart 3 of the procedure.
5. Before the electronic tone stopssounding, push the“”side of the powerdoor locking switch the same number oftimes as the leftmost digit of the transmit-
ter code. For example, push the lockingswitch eight times if the leftmost digit ofthe code is 8.
NOTE
.The electronic tone will stop sound-ing when you start entering the num-ber..If you do not start entering thenumber using the lock knob beforetheelectronic tone stops sounding, anerror will occur. In this event, performthe registration steps again beginningwith part 3 of the procedure..If the interval between one push ofthe knob and the next exceeds 5seconds, an error will occur. In thisevent, perform the procedure againbeginning with part 4. If an error occurssix times, perform the procedure againstarting with part 3.
6. When you have finished entering thenumber, push the“”side of the lockingswitch within 5 seconds.
NOTE
.An electronic tone will sound..If you push the“”side of thelocking switch when more than 5seconds have passed, an error willoccur. In this event, perform the proce-dure again beginning with part 4. If anerror occurs six times, perform theprocedure again starting with part 3.
7. Perform parts 5 and 6 of the procedurefor eachof the remaining digits of thetransmitter code beginning with the sec-ond digit (counting from the left) andfinishing with the eighth digit.
Page 120 of 426
NOTE
.When you finish entering the eighthdigit, an electronic tone will sound for30 seconds..If the interval between one push ofthe switch and the next exceeds 5seconds, an error will occur. In thisevent, perform the procedure againbeginning with part 4. If an error occurssix times, perform the procedure againstarting with part 3.
8. Before the electronic tone stopssounding, use the power door lockingswitch to reenter the transmitter codebeginningwith the leftmost digit.
NOTE
If you do not start entering the numberusing the lock knob before the electro-nic tone stops sounding, an error willoccur. In this event, perform the proce-dure again beginning with part 3.
9. When you have finished entering thecode a second time, an electronic tone willsound for 1 second and automatic doorlocking and unlocking operation will takeplace once to indicate completion ofregistration, provided the code enteredthe second time is identical to that enteredthe first time.
NOTE
If the code entered the second time isnot identical to the code entered thefirst time, an error will occur. In thisevent, perform the procedure againbeginning with part 5. If an error occursfive times, perform the procedure againstarting with part 3.
10. If you wish to program another trans-mitter code into the system (up to fourtransmitter codes can be programmed intothe system), perform the procedure begin-ning with part 4. When you have finishedprogramming all of the necessary trans-mitter codes into the system, remove thekey from the ignition switch.
11. Test every registered transmitter toconfirm correctoperation.
!Deleting old transmitter codes
The control unit of the remote keylessentry system has four memory locations tostore transmitter codes, giving it the abilityto operate with up to four transmitters.When you lose a transmitter, the losttransmitter’s code remains in the memory.For security reasons, lost transmittercodes should be deleted from the mem-ory.
To delete old transmitter codes, programfour transmitter codes into the system. If
you have only one current transmitter,program it four times. If you have twocurrent transmitters, program each onetwice. If you have three current transmit-ters, program two of them once and thethird one twice. This process will leaveonly current transmitter codes in thesystem’s memory.
NOTE
Make sure no one else is operatingtheir keyless entry system within rangeof your vehicle when programmingtransmitters. If someone else were tooperate their remote transmitter whileyou are programming your transmit-ters, it is possible that their transmittercode will be programmed into yoursystem, allowing them unauthorizedaccess to your vehicle.
Keys and doors2-15
Page 122 of 426
&If you have accidentally trig-
gered the alarm system
!To stop the alarm
Do any of the following operations.
.Press any button on the remote trans-mitter.
.Turn the ignition switch to the“ON”position.
&Arming the system
!To arm the system using remotetransmitter
1. Close all windows and the moonroof.
2. Remove the key from the ignitionswitch.
3. Open the doors and get out of thevehicle.
4. Make sure that the engine hood islocked.
5. Close all doors and the rear gate.
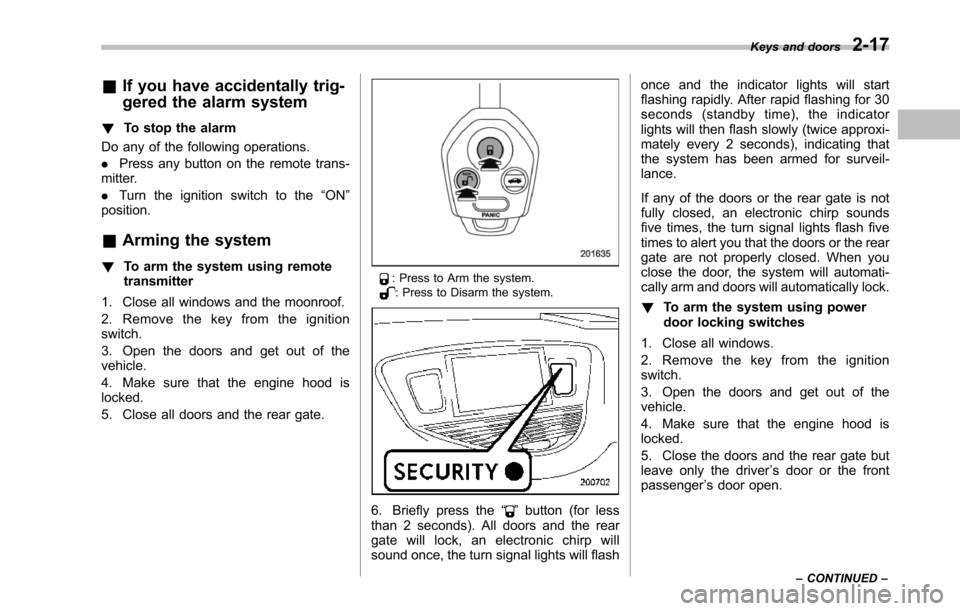
: Press to Arm the system.: Press to Disarm the system.
6. Briefly press the“”button (for lessthan 2 seconds). All doors and the reargate will lock, an electronic chirp willsound once, the turn signal lights will flash
once and the indicator lights will startflashing rapidly. After rapid flashing for 30seconds (standby time), the indicatorlights will then flash slowly (twice approxi-mately every 2 seconds), indicating thatthe system has been armed for surveil-lance.
If any of the doors or the rear gate is notfully closed, an electronic chirp soundsfive times, the turn signal lights flash fivetimes to alert you that the doors or the reargate are not properly closed. When youclose the door, the system will automati-cally arm and doors will automatically lock.
!To arm the system using powerdoor locking switches
1. Close all windows.
2. Remove the key from the ignitionswitch.
3. Open the doors and get out of thevehicle.
4. Make sure that the engine hood islocked.
5. Close the doors and the rear gate butleave only the driver’s door or the frontpassenger’s door open.
Keys and doors2-17
–CONTINUED–
Page 136 of 426
Ignition switch
WARNING
.Never turn the ignition switch to“LOCK”while the vehicle isbeing driven or towed becausethat will lock the steering wheel,preventing steering control. Andwhen the engine is turned off, ittakes a much greater effort thanusual to steer.
.Before leaving the vehicle, al-ways removethe key from theignition switch for safety andnever allow an unattended childto remain in the vehicle. Failureto follow this procedure couldresult in injury to a child orothers. Children could operatethe power windows, the moon-roof or other controls or evenmake the vehicle move.
CAUTION
Do not attach a large key holder orkey case to either key. If it bangedagainst your knees or hands whileyou were driving, it could turn theignition switch from the“ON”posi-
tion to the“Acc”or“LOCK”posi-tion, thereby stopping the engine.Also, if the key is attached to akeyholder or to a large bunch ofother keys, centrifugal force may acton it as the vehicle moves, resultingin unwanted turning of the ignitionswitch.
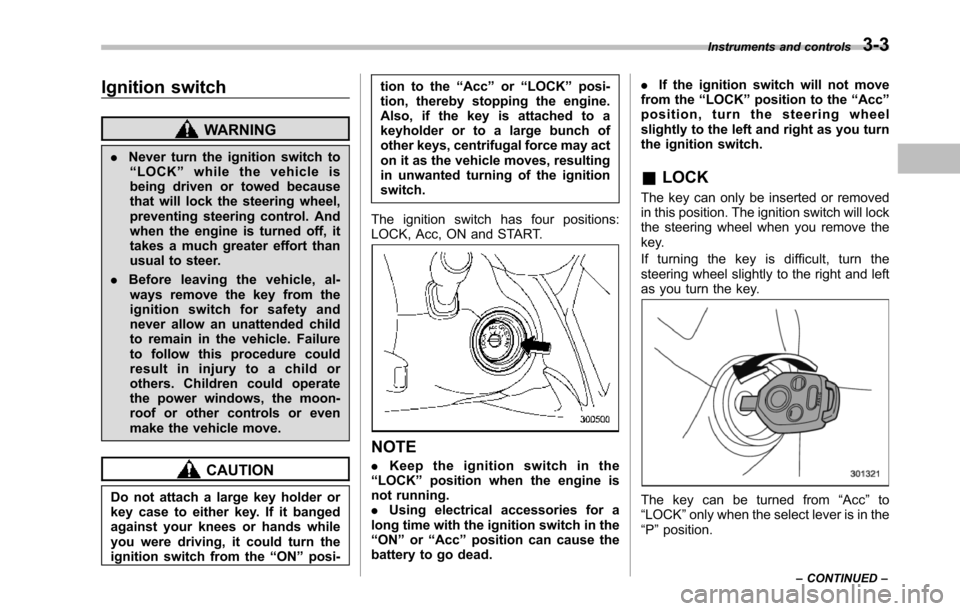
The ignition switch has four positions:LOCK, Acc, ON and START.
NOTE
.Keep the ignition switch in the“LOCK”position when the engine isnot running..Using electrical accessories for along time with the ignition switch in the“ON”or“Acc”position can cause thebattery to go dead.
.If the ignition switch will not movefrom the“LOCK”position to the“Acc”position, turn the steering wheelslightly to the left and right as you turnthe ignition switch.
&LOCK
The key can only be inserted or removedin this position. The ignition switch will lockthe steering wheel when you remove thekey.
If turning the key is difficult, turn thesteering wheel slightly to the right and leftas you turn the key.
The key can be turned from“Acc”to“LOCK”only when the select lever is in the“P”position.
Instruments and controls3-3
–CONTINUED–
Page 137 of 426
3-4Instruments and controls
&Acc
In this position the electrical accessories(radio, accessory power outlet, etc.) canbe used.
&ON
This is the normal operating position afterthe engine is started.
&START
CAUTION
Do not turn the ignition switch to the“START”position while the engineis running.
The engineis started in this position. Thestarter cranks the engine to start it. Whenthe key is released (after the engine hasstarted), the key automatically returns tothe“ON”position.
If your registered key fails to start theengine, pull out the key once (the securityindicator light will blink), and then insertthe key in the ignition switch and turn it tothe“START”position and again try to startthe engine.
NOTE
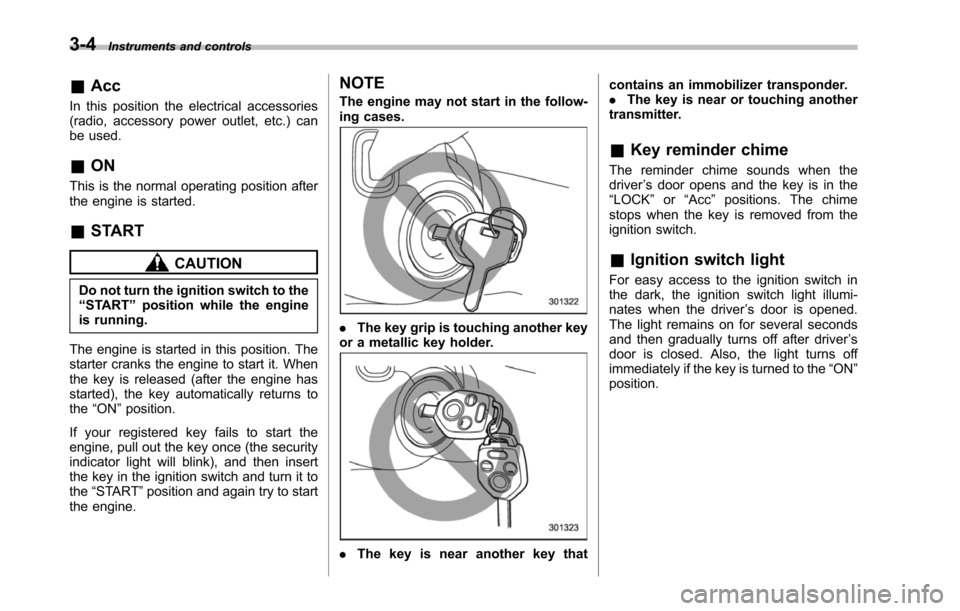
The engine may not start in the follow-ing cases.
.The key grip is touching another keyor a metallic key holder.
.Thekey is near another key that
contains an immobilizer transponder..The key is near or touching anothertransmitter.
&Key reminder chime
The reminder chime sounds when thedriver’s door opens and the key is in the“LOCK”or“Acc”positions. The chimestops when the key is removed from theignition switch.
&Ignition switch light
For easy access to the ignition switch inthe dark, the ignition switch light illumi-nates whenthe driver’s door is opened.The light remains on for several secondsand then gradually turns off after driver’sdoor is closed. Also, the light turns offimmediately if the key is turned to the“ON”position.