Page 55 of 106
Navigation 129
Navigation
7After a summary of the route plan is displayed, the entire
route is displayed on the map. The route is researched
automatically. Touch (More) to change the route
plan, or touch (Go!) to start navigation. (When the
countdown is displayed in the “Go!” button, guidance
begins automatically after 10 seconds even if you do not
touch the button.)Selecting the Destination from the Destination
List
You can set a position that has been saved in the destination list as the
destination.
See “Editing the Destination Li st (Route Editing)” on Page 141 for more
details on registering a positi on to the destination list.
1Display the destination list as follows.
• If the Map screen is displayed, touch and then touch
(Favorites). (Only when registered to the Quick
Menu.)
• If the Map screen is displayed, touch (Menu), (Destination) and then touch
(Favorites).
2The destination list is displayed.
More
Go!
Favorites
Menu
DestinationFavorites
Page 56 of 106
130 Navigation
Navigation
3Touch the position you want to select as the destination.
If necessary, you can scroll through the list, or touch (Filter) and enter a few letters from the item name
to search the list.
4The map is displayed in full-screen mode with the
selected point at the center. If necessary, you can touch
another point on the map to change the destination. The
cursor ( ) is displayed at the new position. Touch
(Next) to set the destination, or touch to select
another destination.
5After a summary of the route plan is displayed, the entire
route is displayed on the map. The route is researched
automatically. Touch (More) to change the route
plan, or touch (Go!) to start navigation. (When the
countdown is displayed in the “Go!” button, guidance
begins automatically after 10 seconds even if you do not
touch the button.)
Filter
Next
More
Go!
Page 57 of 106

Navigation 131
Navigation
Selecting a Frequently Used Destination (Smart
History)
Destinations that have been set previously are displayed in the History
list. The two most recent destinatio ns are displayed on the destination
menu allowing you to select them easily. Smart History uses conditions
such as the current time, date, and po sition, and displays a position in
response to the user's navigati on habits. The more you use the
navigation system, the more accu rate the anticipated destination
becomes.
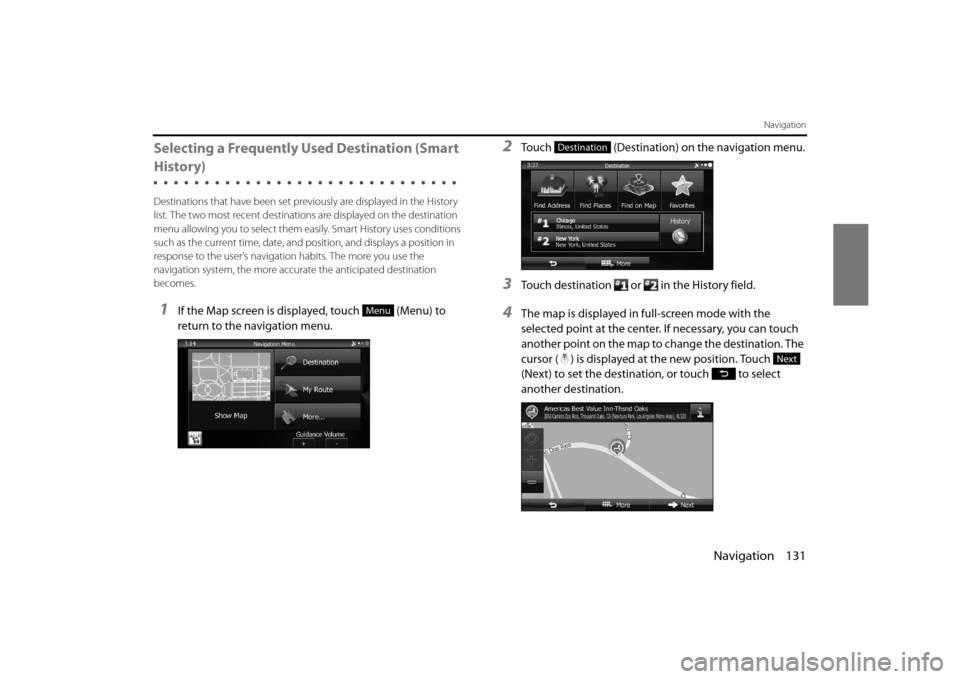
1If the Map screen is displayed, touch (Menu) to
return to the navigation menu.
2Touch (Destination) on the navigation menu.
3Touch destination or in the History field.
4The map is displayed in full-screen mode with the
selected point at the center. If necessary, you can touch
another point on the map to change the destination. The
cursor ( ) is displayed at the new position. Touch
(Next) to set the destination, or touch to select
another destination.Menu
Destination
Next
Page 58 of 106

132 Navigation
Navigation
5After a summary of the route plan is displayed, the entire
route is displayed on the map. The route is researched
automatically. Touch (More) to change the route
plan, or touch (Go!) to start navigation. (When the
countdown is displayed in the “Go!” button, guidance
begins automatically after 10 seconds even if you do not
touch the button.)Selecting a Recent Destination from History
Destinations that have been set previously are displayed in the History
list.
1Use the History function as follows.
• If the Map screen is displayed, touch and then touch (History). (Only when registered to the Quick Menu.)
• If the Map screen is displayed, touch (Menu), (Destination) and then touch (History).
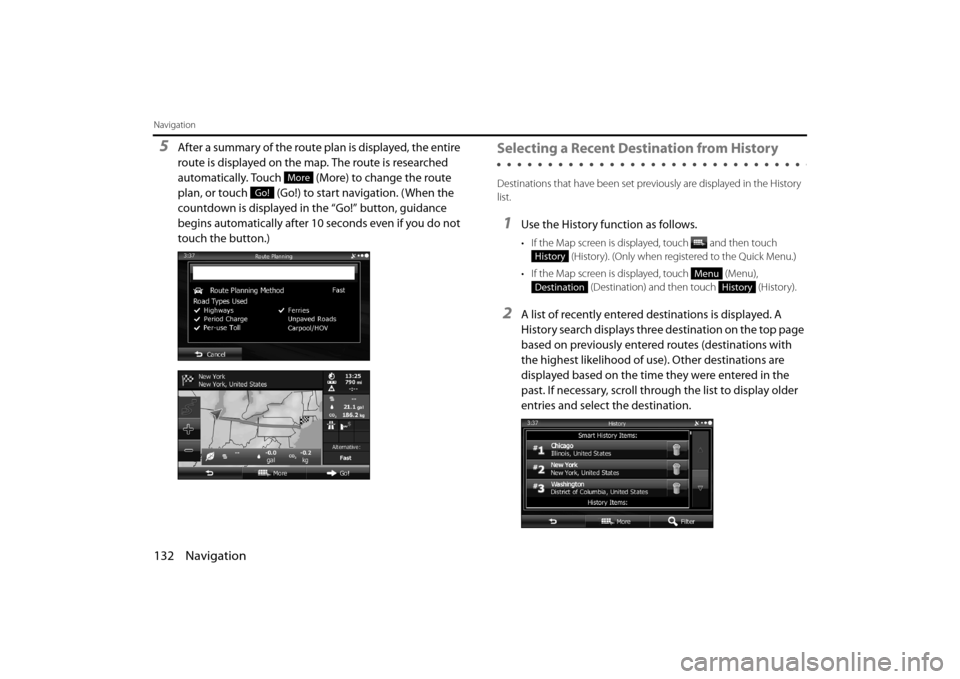
2A list of recently entered destinations is displayed. A
History search displays three destination on the top page
based on previously entered routes (destinations with
the highest likelihood of use). Other destinations are
displayed based on the time they were entered in the
past. If necessary, scroll through the list to display older
entries and select the destination.
More
Go!
History
Menu
DestinationHistory
Page 59 of 106
Navigation 133
Navigation
3Select a destination from the list.
4The map is displayed in full-screen mode with the
selected point at the center. If necessary, you can touch
another point on the map to change the destination. The
cursor ( ) is displayed at the new position. Touch
(Next) to set the destination, or touch to select
another destination.
5After a summary of the route plan is displayed, the entire
route is displayed on the map. The route is researched
automatically. Touch (More) to change the route
plan, or touch (Go!) to start navigation. (When the
countdown is displayed in the “Go!” button, guidance
begins automatically after 10 seconds even if you do not
touch the button.)
Next
More
Go!
Page 60 of 106
134 Navigation
Navigation
Creating a Route from the Destination List
(Route Creator)
You can create a route for each destination in the saved routes menu.
1If the Map screen is displayed, touch (Menu) to
return to the navigation menu.
2Touch (My Route) on the navigation menu.
3Touch (Create Route).
4Only one row showing the route's start point (current
position displayed) is displayed in the route point list.
5Touch to select a destination.
6When the destination menu is displayed, select the
route's destination using the same method as described
previously.
7After selecting a new destination, you are returned to the
list.
8To add another destination, touch at the point where
you want to add a new route point to the list, and repeat
the steps above.
Menu
My Route
Create Route
Page 61 of 106
Navigation 135
Navigation
Displaying the Entire Route on the Map
You can easily display an overview of the entire route
currently being navigated. Follow the steps below to use the
initial settings screen.
1Touch (Menu) on the Map screen.
2Touch (My Route) on the navigation menu.
3Touch (Overview). The entire route currently
being navigated is displayed on the map along with
detailed information and buttons.
Menu
My Route
Overview
Page 62 of 106

136 Navigation
Navigation
Confirming Route Settings and Calling Route Related Functions
You can check a variety of route settings recommended by
the software.
1If the Map screen is displayed, touch (Menu) to
return to the navigation menu.
2Touch (My Route) on the navigation menu.
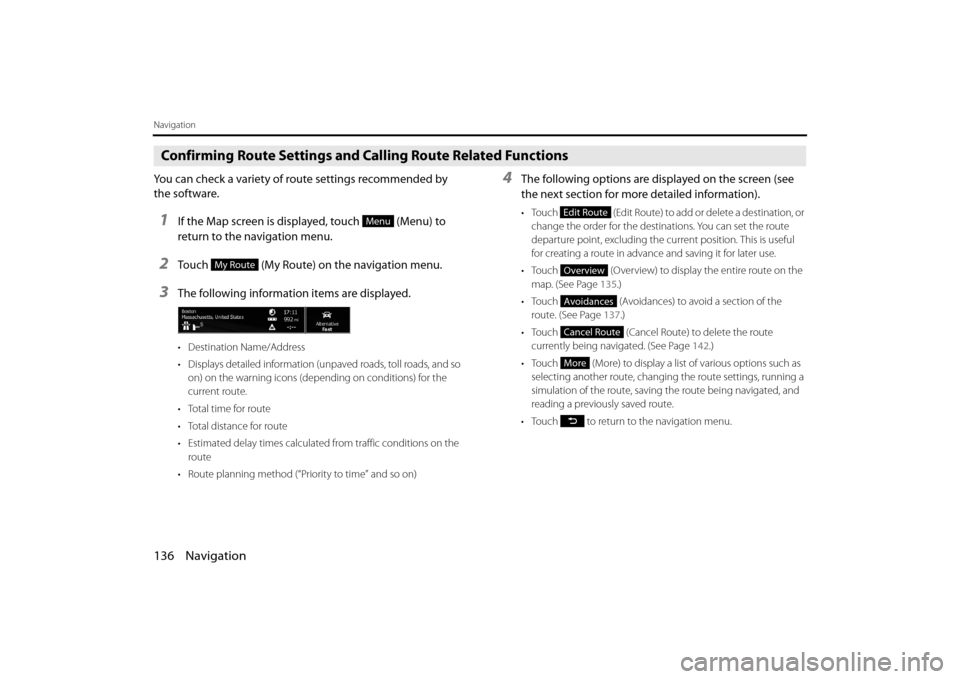
3The following information items are displayed.
• Destination Name/Address
• Displays detailed information (unpaved roads, toll roads, and so on) on the warning icons (depending on conditions) for the
current route.
•Total time for route
• Total distance for route
• Estimated delay times calculated from traffic conditions on the route
• Route planning method (“Priority to time” and so on)
4The following options are displayed on the screen (see
the next section for more detailed information).
• Touch (Edit Route) to add or delete a destination, or
change the order for the destinations. You can set the route
departure point, excluding the cu rrent position. This is useful
for creating a route in advance and saving it for later use.
• Touch (Overview) to display the entire route on the map. (See Page 135.)
• Touch (Avoidances) to avoid a section of the route. (See Page 137.)
• Touch (Cancel Route) to delete the route currently being navigated. (See Page 142.)
• Touch (More) to display a li st of various options such as
selecting another route, changing the route settings, running a
simulation of the route, saving the route being navigated, and
reading a previously saved route.
• Touch to return to the navigation menu.Menu
My Route
Edit Route
Overview
Avoidances
Cancel Route
More