2014 SUBARU FORESTER display
[x] Cancel search: displayPage 72 of 106

146 Navigation
Navigation
Saving a Position to the Destination List
The destination list is a list of frequently used destinations.
You can add any destination to this list. See “Selecting the
Destination from the Destination List” on Page 129 for more
details on searching for a route using a destination from the
destination list.
1Select a destination.
2When the map is displayed in full-screen mode with the
selected point at the center, touch (More).
3Touch (Add to Favorites).
4(Optional) You can use the keyboard to change the initial
display name in the destination list. Touch to enter
numbers or symbols.
• For the keyboard, see “Usi ng the Keyboard” on Page 84.
5Touch (Next) to save the position as a new entry on
the destination list.
More
Add to Favorites
Next
Page 73 of 106

Navigation 147
Navigation
Displaying a Simulation of the Route
You can run a simulation of the route currently being
navigated. Follow the steps below to use the initial settings
screen.
1If the Map screen is displayed, touch (Menu) to
return to the navigation menu.
2Touch (My Route) on the navigation menu.
3Touch (More).
4Scroll down through the list, and then touch (Simulate Navigation). The simulation
begins from the start point and works through the entire
route at the recommended speed.
5(Optional) You can use the following buttons during the
simulation (although the control buttons disappear after
a few seconds, you can touch the map to show them
again).
Menu
My Route
More
Simulate Navigation
Page 75 of 106

Navigation 149
Navigation
Voice Control Navigation
By using the voice control system (voice input microphone
and button), you can set the destination by giving voice
commands. This enables you to use functions that are usually
inoperable while driving.
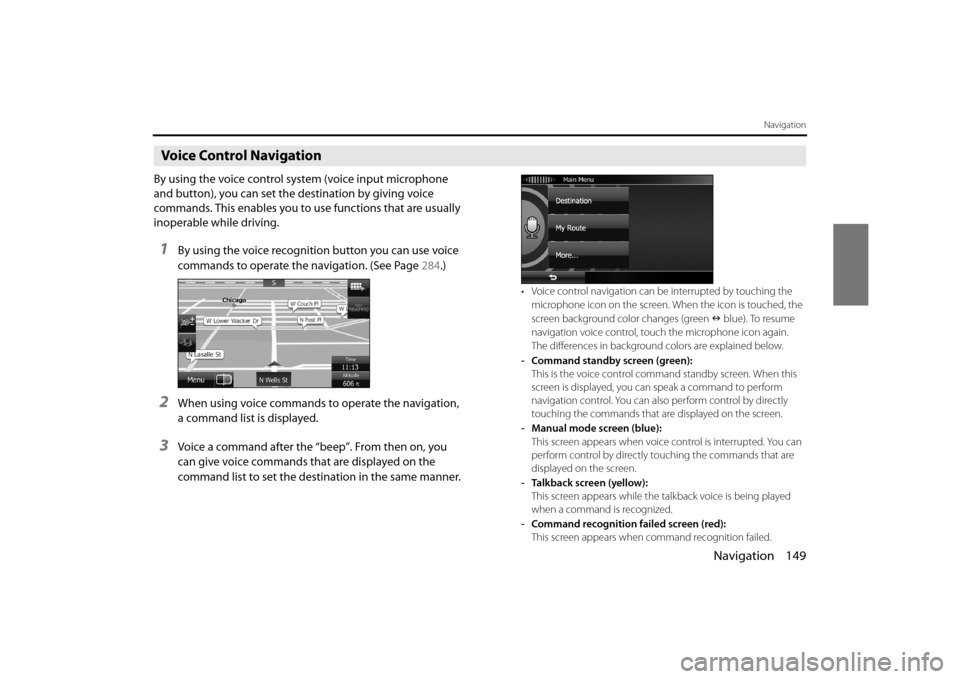
1By using the voice recognition button you can use voice
commands to operate the navigation. (See Page 284.)
2When using voice commands to operate the navigation,
a command list is displayed.
3Voice a command after the “beep”. From then on, you
can give voice commands that are displayed on the
command list to set the destination in the same manner.
• Voice control navigation can be interrupted by touching the
microphone icon on the screen. When the icon is touched, the
screen background color changes (green blue). To resume
navigation voice control, touc h the microphone icon again.
The differences in background colors are explained below.
- Command standby screen (green): This is the voice control command standby screen. When this
screen is displayed, you ca n speak a command to perform
navigation control. You can also perform control by directly
touching the commands that ar e displayed on the screen.
- Manual mode screen (blue): This screen appears when voice control is interrupted. You can
perform control by directly touching the commands that are
displayed on the screen.
- Talkback screen (yellow): This screen appears while the talkback voice is being played
when a command is recognized.
- Command recognition failed screen (red): This screen appears when command recognition failed.
Page 79 of 106

Navigation 153
Reference Data
Real-time traffic information (TMC)
TMC ( Traffic Message Channel) offers real-time traffic conditions. This
can help you to avoid traffic jams th at could not be anticipated due to
road closures or accidents.
TMC uses a dedicated XM satellite ra dio to broadcast real-time traffic
information.
The default settings use traffic information when searching for a route.
If traffic data normally broadcast in your region can be accessed, this
received information is automatically taken into account. This does not
need to be manually set. XM sate llite radio stations broadcasting TMC
data are searched for automatica lly, and decoded information is
immediately used to search for routes . If traffic information that might
affect the current route is received , a warning is displayed indicating
that the route will be searched for again, and navigation continues
using a new, optimal route taking into account the latest traffic
conditions.
By delaying the timing before applyi ng a route that has been searched
again, the user can check the route and fine-tune the details creating
the optimal search results. You can se t this from Traffic settings. (See
Page 160.) When traffic information is being received, a special icon ( ) is
displayed on the map. When there is no traffic information available for
the route, this icon indicates the status of the traffic information
receiver, and when information is rece
ived, the type of upcoming traffic
information is displayed.
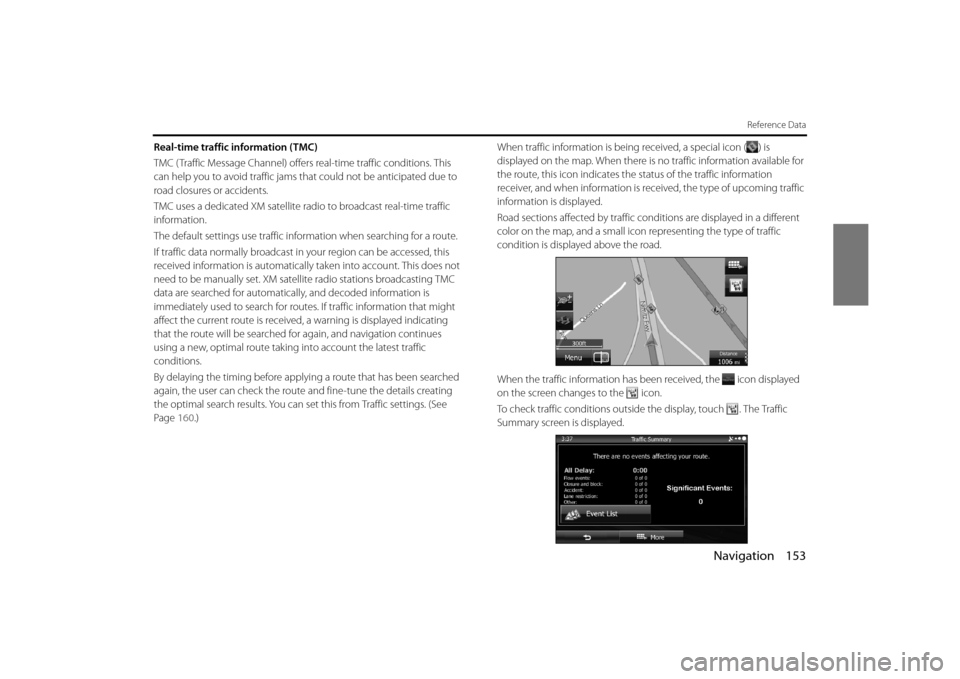
Road sections affected by traffic co nditions are displayed in a different
color on the map, and a small icon representing the type of traffic
condition is displayed above the road.
When the traffic information has be en received, the icon displayed
on the screen changes to the icon.
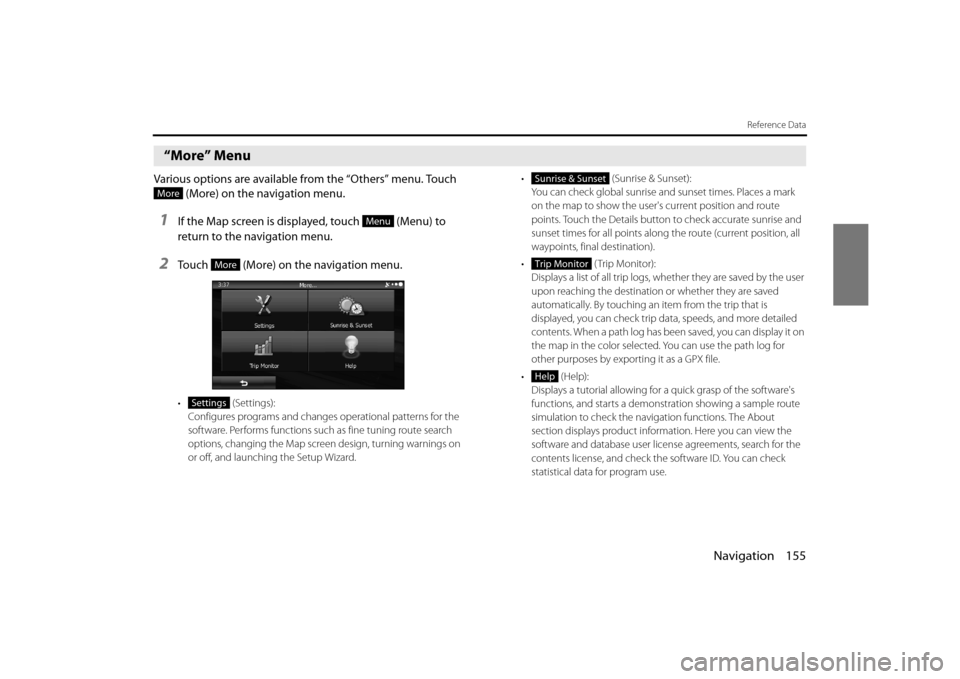
To check traffic conditions outside the display, touch . The Traffic
Summary screen is displayed.
Page 80 of 106

154 Navigation
Reference Data
Touch (Event List) to check the traffic information that has
been received.
On this screen, you can select one entry from the list to view list of the
traffic conditions for that section of the road.
On this screen, you can select one entr y from the list to view full details
of the traffic conditions fo r that section of the road. Touch to open another screen displaying information on the
selected map position.
NOTE
•
This function is only available when TMC is installed in the product being
used.
• The TMC service is not available for all regions. There are also times when it
may not be available in your country or district. For more information on
availability, contact your nearest SUBARU dealer.
Event List
Page 81 of 106

Navigation 155
Reference Data
“More” Menu
Various options are available from the “Others” menu. Touch (More) on the navigation menu.
1If the Map screen is displayed, touch (Menu) to
return to the navigation menu.
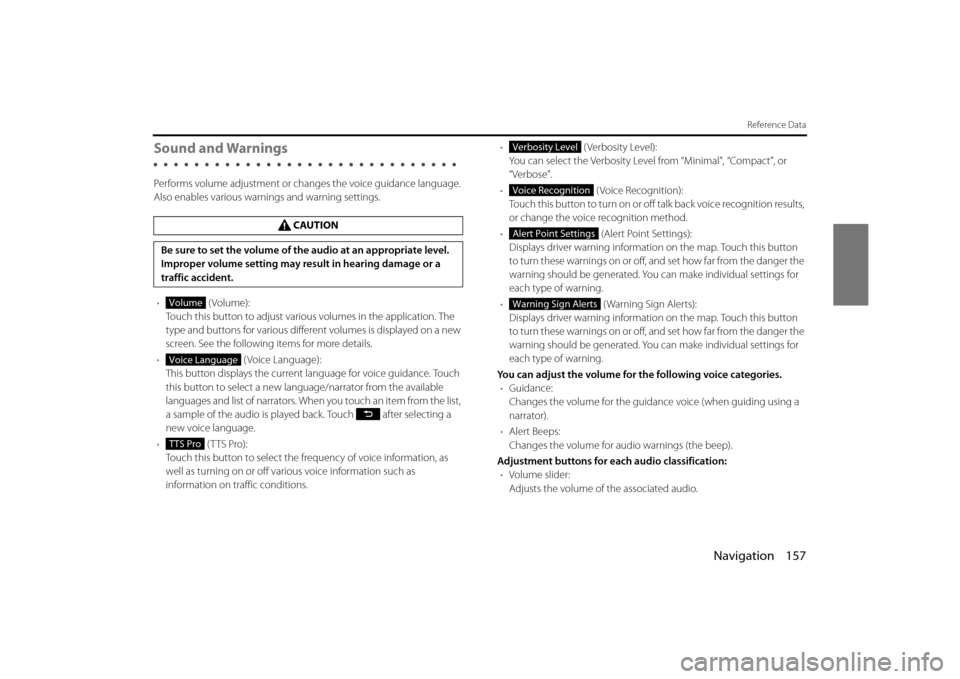
2Touch (More) on the navigation menu.
• (Settings):
Configures programs and change s operational patterns for the
software. Performs functions such as fine tuning route search
options, changing the Map screen design, turning warnings on
or off, and launching the Setup Wizard. • (Sunrise & Sunset):
You can check global sunrise an d sunset times. Places a mark
on the map to show the user's current position and route
points. Touch the Details button to check accurate sunrise and
sunset times for all points along the route (current position, all
waypoints, final destination).
• (Trip Monitor): Displays a list of all trip logs, whether they are saved by the user
upon reaching the destination or whether they are saved
automatically. By touching an item from the trip that is
displayed, you can check trip data, speeds, and more detailed
contents. When a path log has been saved, you can display it on
the map in the color selected. You can use the path log for
other purposes by exporting it as a GPX file.
• (Help): Displays a tutorial allowing for a quick grasp of the software's
functions, and starts a demons tration showing a sample route
simulation to check the navigation functions. The About
section displays product information. Here you can view the
software and database user license agreements, search for the
contents license, and check the software ID. You can check
statistical data for program use.
More
Menu
More
Settings
Sunrise & Sunset
Trip Monitor
Help
Page 82 of 106

156 Navigation
Reference Data
Settings Menu
Configures programs and changes operational patterns for
the software. On the navigation menu, touch (More),
and then touch (Settings).
The Settings menu contains a variety of options. Touch or
scroll the list with your finger to view the entire list.
• (Sound and Warnings):
Performs volume adjustment or changes the voice guidance
language. Also enables various warnings and warning settings. (See
Page 157.)
• (Customize Quick Menu):
Allows you to set Quick menu items to suit your needs. Touch the
button you want to change, and then select another function from
the list. (See Page 158.) •
( Traffic):
Sets On/Off of traffic information display and the method to use the
received real-time traffic information on route search. (See Page 160.)
• (Route Settings):
Sets the route search method. Sele ct the type of vehicle you are
using, the road category to use for the route search, and the route
search method. (See Page 161.)
• (Map Settings):
Fine tunes the Map screen appearance. Performs adjustments for
your selected map display, selects fr om a list of color designs used for
daytime and nighttime, turns the pa th log on or off, and manages
the spot display categories (allows you to select the type of spot
displayed on the map). (See Page 162.)
• (Visual Guidance):
Changes settings related to Map screen guidance. (See Page 164.)
• (Units and Formats):
Sets display units and the date display. (See Page 165.)
• (Trip Monitor):
Contains useful information on the us er's distance moved in the trip
logs and path logs. You can save tr ip logs automatically by turning
this setting on, or save them manual ly when arriving at a destination.
(See Page 165 .)
• (Start Configuration Wizard):
Changes basic software configurations set during the initial setup
process. See step 3 in “Read First” on Page 79.
More
Settings
Sound and Warnings
Customize Quick Menu
Traffic
Route Settings
Map Settings
Visual Guidance
Units and Formats
Trip Monitor
Start Configuration Wizard
Page 83 of 106

Navigation 157
Reference Data
Sound and Warnings
Performs volume adjustment or changes the voice guidance language.
Also enables various warnings and warning settings.
• (Volume):
Touch this button to adjust various volumes in the application. The
type and buttons for various differ ent volumes is displayed on a new
screen. See the following items for more details.
• (Voice Language):
This button displays the current language for voice guidance. Touch
this button to select a new lang uage/narrator from the available
languages and list of narrators. When you touch an item from the list,
a sample of the audio is played back. Touch after selecting a
new voice language.
• (TTS Pro):
Touch this button to select the frequency of voice information, as
well as turning on or off various voice information such as
information on traffic conditions. •
(Verbosity Level):
You can select the Verbosity Level from “Minimal”, “Compact”, or
“Verbose”.
• ( Voice Recognition):
Touch this button to turn on or off talk back voice recognition results,
or change the voice recognition method.
• (Alert Point Settings):
Displays driver warning informatio n on the map. Touch this button
to turn these warnings on or off, and set how far from the danger the
warning should be generated. You can make individual settings for
each type of warning.
• ( Warning Sign Alerts):
Displays driver warning informatio n on the map. Touch this button
to turn these warnings on or off, and set how far from the danger the
warning should be generated. You can make individual settings for
each type of warning.
You can adjust the volume for the following voice categories. • Guidance:
Changes the volume for the guidance voice (when guiding using a
narrator).
• Alert Beeps:
Changes the volume for audio warnings (the beep).
Adjustment buttons for each audio classification: • Volume slider:
Adjusts the volume of the associated audio.
CAUTION
Be sure to set the volume of the audio at an appropriate level.
Improper volume setting may re sult in hearing damage or a
traffic accident.
Volume
Voice Language
TTS Pro
Verbosity Level
Voice Recognition
Alert Point Settings
Warning Sign Alerts